Table of Contents
Advertisement
Quick Links
Advertisement
Table of Contents
Troubleshooting

Related Manuals for Total Source WRZ-ES


Summary of Contents for Total Source WRZ-ES
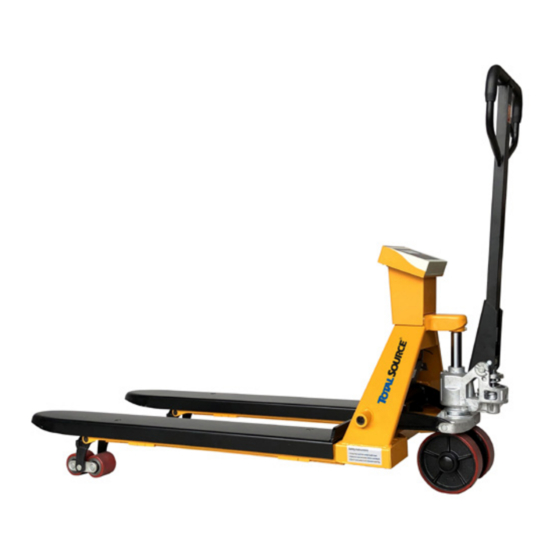
- Page 1 INSTRUCTION MANUAL PALLET TRUCK WITH SCALE W R Z-E S...
- Page 2 © 01-2021. TotalSource and TVH are registered trademarks. TVH Parts Holding nv, Brabantstraat 15, B-8790 Waregem. TVH is ® ® a supplier of after-market spare parts and accessories that are suitable for the maintenance and repair of OEM-equipment. All sales are subject to the general and special terms & conditions of sale on www.tvh.com/avv. All rights reserved.
-
Page 3: Table Of Contents
TABLE OF CONTENTS GENERAL SPECIFICATIONS ........4 INSTALLATION &... -
Page 4: General Specifications
Fork size (kg) ation Accuracy weight Length Width Fork (kg) (‰) (kg) (mm) over Width forks (mm) (mm) WRZ-ES 540 Without 2000/3000 1 ±1 1150 printer WR-ES 685 2000/3000 1 ±1 1150 Materials and specifications are subject to change without notice. -
Page 5: Installation & Assembly
2. INSTALLATION & ASSEMBLY 2.1. Handle attachment Unpacking Open shipping container and check for shipping damage. Report any damage immediately to your distributor and shipping agent. Do not discard any shipping material until the Pallet Truck is assembled and working properly. Individual trucks are assembled and ready to use. -
Page 6: Weight Gauge Installation
2.2. Weight gauge installation Step 1 Remove Display from box. Step 2 Remove x4 screws which holds the display in in the frame casing. Step 3 Remove the display from the mount frame. Step 4 You will need to remove the 3 mounting bolts on the HPT Step 5 Once the mounting bolts are removed... - Page 7 Step 6 Align the display mount frame (Step 3) up with the fixation holes on the HPT (Step 4) making sure the cable all still accessible. Step 7 Use the 3 mounting bolts removed in step 3 to fix the display mounting frame in place.
-
Page 8: To Adjust Release Device
3. TO ADJUST RELEASE DEVICE On the handle of the pallet truck, you will find the control lever (81) which can be set in three positions (See Fig. 4): LOWER=to lower the forks; NEUTRAL=to move the load; ASCENT=to raise the forks. After assembling the handle, you can adjust the three positions. -
Page 9: Daily Check And Maintenance
4.5. Daily check and maintenance Daily check of the pallet truck will limit wear as much as possible. Give special attention to the wheels the handle, the forks and lift and lower control. The forks should be unloaded and lowered in the lowest position when the job is over. -
Page 10: Troubleshooting
6. TROUBLESHOOTING Trouble Cause Solution The forks cannot be • There is not enough • Pour in enough filtered oil. lifted to max. height hydraulic oil. • There is no hydraulic oil. • Pour in more filtered oil. • The oil has impurities. The forks do not lift •... -
Page 11: Battery Power Data And Replacement
7. BATTERY POWER DATA AND REPLACEMENT The indicator on the pallet truck scale uses maintenance free lead-acid battery as power supply. Rechargeable batteries need to be charged, according to their own instruction. How to change batteries: 7.1.1 Remove the weighing instrument. 7.1.2 Loosen the screws on the battery cover and remove the cover. -
Page 13: Parts List
9. PARTS LIST... - Page 14 Part Description Part Description Forks Cover Oil Plug Screw M12×42 O-Ring Convex Washer Pressure Adjust Screw Concave Washer Spring Screw M12×55 Needle Valve Load Cell Plunger Piston Plate Spring Cap Truck Frame Spring Spring Pin 5×30 Dust Seal Ring Shaft U-Ring Spring Pin 5×35 Pump Retainer Pin...
- Page 15 Part Description Part Description Spring Washer 8 Roller Hexagon Screw M8×12 Spring Pin 6×30 Screw M4×14 Spring Pin 4×12 Instrument Housing Control Lever Weighing Instrument Plastic Mat Oil Plug Release Rod Oil Seal 16×10×2 Handle Pump Housing Oil Lite Bushing Steel Ball 18 Roller Ram Piston...
- Page 16 Your distributor: Manufactured outside the EU for: TVH AUSTRALIA PTY LTD • HEAD OFFICE BRISBANE ABN 67 117 701 587 • 60 Bernoulli Street • Darra QLD 4076 • Australia T +61 7 3717 3222 • F +61 7 3275 3881 • info.au@tvh.com • www.tvh.com...
Need help?
Do you have a question about the WRZ-ES and is the answer not in the manual?
Questions and answers