Table of Contents
Advertisement
Quick Links
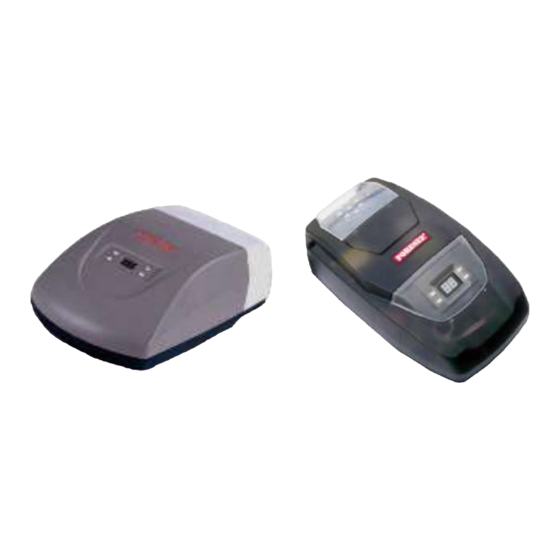
F300 series
F300 series
F350 Classic
Specifications
Supply
180-240Vac 50Hz
Speed
12-14cm/sec opening, 8-12cm/s closing
Duty cycle
25% 20 times/hr
Temp'
-20°C to 40°C
Door height
220cm f or 3m rails, 280cm f or 3.6m rails
F350
Standby power
<4.5W
Door max size
<8m²
Door max weight
<114kg
Motor power
100W
Force
700N
Motor torque
3.2Nm
Installation manual
F360 Duro
F360
F370
F390
<6.5W
<6.5W
<6.5W
<11m²
<11m²
<16m²
<157kg
<157kg
<180kg
150W
150W
170W
1100N
1100N
1300N
4.8Nm
4.8Nm
8.0Nm
doc.
F370 Primo
F390 Agro
F05
F05
v1.2
doc.
iss V1.2
▪
Description
▪
Preparation
▪ Contents
▪ Rail assembly
▪
Installation
▪ Header bracket
▪ Door bracket
▪ Lif ting the rail
▪ Rail brackets
▪ Electrical
▪
Programming
▪ Initial settings
▪ Remotes
▪
Commissioning
▪ Trouble shooting
▪ Accessories
▪
User notices
▪ Manual disconnect
▪ Saf e operation
▪ Warranty
P1
2
3
3
5
6
6
7
7
8
11
12
13
14
14
15
Advertisement
Table of Contents

Subscribe to Our Youtube Channel
Summary of Contents for Forematic F300 Series
- Page 1 F300 series doc. v1.2 doc. iss V1.2 F300 series Installation manual ▪ Description ▪ Preparation ▪ Contents ▪ Rail assembly ▪ Installation ▪ Header bracket ▪ Door bracket ▪ Lif ting the rail F350 Classic F360 Duro F370 Primo ▪ Rail brackets ▪...
- Page 2 Description Door condition F300 series garage door openers are designed f or horizontally tracked domestic garage doors. Fitting to other door types o r in Automated doors must be sound, well balanced, and in good public areas is at the installer’s discretion.
- Page 3 F300 series PREPARATION doc. v1.2 Assembling a 2 piece rail Contents A two piece rail pack may be ordered. to be assembled on site. Rails can be made up to 3m or 3.6m lengths. Follow the instructions below. One piece rails need no assembly.
- Page 4 F300 series PREPARATION doc. v1.2 When the sections are joined Check that the chain engages properly with Tighten the chain checking for tension. together, turn the rail over, then turn both cog wheels. The chain should be long The chain should move sideways, but up all the remaining locking tabs.
-
Page 5: Header Bracket
F300 series INSTALLATION doc. v1.2 Header bracket The header bracket’s lower slotted mounting holes must be at least 10mm above the highest point the door reaches. The slotted holes can be set 200mm higher if you The header bracket is fixed to the door frame in the centre prefer, but over 50mm from the ceiling. -
Page 6: Door Bracket
F300 series INSTALLATION doc. v1.2 Door bracket The full force of the opener will be pulling on this bracket. Bolting through the door is best, with the nuts The door bracket fixes to the centre of the on the inside. Coach bolts have plain heads that cannot... -
Page 7: Rail Brackets
F300 series INSTALLATION doc. v1.2 U bracket made from Rail brackets roof hanger strip Lift the opener to the horizontal. Measure the height H from the top of the rail to some useful fixing points, such as a roof joist. Bend up two ‘U’... - Page 8 F300 series PROGRAMMING doc. v1.2 Programmed via the 4 buttons “S”, “P”, “+” Programming teaches the opener about a Set open position and “-“. Key “S” stores remotes. Key “P” is an Set closed position door. The opener will not function until the enter button.
-
Page 9: Step 5 - Alarm Setting
F300 series PROGRAMMING doc. v1.2 Step 5 – Step 3 – Step 6 – alarm setting force learning auto close time The opener can be programmed to The opener runs a cycle measuring the If a door stays open for 10 mins the alarm close after a time delay. - Page 10 F300 series USER SETTINGS doc. v1.2 Fina Cycle counter viewing Re-calibrate force lise programming Press both ‘P’ and ‘S’ at the same With the door open, press ‘S’ twice. The display Programming must be finalised time. A single digit will show.
-
Page 11: Troubleshooting
F300 series COMMISSIONING doc. v1.2 Troubleshooting The trouble shooting table is a summary of the most common issues encountered. FIRST CHECK ON POWER UP check that DISPLAY CODES Limit reached (this is normal) Check the power is on and the disconnect •... - Page 12 F300 series COMMISSIONING doc. v1.2 Photo beam fitting PCB & accessories The PCB includes a 15 code radio receiver, The FA31 optional photo beam prevents 24V battery charger, output for an external the door closing if the beam is blocked 24V lamp, and lock interface.
-
Page 13: Manual Operation
F300 series USER NOTICES doc. v1.2 Manual operation Maintenance & repair A disconnect pull cord is fitted to the rail An opener fitted and maintained to these Damage resulting from low maintenance to allow the door to open in the unlikely... -
Page 14: Warranty
F300 series USER NOTICES doc. v1.2 Warranty Period Warranty exceptions The purchaser is granted a warranty covering the safe and reliable The warranty does not cover damage caused through: function of the Foresee Garage Door Operator (Mechanics, Motor and Motor Control Systems) for a period of 3 years from the date of purchase.


Need help?
Do you have a question about the F300 Series and is the answer not in the manual?
Questions and answers