Table of Contents
Advertisement
Quick Links
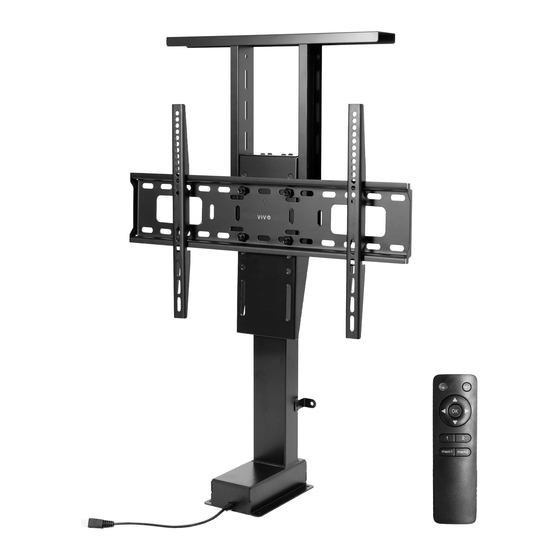
Motorized TV Stand with Remote Control
Instruction Manual
SKU: MOUNT-E-UP80D
Scan the QR code with your mobile device or follow the link
for helpful videos and specifications related to this product.
https://vivo-us.com/products/mount-e-up80d
GET IN TOUCH | Monday-Friday from 7:00am-7:00pm CST
help@vivo-us.com
www.vivo-us.com
Chat live with an agent!
309-278-5303
Advertisement
Table of Contents

Subscribe to Our Youtube Channel
Summary of Contents for Vivo MOUNT-E-UP80D
- Page 1 Motorized TV Stand with Remote Control Instruction Manual SKU: MOUNT-E-UP80D Scan the QR code with your mobile device or follow the link for helpful videos and specifications related to this product. https://vivo-us.com/products/mount-e-up80d GET IN TOUCH | Monday-Friday from 7:00am-7:00pm CST help@vivo-us.com...
- Page 2 WARNING! If you do not understand these directions, or if you have any doubts about the safety of the installation, please call a qualified technician. Check carefully to make sure there are no missing or defective parts. Improper installation may cause damage or serious injury. Do not use this product for any purpose that is not explicitly specified in this manual.
- Page 3 PRE-ASSEMBLY When fabricating custom cabinetry for your motorized TV mount, ensure there will be at least 50mm of clearance on the sides and front of the TV along with at least 10mm of clearance on the top. ASSEMBLY STEPS STEP 1 Connect cable from Motorized Lift (A) to Control Unit (G).
- Page 4 STEP 3 Slide Mounting Plate (B) onto Motorized Lift (A) and secure using M6x12mm Screws (S-C) and 4mm Allen Wrench (T-A) . Connect Shelf Supports (C) to the sides of Motorized Lift (A) using M6x12mm Screws (S-C) and 4mm Allen Wrench (T-A). Attach Shelf (D) to top of Shelf Supports (C) using M6x12mm Screws (S-C) and 4mm Allen Wrench (T-A).
- Page 5 STEP 5 Secure lift assembly to inside of cabinet by installing ST5.5x16mm Screws (S-A) into the tabs on lift using a drill. Secure Control Unit (G) and AC Adapter with Cover (H, I) using ST4.2x20mm Screws (S-B) and ST5.5x16mm Screws (S-A) and a drill.
- Page 6 STEP 7 Install VESA Brackets (F) to TV using appropriate Screws (M-A, M-B, M-C, M-D), M8 Washers (M-E), Spacers (M-F, M-G) and a Phillips screwdriver. STEP 8 Place TV with VESA Brackets (F) onto TV Bracket (E). Tighten set screw on VESA Brackets (F) with Phillips screwdriver to secure.
- Page 7 STEP 9 Motorized lift is now ready for use.
- Page 8 : 1HR 8M (within office hrs) - 23% within < 15m - 38% within < 30m - 61% within < 1hr - 83% within < 2hr - 92% within < 3hr FOR MORE VIVO PRODUCTS, CHECK OUT OUR WEBSITE AT: www.vivo-us.com...


Need help?
Do you have a question about the MOUNT-E-UP80D and is the answer not in the manual?
Questions and answers
remote just beeps