Table of Contents
Advertisement
Quick Links
INSTALLATION MANUAL
SINGLE ZONE OUTDOOR UNIT
SPLIT-STYLE AIR CONDITIONER
DRA1H09S1A, DRA1H12S1A, DRA1H18S1A, DRA1H24S1A
Model Number:
Serial Number:
Purchase Date:
Installing Contractor Company Name:
TIP
Capture relevant information about your Durastar mini-split equipment before it is
installed and write it above for future reference.
DURASTAR.COM
1
Advertisement
Table of Contents

Related Manuals for DURASTAR DRA1H09S1A


Summary of Contents for DURASTAR DRA1H09S1A
- Page 1 SINGLE ZONE OUTDOOR UNIT SPLIT-STYLE AIR CONDITIONER DRA1H09S1A, DRA1H12S1A, DRA1H18S1A, DRA1H24S1A Model Number: Serial Number: Purchase Date: Installing Contractor Company Name: Capture relevant information about your Durastar mini-split equipment before it is installed and write it above for future reference. DURASTAR.COM...
-
Page 2: Table Of Contents
STEP 3: FLARE PIPE ENDS ........................17 STEP 4: CONNECT PIPES .......................... 18 SYSTEM EVACUATION ..........................20 FINAL CHECKS ..............................21 TEST RUN ................................22 TROUBLESHOOTING ..........................23 WIRING DIAGRAMS ............................27 ERROR AND OPERATING CODES .......................30 JOB SITE INFORMATION SHEET ......................31 DURASTAR.COM... -
Page 3: Introduction
• Read the troubleshooting section of this manual as it will help you diagnose and solve common issues. • Visit us on the web at WWW.DURASTAR.COM to download product guides and up-to-date information. • If you need warranty service, our friendly customer service representatives are available via email at QUESTIONS@DURASTAR.COM or by telephone at 1-888-320-0706. -
Page 4: Important Safety Precautions
Do not wash the air conditioner with water as this could cause an electric shock. • Disconnect the power supply by turning it off at the circuit breaker when cleaning the air conditioner. Otherwise, you could risk electric shock. DURASTAR.COM... - Page 5 • The air conditioner’s circuit board (PCB) is designed with a fuse to provide over-current protection. The specifications of the fuse are printed on the circuit board. DURASTAR.COM...
- Page 6 Do not climb onto or place objects on top of the outdoor unit. • Do not allow the air conditioner to operate for long periods of time with doors or windows open, or if the humidity is very high. DURASTAR.COM...
-
Page 7: Operating Temperatures
Regularly inspect and clean air filters. NOTE Your Durastar air conditioner's outdoor unit is equipped with a base pan heater, allowing it to continue to operate at freezing temperatures as low as -22°F (-30°C). When outdoor air temperatures are at or below 32°F (0°C), we strongly recommend keeping the unit plugged in at all times to ensure smooth ongoing performance. -
Page 8: Accessories
Refrigerant leak detector • Copper pipe cutter • Flaring tool • Burr reamer • Crescent or spanner wrench • Hexagonal wrench set • Torque wrench • Multimeter • Electroprobe • Level • Hammer • Wire strippers • Wire crimper DURASTAR.COM... -
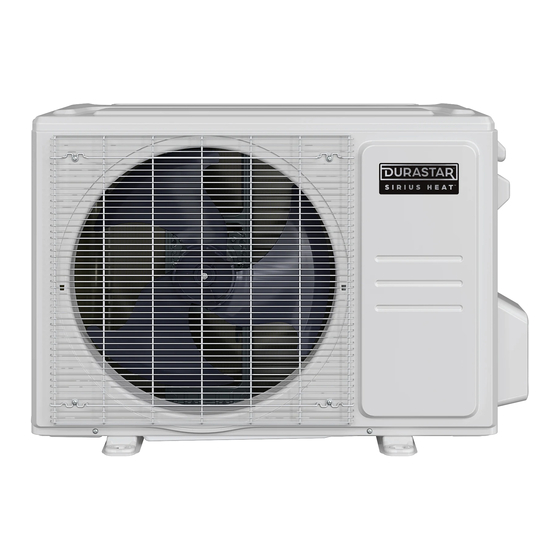
Page 9: Parts Identification
The installation may be slightly different in different areas. Signal Cable, Air Inlets Refrigerant Pipes, and Drain Hose Wiring Terminal Valve Cover Air Outlet NOTE Illustrations in this manual are for explanatory purposes. The actual shape of your mini- split equipment may vary slightly. DURASTAR.COM... -
Page 10: Outdoor Unit Installation
• In a location 10 ft. (3 m) or closer to TV or radio antennas. Operation of the unit may interfere with antenna reception in areas where the signal is weak. An amplifier may be needed for affected devices. DURASTAR.COM... -
Page 11: Step 2: Install The Drain Joint
Seal Seal Drain joint NOTE In cold climates, make sure that the drain hose is as vertical as possible to ensure swift water drainage. If water drains too slowly, it can freeze in the hose and flood the unit. DURASTAR.COM... -
Page 12: Step 3: Mount The Outdoor Unit
Mounting Dimensions Outdoor Unit - Dimensions W x H x D inches (mm) Dist. A inches (mm) Dist. B inches (mm) DRA1H09S1A - 31-11/16 x 21-13/16 x 12-7/8 (805 x 554 x 330) 20-1/8” (511) 12-1/2” (317) 20-1/8” (511) 12-1/2” (317) DRA1H12S1A - 31-11/16 x 21-13/16 x 12-7/8 (805 x 554 x 330) 26-1/8”... -
Page 13: Step 4: Connect The Signal And Power Cables
• Outdoor Power Cable: Determined by the amperage of system and the local codes in your area. CABLE SIZING Use a minimum of 14 AWG for power and signal cables connected to and between the indoor and outdoor units. DURASTAR.COM... -
Page 14: Refrigerant Piping Connections
Run nitrogen through the refrigerant tubing when brazing to avoid carbon build up. The presence of foreign materials will lower the unit's capacity and can cause abnormally high pressure in the refrigeration system. This can result in explosion and personal injury. DURASTAR.COM... - Page 15 Indoor Unit 19’ 9” (6m) 32’ 10” (10m) Required distance between oil traps when Required distance between oil traps when the indoor unit is installed higher than the the outdoor unit is installed higher than the outdoor unit. indoor unit. DURASTAR.COM...
-
Page 16: Step 1: Cut Pipes
Burrs can affect the airtight seal of the refrigerant piping connection and must be completely removed. 1. Hold the pipe at a downward angle to prevent burrs from falling into the pipe. 2. Using a reamer or deburring tool, remove all burrs from the cut section of the pipe. Pipe Reamer Point downward DURASTAR.COM... -
Page 17: Step 3: Flare Pipe Ends
4. Remove PVC tape from ends of pipe when ready to perform flaring. 5. Clamp flare form on the end of the pipe. The end of the pipe must extend beyond the edge of the flare form in accordance with the pipe extension table on the next page. DURASTAR.COM... -
Page 18: Step 4: Connect Pipes
Do not leave coils in the refrigerant line sets. All excess line length must be removed to ensure proper system operation. CONNECTING PIPING TO INDOOR UNIT 1. Align the center of the two pipes that you will connect. Indoor unit tubing Flare nut Pipe DURASTAR.COM... - Page 19 5. While firmly gripping the body of the valve, use a torque wrench to tighten the flare nut according to the correct torque values in the table above. 6. Loosen the flare nut slightly, then tighten again. 7. Repeat steps 3-6 for the remaining pipe. Valve cover DURASTAR.COM...
-
Page 20: System Evacuation
Start back at step 1 once all leaks have been fixed. Manifold Gauge Low pressure Flare nut gauge Low pressure High pressure valve valve Low pressure hose Auxiliary hose Vacuum pump Valve body Valve stem Low pressure valve DURASTAR.COM... -
Page 21: Final Checks
The refrigerant should be charged from the service port on the outdoor unit's low pressure valve. Additional refrigerant information can be found in the SUBMITTALS DOCUMENTS at WWW.SERVICE.DURASTAR.COM. Additional refrigerant can be calculated using the following formula: Liquid Side Ø 1/4" (6.35mm) Liquid Side Ø... -
Page 22: Test Run
A: Low pressure stop valve B: High pressure stop valve C & D: Indoor unit flare nuts Use the Durastar Job Site Information Sheet at the end of this manual as a commissioning report to record your start up readings. TEST RUN TEST RUN INSTRUCTIONS You should perform the test run for at least 30 minutes. -
Page 23: Troubleshooting
The indoor unit makes A rushing air sound may occur when the louver resets its position. noises A squeaking sound may occur after running the unit in HEAT mode due to expansion and contraction of the unit’s plastic parts. DURASTAR.COM... - Page 24 • Press ON/OFF button on remote control to restart operation. NOTE If problem persists, contact a local dealer or your nearest customer service center. Provide them with a detailed description of the unit malfunction as well as your model number. DURASTAR.COM...
- Page 25 Incompressible gas or moisture has Evacuate and recharge the system with frequently entered the system refrigerant The compressor is broken Replace the compressor The voltage is too high or too low Install a manostat to regulate the voltage DURASTAR.COM...
- Page 26 If not, disconnect the power, then connect it again. Turn the unit on. appears If the problem persists, disconnect the power and contact your nearest customer service center. NOTE If your problem persists after performing the checks and diagnostics above, turn off your unit immediately and contact an authorized service center. DURASTAR.COM...
-
Page 27: Wiring Diagrams
WIRING DIAGRAMS DRA1H09S1A & DRA1H12S1A Dotted line indicates this component is optional. Your configuration many vary. 1 indicates this component can exist in various locations. DURASTAR.COM... - Page 28 DRA1H18S1A Dotted line indicates this component is optional. Your configuration many vary. The D box contains the ground wire for the compressor. The other boxes do not. DURASTAR.COM...
- Page 29 DRA1H24S1A DURASTAR.COM...
-
Page 30: Error And Operating Codes
ERROR AND OPERATING CODES º º Freeze protection heating 46 F/54 F (8 C/12 C) * Normal operating codes, not malfunctions. DURASTAR.COM... -
Page 31: Job Site Information Sheet
Unit Location: ____________________________________________________________________________ _________________________________________________________________________________________ Indoor Unit (IDU) Information IDU Model #: _____________________________ IDU Serial #: ____________________________________ Unit Type: ___________________________ Unit Location: _______________________________________ _________________________________________________________________________________________ Refrigerant Line Size (Circle Liquid and Gas Line): 1/4" 3/8" 1/2" 5/8" Line Set Length: ________________ DURASTAR.COM... - Page 32 Gas Line Saturation: _________°F Liquid Line Saturation: _________°F Indoor Electrical Readings IDU Power/Control Wire Color: 1 __________________ 2 __________________ 3 ___________________ Voltage Readings: 1-2 ___________ AC 2-3 ___________DC Indoor Thermal Readings Return Air: _________°F Supply Air: _________°F Room Air: _________°F DURASTAR.COM...
- Page 33 THIS PAGE INTENTIONALLY LEFT BLANK. DURASTAR.COM...
- Page 34 THIS PAGE INTENTIONALLY LEFT BLANK. DURASTAR.COM...
- Page 35 THIS PAGE INTENTIONALLY LEFT BLANK. DURASTAR.COM...
- Page 36 THIS PAGE INTENTIONALLY LEFT BLANK. ©2022 Durastar DURASTAR.COM V1.0 1122...
Need help?
Do you have a question about the DRA1H09S1A and is the answer not in the manual?
Questions and answers