Table of Contents
Advertisement
Advertisement
Table of Contents

Related Manuals for B&G Triton Edge


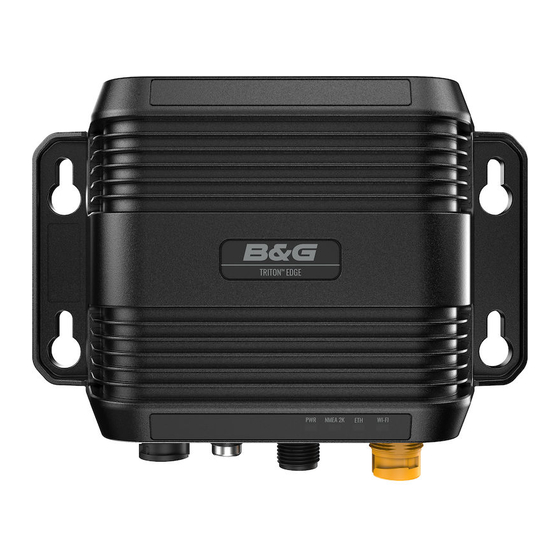
Summary of Contents for B&G Triton Edge
- Page 1 TRITON EDGE ™ ™ QUICK START GUIDE ENGLISH www.bandg.com...
- Page 2 ⚠ WARNING: Refer to important safety information on the Safety, Disclaimers and Compliance sheet. Review all warnings, limitations, and disclaimers before using this product. Trademarks Reg. U.S. Pat. & Tm. Off, and ™ common law marks. Visit www.navico.com/intellectual-property to review the global trademark ®...
-
Page 3: Table Of Contents
CONTENTS Registration Save information Download the B&G app Register your Triton Edge Connect to Triton Edge Connect via Wi-Fi hotspot ® Access the web interface via Wi-Fi hotspot ® Connect via a wired connection Use a multi-function display to find the IP address... -
Page 4: Save Information
Visit the B&G website, www.bandg.com, to see more information about the app. Register your Triton Edge Your Triton Edge needs to be registered to your personal B&G profile so that you can upload and access your sailing data. Connect your smartphone to the internet, and open the B&G app. -
Page 5: Connect To Triton Edge
CONNECT TO TRITON EDGE Communication with the sailing processor is via a user-friendly web interface. Access the web interface by connecting to the Triton Edge and using a compatible web browser such as Google Chrome , Microsoft Edge , Firefox , or Safari ®... -
Page 6: Connect Via A Wired Connection
Connect via a wired connection If the sailing processor is connected to Ethernet, an IP address will be assigned to it. Note: The IP address assigned to the Triton Edge is required to access the web interface. ¼ First, connect a device to the unit’s wireless hotspot and access the web interface using the IP address 192.168.76.1, as outlined above. -
Page 7: First Start Up
FIRST START UP The first time you start the sailing processor and access the web interface, prompts will guide you through system settings such as naming your sailing processor; choosing your preferred units for data; and setting the time zone. This onboarding process is only repeated following a factory reset. -
Page 8: The Web Interface: Main Menu
General—Gives access to general system settings such as network connections and software version. HV displays—Allows you to configure and control your HV display(s) using the Triton Edge web interface. Note: This menu option is only present when one or more HV displays is connected. -
Page 9: Setup Guide
General > My vessel > Add your boat details. Select measured sources Select the configurations and core sensors to be used by the Triton Edge for boat speed and wind. (This should be performed before running an Auto source selection.) To revisit this task later, access it under General >... -
Page 10: Tasks On The Water
Review sailing data Lists key data, and indicates the status of related data sources. A green status indicates a reading is valid; a red status indicates that a reading isn’t valid. Navigate to Sailing data in the main menu to review the readings at any time. Review depth offset Enter an offset so that the depth reading displays depth below keel or, if preferred, depth measured from the water surface. -
Page 11: Dashboard
DASHBOARD The dashboard provides an overview of key readings without you having to select from a menu. Note: A red background indicates that data may not be valid, and you should review the ¼ sensor(s) associated with that reading (including check the sensor’s physical connections). A Sensors—Gives an overview of core selected sensors. -
Page 12: Sailing Data And Sensors
SAILING DATA AND SENSORS Sailing data Select a category from the Sailing data menu (1), (2), to display the readings related to that category. Select one of the data values (3) to open the data card associated with that data type. Readings are live, with the update rate determined by the damping value. -
Page 13: Sensors
Sensors The Sensors menu is on the right of the Sailing data screen, and is used to access data cards and settings for your connected sensors. A Live data value—This is derived from the input(s) and operations applied. Directly used by—Lets you know which calculations depend on the live data value. Input—Lets you check or change the source used for the live data value, and view other readings from the same source. -
Page 14: Correction Tables
CORRECTION TABLES Correction tables allow you to correct boat speed and true wind direction tack to tack by applying offsets at different heel angles or wind speeds. Open a correction table Select the Correction tables menu (1) to see all three correction tables simultaneously. Select the enlarge icon (2) at the top right of any correction table to open its graph full screen. -
Page 15: Edit A Correction Table
Edit a correction table Enlarge the correction table to full screen, then select Edit (1) to open the table. Select each cell (2), or tab between them, to enter the applicable correction. Corrections can be negative or positive. Note: Refer to the inline help on the web interface to view the processes for determining ¼... -
Page 16: Data Recording
Note: Your Triton Edge must be registered to your B&G account before any recordings ¼ can be uploaded to the cloud for review. See Register your Triton Edge on page 4 for instructions on pairing your sailing processor to your B&G account. -
Page 17: Connect To The Internet
Connect to the internet Use the main menu to navigate to General > Connectivity (1). Move the slider (2) to its on state. If a previously-used network is in range, the Triton Edge will automatically connect to it when you switch on Wi-Fi ®... -
Page 18: Upload Data Recordings
Upload data recordings To upload data recordings to your B&G account, navigate to the Preferences menu and set the switch Automatically upload recordings (1) to On. If you keep the switch on, recordings will be uploaded automatically whenever an internet connection is available. -
Page 19: Export Recorded Files
Export recorded files With the Triton Edge connected to a mobile device, navigate to the Data recording screen. Select the export icon (1) to export that file to the device in .gpx or .csv format. Delete recorded files To delete a recording permanently from the sailing processor, select the more icon (A), above, then Delete. -
Page 20: Hv Displays
Any B&G HVision display (HV display) connected to the NMEA 2000 network can be configured ® using the Triton Edge web interface. Note: The HV displays menu is only visible when one or more HV displays is connected. ¼ A Name—Select in the field to edit the name of a display. If you have several HV displays on the network, renaming them according to their location might help you identify them for easy configuration. -
Page 21: Software Updates
SOFTWARE UPDATES Software upgrades for the Triton Edge are released from time to time and we recommend installing these as they become available. Install a software update Your sailing processor will automatically check for software updates when it’s connected to the internet. -
Page 22: Install An Update From A Downloaded File
Locate and select the .upd file you downloaded. After the update package has uploaded to the Triton Edge, the notification on the main menu changes to show new software is ready to install. Select Update now (1) to proceed with installing the update. - Page 24 ®Reg. U.S. Pat. & Tm. Off, and ™ common law marks. Visit www.navico.com/intellectual-property to review the global trademark rights and accreditations for www.bandg.com Navico Holding AS and other entities.
Need help?
Do you have a question about the Triton Edge and is the answer not in the manual?
Questions and answers