
Related Manuals for Amcrest IP4M-T1044EW-AI


Summary of Contents for Amcrest IP4M-T1044EW-AI
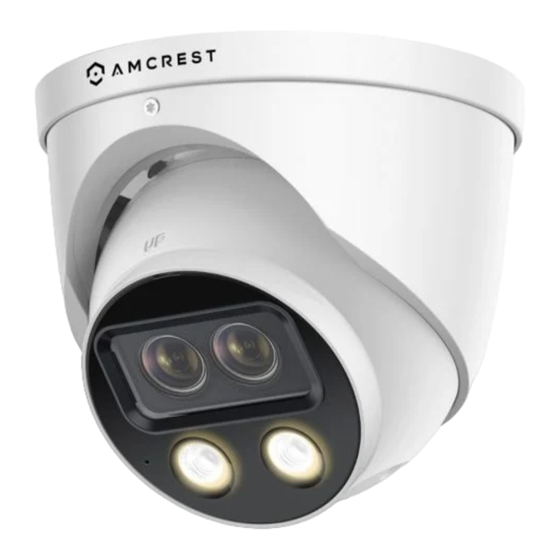
- Page 1 IP4M-T1044EW-AI / IP4M-T1044EB-AI 4MP Dual Lens POE AI Turret Camera User Manual Version 1.0.0 January 20 , 2023...
-
Page 2: Table Of Contents
Contents Overview ..........................3 Installation Guide........................4 Camera Access Setup ....................... 4 Desktop Access Setup ......................4 App Setup..........................5 Playback ..........................11 Setup ............................12 Camera ........................... 12 Audio ............................19 Network ..........................20 Event ............................24 Storage ........................... 47 Destination.......................... -
Page 3: Overview
(up to 256GB), SFTP/FTP, NAS, NVR, or using the Amcrest Cloud. All these features can be accessed and customized using a web browser or even using the Amcrest View Pro app using a mobile device. -
Page 4: Installation Guide
Desktop Access (Web UI) Amcrest View Pro app Amcrest Cloud Note: Additional software such as Amcrest Surveillance Pro can be used to access the camera. For more information on Amcrest Surveillance Pro, please visit amcrest.com Desktop Access Setup The AI features associated with your camera are only accessible and customizable using the built-in web user interface using a web browser. -
Page 5: App Setup
Amcrest Cloud App Setup Amcrest Cloud allows you to access your device from anywhere in the world. Please note, you will need an Amcrest Cloud account to proceed with Amcrest Cloud app setup. You can register for a cloud account in the Amcrest Cloud app or from the Amcrest Cloud website at amcrestcloud.com... - Page 6 Note: Connect your mobile device to the same network that your camera is on. 2. Register for an Amcrest Cloud account. To register click on Sign Up and fill out the form to complete registration. 3. Tap on Add Camera 4.
- Page 7 The following steps will continue the app setup process for an Android phone and, though the iPhone version of the app has slightly different steps, most of this process is identical and easy. Download and install the Amcrest View Pro app for the App Store or Google Play Store.
- Page 8 6. Scan the QR code. The QR code can be found on the serial tag along with a scannable barcode. Note: IP/Domain/DDNS can be used to establish a DDNS connection. For more information on how to setup a DDNS connection, visit amcrest.com/support...
- Page 9 The default username and password will be admin. Tap “Start Live View”. For more information about Amcrest View Pro and its functionalities visit amcrest.com/support Using the Web UI The web user interface (web UI) will be the recommended method for accessing the AI features and settings for your camera.
- Page 10 Button Function Name Function Description Click this option to manually activate an alarm if an external alarm is Relay Out connected. White Light Click this option to manually activate the white light LEDs. Siren Activation Click this option to manually activate the built-in siren (IE Mode only). Click this option and use your mouse on the interface to digitally zoom Digital Zoom in on an area.
-
Page 11: Playback
Playback The Playback tab allows the user to playback the camera’s recorded video. Below is a screenshot of the Playback tab: This is the interface for the playback menu. There are 5 main sections: Section 1: Allows the user to filter between video (.mp4) or snapshots (.jpg). Section 2: Allows the user to playback events based on calendar dates. -
Page 12: Setup
Manual events. The “All” option will select all recording types in the interface. Cloud Storage The Cloud Storage tab allows the user quick access to the Amcrest Cloud website. At this website (amcrestcloud.com) users can register for new accounts as well as view or modify existing accounts. - Page 13 Configuration The Configuration menu allows the user to configure image profiles for normal, day, and night usage. Below is an explanation for each of the fields on the Configuration tab in the Configuration menu item: Picture Profile: This dropdown box allows the user to select which profile to modify. The 3 options are Day, Night, and General.
- Page 14 Shutter Priority: This setting will maximize the fastest shutter speed and will sacrifice the gain in return. Manual - This setting lets you select your shutter speed and have the gain adjust automatically. Selecting customized range will let you both the shutter speed an adjust the gain manually. Exposure Comp: Use this slider to adjust the exposure compensation.
- Page 15 To reset to default settings, click the Reset Defaults button. To refresh the screen, click on Refresh. To save the settings, click the Save button. Day & Night This menu allows the user to adjust day and nighttime settings. Below is an explanation of the features provided in this menu.
- Page 16 Smart Codec: This option allows the user to enable or disable the smart codec. Smart codec is a function in most Amcrest cameras which aim to reduce bandwidth consumption without losing visible image quality by intelligently increasing compression where it will not make a visible difference in the scene .
- Page 17 Frame Interval: This field allows the user to set the P frame amount between two I frames. The value ranges from 1 to 150 seconds. Default value is 50. Recommended value is frame rate *2. Watermark Settings: This function allows the user to verify if the video has been tampered with. Watermark Character: This field allows the user to set the watermark’s text.
- Page 18 Logo Overlay The logo overlay menu allows the user to enable or disable the Amcrest overlay logo in the interface. Click the enable option to enable the Amcrest overlay and click save to apply the setting. To disable the Amcrest overlay, click disable, then click save to apply the setting.
-
Page 19: Audio
However, this can be updated if accessing the camera in IE mode on Edge, for more information please visit amcrest.com/support Audio This menu allows the user to modify audio settings for the camera. Please note, this device has a dongle wire connection which allows the user to connect an external RCA microphone or speaker. -
Page 20: Network
The P2P settings screen is where users can use a QR code to connect their smartphone or tablet to the camera. This feature needs to be enabled for use with the Amcrest View app, or other software that requires P2P. - Page 21 QR code scanning feature cannot be used. QR Code: This image is a Quick Response (QR) code. By scanning this image using the Amcrest View app, this camera can establish a connection with the app.
- Page 22 For purposes of this guide, AmcrestDDNS will be used. AmcrestDDNS is a free DDNS service provided by Amcrest, and it must be renewed every year. A renewal reminder email will be sent to the email entered in the username field below. To use AmcrestDDNS, enter the domain name set for the camera in the Domain Name field and enable the Type option.
- Page 23 SMTP Server: SMTP stands for Simple Mail Transfer Protocol. This field allows the user to enter the SMTP server used by the email service. Authentication: This dropdown box allows the user to select an encryption type. There are two types of email encryption protocols that are available: SSL: Secure Socket Layer TLS: Transport Layer Security...
-
Page 24: Event
The fourth column shows the Internal Port used by that service to establish communication from the router to the camera. To edit this, click the pencil button in the modify column for that line item. o The fifth column shows the External Port used by that service to establish communication from the router to the internet. - Page 25 Anti-Dither: Refers to the amount of time, in seconds, the event will last. For instance, once motion is detected by the camera, the event will last 30 seconds before it ends. However, this can be adjusted between 0 and 100 seconds if needed. Detection Area: Clicking this button opens a pop-up screen that can be used to set detection areas.
- Page 26 Send Email: This checkbox allows the user to enable the camera to send an email when a motion detection alarm is triggered. Siren: This checkbox allows the user to enable the camera to trigger an audible siren once motion is detected. Warning Light: This checkbox allows the user to enable the camera to trigger the white light LED to turn on once an object has been detected.
- Page 27 Setting an IVS Rule All IVS rules can only be set and/or modified using the web user interface. They cannot be set using the Amcrest View Pro app or any other platforms associated with your device. For more information on setting IVS rule, refer to...
- Page 28 • Ensure a Smart Plan has been activated in the Smart Plan menu for IVS. • Access the IVS menu and click on the Add ( ) icon to begin customizing IVS rules. • Use the dropdown menu in the Rule Type column to select which IVS rule you want to use. Tripwire Tripwire allows the camera to trigger an event if an object, such as a human or vehicle, crosses the set tripwire line.
- Page 29 To reset to default settings, click the Reset Defaults button. To refresh the page, click the Refresh button. To save the settings, click the Save button. Setting a Tripwire Before setting up this rule, ensure the camera is facing an area in which objects can be easily detected, away from obstructions or other objects that may produce a false alert.
- Page 30 Record Delay: This field specifies, in seconds, how long the delay between IVS events should be. The default is 10 seconds however this can be modified between 10~300 seconds. Relay Out: This checkbox allows the user to enable the camera to trigger a connected alarm (connected to the alarm port on the back of the camera) when a motion detection alarm is triggered.
- Page 31 7. Click the Draw Rule option and use your mouse to draw a detection area. Once the detection area is created, click Save to apply the settings. Note: The target filtering and pixel counter can be used to refine the set rule however for optimal experience it is highly recommended to leave these settings as default To reset to default settings, click the Reset Defaults button.
- Page 32 Setting an Abandoned Object Rule Before setting up this rule, ensure the camera is facing an area in which objects can be easily detected, away from obstructions or other objects that may produce a false alert. 1. Select Abandoned Object from the Rule Type drop down menu. Set a name for the rule by double clicking the mouse over the Name of the rule.
- Page 33 Mode: Select between different white light LED modes. Flicker: Allows the white light LED to flash once the area has been triggered. “Normally on” allows the white light LEDs to remain solid after the rule is triggered. Flicker Frequency: The speed of the white light LED flash (low, middle, or high) Duration: How long the flash will last.
- Page 34 Record: This checkbox allows the user to enable the camera to record video when an IVS event is triggered. Record Delay: This field specifies, in seconds, how long the delay between IVS events should be. The default is 10 seconds however this can be modified between 10~300 seconds. Relay Out: This checkbox allows the user to enable the camera to trigger a connected alarm (connected to the alarm port on the back of the camera) when a motion detection alarm is triggered.
- Page 35 Crowd Gathering Estimation Crowd Gathering Estimation is used to detect a group of people that enter or exit a specific area set by the user. Below is a description of the features in this menu. No.: Provides the order in which the IVS rules will be displayed in the menu. Name: Allows the user to customize a name for their rule.
- Page 36 Setting a Crowd Estimation Gathering Rule Before setting up this rule, ensure the camera is facing an area in which objects can be easily detected, away from obstructions or other objects that may produce a false alert. 1. Select Crowd Gathering Estimation from the Rule Type drop down menu. Set a name for the rule by double clicking the mouse over the Name of the rule.
- Page 37 Clear: This option is used to clear the drawn rule set on the live monitor screen. Target filter: Sets a maximum and minimum pixel size in which an event will be triggered. Clear: Clears the modified target area to draw the target area on the live monitoring screen Draw Target: Allows the user to set a target area on the live monitor screen.
- Page 38 Mode: Select between different white light LED modes. Flicker: Allows the white light LED to flash once the area has been triggered. “Normally on” allows the white light LEDs to remain solid after the rule is triggered. Flicker Frequency: The speed of the white light LED flash (low, middle, or high) Duration: How long the flash will last.
- Page 39 Actual Length: Represents the actual length of the ruler on the live monitoring screen in meters. Add Rulers: This option allows the user to add and adjust a ruler on the live monitoring screen. Rulers are used to adjust calibration for IVS rules. Use your mouse to draw rulers on the live monitoring screen. Remove Rulers: Removes rulers set in the detection area menu.
- Page 40 To verify the width and height accuracy of the detection area you can use the weight and height verification options via the dropdown box. To begin, choose your verification method from the dropdown menu and click on the Calibration Validation button. Left click on the live monitoring screen and draw a vertical or horizontal line to verify the calibration.
- Page 41 To reset to default settings, click the Reset Defaults button. To refresh the page, click the Refresh button. To save the settings, click the Save button. Using People Counting People Counting is a great tool to use to keep track and provide insight into the number of people entering or exiting a certain area.
- Page 42 Global Setup: Use the sensitivity slider to adjust the sensitivity of the detection area. The default value is 5 however can go up to 10 (not recommended). Draw Rule: This option allows the user to customize the detection area. Clear: Clears the set detection area. To reset to default settings, click the Reset Defaults button.
- Page 43 The report can also be exported to your computer if needed. To export this report, click Export to save the .bmp image to your device. Face Detection Face Detection is used to detect face events and receive facial image snapshots using email alerts. An OSD overlay of the total number of faces counted can also be displayed on live view as well if needed.
- Page 44 Clear: Remove the set detection area. Exclude Region: Draw or modify the area in which face detection will not apply. Target filter: Sets a maximum and minimum pixel size in which an event will be triggered. Clear: Clears the modified target area to draw the target area on the live monitoring screen Draw Target: Allows the user to set a target area on the live monitor screen.
- Page 45 An image of the report can also be exported to your computer if needed. To export a heat map report, click the Export option and save the image to your computer. Alarm This menu allows the user to configure external alarm settings if an external alarm system is connected to the dongle connection of the camera.
- Page 46 Flicker Frequency: The speed of the white light LED flash (low, middle, or high) Duration: How long the flash will last. Default is 10 seconds however can range between 5 and 30. Period: Set a schedule in which the flash will apply. Snapshot: This checkbox allows a snapshot of the event to be sent to registered email address once triggered.
-
Page 47: Storage
Send Email: This checkbox allows the user to enable the camera to send an email when illegal access is attempted. To reset to default settings, click the Reset Defaults button. To refresh the page, click the Refresh button. To save the settings, click the Save button. - Page 48 Below is an explanation of the fields on the Record Schedule settings tab: Record Type: These checkboxes allow the user to select which recording type they want to configure on the schedule. There are 3 types of recordings: General: General recording means that the camera captures all footage for the specified time period. General recording is represented by the color green.
-
Page 49: Destination
Alarm: Alarm means that the camera only takes snapshots when an alarm is activated. Alarm recording is represented by the color red. Snapshot Recording Schedule: To specify a snapshot range, first select the type of snapshot desired, then click and drag on time bar for the desired date. - Page 50 Path This tab is where the user can designate a path for recorded video and snapshots to reside in. Below is a screenshot of the Path tab: Below is an explanation of the fields on the Path settings tab: Event Type: This column designates storage options available to the camera. The options are SD Card, FTP, and NAS.
-
Page 51: System
Save button. Cloud Storage This menu redirects the user to the Amcrest Cloud web site. At this website (amcrestcloud.com) users can register for new accounts as well as view or modify existing accounts. For more information on Amcrest Cloud visit: amcrestcloud.com... - Page 52 General This tab is where the user can configure some basic camera settings. Below is an explanation of the fields on the General settings tab: Device Name: This field allows the user to change the device’s name. Language: This dropdown box allows the user to change the language used in the camera. Video Standard: This dropdown box allows the user to select either the NTSC or PAL video standard.
-
Page 53: Information
Go to amcrest.com/firmware Search for the model number of your camera and download the latest firmware file. Return to the web user interface for your camera and press the Browse button to locate and import the firmware file you just downloaded. -
Page 54: Alarm
Version This screen allows the user to see various information about the camera’s software versions, as well as other information. On this screen, software version, web interface version, and ONVIF version are displayed. Also, the S/N (Token ID) is displayed here. This screen is where the camera’s activity log is kept. - Page 55 Click the Connections menu item on the left-hand menu and ensure that the HTTP port has changed. Click the DDNS menu item on the left-hand menu, pick Amcrest DDNS from the drop-down box, click the checkbox next to Server Type, and then click the Save button on the bottom right.
- Page 56 Port Forwarding Remote Web Access Setup Port Forwarding is an alternative method to setting up remote access for Amcrest cameras. This method should only be used if the UPnP/DDNS Remote Access method did not work. Below is a step-by-step walkthrough that details how to setup the camera for Remote Web Access using Port Forwarding: Login to your camera, open the main menu then go to Setup ->...
- Page 57 View your camera live or watch recorded clips using the menu button on the top of the page. You can also use the Amcrest Cloud app on iOS and Android to add more cameras, play recordings, and view your camera live, from anywhere.
- Page 58 user's authority to operate the equipment. In cases where the manual is provided only in a form other than paper, such as on a computer disk or over the Internet, the information required by this section may be included in the manual in that alternative form, provided the user can reasonably be expected to have the capability to access information in that form.
- Page 59 All the designs and software here are subject to change without prior written notice. All trademarks and registered trademarks mentioned are the properties of their respective owners. To contact Amcrest support, please do one of the following: Visit http://amcrest.com/contact and use the email form...
Need help?
Do you have a question about the IP4M-T1044EW-AI and is the answer not in the manual?
Questions and answers