
Subscribe to Our Youtube Channel
Related Manuals for Unverferth BLU-JET AT3015


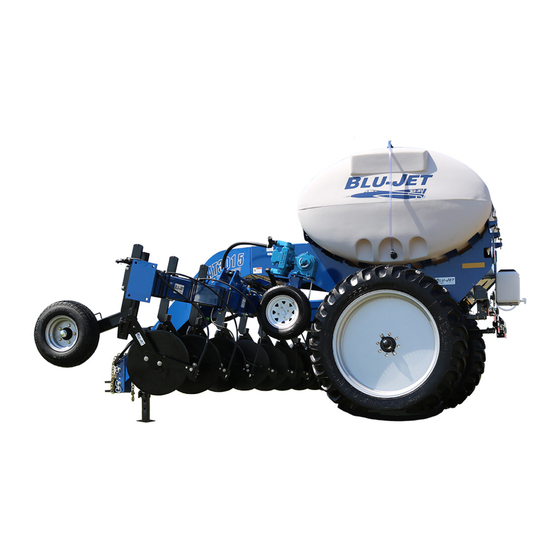
Summary of Contents for Unverferth BLU-JET AT3015
- Page 1 All Terrain Injection Liquid Applicator AT3015 Serial Number D66640100 & Higher Part No. J0603015...
- Page 2 The information, specifications, and illustrations in the manual are based on the information avail- able at the time it was written. Due to continuing improvements in the design and manufacture of Unverferth products, all specifications and information contained herein are subject to change without notice.
-
Page 3: Table Of Contents
— Introduction AT3015 TABLE OF CONTENTS Foreword ............................... 2 Pre-Operation Checklist ..........................2 SECTION I Safety General Hazard Information ........................1-2 Safety Decals .............................1-3 Following Safety Instructions ........................1-5 Before Servicing ............................1-5 Before Operating ............................1-6 During Operation ............................1-6 Before Transporting ............................1-7 During Transport ............................1-7 Pressurized Oil ............................1-8 Chemical Hazards ............................1-8 Clean Water Tank ............................1-9... - Page 4 — Introduction AT3015 TABLE OF CONTENTS SECTION III Operation Preparing Tractor ............................3-2 Preparing Applicator Hardware .............................3-2 Pivot Pins ............................3-2 Hitch ..............................3-2 Hydraulic System ..........................3-2 Tires/Wheels ............................3-3 Lubrication ............................3-3 Hitching to the Tractor Drawbar Hitching ..........................3-4 Transport Chain ..........................3-5 Hydraulic Connections .........................3-6 Leveling Main Frame ..........................3-7 Electrical Harness Connection ......................3-7 Jack Usage ..............................3-8...
- Page 5 — Introduction AT3015 TABLE OF CONTENTS SECTION IV Parts Main Frame & Clean Water Tank Components ..................5-2 Wheel Axle, 120” Wheel Spacing (J33000012) ..................5-4 Wheel Axle, 76” Wheel Spacing (J33000013) ..................5-5 Wheel Axle, 88” Wheel Spacing (J33000015) ..................5-6 Hub and Spindle Components (JAAM2800-1) ...................5-7 Decals ................................5-8 Light Kit Components ..........................5-10 Standard Toolbar 26’...
- Page 6 — Introduction AT3015 Notes...
-
Page 7: Section I
— Safety AT3015 SECTION I Safety General Hazard Information ........................1-2 Safety Decals .............................1-3 Following Safety Instructions ........................1-5 Before Servicing ............................1-5 Before Operating ............................1-6 During Operation ............................1-6 Before Transporting ............................1-7 During Transport ............................1-7 Pressurized Oil ............................1-8 Chemical Hazards ............................1-8 Clean Water Tank ............................1-9 Preparing for Emergencies ........................1-10 Wearing Protective Equipment .........................1-10... -
Page 8: Safety
It is true that the designer, the manufacturer, and the safety engineer can help; and they will help, but their combined efforts can be wiped out by a single careless act of the operator. It is said that, “the best kind of a safety device is a careful operator.” We, at Unverferth Mfg. -
Page 9: Safety Decals
— Safety AT3015 Safety Decals • Replace lost, damaged, painted, oR unReadable decals immediately. if paRts that have decals aRe Replaced, also make suRe to install new DECALS. THESE DECALS INFORM AND REMIND THE OPERATOR WITH OPERATIONAL INFORMATION AND SAFETY MESSAGES. 9501197 95839 97048... - Page 10 — Safety AT3015 Safety Decals (continued) 97337 TA510514 SMV Emblem 9008714 - Rear SIS Decal, 20MPH 9003127 - Reflector “AMBER” 9008720 - Rear SIS Decal, 30KPH 9003126 - Reflector “RED” 9003125 - Decal, Fluorescent, Red-Orange JAP2472 CAUTION To Avoid Pump Damage Do Not Exceed 450 RPM Pump Speed: •...
-
Page 11: Following Safety Instructions
— Safety AT3015 Following Safety Instructions • Read and understand this operator’s manual before operating. • All machinery should be operated only by trained and authorized personnel. • To prevent machine damage, use only attachments and service parts approved by the manufacturer. -
Page 12: Before Operating
— Safety AT3015 Before Operating • Do not stand between towing vehicle and implement during hitching. • Always make certain everyone and everything is clear of the machine before beginning operation. • Verify that all safety shields are in place and properly secured. •... -
Page 13: Before Transporting
— Safety AT3015 Before Transporting • Secure transport chains to towing vehicle before transporting. DO NOT transport without chains. • Install transport locks before transporting. • Check for proper function of all available transport lights. Make sure that all reflectors are clean and in place on machine. -
Page 14: Pressurized Oil
— Safety AT3015 Pressurized Oil • Relieve the hydraulic system of all pressure before adjusting or servicing. See hydraulic power unit manual for procedure to relieve pressure. • High-pressure fluids can penetrate the skin and cause serious injury or death. Use cardboard or wood to detect leaks in the hydraulic system. -
Page 15: Clean Water Tank
— Safety AT3015 Clean Water Tank • A clean water tank is provided as standard equipment. It is equipped with a spigot for general washing and a hose for emergency eye washing. • Always keep clean water in tank. Water in clean water tank is not suitable for human consumption. -
Page 16: Preparing For Emergencies
— Safety AT3015 Preparing for Emergencies • Keep a first aid kit and properly rated fire extinguisher nearby. • Keep emergency numbers for fire, rescue, and poison control personnel near the phone. Wearing Protective Equipment • Wear clothing and personal protective equipment appropriate for the job. -
Page 17: Set Up
— Set Up AT3015 Section II Set Up Pre-Delivery Checklist............................2-2 Dealer Set Up ..............................2-2 General Set Up Information ..........................2-3 Unloading Applicator from Shipping Trailer ......................2-4 Tongue Assembly to Main Frame Assembly ....................2-4 Pump Drive .................................2-7 Coulter Assembly ..............................2-8 Gauge Wheel Assembly ............................2-8 Transport Lighting Assembly ..........................2-8 SMV Emblem &... -
Page 18: Pre-Delivery Checklist
— Set Up AT3015 Pre-Delivery Checklist o Torque wheel nuts as specified in MAINTENANCE section. o Check tire pressure as specified in MAINTENANCE section. o Axles are adjusted from shipping position to desired operating width. o All grease fittings have been lubricated. o Check to be sure all safety decals are correctly located and legible. -
Page 19: General Setup Information
— Set Up AT3015 General Setup Information For your safety, and the safety of others, use proper tools and equipment and always use safe working procedures. Refer to these instructions before starting any work on your machine. For ease of assembly, install all hardware loosely until assembly is complete and then tighten according to “Torque Chart”... -
Page 20: Unloading Applicator From Shipping Trailer
— Set Up AT3015 Unloading Applicator from Shipping Trailer Tongue Assembly to Main Frame Assembly 1. Remove the four 3/4”-10UNC x 2” capscrews, grade 8 (91299-145), ten 3/4”-10UNC x 3” capscrews, grade 8 (91299-149), fourteen 3/4”-10UNC lock nuts (97025), and four corner brace plates (JAM3566) from the tongue assembly. - Page 21 — Set Up AT3015 Unloading Applicator from Shipping Trailer (continued) 3. Route hydraulic hoses through the tongue assembly. fig. 2-2 4. Attach the bulkhead plate (JAM3588) to the tongue assembly with two 3/8”-16UNC x 1” capscrews (9390-055) and 3/8”-16UNC lock nuts (9928).
- Page 22 — Set Up AT3015 Unloading Applicator from Shipping Trailer (continued) 7. Refer to “Hitching to the Tractor” in OPERATION section. Attach Applicator to the trac- tor. 8. Check all hoses and cylinders for signs of leakage. Hoses should not be kinked, twisted or rubbing against sharp edges.
-
Page 23: Pump Drive
— Set Up AT3015 Pump Drive 1. Lower the toolbar to working position. 1/2”-13UNC x 4 1/2” 2. Using a safe lifting device rated at a Capscrews (9390-112) & minimum of 150 lbs., support the pump 1/2”-13UNC Lock Nuts (9800) drive wheel and axle. -
Page 24: Coulter Assembly
See federal regulation 49 CFR 562; available at www.govinfo.gov for US federal law require- ments. See your Unverferth dealer for additional brackets, reflectors, or lights to meet your require- ments. NOTE: Consult “Overhead Layouts” for light kit placement. -
Page 25: Attaching 18" Hitch Extension Option To Tongue Assembly
— Set Up AT3015 Attaching 18” Hitch Extension Option to Tongue Assembly 1. Remove and save the hitch, mounting hardware and transport chain. (FIG. 2-3A) fig. 2-3a hitch transport chain mounting hardware 2. Attach the hitch extension to the tongue assembly with the 1”-8UNC hardware provided. (FIG. -
Page 26: Pump Set Up - For Units With Centrifugal Pump
— Set Up AT3015 Pump Set Up — For Units With Centrifugal Pump For set up of a non-PWM pump, refer to your rate controller manual for details. For specific details related to your product pump, please refer to your pump manual. •... -
Page 27: Rate Orifice Installation
— Set Up AT3015 Rate Orifice Installation 1. Consult “Row Spacing Rate Chart” in MAINTENANCE section for orifice size. 2. Remove nozzle nut and insert orifice. 3. Travel a few feet and check blade depth. Adjust gauge wheels or coulters to achieve the 4”... - Page 28 — Set Up AT3015 Layout — 9 Row 36” Spacing with Standard Toolbar overhead view 137 3/4 137 3/4 Rear view 76” wheel axle (j33000013) 44 3/4 42 1/4 44 3/4 2-12...
- Page 29 — Set Up AT3015 Layout — 9 Row 38” Spacing with Standard Toolbar overhead view 145 3/4 145 3/4 Rear view 76” wheel axle (j33000013) 44 3/4 42 1/4 44 3/4 2-13...
- Page 30 — Set Up AT3015 Layout — 11 Row 30” Spacing with Standard Toolbar 2-14...
- Page 31 — Set Up AT3015 Layout — 11 Row 36” Spacing with Gull Wing Toolbar overhead view 137 3/4 137 3/4 Rear view 76” wheel axle (j33000013) 44 1/2 41 1/4 44 1/2 2-15...
- Page 32 — Set Up AT3015 Layout — 11 Row 38” Spacing with Gull Wing Toolbar overhead view 137 3/4 137 3/4 Rear view 76” wheel axle (j33000013) 44 3/4 41 1/4 44 3/4 2-16...
- Page 33 — Set Up AT3015 Layout — 13 Row 22” Spacing with Standard Toolbar 2-17...
- Page 34 — Set Up AT3015 Layout — 13 Row 30” Spacing with Standard Toolbar 2-18...
- Page 35 — Set Up AT3015 Layout — 15 Row 20” Spacing with Standard Toolbar 2-19...
- Page 36 — Set Up AT3015 Layout — 15 Row 30” Spacing with Gull Wing Toolbar 2-20...
- Page 37 — Set Up AT3015 Layout — 17 Row 30” Spacing with Gull Wing Toolbar 2-21...
-
Page 38: Raven Rcm Guide
— Set Up AT3015 Raven RCM Guide RCM Set-Up Whenever the tractor is turned off or the ECU for the liquid applicator loses power, the fol- lowing steps will have to be performed in order for the RCM to function properly right away. NOTE: Before programming the RCM, ensure the RCM monitor is connected to the battery. - Page 39 — Set Up AT3015 Raven RCM Guide (continued) 8. Under Application Type, select “Liquid (Gal)”. 9. Press the Next Page icon. 10. Under Application Mode, select “Liquid”. 11. Press the Next Page icon. 2-23...
- Page 40 — Set Up AT3015 Raven RCM Guide (continued) 12. Ensure “AUX-N Enabled” is unchecked. 13. Press the Next Page icon. 14. Enter the number of sections. If applicable, select equal width sections. 15. Press the Next Page icon. 2-24...
- Page 41 — Set Up AT3015 Raven RCM Guide (continued) 16. Verify or enter the widths of the individual sections. NOTE: If section widths are unknown, simply count the number of rows plumbed into each section and multiply by the row width. Section 1 will start on the left hand side of the machine when facing the machine form the rear.
- Page 42 — Set Up AT3015 Raven RCM Guide (continued) 20. Review the information on the Section Summary screen. 21. If the information is correct, press the Next Page icon. To make adjustments to the configuration, press Back and adjust settings as needed. 22.
- Page 43 — Set Up AT3015 Raven RCM Guide (continued) 24. Ensure both boxes are unchecked and Height Switch dropdown says “None”. 25. Press the Next Page icon. 26. Select “Standard” for control valve type. 27. Enter the desired Valve Response Rate, Control Deadband, Valve Delay, Valve Advance, and Control Effort.
- Page 44 — Set Up AT3015 Raven RCM Guide (continued) 29. Enter the Flowmeter Calibration number. This is unique to each Flowmeter. Check the tag on your flow meter to find the value. The value represented in the picture below does not necessarily represent the number for your flow meter.
- Page 45 — Set Up AT3015 Raven RCM Guide (continued) 34. The Setup Rates page determines the application rates that the RCM will regulate to. Enter any desired three Preset Rate Values which can be selected on the home screen. On the home screen, target rates can be entered as well.
- Page 46 — Set Up AT3015 Raven RCM Guide (continued) 43. No action required on this screen. Shows the setup summary. Make sure all the values are correct. 44. Press the Next Page icon to finish the RCM set-up 2-30...
- Page 47 — Set Up AT3015 Raven RCM Guide (continued) Flow Meter Calibration Flow Meter Calibration can be accomplished by performing a catch test calibration or an Applied Product Calibration. This calibration should only be done if the applied rate differs greatly from the target rate. Catch Test Calibration A catch test calibration will calibrate the flow meter by dispensing product through...
- Page 48 — Set Up AT3015 Raven RCM Guide (continued) 4. A warning message will be displayed. Review the message and touch the Green Checkmark. 5. Select which sections to dispense product through and touch Calibrate Rate Sensor. 6. Enter the number of nozzles in the sections selected that will dispense product into the Number of Nozzles that will Spray.
- Page 49 — Set Up AT3015 Raven RCM Guide (continued) 7. Turn the master switch on and then press start to begin the test. Once the test is complete, collect the product and measure how much was dispensed. 2-33...
- Page 50 — Set Up AT3015 Raven RCM Guide (continued) Applied Product Calibration An applied product calibration compares the amount of product that is applied during normal field application to the amount of product the flow meter thinks was applied. This test can be used when time doesn’t allow for a full catch test or if calibration of a larger quantity of product is desired.
- Page 51 — Set Up AT3015 Raven RCM Guide (continued) 4. A message outlining the test procedure will be displayed. Review the instruction and touch the checkmark. 5. Ensure that the applied product is being recorded. A button should be displayed indicating the accumulated total. Once the application is complete, touch the Stop Accumulating button.
- Page 52 — Set Up AT3015 Raven RCM Guide (continued) Nozzle Flow Check An applied product calibration compares the amount of product that is applied during normal A nozzle flow check test allows the operator to check nozzle flow by turning on the pump and valves while remaining stationary.
- Page 53 — Set Up AT3015 Raven RCM Guide (continued) 4. Review the step by step instructions. Touch Start to initiate product flow. Complete system inspection as necessary. Control Section Test A Control Section Test is used to manually operate each section shut off valves. This test can be used when diagnosing issues with the section control system.
- Page 54 — Set Up AT3015 Raven RCM Guide (continued) 2. Select “Control/Section Test” from the drop down menu. 3. Press begin to start the process. A warning alarm will pop up saying that the test will discharge product. Make sure to read the warning carefully.
-
Page 55: Operation
— Operation AT3015 Section III Operation Preparing Tractor ........................3-2 Preparing Applicator Hardware ..........................3-2 Pivot Pins ..........................3-2 Hitch ............................ 3-2 Hydraulic System ......................... 3-2 Tires/Wheels ......................... 3-3 Lubrication ........................... 3-3 Hitching to the Tractor Drawbar Hitching ......................... 3-4 Transport Chain ........................ -
Page 56: Preparing Tractor
— Operation AT3015 Preparing Tractor Before operating applicator, read the tractor operator’s manual and gain an understanding of its safe methods of operation. Check the tractor brakes and transport lights. Make sure they are in proper working order. Check the tractor hydraulic oil reservoir and add oil if needed. Verify that the tractor is adequately ballasted for drawbar operation at the anticipated draft and vertical tongue load. -
Page 57: Tires/Wheels
— Operation AT3015 Preparing Applicator (continued) Tires/Wheels Check tire pressures and maintain at recommended values listed in the MAINTENANCE section. • IMPROPERLY TORQUED WHEEL NUTS/BOLTS CAN CAUSE A LOSS OF IMPLEMENT CONTROL AND MACHINE DAMAGE. WHEEL NUTS/BOLTS MUST BE CHECKED REGU- LARLY. -
Page 58: Hitching To The Tractor Drawbar Hitching
— Operation AT3015 Hitching to the Tractor Drawbar Hitching • DO NOT STAND BETWEEN THE APPLICATOR AND TRACTOR WHEN HITCHING. ALWAYS ENGAGE PARKING BRAKE AND STOP ENGINE BEFORE INSERTING HITCH PIN. Connect the hitch to the tractor drawbar. Do not attempt to hitch to any other location on FIG. -
Page 59: Transport Chain
— Operation AT3015 Hitching to the Tractor (continued) Transport Chain Always use a transport chain when connecting Transport chain connection shown for the applicator directly to a tractor. Make sure illustration purposes only. Refer to the intermediate chain support is in use. tractor manufacturer for proper attachment. -
Page 60: Hydraulic Connections
— Operation AT3015 Hitching to the Tractor (continued) Hydraulic Connections • HIGH-PRESSURE FLUIDS CAN PENETRATE THE SKIN AND CAUSE SERIOUS INJURY OR DEATH. USE CARDBOARD OR WOOD TO DETECT LEAKS IN THE HYDRAULIC SYSTEM. SEEK MEDICAL TREATMENT IMMEDIATELY IF INJURED BY HIGH-PRESSURE FLUIDS. -
Page 61: Leveling Main Frame
— Operation AT3015 Hitching to the Tractor (continued) Leveling Main Frame 1. Before leveling the machine tire pressure should be checked. Inflate mainframe tires to 56 P.S.I. Max. Before beginning opera- tion of this machine the mainframe must be level. Place toolbar on level surface. Adjust the hitch up or down in the tongue connector and connect to tractor. -
Page 62: Jack Usage
— Operation AT3015 Jack Usage • UNHITCHING A LOADED APPLICATOR CAN CAUSE SERIOUS INJURY OR DEATH DUE TO TONGUE RISING OR FALLING. ALWAYS HAVE A LOADED APPLICATOR ATTACHED TO A TRACTOR. Use jack to support an empty applicator, never a loaded applicator. Always have a loaded ap- plicator hooked to tractor. -
Page 63: Transporting Drawbar Connection
— Operation AT3015 Transporting Drawbar Connection • USE ExCEPTIONAL CARE WHEN OPERATING APPLICATOR EQUIPPED WITH SINGLE TIRES AND SET AT NARROW WHEEL SPACING. THE POSSIBILITY OF TIPPING OVER DURING TURNS OR TRAVEL ON ROUGH ROADS IS INCREASED UNDER THESE CON- DITIONS. -
Page 64: Depth Collar Depth Control
— Operation AT3015 Transporting (continued) • PERFORM TOOLBAR UNFOLDING AND FOLDING OPERATIONS ONLY IN AREAS WITH ADEQUATE HEIGHT, WIDTH AND LENGTH CLEARANCES. IN PARTICULAR, BE MIND- FUL OF LOCATION OF OVERHEAD POWER LINES. FAILURE TO DO SO CAN RESULT IN PERSONAL INJURY AND PROPERTY DAMAGE. •... -
Page 65: Standard Toolbar Wing Lock
— Operation AT3015 Transporting (continued) Standard Toolbar Wing Lock • Keep hands clear of pinch point areas. 1. Wing lock pin storage. • Lock wings during operation. Failure do do so could result in damage to wing fold cylinders. Lock Unlock Gull Wing Toolbar Operation •... -
Page 66: Coulter Shank Adjustments
— Operation AT3015 Coulter Shank Adjustments 1. Loosen carriage bolts and adjust coulter shanks in flatback until the blade is running at a depth of 4 to 5 inches. Orifice and Nozzle Installation • KEEP HANDS CLEAR OF PINCH POINT AREAS. •... -
Page 67: Bottom Fill Valve
— Operation AT3015 Bottom Fill Valve • ALWAYS WEAR PERSONAL PROTECTIVE EQUIPMENT WHEN WORKING WITH OR NEAR CHEMICALS. THIS EQUIPMENT INCLUDES, BUT IS NOT LIMITED TO: PROTECTIVE EYE WEAR, GLOVES, SHOES, SOCKS, LONG-SLEEVED SHIRT, AND LONG PANTS. AD- DITIONAL PROTECTION MAY BE REQUIRED FOR MANY TYPES OF CHEMICALS. •... -
Page 68: Clean Water Tank
— Operation AT3015 Clean Water Tank 1. Location of nine-gallon emergency water tank/toolbox. Change water daily to provide fresh clean water to flush exposed skin or eyes. Drain water daily in cold temperatures to prevent freezing and bursting tank. 2. In case of exposure to fertilizer, open fau- cet or pull top end of hose loose to flush exposed part of body. -
Page 69: Maintenance
— Maintenance AT3015 Section IV Maintenance Lubrication ............................4-2 High-Pressure Coulter Injection System Nozzle Calibration Worksheet ..........4-4 30 Inch Spacing Rate Chart ........................ 4-6 Schematics ............................4-7 Wheel, Hub and Spindle Disassembly and Assembly ................4-8 Wheels and Tires ..........................4-10 Complete Torque Chart Grade 5 ............................. -
Page 70: Lubrication
— Maintenance AT3015 Lubrication... - Page 71 — Maintenance AT3015 Lubrication (continued) To keep your applicator in top operating condition and to assure its proper performance and reliability for a long period of time, periodic inspection and lubrication is a must. Use EP-2 lubricant at the locations described in the chart. The lubrication locations and recommended schedule are as follows: ITEM DESCRIPTION...
-
Page 72: High-Pressure Coulter Injection System Nozzle Calibration Worksheet
— Maintenance AT3015 High-Pressure Coulter Injection System Nozzle Calibration Worksheet Calibration of these systems involves two separate sets of calculations. The first being a procedure of setting rate and the second being a procedure of obtaining system pressure. FIRST: These systems utilize a positive-displacement, ground-driven, piston pump to establish the GPA (gallon per acre) rate. - Page 73 — Maintenance AT3015 High-Pressure Coulter Injection System Nozzle Calibration Worksheet Step 5: Swath width is the number of rows being applied (Example: A 15 row 30” machine will cover 16 rows.) times the spacing between the rows. Rows x Spacing = Swath width 16 rows x 30”...
-
Page 74: 30 Inch Spacing Rate Chart
— Maintenance AT3015 30 Inch Spacing Rate Chart Gallons per Acre 30 Inch Spacing Orifice # 10.65 lb./gal 5 mph 6 mph 7 mph 8 mph 9 mph 10 mph 11 mph 12 mph 0.320 12.7 10.5 0.369 14.6 12.2 10.4 4916 49 0.413... -
Page 75: Schematics
— Maintenance AT3015 Schematics Main Electrical Harness 10’ - 5 Wire, 7 Pin & Dust Cap (Part #JAP3142) Light Electrical Harness 17’ - 5 Wire (Part #JAP3197) -
Page 76: Wheel, Hub And Spindle Disassembly And Assembly
— Maintenance AT3015 Wheel, Hub and Spindle Disassembly and Assembly • TIPPING OR MOVEMENT OF THE MACHINE CAN CAUSE SERIOUS INJURY OR DEATH. BE SURE MACHINE IS SECURELY BLOCKED. • FALLING OBJECTS CAN CAUSE SERIOUS INJURY OR DEATH. DO NOT WORK UNDER THE MACHINE AT ANY TIME WHILE BEING HOISTED. - Page 77 — Maintenance AT3015 Wheel, Hub and Spindle Disassembly and Assembly (continued) 5. Inspect the spindle and replace if necessary. If spindle does not need to be replaced, skip to Step 6; otherwise continue with Step 5. Remove the bolt and lock nut that retain the spindle to the axle. Using a lifting device rated for 150 lbs., remove the old spindle.
-
Page 78: Wheels And Tires
— Maintenance AT3015 Wheels and Tires Wheel Nut Torque Requirements • IMPROPERLY TORQUED WHEEL NUTS/BOLTS CAN CAUSE A LOSS OF IMPLEMENT CONTROL AND MACHINE DAMAGE. TORQUE WHEEL NUTS/BOLTS TO VALUES IN TABLE. CHECK TORQUE BEFORE USE, AFTER ONE HOUR OF UNLOADED USE OR AFTER FIRST LOAD, AND EACH LOAD UNTIL WHEEL NUTS/BOLTS MAINTAIN TORQUE VALUE. - Page 79 — Maintenance AT3015 Tire Pressure for Blu-Jet NH3 Applicators Wheels and Tires (continued) Load Index / Ply Tire Size Rating Tire Make Part # Max PSI Carlisle 99136 20.5x8.0B10 F-Ply Tire Pressure 99311 11L15 I-1 F-Ply Firestone 9502097 VF385/65R22.5 I-1 163D The following is to be used as a general guide for tire inflation and figures can vary de- 9502085...
-
Page 80: Complete Torque Chart
— Maintenance AT3015 Complete Torque Chart Capscrews - Grade 5 NOTE: • Grade 5 capscrews can be identified by three radial dashes on the head. • For wheel torque requirements, refer to Wheels and Tires. • Tighten U-bolts evenly and equally to have the same number of threads exposed on each end. -
Page 81: Grade 8
— Maintenance AT3015 Complete Torque Chart Capscrews - Grade 8 NOTE: • Grade 8 capscrews can be identified by six radial dashes on the head. • For wheel torque requirements, refer to Wheels and Tires. • Tighten U-bolts evenly and equally to have the same number of threads exposed on each end. -
Page 82: Hydraulic Fittings
— Maintenance AT3015 Hydraulic Fittings – Torque and Installation SAE Flare Connection (J. I. C.) 1. Tighten nut with finger until it bottoms the seat. 2. Using a wrench, rotate nut to tighten. Turn nut 1/3 turn to apply proper torque. SAE Straight Thread O-Ring Seal 1. - Page 83 AT3015 — Parts Section V Parts Please visit www.unverferth.com/parts/ for the most current parts listing. Main Frame & Clean Water Tank Components ..................5-2 Wheel Axle, 120” Wheel Spacing (J33000012) ..................5-4 Wheel Axle, 76” Wheel Spacing (J33000013) ..................5-5 Wheel Axle, 88” Wheel Spacing (J33000015) ..................5-6 Hub and Spindle Components (JAAM2800-1) ...................5-7...
-
Page 84: Main Frame & Clean Water Tank Components
AT3015 — Parts Main Frame & Clean Water Tank Components Please visit www.unverferth.com/parts/ for the most current parts listing. - Page 85 AT3015 — Parts Main Frame & Clean Water Tank Components Please visit www.unverferth.com/parts/ for the most current parts listing. item part number Description notes J33000004 Main Frame Assembly Includes Items 1A, 2-38 JAP3203 Tank 1000 Gallon Elliptical with Lid (Gray)
-
Page 86: Wheel Axle, 120" Wheel Spacing (J33000012)
AT3015 — Parts Wheel Axle, 120” Wheel Spacing (J33000012) Please visit www.unverferth.com/parts/ for the most current parts listing. 11 Row 30” Spacing 13 Row 30” Spacing 15 Row 20” Spacing 15 Row 30” Spacing 17 Row 30” Spacing NOTE: Valve Stems to... -
Page 87: Wheel Axle, 76" Wheel Spacing (J33000013)
AT3015 — Parts Wheel Axle, 76” Wheel Spacing (J33000013) Please visit www.unverferth.com/parts/ for the most current parts listing. NOTE: Valve Stems to the inside item part number Description notes 111272SM Wheel & Tire Assembly, TL12.4B38 R-1 93300 Valve Stem, Metal Tire, 12.4 x 38, 14 Ply R-1... -
Page 88: Wheel Axle, 88" Wheel Spacing (J33000015)
AT3015 — Parts Wheel Axle, 88” Wheel Spacing (J33000015) Please visit www.unverferth.com/parts/ for the most current parts listing. NOTE: Valve Stems to the inside item part number Description notes 111272SM Wheel & Tire Assembly, TL12.4B38 R-1 93300 Valve Stem, Metal Tire, 12.4 x 38, 14 Ply R-1... -
Page 89: Hub And Spindle Components (Jaam2800-1)
AT3015 — Parts Hub and Spindle Components (JAAM2800-1) Please visit www.unverferth.com/parts/ for the most current parts listing. item part number Description notes 9247 Bearing Cone, LM501349 TA37809 Cotter Pin, 7/32” Dia. x 1 3/4” JAP2171 Spindle, 2 3/4” Dia. x 16”... -
Page 90: Decals
AT3015 — Parts Decals Please visit www.unverferth.com/parts/ for the most current parts listing. - Page 91 AT3015 — Parts Decals Please visit www.unverferth.com/parts/ for the most current parts listing. item part number Description JAP2580 Decal, AT3015 JAP2575 Decal, Blu-Jet “By Unverferth” JAP2215 Decal, BLU-JET By Unverferth 95839 Decal, WARNING (Pinch Point) JAP2583 Decal, Tank Graphic “Blu-Jet”...
-
Page 92: Light Kit Components
AT3015 — Parts Light Kit Components Please visit www.unverferth.com/parts/ for the most current parts listing. 5-10... - Page 93 AT3015 — Parts Light Kit Components Please visit www.unverferth.com/parts/ for the most current parts listing. 11 Row 30” 9 Row 36” 13 Row 30” 9 Row 38” item part number Description notes 15 Row 20” 11 Row 36” 15 Row 30”...
-
Page 94: Standard Toolbar 26' Components (J33000003)
AT3015 — Parts Standard Toolbar 26’ Components (J33000003) Please visit www.unverferth.com/parts/ for the most current parts listing. 9 Row 36” Spacing 9 Row 38” Spacing 11 Row 30” Spacing 13 Row 22” Spacing 15 Row 20” Spacing 5-12... - Page 95 AT3015 — Parts Standard Toolbar 26’ Components (J33000003) Please visit www.unverferth.com/parts/ for the most current parts listing. item part number Description notes J33000003 AT3000 Standard Toolbar, 26’ J33000144 Gauge Wheel, Vertical Pin Adjust, Angled, Narrow JAM3520BB Wing Weldment, Standard Toolbar, AT3000, 7’-5”...
-
Page 96: Standard Toolbar 31' Components (J33000007)
AT3015 — Parts Standard Toolbar 31’ Components (J33000007) Please visit www.unverferth.com/parts/ for the most current parts listing. 13 Row 30” Spacing 5-14... - Page 97 AT3015 — Parts Standard Toolbar 31’ Components (J33000007) Please visit www.unverferth.com/parts/ for the most current parts listing. item Qty part number Description notes J33000007 AT3000 Standard Toolbar, 31’ J33000144 Gauge Wheel, Vertical Pin Adjust, Angled, Narrow JAAM2732BB Wing Extension Kit 30”, AT3000 Standard Toolbar JAM3533BB Wing Extension 30”...
- Page 98 AT3015 — Parts Gauge Wheel Legs RH/LH Pair, Vertical Pin Adjust Please visit www.unverferth.com/parts/ for the most current parts listing. 5-16...
- Page 99 AT3015 — Parts Gauge Wheel Legs RH/LH Pair, Vertical Pin Adjust item part number Description notes Includes Items JAM3585 Gauge Wheel Leg LH Assembly 2A, 3-13 Includes Items JAM3586 Gauge Wheel Leg RH Assembly 2B, 3-13 JEM7675 Gauge Wheel Leg Weldment LH JEM7676 Gauge Wheel Leg Weldment RH 9393-016...
-
Page 100: 30" Wing Extension Kit Components
AT3015 — Parts 30” Wing Extension Kit Components (JAAM2642) Please visit www.unverferth.com/parts/ for the most current parts listing. 17 Row 30” Spacing item part number Description notes JAAM2642 Wing Extension Kit 30” JAM3533BB Wing, Extension 30” 9390-145 Capscrew, 3/4”-10UNC x 2”, G5 9802 Lock Nut/Top, 3/4”-10UNC... -
Page 101: Standard Hydraulic Components (Jpkg00168)
AT3015 — Parts Standard Hydraulic Components (JPKG00168) Please visit www.unverferth.com/parts/ for the most current parts listing. item part number Description notes JPKG00168 Package, Hydraulic Kit, Standard AT3015 Includes Hoses JAM2090 Bracket, Depth Collar & Lockup Storage JAM3588 Bulkhead Plate, AT3... -
Page 102: Standard Hydraulic Hoses Included With Kit (Jpkg00168)
AT3015 — Parts Standard Hydraulic Hoses Included With Kit (JPKG00168) Please visit www.unverferth.com/parts/ for the most current parts listing. 9 Row 36”/38” Spacing 11 Row 30” Spacing 13 Row 22”/30” Spacing 15 Row 20” Spacing item Qty part number Description... -
Page 103: Gull Wing Center (Jaam2916)
AT3015 — Parts Gull Wing Center (JAAM2916) Please visit www.unverferth.com/parts/ for the most current parts listing. 11 Row 36” Spacing 11 Row 38” Spacing 15 Row 30” Spacing 17 Row 30” Spacing item part number Description notes JAAM2916 Gull Wing Center Section Frame Assembly, AT Liquid... -
Page 104: Gull Wing Primary Wings (Jpkg000176)
AT3015 — Parts Gull Wing Primary Wings (JPKG00176) Please visit www.unverferth.com/parts/ for the most current parts listing. Left-Hand as viewed from the rear. 11 Row 36” Spacing 11 Row 38” Spacing 15 Row 30” Spacing 17 Row 30” Spacing Right-Hand as viewed from the rear. -
Page 105: Gull Wing Primary Wings (Jpkg000176)
AT3015 — Parts Gull Wing Primary Wings (JPKG00176) Please visit www.unverferth.com/parts/ for the most current parts listing. item part number Description notes JAM3534 Primary Wing, Right-Hand, Gull Wing Toolbar JAM3535 Primary Wing, Left-Hand, Gull Wing Toolbar JAM3542 Wing Stop JAM3653 Wing Fold Linkage, Single, 19”, With Wing Stop Mount... -
Page 106: Gull Wing Hydraulic Components (Jpkg00177)
AT3015 — Parts Gull Wing Hydraulic Components (JPKG00177) Please visit www.unverferth.com/parts/ for the most current parts listing. 11 Row 36” Spacing 11 Row 38” Spacing 15 Row 30” Spacing 17 Row 30” Spacing 5-24... - Page 107 AT3015 — Parts Gull Wing Hydraulic Components (JPKG00177) Please visit www.unverferth.com/parts/ for the most current parts listing. item part number Description notes JPKG00177 Package, HydraulicS Kit, AT Liquid Gull Wing Toolbar 9002274 Tee, 9/16-18 JIC Male x 9/16-18 JIC Male x 3/4-16 O-Ring Male...
-
Page 108: Gull Wing Hydraulic Hoses Included With Kit (Jpkg00177)
AT3015 — Parts Gull Wing Hydraulic Hoses Included With Kit (JPKG00177) Please visit www.unverferth.com/parts/ for the most current parts listing. 11 Row 36” Spacing 11 Row 38” Spacing 15 Row 30” Spacing 17 Row 30” Spacing item Qty part number... -
Page 109: Secondary Gull Wing With Hardware (Jpkg00175)
AT3015 — Parts Secondary Gull Wing With Hardware (JPKG00175) Please visit www.unverferth.com/parts/ for the most current parts listing. 11 Row 36” Spacing Right-Hand as viewed from the rear. 11 Row 38” Spacing 15 Row 30” Spacing 17 Row 30” Spacing Left-Hand as viewed from the rear. -
Page 110: Secondary Gull Wing Hydraulic Kit Components (Jpkg00178)
AT3015 — Parts Secondary Gull Wing Hydraulic Kit Components (JPKG00178) Please visit www.unverferth.com/parts/ for the most current parts listing. 11 Row 36” Spacing 11 Row 38” Spacing 15 Row 30” Spacing 17 Row 30” Spacing item part number Description notes... -
Page 111: Secondary Gull Wing Hydraulic Hoses Included With Kit (Jpkg00178)
AT3015 — Parts Secondary Gull Wing Hydraulic Hoses Included With Kit (JPKG00178) Please visit www.unverferth.com/parts/ for the most current parts listing. 11 Row 36” Spacing 11 Row 38” Spacing 15 Row 30” Spacing 17 Row 30” Spacing item Qty part number... -
Page 112: Bottom Fill Plumbing Kit, 1 Pump, 2" Fill (J33000108)
AT3015 — Parts Bottom Fill Plumbing Kit, 1 Pump, 2” Fill (J33000108) Please visit www.unverferth.com/parts/ for the most current parts listing. 5-30... - Page 113 AT3015 — Parts Bottom Fill Plumbing Kit, 1 Pump, 2” Fill (J33000108) Please visit www.unverferth.com/parts/ for the most current parts listing. item Qty part number Description notes J33000108 Bottom Fill Plumbing Kit, AT3015 Tank, 1 Pump, 2’’Fill JAM4827 Bracket, Fill Valve Support Plate 9394-006 Hex Nut, 3/8”-16UNC...
-
Page 114: Pump Drive Components
AT3015 — Parts Pump Drive Components Please visit www.unverferth.com/parts/ for the most current parts listing. NOTE: Sprocket location for standard and Gull Wing centers section. NOTE: When AT3000 wheels are on 76” spacing, the pump drive must be configured with the drive tire and chain on the same side. - Page 115 AT3015 — Parts Pump Drive Components Please visit www.unverferth.com/parts/ for the most current parts listing. item part number Description notes JAM3513 Backing Plate, AT3000 Pump Drive JAM3514 Pump Mounting, AT3000 JAM3515 Axle Mount, AT3000 Pump Drive JAM3516 Pump Drive Wheel Mount 91829 Wheel Bolt, 1/2”-20UNF x 1 5/8”...
-
Page 116: Pump Drive Kit
AT3015 — Parts Pump Drive Kit Please visit www.unverferth.com/parts/ for the most current parts listing. item part number Description notes JAP2111 Chain, Roller, Stainless Steel, #50, 63.36” JAP2112 #50 Stainless Connector Link JAP2113 #50 Stainless 1/2” Link JAP2392 Sprocket, 5040 x w/Hub, 1-1/2” RND Bore, 3/8” Key, 40 Tooth... -
Page 117: Super 1200 Coulter & 23" Shank Components (Jaam2730)
AT3015 — Parts Super 1200 Coulter & 23” Shank Components (JAAM2730) Please visit www.unverferth.com/parts/ for the most current parts listing. part item Description notes number JAAM2730 Super 1200 Coulter & 23” Shank, 1 Row Includes Items 1-7 9390-032 Capscrew, 5/16”-18UNC x 1 1/2”... -
Page 118: Coulter Arm, Hub & Knee Components (Jam2799)
AT3015 — Parts Coulter Arm, Hub & Knee Components (JAM2799) Please visit www.unverferth.com/parts/ for the most current parts listing. item part number Description notes JAM2799 Coulter Arm Assembly With Hub & Knee Casting, HD Includes Items 1-14 JAM2743B Casting, Coulter Knee, HD, Machined With Bushings JAP2274 Bushing, 1 17/32”... -
Page 119: Hub Assembly, 4-Bolt Components (Jap2707)
AT3015 — Parts Hub Assembly, 4-Bolt Components (JAP2707) Please visit www.unverferth.com/parts/ for the most current parts listing. item part number Description notes JAP2707 Hub Assembly, 4 Bolt 90024 Hub Cap, 1610 9405-103 Flat Washer, 3/4” SAE JAP2706-1 Hub W/ Cups, 4 Bolt, 5” BC, 3.62” Pilot, W/Zerk Hole... - Page 120 AT3015 — Parts Narrow Fold Transport Coulter Option (43691) (Single Tube Toolbar) Please visit www.unverferth.com/parts/ for the most current parts listing. 13 Row 30” Spacing 5-38...
- Page 121 AT3015 — Parts Narrow Fold Transport Coulter Option (43691) (Single Tube Toolbar) Please visit www.unverferth.com/parts/ for the most current parts listing. item part number Description 43691 Narrow Fold Transport Coulter Option (1 Pair) Includes Items 1-16 91383 Male Tip Coupling, 3/4-16 O-Ring Female...
- Page 122 AT3015 — Parts Narrow Fold Transport Coulter Option (43679) (Single Tube Toolbar) Please visit www.unverferth.com/parts/ for the most current parts listing. 15 Row 30” Spacing 17 Row 30” Spacing LEFT-HAND FROM THE REAR LEFT-HAND FROM THE REAR RIGHT-HAND FROM THE REAR...
- Page 123 AT3015 — Parts Narrow Fold Transport Coulter Option (43679) (Single Tube Toolbar) Please visit www.unverferth.com/parts/ for the most current parts listing. item part number Description 43679 Narrow Fold Transport Coulter Option (2 Pair) Includes Items 2, 4-8, 10, 12, 15-20 JAAM2111 90°...
-
Page 124: Jetstream Liquid Assembly Components Tee-Jet Check (Jaam3353); Low Rate (Jaam3355)
AT3015 — Parts Jetstream Liquid Assembly Components Tee-Jet Check (JAAM3353); Low Rate (JAAM3355) Please visit www.unverferth.com/parts/ for the most current parts listing. Orifice Plate Location Washer part of nozzle cap 5-42... - Page 125 AT3015 — Parts Jetstream Liquid Assembly Components Tee-Jet Check (JAAM3353); Low Rate (JAAM3355) Please visit www.unverferth.com/parts/ for the most current parts listing. item part number Description notes JAAM3353 Jetstream Liquid Assembly Tee-Jet Check, 1 Row Includes Items 2-24 & 30-31...
-
Page 126: Jetstream Coulter Knife Assembly Components (Jaam3356)
AT3015 — Parts Jetstream Coulter Knife Assembly Components (JAAM3356) Please visit www.unverferth.com/parts/ for the most current parts listing. Orifice Plate Location Washer part of nozzle cap 5-44... - Page 127 AT3015 — Parts Jetstream Coulter Knife Assembly Components (JAAM3356) Please visit www.unverferth.com/parts/ for the most current parts listing. item part number Description notes JAAM3356 Coulter Knife Assembly, W/Knife, Tee-Jet Check Includes Items 1-17 JAM3324 Adapter Plate, Coulter Knife 67923 Liquid Fertlizer Knife 3/8” Extra Thin...
-
Page 128: Manifold Liquid Injection Assembly (Standard Toolbar) 11 Row 30" Spacing (J44000159)
AT3015 — Parts Manifold Liquid Injection Assembly (Standard Toolbar) 11 Row 30” Spacing (J44000159) Please visit www.unverferth.com/parts/ for the most current parts listing. 5-46... - Page 129 AT3015 — Parts Manifold Liquid Injection Assembly (Standard Toolbar) 11 Row 30” Spacing (J44000159) Please visit www.unverferth.com/parts/ for the most current parts listing. item part number Description notes J44000159 Manifold Assembly, AT3015, 3/4’’ EPDM Hose, 11 Row JAM3628 Bracket, Mounting, Liquid Trunk Line 9008246 1 1/4”...
-
Page 130: Row 30" Spacing (J44000161)
AT3015 — Parts Manifold Liquid Injection Assembly (Standard Toolbar) 13 Row 30” Spacing (J44000161) Please visit www.unverferth.com/parts/ for the most current parts listing. 5-48... - Page 131 AT3015 — Parts Manifold Liquid Injection Assembly (Standard Toolbar) 13 Row 30” Spacing (J44000161) Please visit www.unverferth.com/parts/ for the most current parts listing. item part number Description J44000161 Manifold Assembly, AT4000, 3/4’’ EPDM Hose, 13 Row JAM3628 Bracket, Mounting, Liquid Trunk Line 9008246 1 1/4”...
-
Page 132: Manifold Liquid Injection Assembly (Gull Wing Toolbar) 15 Row 30" Spacing (J33000109)
AT3015 — Parts Manifold Liquid Injection Assembly (Gull Wing Toolbar) 15 Row 30” Spacing (J33000109) Please visit www.unverferth.com/parts/ for the most current parts listing. 5-50... - Page 133 AT3015 — Parts Manifold Liquid Injection Assembly (Gull Wing Toolbar) 15 Row 30” Spacing (J33000109) Please visit www.unverferth.com/parts/ for the most current parts listing. item Qty part number Description J33000109 Manifold Assembly, AT3000, 3/4’’ EPDM Hose, 15 Row JAM3628 Mounting Bracket Liquid Trunk Line 9008246 1-1/4”...
-
Page 134: Row 30" Spacing (J33000117)
AT3015 — Parts Manifold Liquid Injection Assembly (Gull Wing Toolbar) 17 Row 30” Spacing (J33000117) Please visit www.unverferth.com/parts/ for the most current parts listing. 5-52... - Page 135 AT3015 — Parts Manifold Liquid Injection Assembly (Gull Wing Toolbar) 17 Row 30” Spacing (J33000117) Please visit www.unverferth.com/parts/ for the most current parts listing. item part number Description notes J33000117 Manifold Assembly, AT3015, 3/4’’ EPDM Hose, 17 Row JAM3628 Bracket, Mounting, Liquid Trunk Line 9008246 1 1/4”...
-
Page 136: Single Piston Pump, Ngp-7055, 34.2 Gallon (Jcp2568)
AT3015 — Parts Single Piston Pump, NGP-7055, 34.2 Gallon (JCP2568) Please visit www.unverferth.com/parts/ for the most current parts listing. item part number Description 9394-006 Hex Nut, 3/8”-16UNC 9404-021 Lock Washer, 3/8” 9390-057 Capscrew, 3/8”-16UNC x 1 1/2”, G5 JCP2568 Pump, Single PISTON, NGP-7055, 34.2 GALLON 9503890 Pump, Single PISTON, NGP-7055-S-BLK, 34.2 GALLON (Stainless Steel) -
Page 137: Twin Piston Pump, Ngp-9055, 34.2 Gallon (Jcp2569)
AT3015 — Parts Twin Piston Pump, NGP-9055, 68.4 Gallon (JCP2569) Please visit www.unverferth.com/parts/ for the most current parts listing. item part number Description 9394-006 Hex Nut, 3/8”-16UNC 9404-021 Lock Washer, 3/8” 9390-057 Capscrew, 3/8”-16UNC x 1 1/2”, G5 JCP2569 Pump, TWIN PISTON, NGP-9055, 68.4 GALLON 9503891 Pump, TWIN PISTON, NGP-9055-S-BLK, 68.4 GALLON (Stainless Steel) -
Page 138: Bolt-On Coulter Bar (Jaam2908)
AT3015 — Parts Bolt-On Coulter Bar (JAAM2908) Please visit www.unverferth.com/parts/ for the most current parts listing. 11 Row 36” Spacing 11 Row 38” Spacing 13 Row 22” Spacing ITEM item part number Description notes JAAM2908 Bolt-On Coulter Bar Assembly 9390-450 Capscrew, 3/4”-10UNC x 10”... -
Page 139: Coulter Flatback 7" X 7" Centered Assembly (Jaam2821)
AT3015 — Parts Coulter Flatback 7” x 7” Centered Assembly (JAAM2821) Please visit www.unverferth.com/parts/ for the most current parts listing. 9 Row 36”/38” Spacing 11 Row 30”/36”/38” Spacing 13 Row 22”/30” Spacing 15 Row 20”/30” Spacing 17 Row 30” Spacing... -
Page 140: Coulter Flatback Centered Mounting Bracket (Jaam2646)
AT3015 — Parts Coulter Flatback Centered Mounting Bracket (JAAM2646) JAAM2646 Please visit www.unverferth.com/parts/ for the most current parts listing. 15 Row 30” Spacing 17 Row 30” Spacing JAAM2646 item part number Description notes JAAM2646 Coulter Flatback Centered Mounting Bracket Assembly... -
Page 141: Hitches
AT3015 — Parts Hitches 2 2a item part number Description notes JAM2144 Clevis Hitch JAP2864 CATEGORY 4 Heat Treated Cast Wheatland Hitch 250-400+ HP 2” Pin JAP2850 CATEGORY 3 Heat Treated Cast Wheatland Hitch 110-250 HP 1 1/2” Pin JAP3232 CATEGORY 4 Ball Swivel Hitch, 2”... -
Page 142: Controller Components
AT3015 — Parts Controller Components Please visit www.unverferth.com/parts/ for the most current parts listing. 5-60... - Page 143 AT3015 — Parts Controller Components Please visit www.unverferth.com/parts/ for the most current parts listing. item part number Description notes 9503471 Wire Harness 30 Ft. 16-Pin Console to 47-Pin Connector Less Rate Controller 9000106 Cable Tie 7 1/2” 9007549 Console Harness (450 Controller) 9503471 Wire Harness 30 Ft.
-
Page 144: Ace 205 Variable Rate Pump
AT3015 — Parts ACE 205 Variable Rate Pump Please visit www.unverferth.com/parts/ for the most current parts listing. 5-62... - Page 145 AT3015 — Parts ACE 205 Variable Rate Pump Please visit www.unverferth.com/parts/ for the most current parts listing. part item Description notes number 9503464 Ball Valve Flanged Single 490 Series See “Ball Valve TA854833 Ball Valve Flanged 450 BEC (3-Section) Components”...
- Page 146 AT3015 — Parts ACE 205 Variable Rate Pump (continued) Please visit www.unverferth.com/parts/ for the most current parts listing. part item Description notes number TA800926 Worm Drive Hose Clamp (1 3/4” - 3 3/4”) (SS) TA806325 Hose, 1 1/2” EPDM, 200 PSI 5 Ft.
-
Page 147: Ball Valve Components
AT3015 — Parts Ball Valve Components Please visit www.unverferth.com/parts/ for the most current parts listing. item part number Description notes 9503464 Ball Valve Flanged Single 490 Series TA854833 Ball Valve Flanged 450 BEC (3-Section) Includes Items 3-9 TA854835 Ball Valve Flanged 450 BEC (5-Section) - Page 148 L:\MANUALS\BLU-JET\J0603015-1.INDD\\JANUARY 2020-1//JANUARY 2021-2//DECEMBER 2021-3//NOVEMBER 2022-4...
Need help?
Do you have a question about the BLU-JET AT3015 and is the answer not in the manual?
Questions and answers