
Subscribe to Our Youtube Channel
Related Manuals for Unverferth BLU-JET SubTiller 4


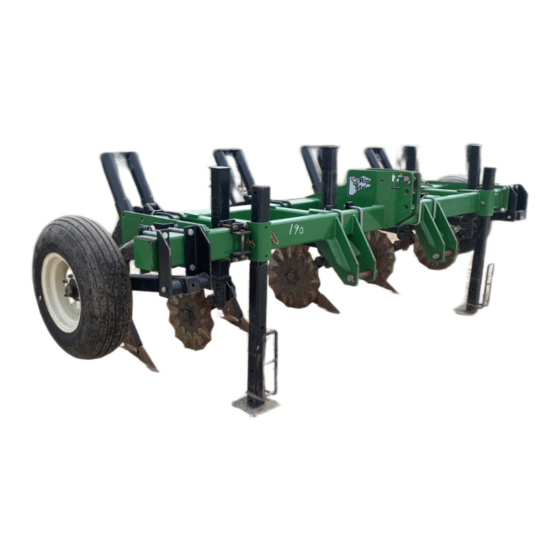
Summary of Contents for Unverferth BLU-JET SubTiller 4
- Page 1 Primary Tillage SubTiller ® 3-Point & Pull-Type Rigid & Folding Frames Beginning with Serial Number A66840100 Part No. 603430...
-
Page 2: Pre-Delivery Checklist
— Introduction SubTiller 4 Foreword This symbol identifies important safety messages. When you see it, read the message that follows and be alert to the possibility of personal injury. Remember, safety instructions stated in this manual are for your protection. Read them carefully and follow them closely when working around or using this machine. -
Page 3: Product Information
• Serial number All products manufactured by Unverferth Mfg. Co., Inc. are warranted to be free from material and workmanship defects for one full year from time of consumer delivery. Your local dealer will gladly assist you with any warranty questions. -
Page 4: Table Of Contents
— Introduction SubTiller 4 TABLE OF CONTENTS Foreword ............................... 2 Pre-Delivery Checklist ........................... 2 Product Information ............................3 SECTION I Safety General Hazard Information ........................1-2 Safety Decals .............................1-3 Following Safety Instructions ........................1-5 Before Servicing ............................1-5 Before Operating ............................1-5 During Operation ............................1-6 Pressurized Oil ............................1-6 Preparing for Emergencies ........................1-7 Wearing Protective Equipment ........................1-7... - Page 5 — Introduction SubTiller 4 TABLE OF CONTENTS SECTION III Operation Preparing Tractor ............................3-2 Front-End Weights ..........................3-2 Horsepower Requirements ........................3-2 Sway Blocks ............................3-2 Wheel Spacings ..........................3-2 Preparing Implement ..........................3-3 Hardware .............................3-3 Pivot Pins ............................3-3 Hydraulics ............................3-3 Tire Pressure ............................3-4 Pins and Retaining Rings ........................3-4 Point Selection ............................3-4 Shanks ..............................3-5 Coulters ...............................3-5...
- Page 6 — Introduction SubTiller 4 TABLE OF CONTENTS SECTION V Parts Frame Assembly, 7’-9” Base, 3-Point Rigid Components .................5-2 Frame Assembly, 11’-3” Base, 3-Point Rigid Components ...............5-4 Frame Assembly, 12’-4” Base, 3-Point Folding Components ..............5-6 Frame Assembly, 12’-4” Base, Pull-Type Folding Components ..............5-8 Pull-Hitch (Welded), Tongue, Jack, and Transport Chain Components ...........5-10 Pull-Hitch, Tongue, Jack, and Transport Chain Components ..............5-12 Pull-Type Conversion Option Components Less Hydraulics ..............5-14...
-
Page 7: Section I
— Safety SubTiller 4 SECTION I Safety General Hazard Information ........................1-2 Safety Decals .............................1-3 Following Safety Instructions ........................1-5 Before Servicing ............................1-5 Before Operating ............................1-5 During Operation ............................1-6 Pressurized Oil ............................1-6 Preparing for Emergencies ........................1-7 Wearing Protective Equipment ........................1-7... -
Page 8: General Hazard Information
It is said that, “the best kind of a safety device is a careful operator.” We, at Unverferth Mfg. Co., Inc. ask that you be that kind of operator. -
Page 9: Safety Decals
— Safety SubTiller 4 Safety Decals • REPLACE LOST, DAMAGED, PAINTED, OR UNREADABLE DECALS IMMEDIATELY. IF PARTS THAT HAVE DECALS ARE REPLACED, ALSO MAKE SURE TO INSTALL NEW DECALS. THESE DECALS INFORM AND REMIND THE OPERATOR WITH OPERATIONAL INFORMATION AND SAFETY MESSAGES. - Page 10 — Safety SubTiller 4 Safety Decals (continued) Pull-Type Models PART NO. TA510514 SMV EMBLEM Part #9503534 Part #94094 Part #97961 Part #900558 Part #95445 Part #97575 Part #99507 Part #9003126 Part #9003125 Part #9003127 Red Reflector Fluorescent Orange Amber Reflector...
-
Page 11: Following Safety Instructions
— Safety SubTiller 4 Following Safety Instructions • Read and understand this operator’s manual before operating. • All machinery should be operated only by trained and authorized personnel. • To prevent machine damage, use only attachments and service parts approved by the manufacturer. -
Page 12: During Operation
— Safety SubTiller 4 During Operation • Do not allow anyone to ride on the equipment. Never dismount from moving vehicle. Severe injury or death can occur from being run over by the equipment. • Regulate speed to field conditions. Maintain complete control at all times. •... -
Page 13: Preparing For Emergencies
— Safety SubTiller 4 Preparing for Emergencies • Keep a first aid kit and properly rated fire extinguisher nearby. • Keep emergency numbers for fire, rescue, and poison control personnel near the phone. Wearing Protective Equipment • Wear clothing and personal protective equipment appropriate for the job. - Page 14 — Safety SubTiller 4 Notes...
-
Page 15: Set Up
— Set Up SubTiller 4 SECTION II Set Up Unloading Instructions ..........................2-2 Axle Weldment - Pull-Type Models ......................2-5 Axle Cylinders - Pull-Type Models ......................2-6 Axle Hubs & Spindles - Pull-Type Models ....................2-7 Wheel Assembly - Pull-Type Models......................2-7 Pull-Hitch Assembly - Pull-Type Models ....................2-8 Dust Cap Holder Assembly - Pull-type Models ..................2-9 Hydraulic Fittings and Hoses - Pull-Type Models ..................2-10 Hydraulic Fittings and Hoses - 3-Point, Folding Model .................2-14... -
Page 16: Unloading Instructions
— Set Up SubTiller 4 Unloading Instructions • BEFORE REMOVING SHIPPING CHAINS OR STRAPS FROM LOAD, POSITION UNLOAD- ING EQUIPMENT INTO FORK POCKETS OF SHIPPING FRAME. • READ AND UNDERSTAND SAFETY RULES BEFORE OPERATING OR SERVICING THIS MACHINE. REVIEW THE SAFETY SECTION IN THIS MANUAL IF NECESSARY. •... - Page 17 — Set Up SubTiller 4 Unloading Instructions (continued) Be sure to unload in an area that is firm and level. Keep all personnel at least fifteen feet away from unit when removing unit from truck. Before moving to assembly area, lower machine to the ground.
- Page 18 — Set Up SubTiller 4 Unloading Instructions (continued) 3-Point Models FIG. 2-2 Upper Mast Pin Remove upper mast pin from shipping stand (FIG. 2-2). STAND CLEAR of frame before proceeding. NOTE: 3-Point Models - It may be necessary to raise machine slightly to remove load from upper mast pin.
-
Page 19: Axle Weldment - Pull-Type Models
— Set Up SubTiller 4 Unloading Instructions (continued) (continued) Pull-Type Models Using a safe lifting device and supports rated at a minimum of 12,000 lbs., raise the front of the machine to a level position (FIG. 2-5). Remove and discard the yellow shipping stands from the front of the machine. -
Page 20: Axle Cylinders - Pull-Type Models
— Set Up SubTiller 4 Axle Cylinders — Pull-Type Models Using a safe lifting device rated at a minimum of 100 lbs., lift and attach the 4 3/4” x 16” cylinder with pins and Left-Hand cotter pins (JDP3994) to the left-hand axle Side Shown weldment as shown in FIG. -
Page 21: Axle Hubs & Spindles - Pull-Type Models
— Set Up SubTiller 4 Axle Hubs & Spindles — Pull-Type Models Install transport locks Remove the 1/2”-13UNC x 4” capscrews (9390-111) and 1/2”-13UNC lock nuts (9800) (FIG. 2-9). Insert the hub and spindle assemblies (JAAM2783) into the axle weldments. (FIG. 2-9) 1/2”-13UNC x 4”... -
Page 22: Pull-Hitch Assembly - Pull-Type Models
— Set Up SubTiller 4 Pull-Hitch Assembly — Pull-Type Models Using a safe lifting device and supports rated at a minimum of 1,000 lbs., loosely attach the pull-hitch weldment to the main frame with 1”-8UNC x 3 1/2” capscrews grade 8 (91299-189) and 1”-8UNC lock nuts (9663). (FIG. 2-11) FIG. -
Page 23: Dust Cap Holder Assembly - Pull-Type Models
— Set Up SubTiller 4 Dust Cap Holder Assembly — Pull-Type Models Attach the dust cap holder bracket (JAM4575) to the frame with 3/8”-16UNC U-Bolt 3/8”-16UNC (9503892) & U-bolt (9503892) and 3/8”-16UNC elastic Elastic Lock Nuts (9398-012) lock nuts (9398-012). (FIG. 2-12) Dust Cap (9001968), 1/4”-20UNC x 3/4”... -
Page 24: Hydraulic Fittings And Hoses - Pull-Type Models
— Set Up SubTiller 4 Hydraulic Fittings and Hoses — Pull-Type Models Install 7/8-14 JIC male x 3/4-16 O-ring FIG. 2-13 male 90° elbows (98201) to the axle cylinders (JDP3994 and JDP4255). (FIG. 90° Elbow 2-13) 98201 Install 7/8-14 JIC male x 3/4-16 O-ring Transport Hydraulic male adapters (9503026) to the transport Tractor port side... - Page 25 — Set Up SubTiller 4 Hydraulic Fittings and Hoses — Pull-Type Models (continued) Secure the transport hydraulic check valve with mounting hardware (JDP3993) to the FIG. 2-15 U-Bolt 3/8”-16UNC transport valve mount plate (79817B). (FIG. (9503892) & Elastic 2-15) Lock Nuts (9398-012) Loosely attach transport valve mount plate (79817B) to the left-hand side of the frame with 3/8”-16UNC U-bolt (9503892) and...
- Page 26 — Set Up SubTiller 4 Hydraulic Fittings and Hoses — Pull-Type Models (continued) Route the 3/8” x 126” hydraulic hose (JDP5024) attached to the base end of the 4 1/2” hydraulic cylinder on the right-hand side of the unit to the 4 3/4” hydraulic cylinder on the left-hand side of the unit.
- Page 27 — Set Up SubTiller 4 Hydraulic Fittings and Hoses — Pull-Type Models (continued) Attach 3/8” x 126” hydraulic hose (JDP5024) to base end of 4 3/2” hydraulic cylinder on the left-hand side of the unit. The hose will extend to transport hydraulic check valve (JDP3993).
-
Page 28: Hydraulic Fittings And Hoses - 3-Point, Folding Model
— Set Up SubTiller 4 Hydraulic Fittings and Hoses — 3-Point, Folding Model Attach base end of 3” x 20” cylinders (JDP4492) to the center of the main frame as shown in FIG. 2-20 with the pins and cotter pins provided. Secure the rod end of 3”... -
Page 29: Hydraulic Fittings And Hoses - Pull-Type, Folding Models
— Set Up SubTiller 4 Hydraulic Fittings and Hoses — Pull-Type, Folding Models Attach base end of cylinders (7 & 9 Shank - 4” x 20” cylinder JDP4375; 11 Shank - 5” x 20” cylinder JDP4482) to the center of the main frame as shown in FIG. 2-21 with the pins and cotter pins provided. - Page 30 — Set Up SubTiller 4 Hydraulic Fittings and Hoses — Pull-Type, Folding Models (cont.) On the left-hand cylinder, attach 9/16-18 JIC male x 9/16-18 JIC female x 9/16-18 JIC male tees (91465) onto the cylinder base and rod end 90° elbows (9874). (FIG. 2-22) FIG.
- Page 31 — Set Up SubTiller 4 Hydraulic Fittings and Hoses — Pull-Type, Folding Models (cont.) Attach 1/4” x 108” hydraulic hoses (JDP5038) to fittings on cylinder rod end. (FIG. 2-23) Attach 1/4” x 60” hydraulic hoses (JDP5085) to fittings on cylinder rod end. (FIG. 2-23) Attach 1/4”...
-
Page 32: Hydraulics - Purging Hydraulic System
— Set Up SubTiller 4 Hydraulics - Purging Hydraulic System RELIEVE HYDRAULIC SYSTEM OF ALL PRESSURE BEFORE ADJUSTING OR SERVICING. • SEE TRACTOR OPERATOR'S MANUAL FOR PROPER PROCEDURES. HIGH-PRESSURE FLUIDS CAN PENETRATE THE SKIN AND CAUSE SERIOUS INJURY • OR DEATH. USE CARDBOARD OR WOOD TO DETECT LEAKS IN THE HYDRAULIC SYSTEM. -
Page 33: Attaching Coulter Blades
— Set Up SubTiller 4 Attaching Coulter Blades • SHARP EDGES ON COULTER BLADES CAN CAUSE SERIOUS INJURY. BE CAREFUL WHEN WORKING AROUND COULTER BLADES. On some models, the coulter assembly may be repositioned for shipping purposes. Before FIG. 2-25 installing coulter blades, check alignment of coulter assemblies with “Overhead Layouts”. -
Page 34: Rigid Models - Light And Panel Reflector Assembly
See federal regulation 49 CFR 562; available at www.govinfo.gov for US federal law requirements. See your Unverferth dealer for additional brackets, reflectors, or lights to meet your requirements. Attaching Inner Light and Reflector Assemblies Mount the light post mounting plates (JAM3408) to the top of the rear main frame with 3/8”-16UNC x 8”... -
Page 35: Attaching Outer Light And Reflector Assemblies
— Set Up SubTiller 4 Rigid Models — Light and Panel Reflector Assembly (continued) Attaching Outer Light and Reflector Assemblies Mount the light post mounting plates (JAM3408) to the front of the main frame FIG. 2-27 with 3/8”-16UNC x 8” U-bolts (JBP3335) and 3/8”-16UNC elastic lock nuts (9398- Light Post Mounting 012) (FIG. -
Page 36: Folding Models - Light And Panel Reflector Assembly
See federal regulation 49 CFR 562; available at www.govinfo.gov for US federal law requirements. See your Unverferth dealer for additional brackets, reflectors, or lights to meet your requirements. Attaching Inner Light and Reflector Assemblies Mount the light post mounting plates (JAM3408) to the top of the rear main frame with 3/8”-16UNC x 8”... -
Page 37: Attaching Outer Light And Reflector Assemblies
— Set Up SubTiller 4 Folding Models — Light and Panel Reflector Assembly (continued) Attaching Outer Light and Reflector Assemblies Mount the light post mounting plates (JAM3408) to the top of the main frame with 3/8”- 16UNC x 8” U-bolts (JBP3335) and 3/8”-16UNC elastic lock nuts (9398-012). Reference “Overhead Layouts”... -
Page 38: Attaching Smv Emblem
— Set Up SubTiller 4 Folding Models — Light and Panel Reflector Assembly (continued) Attaching SMV Emblem Attach the SMV emblem mounting bracket to the top of the main frame with 3/8”- 16UNC x 8” U-bolts (JBP3335) and 3/8”-16UNC elastic lock nuts (9398-012) (FIG. 2-31). Reference “Overhead Layouts”... -
Page 39: Overhead Layouts
— Set Up SubTiller 4 Overhead Layout NOTE: All overhead layout dimensions shown in inches. No. of Shank Frame Refer to Fold Type Frame Size Shanks Spacing Style Page 30” 3-Point Rigid 7’9” Base Page 2-26 30” 3-Point Rigid 11’3” Base Page 2-27 30”... - Page 40 — Set Up SubTiller 4 Overhead Layout — 3-Point Rigid — 3 Row 30” Spacing, 7’9” Base 127) Reflector AMBER (9003127) Reflector AMBER (9003127) Reflector RED (9003126) Reflector RED (9003126) Reflector RED (9003126) d Sides On Left-Hand & Right-Hand Sides On Left-Hand &...
- Page 41 — Set Up SubTiller 4 Overhead Layout 3-Point Rigid — 5 Row 30” Spacing, 11’3” Base Lights/AMBER LED (Qty - 4) On Front Side, Reflector AMBER (9003127) (Qty - 2) Reflector RED (9003126) (Qty - 4) SMV Emblem (TA510514) 43 1/4 43 1/4 Light/RED LED (Qty - 2)
- Page 42 — Set Up SubTiller 4 Overhead Layout 3-Point Rigid — 7 Row 30” Spacing, 11’3” Base/29” Extensions Lights/AMBER LED (Qty - 4) On Front Side, Reflector AMBER (9003127) (Qty - 2) Reflector RED (9003126) (Qty - 4) Lights/RED LED SMV Emblem (TA510514) (Qty - 2) 43 1/4 43 1/4...
- Page 43 — Set Up SubTiller 4 Overhead Layout 3-Point Folding — 7 Row 30” Spacing, 12’4” Base/Hydraulic Wings 30 1/32 Reflector/RED On Front Side, (9003126) SMV Emblem Reflector AMBER Lights/RED LED (Qty - 4) (TA510514) (9003127) (Qty - 2) (Qty - 2) 50 1/4 50 1/4 Lights/AMBER...
- Page 44 — Set Up SubTiller 4 Overhead Layout Pull-Type Folding — 7 Row 30” Spacing, 12’4” Base/Hydraulic Wings Reflector RED On Front Side, (9003126) Reflector AMBER 48 3/4 48 3/4 (Qty - 4) (9003127) (Qty - 2) Lights/RED LED SMV Emblem (Qty - 2) (TA510514) Rear SIS Bracket w/Decal...
- Page 45 — Set Up SubTiller 4 Overhead Layout 3-Point Rigid — 9 Row 30” Spacing, 11’3” Base/59” Extensions Lights/AMBER LED (Qty - 4) Reflector RED (9003126) (Qty - 4) On Front Side, Reflector AMBER (9003127) (Qty - 2) SMV Emblem (TA510514) Lights/RED LED (Qty - 2) 51 3/4 51 3/4...
- Page 46 — Set Up SubTiller 4 Overhead Layout Pull-Type Folding — 9 Row 30” Spacing, 12’4” Base/Hydraulic Wings 112 3/4 112 3/4 Reflector RED (0003126) 48 3/4 48 3/4 (Qty - 4) SMV Emblem On Front Side, (TA510514) Rear SIS Bracket w/Decal Lights/RED LED Reflector AMBER (Qty - 2)
- Page 47 — Set Up SubTiller 4 Overhead Layout Pull-Type Folding — 11 Row 30” Spacing, 12’4” Base/Hydraulic Wings 139 1/2 139 1/2 Reflector RED (9003126) 48 3/4 48 3/4 (Qty - 4) SMV Emblem Front SIS Bracket (TA510514) w/Decal On Front Side, Reflector AMBER Rear SIS Lights/RED LED...
-
Page 48: Pull-Type Conversion Option
— Set Up SubTiller 4 Pull-Type Conversion Option Remove and save the two lower link pins (JBM3628), 1/2”-13UNC x 3” capscrews (9390-107), and 1/2”-13UNC lock nuts (94981). Remove and save the upper link pin (JBM3629), 3/8”-16UNC x 2 1/2” capscrews (9390-061), and 3/8”-16UNC lock nuts (902875). - Page 49 — Set Up SubTiller 4 Pull-Type Conversion Option (continued) Using a safe lifting device rated at a minimum of 500 lbs., attach the left-hand and right-hand axle tower assemblies to the front of the frame as shown in (FIG. 2-33). Torque the 3/4”-10UNC grade 8 hardware according to “Torque Chart”...
- Page 50 — Set Up SubTiller 4 Pull-Type Conversion Option (continued) Using a safe lifting device rated at a minimum of 100 lbs., attach the larger cylinder (Single Wheel - 4” x 16” cylinder; Dual Wheels - 4 1/2” x 16” cylinder) to the left-hand axle tower assembly as shown in FIG.
- Page 51 — Set Up SubTiller 4 Pull-Type Conversion Option (continued) Remove and save the 9/16”-18UNC wheel bolts (9231) from the hubs. Using a safe lifting device rated at a minimum of 100 lbs., attach the wheel assembly (111291SM). Torque 9/16”-18UNF wheel bolts (9231). Refer to “Wheel Hardware Torque Chart”...
- Page 52 — Set Up SubTiller 4 Pull-Type Conversion Option (continued) Secure the CAT3 hitch (JAP2850) or CAT4 hitch (JAP2864) to the tongue (FIG. 2-37). FIG. 2-37 Route the 3/8” x 180” hydraulic hose (JDP5011) attached to the base end of the hydraulic cylinder on the right-hand side of the unit to the hydraulic cylinder on the left-hand side of the unit.
- Page 53 — Set Up SubTiller 4 Pull-Type Conversion Option (continued) Attach 7/8-14 JIC male x 3/4-16 O-ring FIG. 2-39 male adapters (9503026) and 3/4-16 male tip couplings (91383) to tractor end of 9503026 hoses. (FIG. 2-39) 91383 Refer to “Hydraulics - Purging hydraulic System” in this section to purge the hydraulics. 2-39...
- Page 54 — Set Up SubTiller 4 Notes 2-40...
- Page 55 — Operation SubTiller 4 SECTION III Operation Preparing Tractor ............................3-2 Front-End Weights ..........................3-2 Horsepower Requirements ........................3-2 Sway Blocks ............................3-2 Wheel Spacings ..........................3-2 Preparing Implement ..........................3-3 Hardware .............................3-3 Pivot Pins ............................3-3 Hydraulics ............................3-3 Tire Pressure ............................3-4 Pins and Retaining Rings ........................3-4 Point Selection ............................3-4 Shanks ..............................3-5 Coulters ...............................3-5...
-
Page 56: Preparing Tractor
See your tractor operator’s manual for recommendations on ballasting procedures. DO NOT EXCEED THE TRACTOR'S LIFT CAPACITY OR BALLAST RECOMMENDATIONS. • NOTE: Warranty consideration will only be given on items manufactured by Unverferth Mfg. Co., Inc. Horsepower Requirements The power requirement for this unit is 20-40 hp. per shank, depending on the depth of penetration and ground conditions. -
Page 57: Preparing Implement
— Operation SubTiller 4 Preparing Implement Soil surface disturbance may be modified by using the third link adjustment. The implement will normally be operated in a “level” tool bar position or slightly tipped back position. By shortening the turnbuckle and running at shallower depths, soil surface disturbance will be increased. -
Page 58: Tire Pressure
— Operation SubTiller 4 Preparing Implement (continued) Tire Pressure Check tire pressure, see “MAINTENANCE” section for recommended air pressure. Be sure tire pressure is equal in all tires. IMPROPERLY TORQUED WHEEL NUTS/BOLTS CAN CAUSE A LOSS OF IMPLEMENT • CONTROL AND MACHINE DAMAGE. WHEEL NUTS/BOLTS MUST BE CHECKED REGU- LARLY. -
Page 59: Shanks
— Operation SubTiller 4 Preparing Implement (continued) Shanks Replace the Shear bolt on the standard shank model only with 3/4” x 4 1/2” grade 2 bolts. Use of grade 5 or harder bolts will void the warranty of the machine. Do not attempt to hard Shear bolt surface the SubTiller in-line ripper summer till or fall till points. -
Page 60: Attaching Implement To Tractor
— Operation SubTiller 4 Attaching Implement To Tractor CRUSHING CAN CAUSE SERIOUS INJURY OR DEATH. DO NOT STAND BETWEEN THE • TOWING VEHICLE AND IMPLEMENT WHEN HITCHING. ALWAYS ENGAGE THE PARKING BRAKE AND STOP THE ENGINE BEFORE INSERTING THE HITCH PINS OR SECURING LATCHES. -
Page 61: Transporting
See federal regulation 49 CFR 562; available at www.govinfo.gov for US federal law requirements. See your Unverferth dealer for additional brackets, reflectors, or lights to meet your requirements. Do not operate near electrical lines. Know height and width of implement. -
Page 62: Unhitching From Tractor
— Operation SubTiller 4 Unhitching From Tractor • FALLING OR LOWERING EQUIPMENT CAN CAUSE SERIOUS INJURY OR DEATH. KEEP EVERYONE AWAY FROM EQUIPMENT WHEN RAISING OR LOWERING. • HIGH-PRESSURE FLUIDS CAN PENETRATE THE SKIN AND CAUSE SERIOUS INJURY OR DEATH. USE CARDBOARD OR WOOD TO DETECT LEAKS IN THE HYDRAULIC SYSTEM. -
Page 63: Leveling Frame
— Operation SubTiller 4 Leveling Frame For best results, when leveling the implement, position the tractor with implement on a level surface. Check tractor tire pressure and inflate equally from side-to-side. See your tractor operator’s manual for correct tire inflation pressure. Side-to-Side Leveling - 3-Point Models With the implement attached to tractor, raise the unit 1 to 2 inches off the floor. -
Page 64: Depth Of Penetration
Soil Probe hardpan, use the “soil probe” located on the front, left-hand side. For more information on this device, refer to your local Unverferth dealer or contact us, at Unverferth Mfg. Co., Inc. FIG. 3-5 An alternate method of locating the hardpan is to dig a hole to a depth of 24” or greater. -
Page 65: Support Stand
— Operation SubTiller 4 Support Stand FALLING OR LOWERING EQUIPMENT CAN CAUSE SERIOUS INJURY • OR DEATH. KEEP EVERYONE AWAY FROM EQUIPMENT WHEN RAISING OR LOWERING. Before field operation can begin, support stands must be raised and locked into position. Raise unit into transport position and raise support stand by removing pin, raising the support stand and reinstalling the pin into the bottom... - Page 66 — Operation SubTiller 4 Notes 3-12...
-
Page 67: Maintenance
— Maintenance SubTiller 4 SECTION IV Maintenance Daily Service ..............................4-2 Beginning of Day ..........................4-2 End of Day ............................4-2 Annual Service ............................4-3 Beginning of Season ..........................4-3 End of Season ............................4-3 Lubrication ..............................4-4 Wheel Bearings ...........................4-4 Hub Assembly ............................4-6 Shank Wear Bar & Point Replacement .....................4-7 Shear-Bolt Replacement ..........................4-7 Installing Retaining Rings ........................4-10 Electrical Schematic ..........................4-11... -
Page 68: Daily Service
— Maintenance SubTiller 4 Daily Service Beginning of Day NOTE: Before initial use, ensure all lubrication points have been greased. Check all U-bolts and bolts for tightness. This is especially important during the first days of operation. See “Torque Chart” in this section. •... -
Page 69: Annual Service
— Maintenance SubTiller 4 Annual Service Beginning of Season READ AND UNDERSTAND SAFETY RULES BEFORE OPERATING OR SERVICING THIS • MACHINE. REVIEW "SAFETY" SECTION IN THIS MANUAL IF NECESSARY. Check all bolts, U-bolts, and wheel bolts for tightness. Refer to “Torque Chart” in this section. Lubricate implement (see “Lubrication”... -
Page 70: Lubrication
— Maintenance SubTiller 4 Lubrication • Do not use a high pressure grease gun to lubricate these bearings. Damage to bearing seals could occur. To keep your implement in top operating condition and to assure its proper performance and reliability for a long period of time, periodic inspection and lubrication is a must. Use EP-2 lubricant at the locations described in the chart. - Page 71 — Maintenance SubTiller 4 Grease Zerk Lubrication (continued) Hub - Repack Bearings Pivot Pin Hub - Repack Bearings Grease Zerk Pivot Pin Grease Zerk Pivot Pin Grease Pivot Pin Pivot Pin Grease Zerk Zerk Pivot Pin Grease Zerk Grease Zerk Pivot Pin Grease Zerk Grease Zerks...
-
Page 72: Hub Assembly
— Maintenance SubTiller 4 Hub Assembly NOTE: Make sure the bearing is seated in the cone before the seal is put in place. Use grease to lubricate the seal lip. Place the hub onto the spindle. Rotate the hub while doing this so that the seal lip does not fold under as the lip goes on the spindle. -
Page 73: Shank Wear Bar & Point Replacement
— Maintenance SubTiller 4 Shank Wear Bar & Point Replacement The shanks have a replaceable wear bar and point which, after a period of time, will need to be replaced. To replace these components on your machine, refer to the following guidelines: BE SURE THAT THE IMPLEMENT IS SECURELY BLOCKED TO PREVENT FALLING. - Page 74 — Maintenance SubTiller 4 Shank Wear Bar & Point Replacement (continued) Point Replacement Remove the hex nut (9394-010), lock washer (9404-025), and flat washers (9405-088). Remove carriage bolt and point. 9394-010 Insert the head of 1/2”-13UNC x 9” grade 2 carriage bolt (JBP3440) into notch in new point.
-
Page 75: Shear-Bolt Replacement
Severely distorted holes will result in shorter shear-bolt life and should be repaired or replaced. 3/4" Lock Washer Align the holes and install UNVERFERTH (9404-033) 3/4”-10UNC x 4 1/2” grade 2 capscrew/ shear-bolt (JBP3021), 3/4” lock washer 3/4"-10UNC Hex Nut (9404-033) and 3/4”-10UNC hex nut... -
Page 76: Installing Retaining Rings
— Maintenance SubTiller 4 Installing Retaining Rings USE PROPER TOOLS for assembling rings onto pins (for plain external retaining rings use a flat-blade retaining ring pliers). Before inserting pins, be sure the GROOVE IS FREE FROM ALL FOREIGN MATERIAL (paint, dirt, etc.), to ensure a proper seating. DO NOT OVERSTRETCH RING during assembly. -
Page 77: Electrical Schematic
— Maintenance SubTiller 4 Electrical Schematic Rear Electrical Harness (JAP3128) Main Electrical Harness w/Dust Cap (JAP2824) 4-11... -
Page 78: Complete Torque Chart
— Maintenance SubTiller 4 Complete Torque Chart Capscrews - Grade 5 NOTE: • Grade 5 capscrews can be identified by three radial dashes on the head. • For wheel torque requirements, refer to Wheels and Tires. • Tighten U-bolts evenly and equally to have the same number of threads exposed on each end. - Page 79 — Maintenance SubTiller 4 Complete Torque Chart Capscrews - Grade 8 NOTE: • Grade 8 capscrews can be identified by six radial dashes on the head. • For wheel torque requirements, refer to Wheels and Tires. • Tighten U-bolts evenly and equally to have the same number of threads exposed on each end.
-
Page 80: Hydraulic Fittings
— Maintenance SubTiller 4 Hydraulic Fittings – Torque and Installation SAE FLARE CONNECTION (J. I. C.) Tighten nut with finger until it bottoms the seat. Using a wrench, rotate nut to tighten. Turn nut 1/3 turn to apply proper torque. SAE STRAIGHT THREAD O-RING SEAL Insure jam nut and washer are backed up to the back side of smooth portion of elbow adapter. -
Page 81: Wheels And Tires
— Maintenance SubTiller 4 Wheels and Tires Wheel Hardware Torque IMPROPERLY TORQUED WHEEL NUTS/BOLTS CAN CAUSE A LOSS OF IMPLEMENT • CONTROL AND MA CHINE DAMAGE. TORQUE WHEEL NUTS/BOLTS TO VALUES IN TABLE. CHECK TORQUE BEFORE INITIAL USE, AFTER ONE HOUR OF USE, AND EACH HOUR UNTIL WHEEL NUTS/BOLTS MAINTAIN TORQUE VALUE. -
Page 82: Tire Warranty
— Maintenance SubTiller 4 Wheels and Tires (continued) Tire Warranty For questions regarding new tire warranty, please contact your local original equipment tire dealer. Used tires carry no warranty. Following are phone numbers and Websites for your convenience: Carlisle www.carlisletire.com Phone 800-260-7959 Fax 800-352-0075 4-16... - Page 83 — Parts SubTiller 4 SECTION V Parts Frame Assembly, 7’-9” Base, 3-Point Rigid Components .................5-2 Frame Assembly, 11’-3” Base, 3-Point Rigid Components ...............5-4 Frame Assembly, 12’-4” Base, 3-Point Folding Components ..............5-6 Frame Assembly, 12’-4” Base, Pull-Type Folding Components ..............5-8 Pull-Hitch (Welded), Tongue, Jack, and Transport Chain Components ...........5-10 Pull-Hitch, Tongue, Jack, and Transport Chain Components ..............5-12 Pull-Type Conversion Option Components Less Hydraulics ..............5-14 Base Wheels, Pull-Type Components.......................5-16...
-
Page 84: Frame Assembly, 7'-9" Base, 3-Point Rigid Components
— Parts SubTiller 4 Frame Assembly, 7’-9” Base, 3-Point Rigid Components Please visit www.unverferth.com/parts/ for the most current parts listing. 3 Row 30” Spacing... - Page 85 — Parts SubTiller 4 Frame Assembly, 7’-9” Base, 3-Point Rigid Components Please visit www.unverferth.com/parts/ for the most current parts listing. ITEM PART NUMBER DESCRIPTION 900552 Manual Holder 9390-055 Capscrew, 3/8”-16UNC x 1” G5 9928 Lock Nut/Top, 3/8”-16UNC JAM7640 Manual Holder Mounting Bracket...
-
Page 86: Frame Assembly, 11'-3" Base, 3-Point Rigid Components
— Parts SubTiller 4 Frame Assembly, 11’-3” Base, 3-Point Rigid Components Please visit www.unverferth.com/parts/ for the most current parts listing. 5 Row 30” Spacing 7 Row 30” Spacing with 29” Extensions 9 Row 30” Spacing with 59” Extensions... - Page 87 — Parts SubTiller 4 Frame Assembly, 11’-3” Base, 3-Point Rigid Components Please visit www.unverferth.com/parts/ for the most current parts listing. ITEM PART NUMBER DESCRIPTION 900552 Manual Holder 9390-055 Capscrew, 3/8”-16UNC x 1” G5 9928 Lock Nut/Top, 3/8”-16UNC JAM7640 Manual Holder Mounting Bracket...
-
Page 88: Frame Assembly, 12'-4" Base,3-Point Folding Components
— Parts SubTiller 4 Frame Assembly, 12’-4” Base,3-Point Folding Components Please visit www.unverferth.com/parts/ for the most current parts listing. 7 Row 30” Spacing ITEM PART NUMBER DESCRIPTION 7 Shank 900552 Manual Holder 9390-055 Capscrew, 3/8”-16UNC x 1” G5 9928 Lock Nut/Top, 3/8”-16UNC... - Page 89 — Parts SubTiller 4 Frame Assembly, 12’-4” Base,3-Point Folding Components Please visit www.unverferth.com/parts/ for the most current parts listing. ITEM PART NUMBER DESCRIPTION 7 Shank JBP3335 U-Bolt, 3/8”-16UNC x 7”W x 8”L 902875 Lock Nut/Center, 3/8”-16UNC 91299-195 Capscrew, 1”-8UNC x 6” G8 91605 Decal, FEMA (2 1/2”...
-
Page 90: Frame Assembly, 12'-4" Base, Pull-Type Folding Components
— Parts SubTiller 4 Frame Assembly, 12’-4” Base, Pull-Type Folding Components Please visit www.unverferth.com/parts/ for the most current parts listing. 7 Row 30” Spacing 9 Row 30” Spacing 11 Row 30” Spacing... - Page 91 — Parts SubTiller 4 Frame Assembly, 12’-4” Base, Pull-Type Folding Components Please visit www.unverferth.com/parts/ for the most current parts listing. ITEM PART NUMBER DESCRIPTION 91299-195 Capscrew, 1”-8UNC x 6” G8 9390-059 Capscrew, 3/8”-16UNC x 2” G5 9390-061 Capscrew, 3/8”-16UNC x 2 1/2” G5 9390-130 Capscrew, 5/8”-11UNC x 3 1/2”...
-
Page 92: Pull-Hitch (Welded), Tongue, Jack, And Transport Chain Components
— Parts SubTiller 4 Pull-Hitch (Welded), Tongue, Jack, and Transport Chain Components Please visit www.unverferth.com/parts/ for the most current parts listing. 5-10... - Page 93 — Parts SubTiller 4 Pull-Hitch (Welded), Tongue, Jack, and Transport Chain Components Please visit www.unverferth.com/parts/ for the most current parts listing. ITEM PART NUMBER DESCRIPTION NOTES 106941 Washer, 4 1/2" Dia. 79817B Transport Valve Mounting Plate 82313 Jackstand Complete, Top Wind 84979 Bent Pin, 5/8"...
-
Page 94: Pull-Hitch, Tongue, Jack, And Transport Chain Components
— Parts SubTiller 4 Pull-Hitch, Tongue, Jack, and Transport Chain Components Please visit www.unverferth.com/parts/ for the most current parts listing. 5-12... - Page 95 — Parts SubTiller 4 Pull-Hitch, Tongue, Jack, and Transport Chain Components Please visit www.unverferth.com/parts/ for the most current parts listing. ITEM PART NUMBER DESCRIPTION NOTES 9003127 Reflector, AMBER 2” x 9” 9003278 Transport Chain (20,200#) 9003735 Cable Tie, 11” 9005114 Hex Nut, 1”-8UNC...
-
Page 96: Pull-Type Conversion Option Components Less Hydraulics
— Parts SubTiller 4 Pull-Type Conversion Option Components Less Hydraulics Please visit www.unverferth.com/parts/ for the most current parts listing. 5-14... - Page 97 — Parts SubTiller 4 Pull-Type Conversion Option Components Less Hydraulics Please visit www.unverferth.com/parts/ for the most current parts listing. ITEM PART NUMBER DESCRIPTION NOTES J70210364 Tongue Conversion Assembly, CAT3 Includes Items 2-25 JAAM4768 Turnbuckle Assembly JAM2197 Wrench Storage Bracket Weldment...
-
Page 98: Base Wheels, Pull-Type Components
— Parts SubTiller 4 Base Wheels, Pull-Type Components Please visit www.unverferth.com/parts/ for the most current parts listing. 5-16... - Page 99 — Parts SubTiller 4 Base Wheels, Pull-Type Components Please visit www.unverferth.com/parts/ for the most current parts listing. ITEM PART NUMBER DESCRIPTION NOTES 603247SM Wheel & Tire Assembly =Silver Mist= 9002500 Valve Stem W1015-8-47RGSM 10 x 15 Implement Wheel (8-Bolt) Implement Tire, IF320/70R15 (144D) 9390-130 Capscrew, 5/8”-11UNC x 3 1/2”...
-
Page 100: Stabilizer Wheel Components
— Parts SubTiller 4 Stabilizer Wheel Components Please visit www.unverferth.com/parts/ for the most current parts listing. 5-18... - Page 101 — Parts SubTiller 4 Stabilizer Wheel Components Please visit www.unverferth.com/parts/ for the most current parts listing. ITEM PART NUMBER DESCRIPTION NOTES 603344B Stabilizer Wheel Right-Hand Assembly (Black) Includes Items 1-33 603353B Stabilizer Wheel Left-Hand Assembly (Black) 63621 Spindle Arm Right-Hand Weldment =Black=...
-
Page 102: Gauge Wheel, Vertical Adjust Components
— Parts SubTiller 4 Gauge Wheel, Vertical Adjust Components Please visit www.unverferth.com/parts/ for the most current parts listing. ITEM PART NUMBER DESCRIPTION NOTES 111270SM Wheel & Tire Assembly =Silver Mist= 9002500 Valve Stem 9503512SM 6 x 10 Divided Wheel Tire, 22 x 8.00 (NHS) 9390-157 Capscrew, 3/4”-10UNC x 6”... -
Page 103: Gauge Wheel, Swing Adjust Components
— Parts SubTiller 4 Gauge Wheel, Swing Adjust Components Please visit www.unverferth.com/parts/ for the most current parts listing. ITEM PART NUMBER DESCRIPTION NOTES 111270SM Wheel & Tire Assembly =Silver Mist= 9002500 Valve Stem 9503512SM 6 x 10 Divided Wheel Tire, 22 x 8.00 (NHS) 91174 Machinery Bushing, 1.875”... -
Page 104: Hub & Spindle Assembly Components
— Parts SubTiller 4 Hub and Spindle Assembly Components Please visit www.unverferth.com/parts/ for the most current parts listing. ITEM PART NUMBER DESCRIPTION NOTES JAAM2707 Hub & Spindle Assembly Includes Items 1-12 9391-034 Cotter pin, 5/32” Dia. x 1 1/4” 9393-016 Slotted Nut, 3/4”-16UNF... - Page 105 — Parts SubTiller 4 Hub and Spindle Assembly, Pull-Type Frame Components Please visit www.unverferth.com/parts/ for the most current parts listing. ITEM PART NUMBER DESCRIPTION NOTES JAAM2783 Hub & Spindle Assembly Includes Items 1-13 91156 Hub Cap 9391-036 Cotter Pin, 5/32” Dia. x 1 3/4”...
-
Page 106: Coulter Mounting Components
— Parts SubTiller 4 Coulter Mounting Components Please visit www.unverferth.com/parts/ for the most current parts listing. 5-24... - Page 107 — Parts SubTiller 4 Coulter Mounting Components Please visit www.unverferth.com/parts/ for the most current parts listing. ITEM PART NUMBER DESCRIPTION NOTES J70210504 Coulter Assembly, For Single Row Includes Items 1-28 9390-032 Capscrew, 5/16”-18UNC x 1 1/2” G5 9392-182 Roll Pin, 3/8” Dia. x 2 1/2”...
-
Page 108: Shank Components, Auto-Reset
— Parts SubTiller 4 Shank Components - Auto-Reset Please visit www.unverferth.com/parts/ for the most current parts listing. 5-26... - Page 109 — Parts SubTiller 4 Shank Components - Auto-Reset Please visit www.unverferth.com/parts/ for the most current parts listing. ITEM PART NUMBER DESCRIPTION NOTES 800150 Roller/Tube, 2” OD x 1.124” ID x 7/8” 9388-108 Carriage Bolt, 1/2”-13UNC x 2 1/2” G5 9390-107 Capscrew, 1/2”-13UNC x 3”...
-
Page 110: Shank Components, Shear-Bolt
— Parts SubTiller 4 Shank Components - Shear-Bolt Please visit www.unverferth.com/parts/ for the most current parts listing. 5-28... - Page 111 — Parts SubTiller 4 Shank Components - Shear-Bolt Please visit www.unverferth.com/parts/ for the most current parts listing. ITEM PART NUMBER DESCRIPTION NOTES JAM4691 Shank Mount Arm Weldment (Black) Includes Item 10A Split Tension Bushing, 9007693 1” OD x 3/4” ID x 3/4”...
-
Page 112: Lighting Kit (J41000029), 3-Point Rigid Frame
— Parts SubTiller 4 Lighting Kit (J41000029), 3-Point Rigid Frame Please visit www.unverferth.com/parts/ for the most current parts listing. 5-30... - Page 113 — Parts SubTiller 4 Lighting Kit (J41000029), 3-Point Rigid Frame Please visit www.unverferth.com/parts/ for the most current parts listing. ITEM PART NUMBER DESCRIPTION NOTES J41000029 Lighting Kit - 3-Point Rigid Frame 9001968 Connector Holder 9003126 Reflector RED, 2” x 9”...
- Page 114 — Parts SubTiller 4 Lighting Kits (J41000030 & 603708B), Folding Frames Please visit www.unverferth.com/parts/ for the most current parts listing. 5-32...
- Page 115 — Parts SubTiller 4 Lighting Kits (J41000030 & 603708B), Folding Frames Please visit www.unverferth.com/parts/ for the most current parts listing. QTY. PER FRAME ITEM PART NUMBER DESCRIPTION 3-POINT PULL-TYPE J41000030 Lighting Kit - 3-Point Folding Frame 603708B Lighting Kit - Pull-Type Folding Frame...
-
Page 116: Hydraulic, Folding Components
— Parts SubTiller 4 Hydraulic, Folding Components Please visit www.unverferth.com/parts/ for the most current parts listing. 5-34... - Page 117 — Parts SubTiller 4 Hydraulic, Folding Components Please visit www.unverferth.com/parts/ for the most current parts listing. ITEM PART NUMBER DESCRIPTION 91299-195 Capscrew, 1”-8UNC x 5” G8 9398-026 Elastic Lock Nut, 1”-8UNC 91465 Tee, 9/16”-18 JIC Male x 9/16”-18 JIC Female x 9/16”-18 JIC Male 9874 90°...
-
Page 118: Hydraulic, Pull-Type Lift Wheel Components
— Parts SubTiller 4 Hydraulic, Pull-Type Lift Wheel Components Please visit www.unverferth.com/parts/ for the most current parts listing. 5-36... - Page 119 — Parts SubTiller 4 Hydraulic, Pull-Type Lift Wheel Components Please visit www.unverferth.com/parts/ for the most current parts listing. ITEM PART NUMBER DESCRIPTION 91383 Male Tip Coupling, 3/4”-16 O-Ring Female JDP5024 Hydraulic Hose, 3/8” x 126” 9503026 Adapter, 7/8”-14 JIC Male x 3/4”-16 O-Ring Male JDP5133 Hydraulic Hose, 3/8”...
-
Page 120: Pull-Type Conversion Option Hydraulic Components
— Parts SubTiller 4 Pull-Type Conversion Option Hydraulic Components Please visit www.unverferth.com/parts/ for the most current parts listing. 5-38... - Page 121 — Parts SubTiller 4 Pull-Type Conversion Option Hydraulic Components Please visit www.unverferth.com/parts/ for the most current parts listing. ITEM PART NUMBER DESCRIPTION 91383 Male Tip Coupling, 3/4”-16 O-Ring Female JDP5011 Hydraulic Hose, 3/8” x 180” 9503026 Adapter, 7/8”-14 JIC Male x 3/4”-16 O-Ring Male JDP4500 Hydraulic Hose, 3/8”...
- Page 122 MANUALS\\603430//JANUARY 2022-0//April 2022-1...
Need help?
Do you have a question about the BLU-JET SubTiller 4 and is the answer not in the manual?
Questions and answers