Table of Contents
Advertisement
Quick Links
Advertisement
Table of Contents

Subscribe to Our Youtube Channel
Related Manuals for Edgetech HP125 Series


Summary of Contents for Edgetech HP125 Series
- Page 1 HP125 Series & DCM™ OPERATORS MANUAL Rev C Feb 2018 399 River Rd ● Hudson, MA USA 01749 Tel. [508] 263-5900 ● [800] 276-3729 ● Fax [508] 486-9348 ISO 9001:2008 Registered E-mail h2o@edgetechinstruments.com ISO/IEC 17025:2005 Accredited www.edgetechinstruments.com...
-
Page 2: Quick Startup
ESD Protection Electrostatic Discharge (ESD) can cause immediate or latent damage to electronic circuits. Edgetech Instruments products are adequately protected against ESD for their intended use. It is possible to damage the product, however, by delivering electrostatic discharges when touching, removing, or inserting any objects inside the equipment housing. - Page 3 HP125 SERIES WHEN USING PROBE with CABLE. Before mounting the probe into any system ensure the system is safe to work on. Depressurized and verify that all power to connections are isolated in the Off position. Installation should be carried out by trained technicians and following local safety protocols 1.
- Page 4 HP125 SERIES QUICK STARTUP GUIDE WHEN USING PROBE with INTERFACE CONTROL & DISPLAY MODULE 1. Mount the Probe as detailed in page 1 section 1 through 6. 2. Connect cable from Probe to Electronics Unit (if applicable). Unit is prewired to the DCM if ordered as an option from factory 3.
-
Page 5: Table Of Contents
HP125 SERIES TABLE OF CONTENTS Page 1.0 Quick Startup List of Illustrations List of Tables 2.0 Edgetech Commitment to Quality 3.0 Introduction 3.1 General Description 3.2 Specifications Summary 3.3 Model Descriptions 3.4 Available Options 4.0 Installation 4.1 Mounting the Probe 4.2 Probe Electrical Wiring... - Page 6 HP125 SERIES 8.0 Specifications 9.0 Appendix 9.1 Warranty Information 9.2 Mounting Dimensions 9.2.1 Wall Mount 9.2.2 Duct Mount LIST OF ILLUSTRATIONS Page 3-1 Some HP125 Configurations 3-3 Unit alarm versions 4-1 HP125 with Swagelok fitting 4-3 CAM installation details 4-4 Electronics Unit Wiring...
-
Page 7: Edgetech Commitment To Quality
2.0 EDGETECH’S INSTRUMENTS COMMITMENT TO QUALITY Thank you for purchasing one of our products. At Edgetech Instruments, it is our policy to provide cost-effective products and support services that meet or exceed your requirements, to deliver them on time, and to continuously look for ways to improve both. -
Page 8: Introduction
3.0 INTRODUCTION 3.1 GENERAL DESCRIPTION The Edgetech Instruments HP125 Series is a family of multi-function probes that offers a variety of measurement parameters with high accuracy. A single sensor can provide up to 4 measurement parameters. Dew point, Relative Humidity (%RH), Temperature and Pressure (psia or mbar). Electrical analog and digital outputs are provided The HP 125 probes are designed for ease of installation and operation. -
Page 9: Specifications Summary
HP125 SERIES 3.2 SPECIFICATIONS SUMMARY (See Specifications, Chapter 8, for additional information) 3.2.1 STAND-ALONE PROBE Up to four 0 – 10 Vdc Analog Outputs: Digital Output: RS-232 serial output. Reporting function every 10s, space delimited Power Supply: 24 Vdc +10%, unregulated, 1A max. -
Page 10: Model Descriptions
HP125 SERIES Table 3-1 HP125 Series, Standard Available Configurations SENSOR PLUS ELECTRONICS MODULE – MODEL NO. SENSOR ONLY WITH DISPLAY HP125 HPP125 HPB125 3.3 HP125 MODEL DESCRIPTIONS HP125 – RH / Temperature / Calculated Dew Point. HPP125- Pressure / RH / Temperature / Calculated Dew Point. - Page 11 HP125 SERIES Sampling Options -SM- Surface Wall mount, the sensor is mounted between two polypropylene blocks with integral surface wall mount. -UN- Same as wall mount only the sensor holding blocks can be fitted into a Uni-strut fitting -FSS- 300psi Stainless Steel pipe flange mount with gasket, with integral threaded sensor boss.
-
Page 12: Installation
HP125 SERIES Table 3-2 HP125 Series Sensor Measurement Ranges MODEL NO. OUTPUT 1 OUTPUT 2 OUTPUT 3 OUTPUT 4 HP125 DEW POINT AIR TEMP. PERCENT RH DEFAULT RANGE -40 to +95ºC -40 to +125ºC 0 TO 99.9% MAX. LIMITS -60 to +95ºC -40 to +125ºC... -
Page 13: Hp125 With Swagelok Fitting
HP125 SERIES 5. Once the probe is correctly positioned install the connection cable to check length and ease of access to the cable connections at both ends. Remove the connection cable to avoid twisting. Now firstly tighten the pipe bases section and then with the probe in the selected insertion depth tighten the Swagelok fitting. -
Page 14: Probe Electrical Wiring
HP125 SERIES Wiring probe only See Wiring Table 4-1and Figure 4-2 below. ITEM CABLE colour 24VdcPower Supply – Pos. 24VdcPower Supply – Neg. BLACK 0-10V Temperature. YELLOW 0-10V RH WHITE 0-10V Dew Point BLUE 0-10V psig or mbar ORANGE RS232 Serial Input – TX... -
Page 15: Probe With Cam Option
HP125 SERIES 4.3 Installation HP125 Probe with CAM option Reducer Bushing PROBE Dew Point -10C BLEEDER Pressure: 120 PSIG VALVE BLEED Bleeder Port BALL VALVE Ball Ball Valve Valve Closed Open Connection to Compressed Air Header ¾” NPT 1. Close ball valve on the CAM. Close the Bleeder valve (clockwise). -
Page 16: Mounting Dcm Case
HP125 SERIES 4.4 MOUNTING THE DCM MODULE Instruments with the plastic wall mount housing are mounted to a flat surface as follows: For dimensional details of case see Appendix 9.2 page 34 1. Remove the front cover. Using a flat screwdriver, carefully unscrew the four slotted plastic screws. -
Page 17: Wiring Inputs / Outputs
HP125 SERIES 4.4.2 INPUT/OUTPUT WIRING Wire the Analog Outputs as required. See 4.4 below for information on output selection. Connect the RS-232 Serial Output if desired. Only 2 wires are required if the output is needed for transmitting information only. A third wire is added for bi-directional communications with the serial port 1. -
Page 18: Selection Of Analog Output Ranges
HP125 SERIES TERMINAL ITEM ALARM 2 ALARM 1 CHASSIS GROUND ANALOG OUTPUT 2 ANALOG OUTPUT 1 ANALOG OUTPUT RET. FOR FACTORY USE FOR FACTORY USE RS232 RETURN DC POWER IN (+) DC POWER IN (-) RS232 TX RS232 RX Table 4.4 Connect the Alarm relays as needed. -
Page 19: Basic Block Diagram
HP125 SERIES BASIC BLOCK DIAGRAM THEORY OF OPERATION 5.1 PROBE ASSEMBLY See Figure 5-1, the Probe Assy. Basic Block Diagram. The Probe Assembly is a stand-alone, completely self-contained measuring system. All units include the RH and Temperature Sensors, and some optional probes include a Pressure Sensor as well. -
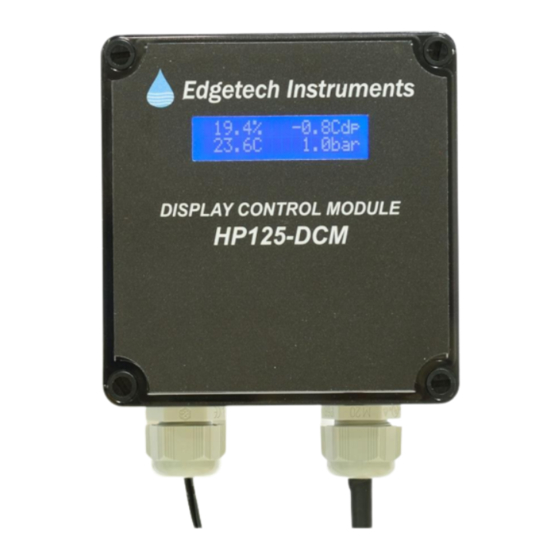
Page 20: Electronics Module
HP125 SERIES 5.2 HP125 ELECTRONICS MODULE (Type DCM) Although the Probe may be used as a stand-alone measuring device, it also may be connected to the type DCM remote display unit, for additional capability. The complete HP125 system consists of the Probe, the interconnecting 3 foot (1meter) cable, and the electronics module. -
Page 21: Operation
See the Installation section for further information if necessary. Use of the HP125 series of probes is extremely simple. There are no controls to operate during normal use, as these devices are designed for long-term unattended operation. With the Analog Outputs,... -
Page 22: Rs-232 Serial Port
HP125 SERIES 6.4 USING THE RS-232C SERIAL PORT TO REPROGRAM YOUR SETTINGS Note: If the Factory Default settings are satisfactory, there is no reason to perform any programming. The Sentry series air header system alarm is very versatile. Through the Serial Port, the user may view current settings, change factory set parameters, or receive an automatic update of system measurements and alarm status. -
Page 23: Set Up With Pc & Usb Only
HP125 SERIES 6.6 PC with USB Port only If your PC does not have an available serial port, you can use the ETI accessory: RSCBL (RS232 cable) plus the USB (USB to SERIAL Converter). The ETI kit provides the 3 stripped RS232 wires, labeled and the wire ends properly tinned- to be connected to the ASHA plus a USB converter jack to plug into your PC USB port. -
Page 24: Changing Dcm Program
HP125 SERIES 6.7 PROGRAMMING THE DCM If you do not see a window similar to the one shown above, you will not be able to program this instrument Check your terminal emulation program, the power supply, and check the interconnecting cable wiring as shown in Table 5 -1 above. -
Page 25: Programming The Alarm Relays
HP125 SERIES To set Output 2, Enter “2 In the example, Output 2 is set to represent pressure by entering “7” when prompted. Pressure is represented in the ASHA as PSIG units. You will be prompted to enter a psig value for the low setting. -
Page 26: Calibrating The Analog Outputs
HP125 SERIES To set the Alarm setpoints enter “M”. The current settings will be displayed. Then follow the prompts to enter the setpoints. After you have made the alarm setting, enter S to save or X to exit. 6.7.2 CALIBRATING THE ANALOG OUTPUTS If you have a precise multimeter or voltmeter, you can check the accuracy and scaling of the analog outputs. -
Page 27: Maintenance
HP125 SERIES 7.0 MAINTENANCE Pressurized gas risk Hazardous chemical and gas risk Electrical risk Ensure adequate safety procedures have been followed Before starting any work ensure the sensor has been powered down. Check to ensure that there is no pressure on the probe. -
Page 28: Sensor Reassembly
HP125 SERIES 7.1.2 SENSOR REASSEMBLY Carefully plug the new sensor circuit board into the socket, noting that it is installed at the correct angle and that the keyway is properly aligned. Using your thumb or a small screwdriver or other tool, press it down sufficiently so that it is fully inserted in the socket. -
Page 29: Specifications
HP125 SERIES 8.0 SPECIFICATIONS Note: See Table 3-2 for actual measurement ranges. HP125 (Sensor Only) Measured Parameters RH/Temp. Relative Humidity ±1.8% @ 23°C (0 TO 90% RH) Temperature ±0.5°C Output Information RH, Temp., DP Electrical Outputs 0 to 10 Vdc (X3) & RS-232C... - Page 30 HP125 SERIES Electrical Outputs Systems with Sensor only – 0 to 10 Vdc (X 4) @ 10 mA max. RS-232C Systems with Sensor and Electronics Unit— Configurable 4-20mA, 0-10V & 0-5V (X2) into 500 Ω max. Alarm Relay (X2) Form A (SPST, NO) rated at 3A/250 Vac...
-
Page 31: Appendix
HP125 SERIES 9.0 APPENDIX 9.1 Warranty Information 9.2 Mounting Dimensions 9.3 Basic Humidity Definitions... -
Page 32: Warranty Information
(ii) the items have not been misused or abused in any manner or repairs attempted thereon; (iii) written notice of the failure within the warranty period is forwarded to EdgeTech and the directions received for properly identifying items returned under warranty are followed;... -
Page 33: Mounting Dimensions
HP125 SERIES OVERALL AND MOUNTING DIMENSIONS 9.2.1 WALL MOUNT DIMENSIONS... -
Page 34: Duct Mount
HP125 SERIES 9.2.2 DUCT MOUNT DIMENSIONS... - Page 35 HP125 SERIES Notes...
Need help?
Do you have a question about the HP125 Series and is the answer not in the manual?
Questions and answers