Table of Contents
Advertisement
Quick Links
WATERPROOF DV CAMCORDER
USER MANUAL
FR : Un manuel dans votre langue est disponible sur Internet:
IT: Il manuale nella sua lingua può essere trovato su Internet:
ES: Puede encontrar un manual en su idioma en Internet:
PT: Um manual em seu idioma pode ser encontrado na Internet:
PL: Instrukcję w swoim języku możesz znaleźć na stronie:
SV: En handbok på ditt språk finns på Internet:
NL: Een handleiding in uw taal vindt u op internet:
bit.ly/3JtIJuI
EN
Advertisement
Table of Contents

Related Manuals for Easypix AQUAPIX WDV5630


Summary of Contents for Easypix AQUAPIX WDV5630
- Page 1 WATERPROOF DV CAMCORDER USER MANUAL FR : Un manuel dans votre langue est disponible sur Internet: IT: Il manuale nella sua lingua può essere trovato su Internet: ES: Puede encontrar un manual en su idioma en Internet: PT: Um manual em seu idioma pode ser encontrado na Internet: PL: Instrukcję...
-
Page 2: Table Of Contents
Table of contents General instructions ................4 Explanation of symbols ................ 4 Product introduction ................5 Declaration and prove safety ............... 5 Intended use ..................5 Restrictions ................... 6 Safety instructions ................7 Operating environment ................ 8 Storage environment ................10 Camera description ................11 First use .................... - Page 3 Playback mode ................... 24 Playing files .................. 24 Photo slideshow ................24 Deleting files ................25 Protecting files ................26 Playback screen icons ................. 27 Recording times .................. 29 Connecting to PC ................30 Connecting to TV ................32 Technical specifications ..............33 Troubleshooting .................
- Page 4 Easypix is not responsible or liable for the misuse of the information contained herein. If you have suggestions for improvement or changes or if you have found errors in this publication, please let us know.
-
Page 5: General Instructions
General instructions Please read this manual and its safety instructions before using this product. Follow all instructions. This will prevent hazards that could result in property damage and/or serious injury. The product may only be used by persons who have fully read and understood the contents of this user manual. -
Page 6: Product Introduction
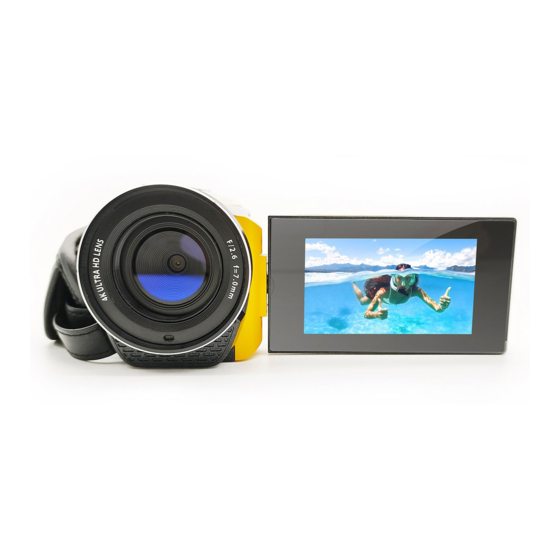
Product introduction Aquapix WDV5630 is a waterproof digital camcorder. Dustproof and waterproof at depths of up to 5 metres it records video up to 4K resolution and captures images up to 56MP. A removable battery, memory card support up to 128GB, 18x digital zoom and a rotating 3.0” IPS screen ensure the best user experience. -
Page 7: Restrictions
Restrictions WARNING The product is not suitable for children under 3 years of age. Contains small parts. Risk of suffocation. When connected to a TV ensure any connected cables do not present a trip hazard. WARNING • Before using the product in water, ensure the battery compartment cover is securely closed and locked. -
Page 8: Safety Instructions
Safety instructions WARNING This product is only suitable for the purpose described. The manufacturer is not liable for damage caused by improper use. WARNING Please read these operating instructions carefully before use. • Always protect your camera from falls, bumps and shocks. -
Page 9: Operating Environment
• Please dispose of the waste and residues at the end of the product's life in accordance with local laws and regulations. Operating environment • Please peel off the transparent protective film from the lens and screen before first use. • It is normal for the case to become warm during use. •... - Page 10 The waterproof camcorder body Aquapix WDV5630 is waterproof and dustproof in accordance with the following standards: Waterproof: Equivalent to IEC Standard publication 529 IPX8 and IPX6 (1 hour at depths up to 5 m) Dustproof: Equivalent to IEC Standard publication 529 IP6X.
-
Page 11: Storage Environment
Precautions for waterproof use Malfunction due to customer error or misuse is not covered by warranty. Before use in water close the battery cover firmly until it is securely locked and watertight. Ensure sure that there is no damage to the seals and lock and that no foreign materials cause an obstruction to prevent the compartment being securely locked as required. -
Page 12: Camera Description
Camera description 1. Lens 2. LCD display 3. Battery compartment lock 4. Battery compartment door 5. Power/Activity LED 6. Zoom/Volume button 7. Charging LED 8. Record/Shutter button 9. Tripod mount... - Page 13 10. Microphone 11. Speaker 12. Power on/off 13. Mode/OK button 14. Menu button 15. Down button 16. Up button 17. Hand strap...
-
Page 14: First Use
First use NOTE! To ensure optimum performance from your camera, please follow the steps below when using the camera for the first time. Step 1: Insert the battery Before using the product for the first time, make sure the battery is fully charged. • To open the battery compartment, slide the lock downward and hold it in the unlock position. -
Page 15: Step 2: Charge The Battery
Step 2: Charge the battery To achieve the fastest charge, ensure the camcorder is switched off during charging. • It is possible to charge the camcorder during recording or playback however the charging time will be longer than if the camera was switched off. •... -
Page 16: Step 3: Insert A Microsd Card
Step 3: Insert a microSD card The camcorder supports the use of a Micro SD memory card up to a maximum capacity of 128GB. Ensure the SD card used has a read/write speed of Class 10 or faster. Step 4: Turn on the camera Press and hold the Power button [12] for up to 3 seconds to turn on the camera. -
Page 17: Camera Settings
Enter the ‘Format’ settings in the user menu to complete the formatting process. • Press 2x the Menu button [14] and navigate to the ‘Format’ menu option. • Press the OK button [13] to confirm the ‘Format’ process. • When formatting is complete, press the Menu button [14] to exit the settings menu. -
Page 18: Video Mode
Language Choose your preferred menu and display language Power Set the frequency according to your local power Frequency supply Format Format the SD card Default settings Reset the camera to factory settings Version Displays the currently installed firmware version Video mode Before recording confirm that a memory card is inserted and recognised by the camcorder. -
Page 19: Video Screen Icons
Video screen icons 1. Video mode 5. Motion detection 9. Date 2. EV 6. Time lapse 10. Time 3. Audio status 7. Resolution 11. Memory card 4. Loop record 8. Elapsed Recording Time 12. Battery level NOTE! • Never remove the card while the Activity LED[5] is illuminated as this could result in lost or corrupt data. -
Page 20: Video Settings
• A recording that exceeds 4GB in size is automatically divided and recorded as multiple files. Video settings While in Video mode, press the Menu button [14] once to enter the Video settings menu. Press the Up [16] and Down [15] buttons to navigate the menu. -
Page 21: Photo Mode
Exposure setting adjusts the shutter speed and determines how long the shutter on the camera Exposure lens stays open each time the shutter button is pressed to take a photo. When set to ON the camera starts recording Motion automatically after sensing motion within view of detection the lens Record audio... -
Page 22: Photo Screen Icons
Photo screen icons 1. Photo mode 6. Self timer 11. Date 7. Burst 2. ISO 12. Time 8. Time-lapse 13. Memory card 3. EV 4. White balance 9. Resolution 14. Battery 10. Shots 5. Quality remaining... -
Page 23: Photo Settings
Photo settings While in Photo mode, press the Menu button [14] once to enter the Photo settings menu. Press the Up [16] and Down [15] buttons to navigate the menu. Press the Mode/OK button [13] to confirm selections. Photo Size Selects the photo resolution With the Time Lapse Photo function activated the camera automatically takes a series of timed Time-lapse... - Page 24 Adjusts the color temperature according to White balance recording conditions ISO settings will brighten or darken a photo. As you increase your ISO number, your photos will grow progressively brighter. Exposure setting adjusts the shutter speed and determines how long the shutter on the camera Exposure lens stays open each time the shutter button is pressed to take a photo.
-
Page 25: Playback Mode
Playback mode Using the LCD display, you can playback your videos, view your photos and delete any unwanted files. Playing files • Press the Mode/OK button [13] to enter Playback mode. • Use the Up button[16] and Down[15] buttons to browse your files. •... -
Page 26: Deleting Files
options menu. • Use the Down button [15] to highlight ‘Slide Show’. • Press the Mode/OK button [13] to open the slide display time options. • Use the Up [16] and Down [15] buttons to highlight the time required and press the Mode/OK button [13] to confirm. -
Page 27: Protecting Files
Protecting files To prevent accidental deletion of your favourite recordings or photos use the ‘Protect’ settings option in Playback mode. • Enter Playback Mode and choose the video or photo file you wish to protect. • Press the Menu button [14] and press the Down button [15] to highlight the ‘Protect’... -
Page 28: Playback Screen Icons
Playback screen icons 1. Video file 8. Video resolution 2. Video file name 9. Current time display 3. Pause 10. Date of recording 4. Stop 11. Time of recording 5. Fast rewind 12. Memory card 6. Fast forward 13. Battery level 7. Video volume... - Page 29 10. Date of recording 14. Photo file 11. Time of recording 15. Photo file name 12. Memory card 16. Photo resolution 13. Battery level 17. Protected File...
-
Page 30: Recording Times
Recording times The table below outlines approximate maximum recording times when using various video resolution settings. Recording times may vary depending on shooting conditions and memory card size. When a video recording file size NOTE! reaches 4GB of data, while recording the camcorder automatically divides the recording and starts a new file. -
Page 31: Connecting To Pc
Connecting to PC By connecting your camcorder to a computer you can transfer files or use the camcorder as a webcam. • Connect the camera to the USB port your computer using the USB cable supplied. • Open the LCD display. • The camcorder will automatically power on and display options for Mass Storage (File Transfer) or PC Camera (Windows®... - Page 32 File transfer • To transfer file from the camcorder to your computer select ‘Mass Storage’. • The camera will mount as an external device on your computer where you can copy the files required. Webcam (Windows ® only) • To use the camcorder as a webcam select ‘PC Camera’.
-
Page 33: Connecting To Tv
Connecting to TV Depending on the recording format NOTE! and HDMI output settings, file playback may be limited. • Using the HDMI cable, connect the HDMI Output on the camcorder to the HDMI Input on the TV. • Select the relevant HDMI Input on the TV. •... -
Page 34: Technical Specifications
Technical specifications 4K (30fps) 2.7K (30fps) Video resolution 1080p (60/30fps) 720p (60/30fps) 56M*/48M*/30M*/24M*/20M*/16M*/ Photo resolution 12M/8MP/5MP Display 3.0”/7.6 cm Sensor 13MP CMOS Sensor Auto, 100, 200, 400, 800, 1600 Lens Fixed, F/2.6, f=7.0 mm Focus range 1 m ~ infinity Waterproof Waterproof up to 5m Microphone/ Built-in mic and speaker... - Page 35 Off/100mS/200mS/500mS/1sec/5sec/ Time-lapse video 10sec/30sec/1min/5min Time-lapse photo Off/On Colour filter Colour, Black & White, Sepia Photo burst Off/3 Photos per shot Loop recording Off/1/3/5/10 min. Self-timer Off/2/5/10 sec. Auto, Daylight, Cloudy, Tungsten Light, White balance Fluorescent Exposure -3.0EV ~ +3.0EV Metering Average, Center-weighted, Spot Photo quality Fine, Normal, Economy...
-
Page 36: Troubleshooting
Troubleshooting Problem Possible cause Solution Camera will not Battery not installed. Install battery as power on Battery not charged. instructed. Charge battery. Camera shuts off Battery charge Charge battery. depleted. Adjust auto-power off Auto-power off settings. function enabled. Files not saved Power interruption Charge battery when while saving. -
Page 37: Box Contents
Box contents • Waterproof camcorder • Battery • Storage bag • USB cable • HDMI cable • Manual (English, German) Operating instructions in other languages are available for download at https://bit.ly/3JtIJuI or www.easypix.info/download-manuals/download/aquapix-wdv5630/... -
Page 38: Disposal
Disposal Disposal of packaging: Dispose of the packaging according to its type. Add cardboard and paperboard to the waste paper, foils and plastic wrapping to the recyclable waste collection. Waste electrical and electronic equipment and/or batteries disposed of by users in private households in the European Union: This symbol on the product or on its packaging indicates that it cannot be disposed of with household waste. - Page 39 system for the recycling of electrical and electronic equipment and/or batteries. For more information on recycling this device and/or battery, contact your local council, the shop where you purchased the device or your household waste disposal service. Recycling materials helps to conserve natural resources and ensures that it is recycled in a way that protects human health and the environment.
-
Page 40: Declaration Of Conformity
Directives 2014/30/EU and 2011/65/EU & (EU) 2015/863. The full text of the EU Declaration of Conformity can be found in German and English at: www.easypix.info/download/pdf/doc-wdv5630.pdf UKCA Declaration of conformity We hereby declare that the product complies with the Radio Equipment Regulations 2017 (SI 2017 No.1206).
Need help?
Do you have a question about the AQUAPIX WDV5630 and is the answer not in the manual?
Questions and answers