
Subscribe to Our Youtube Channel
Related Manuals for NEP PVG-1

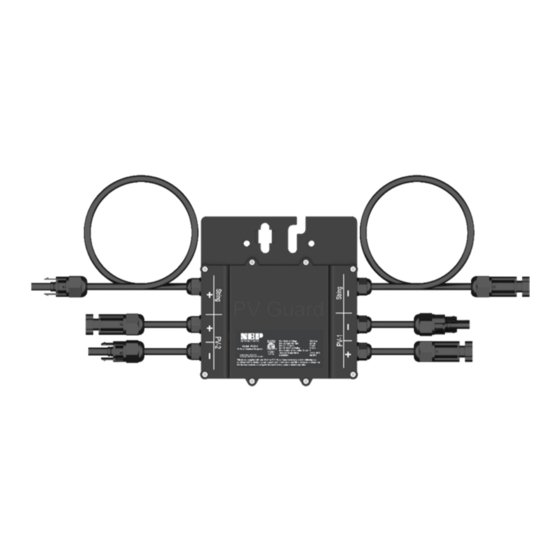
Summary of Contents for NEP PVG-1
- Page 1 Installation and Operation Manual PVG-1/2/3 PVG-M/E/O Rapid Shutdown Device Modified 04/03/2023 by JMB...
-
Page 2: Table Of Contents
4.7*** Connect PVG Controller Signal Ring--------------------------------------------------------------------------------------- 12 4.8 Check Sting Voltage (Inverter with built-in PVG Transformer)----------------------------------------------------------- 13 4.9 Commissioning---------------------------------------------------------------------------------------------------------------------- 13 4.3 PVG System Diagram----------------------------------------------------------------------------------------------------------------------14 4.3.1 PVG-1 System Diagram--------------------------------------------------------------------------------------------------------- 14 4.3.2 PVG-2 System Diagram---------------------------------------------------------------------------------------------------------- 14 5. OPERATING INSTRUCTIONS---------------------------------------------------------------------------------------------------------------15 6. PV PANEL MONITORING USING BDG-256 (OPTIONAL)-----------------------------------------------------------------------------16 6.1 Connection of BDG-256 and PVG-C:--------------------------------------------------------------------------------------------16... -
Page 3: Company Profile
180W to 2000W, and industry leading Rapid Shutdown Devices (RSD). Our field deployment results have demonstrated the high efficiency and reliability of NEP solar inverters. At NEP, we are committed to developing Clean, Reliable, Affordable, and Efficient products for our customers worldwide. -
Page 4: Introduction
1. INTRODUCTION 1.1 Prefix Thank you for choosing PVG rapid shutdown devices. We hope that our products will meet your needs for renewable energy. We highly value your feedback regarding our products and would greatly appreciate any comments you may have. -
Page 5: Safety Instruction
2. SAFETY INSTRUCTION WARNING: PLEASE READ THIS MANUAL BEFORE INSTALLATION. ANY DAMAGE TO THE PRODUCT DUE TO NOT FOLLOWING THIS MANUAL IS NOT COVERED BY THE WARRANTEE. ALL THE INSTALLATION SHOULD BE DONE BY CERTIFIED ELECTRICIAN. IT IS IMPORTANT TO NOTE THAT NOTHING INSIDE THE PRODUCT SHOULD BE MODIFIED, ASIDE FROM THE CABLE CONNECTORS. -
Page 6: Fcc Compliance
3. FCC COMPLIANCE This equipment has been tested and found to comply with the limits for a Class B digital device, pursuant to part 15 of the FCC Rules. These limits are designed to provide reasonable protection against harmful interference in a residential installation. -
Page 7: Installation
4. INSTALLATION WARNING: ALTHOUGH OUR PVG UNITS ARE SHIPPED IN THE "OFF" STATE, IT IS BEST PRACTICE TO APPROACH ALL UNITS AS IF THEY WERE IN THE "ON" STATE AND PROCEED WITH CAUTION. BEFORE WIRING, IT IS CRUCIAL TO TEST AND CONFIRM THAT THE UNITS ARE IN THE "OFF"... -
Page 8: Connect Pvg To Modules
4.2 Connect PVG to Modules ● PVGs must be connected to PV modules before connecting homeruns ● While plugging or unplugging PVGs in a system, DC switch on the inverter must be turned... -
Page 9: Test String Output Voltage Of Pvg
4.3 Test String Output Voltage of PVG • PVG default state from factory is OFF • Safety voltages (OFF) when PV-1 port is powered by a PV module PVG_1: 0.65 Vdc PVG_2: 1.4 Vdc PVG_3: 1.8 Vdc 4.4 Connect Homeruns ●... -
Page 10: Build Site Map
4.5 Build Site Map ● This step is required for panel level monitoring ● This step is recommended for post installation services... -
Page 11: Wire Pvg Controller Power Supply
***4.6 and 4.7 are only required for external PVG controllers 4.6*** Wire PVG Controller Power Supply ● Power conductor to PVG controller shall be 18AWG or 20AWG ● PVG controller shall never loose power supply while inverter is running and taking PV power Option 1 Option 2... -
Page 12: Connect Pvg Controller Signal Ring
4.7*** Connect PVG Controller Signal Ring ● Only positive OR negative PV cables should pass through the signal ring 1. PLC signal may cancel each other if both “positive” and “negative” cables pass through the signal rings... -
Page 13: Check Sting Voltage (Inverter With Built-In Pvg Transformer)
4.8 Check Sting Voltage (Inverter with built-in PVG Transformer) 4.9 Commissioning ● After all strings of the site have been tested, inverters can be turned on. ● String current should be checked to confirm on correct operation. -
Page 14: Pvg System Diagram
4.3 PVG System Diagram 4.3.1 PVG-1 System Diagram 4.3.2 PVG-2 System Diagram PV-1 must be connected to a PV panel to power the PVG. Cables (PV+ and PV-) of an unused PV port shall be connected. -
Page 15: Operating Instructions
5. OPERATING INSTRUCTIONS WARNING: AFTER INSTALLATION, IT IS ESSENTIAL TO TEST THE PVG RAPID SHUTDOWN SYSTEM DURING DAYTIME HOURS WITH ALL INVERTERS STOPPED GENERATING POWER. TO PERFORM THE TEST, MANUALLY PUSH DOWN THE EMERGENCY BUTTON OR DISCONNECT THE AC POWER SUPPLY OF THE PVG CONTROLLER. DURING THE TEST, THE DC VOLTAGE ACROSS ANY PV CONDUCTORS AND BETWEEN ANY PV CONDUCTORS AND GROUND SHOULD DROP TO LESS THAN 30 VDC WITHIN 30 SECONDS. -
Page 16: Pv Panel Monitoring Using Bdg-256 (Optional)
6. PV PANEL MONITORING USING BDG-256 (OPTIONAL) Using BDG-256 gateway, DC current, voltage, power, daily energy, and temperature of each PV panel can be monitored using MICROVIEWER locally, or NEPVIEWER remotely. BDG-256 usage should refer to the BDG-256 gateway manual. 6.1 Connection of BDG-256 and PVG-C: For setup and commissioning of BDG-256 please refer to “Quick Installation Guide BDG-256 Gateway”... -
Page 17: Curve Trace Testing
Northern Electric & Power Inc. (NEP) rapid shutdown devices are unique in that they allow for quick and easy performance of the IV curve trace test on a string level without the need to disconnect each rapid shutdown. NEP achieves this by saving the power state of the device, which allows a small safe current to continue traveling through the string when it is disconnected, powering the devices and running the test. -
Page 18: Step-By-Step Guide
Step-by-Step Guide: The following steps should be followed to perform an IV curve trace with NEP RSDs and Seaward IV Curve Testers: Step 1: Turn On the RSD (if system already commissioned, skip to step 2) · Connect all PV-strings to the inverter. -
Page 19: Data Sheets
8. Data Sheets... -
Page 20: Models And Marking
9.MODELS AND MARKING 9.1 PV Connector Options Manufacturer Male Connector Female Connector Suaubli Electrical Connectors (MC) PV-KST 4/6X-U R PV-KBT4/6X-UR QC Connectors QC4.10 QC4.10 Xietong Connectors PV-XT101.1 (M) PV-XT101.1 (F)` Amphenol UTXCMA4AM UTXCFA4AM 9.2 PVG-1 9.3 PVG-2... -
Page 21: System Mark
10. SYSTEM MARK The following label shall be permanently placed close to the PVG-C remote controller. -
Page 22: Warranty And Production Information
During the Warranty Period, NEP will, at its option, repair the product (if economically feasible) or replace the defective product free of charge, provided that you notify NEP of the product defect within the Warranty Period, and provided that NEP through inspection establishes the existence of such a defect and that it is covered by this Limited Warranty. - Page 23 This warranty does not apply to and NEP will not be responsible for any defect in or damage to: a) the product if it has been misused, neglected, improperly installed, physically damaged or altered, either internally or externally, or damaged from improper use or use in an unsuitable environment;...
-
Page 24: Quick Installation Guide Bdg-256 Gateway
Quick Installation Guide BDG-256 Gateway... - Page 26 Wi-Fi Configuration Guide...
Need help?
Do you have a question about the PVG-1 and is the answer not in the manual?
Questions and answers