Zline ATTAINABLE LUXURY DW7714-18 Installation Manual
Classic dishwasher
Hide thumbs
Also See for ATTAINABLE LUXURY DW7714-18:
- Installation manual and user's manual (48 pages) ,
- Manual (32 pages) ,
- Installation manual and user's manual (28 pages)
Advertisement
Quick Links
Advertisement

Related Manuals for Zline ATTAINABLE LUXURY DW7714-18


Summary of Contents for Zline ATTAINABLE LUXURY DW7714-18
- Page 1 Installation Manual CLASSIC DISHWASHER www.zlinekitchen.com...
- Page 2 ZLINE Kitchen and Bath provides Attainable Luxury, where the kitchen and bath of your dreams is never out of reach. Through our unique designs and unparalleled quality, we’re dedicated to providing you an elevated experience in the heart of your home. With an endless selection of...
- Page 3 ZLINE is fueled by a passion for innovation; A relentless pursuit of bringing the highest end luxury designs and professional features into everyone’s homes. Because we continually strive to improve our products, we may change specifications and designs without prior notice.
- Page 4 TABLE OF CONTENTS IMPORTANT SAFETY INSTRUCTIONS BEFORE INSTALLATION INSTALLATION WARRANTY...
- Page 5 It’s your responsibility to use common sense, caution, and care when installing, maintaining, and operating the dishwasher. ZLINE is not liable for damages resulting from improper use or installation.
- Page 6 • Do not operate the appliance if it’s damaged, malfunctioning, partially disassembled, or has missing or broken parts. If the unit arrives damaged, contact ZLINE at 1-614-777-5004 for help. BASIC PRECAUTIONS BEFORE USE • Read all instructions and precautions in both the installation manual and user manual before using the dishwasher.
- Page 7 IMPORTANT SAFETY INSTRUCTIONS • Do not tamper with the control panel on the dishwasher. • Do not operate your dishwasher unless all enclosure panels are in the proper place. • Do not touch the heating element during or immediately after any washing, sanitizing, or drying cycle to reduce the risk of injury.
- Page 8 BEFORE INSTALLATION ELECTRICAL GROUNDING INSTRUCTIONS • As with all equipment using electricity, water, and moving parts, potential hazards exist. To safely operate this appliance, become familiar with its operation and exercise care when using it. • The dishwasher must be properly grounded. Never connect it to an ungrounded outlet. Prior to removal of the original dishwasher and the installation of your new unit, make sure to switch off your circuit breaker.
- Page 9 BEFORE INSTALLATION • In addition to these instructions, the dishwasher shall be installed in accordance with all local codes, or in absence of a local code: - In the United States, with the National Electric Code ANSI/NPA70- latest edition. - In Canada, with the Canadian Electric Code C22.1-latest edition/ Provincial and Municipal codes and/or local codes.
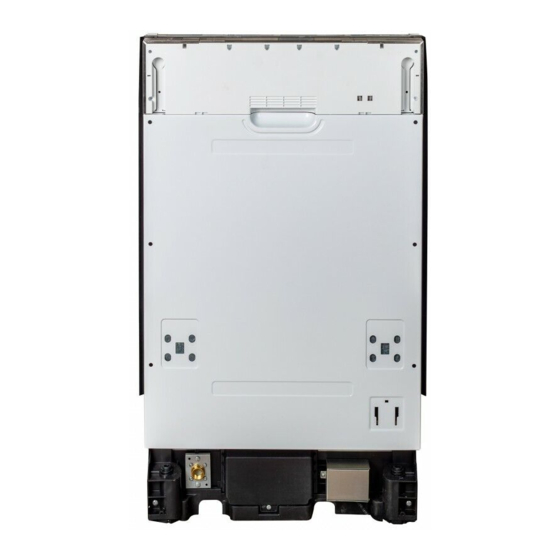
- Page 10 BEFORE INSTALLATION PRODUCT DIMENSIONS The water supply line, power cable, and drain hose should go through the space behind the dishwasher. The power cable and water line run through channels under the dishwasher (see Front View image above) to connections in the front. ENCLOSURE DIMENSIONS This dishwasher is designed to be enclosed on the top and on both sides by a standard residential kitchen cabinet unit.
- Page 11 • Power cable braided line recommended) • Teflon tape or sealing compound • 90° Elbow (3/8 MIP x 3/8 Compression) • Dishwasher panel (sold separately by ZLINE • Tube fittings or custom type supplied by customer) TOOLS REQUIRED (NOT PROVIDED) •...
- Page 12 INSTALLATION Step 2: Select the Best Location for the Dishwasher The following criteria are important to ensure the best location for the dishwasher: • The location must have a solid floor that is able to support the weight of the dishwasher. •...
- Page 13 INSTALLATION Step 3: Check Water Supply Requirements and Cautions • The hot water supply line pressure must be between 20 PSI and 145 PSI. • Adjust the water heater to deliver water between 120°F and 149°F. - The dishwasher must be connected to a hot water supply between 120°F and 149 °F.
- Page 14 INSTALLATION Step 4: Check the Electrical Requirements and Cautions The electrical requirements for the dishwasher are as follows: • In the United States, install in accordance with the National Electric Code/State and Municipal codes and/or local codes. • For cable direct connections. - Use flexible, armored or non-metallic sheathed, copper wire with a grounding wire that meets the wiring requirements for your local codes and ordinances.
- Page 15 INSTALLATION Step 5: Unpacking and Inspecting the Dishwasher Unbox the dishwasher in an open area free of obstruction both around the carton and overhead. We recommend that you retain the carton and all of the packing materials until the dishwasher is fully installed and operational to ensure you have removed all the product’s components from the carton prior to disposal.
- Page 16 Parts Inspection: 1. Confirm you have all the parts listed in Step 1 (see Page 7). NOTE: If the unit arrives damaged or if provided parts are missing, contact ZLINE Customer Service at 1-614-777-5004 for help.
- Page 17 INSTALLATION Step 6: Preparing the Dishwasher Ensure that the circuit breaker and water supply valve are turned off before proceeding with the following steps. 1. Before you move or lay down the dishwasher for installation, adjust the height of the legs so they are as short as possible.
- Page 18 INSTALLATION Step 7: Placing the Dishwasher and Connecting the Hot Water Supply Line 1. Adjust the three leveling legs at the bottom of the dishwasher after measuring the height of the cabinet opening from under the countertop to the floor (see Step 8: Leveling the Dishwasher, page 15).
- Page 19 INSTALLATION Step 8: Leveling the Dishwasher 1. Open the door and place the level against the top of the tub on the inside and check if the dishwasher is level. If it is not level, rotate the leveling legs at the bottom front of the dishwasher until the dishwasher is level.
- Page 20 INSTALLATION Step 9: Securing the Dishwasher • You must secure the dishwasher to the countertop or cabinet side walls for additional stability. • If the countertop is made of wood or a material that will not be damaged by drilling, follow the instructions in Option 1 below.
- Page 21 INSTALLATION Step 9: Securing the Dishwasher, Option 2, Continued Next, put the installation bracket into the slot of the side plane and tighten to the dishwasher with screw ST3.5*9. Then, insert the provided screws into the holes and tighten to secure the dishwasher to the cabinet. See Figure 10 below. Make sure the tub is not distorted by pressure from the screws.
- Page 22 INSTALLATION Step 10: Connecting the Drain Hose 1. Check the parts on the sink where the drain hose will be connected. 2. There are several ways to insert the drain hose into the drain hose connector of the sink, as shown in the following figure. You must connect the drain hose in accordance with the drain pipe installation regulations in your region.
- Page 23 INSTALLATION Step 10: Connecting the Drain Hose Continued • To prevent leaks or drainage problems, make sure the drain hose is not damaged, kinked, or twisted. • Do not cut the corrugated area of the drain hose to fit the size. When arranging the drain hose, use care to avoid contact with sharp edges of the cabinet or under-sink.
- Page 24 INSTALLATION Step 1 1: Electrical Wiring Connections 1. Before connecting the power cable to the dishwasher, make sure the circuit breaker is completely turned off. 2. In the junction box located at the front bottom right of the dishwasher, find the three power wires from the dishwasher, including the green grounding line (Figure 15).
- Page 25 • Refer to the Troubleshooting section of the User Manual to address any error codes. If problems persist, contact ZLINE Customer Service at 1-614-777-5004 for help. Figure 17...
- Page 26 7. Adjust the tension of the door spring. • The door springs are set at the factory to the proper tension of a field installed ZLINE panel. If a custom panel is installed, you will have to adjust the door spring tension.
- Page 27 WARRANTY COVERAGE ZLINE Kitchen and Bath dishwasher products will be warrantied for one year from the original purchase date for the original purchaser of the product. This warranty covers all parts and labor for necessary repairs if any part of the product proves to be defective in materials or workmanship.
- Page 28 WARRANTY WHAT IS NOT COVERED 1. Installation or start-up damages or problems caused by improper installation or use. 2. Damage related to unauthorized service or unauthorized parts. 3. Installation in any commercial or non-residential application. 4. Aesthetic damage, scratches, or natural wear caused by normal use. 5.
- Page 29 For warranty service, please contact our Customer Service team at 1-614- 777-5004 or visit www.zlinekitchen.com/contact to utilize our online Customer Experience Portal. Need to purchase a part or accessory for your ZLINE product? Visit ZLINEparts.com, ZLINE's official parts distribution partner.
- Page 30 2.0.0 www.zlinekitchen.com 1-614-777-5004 contact@zlinekitchen.com...
Need help?
Do you have a question about the ATTAINABLE LUXURY DW7714-18 and is the answer not in the manual?
Questions and answers