Table of Contents
Advertisement
Quick Links
Advertisement
Table of Contents

Subscribe to Our Youtube Channel
Related Manuals for Elation ARENA ZOOM Q7IP


Summary of Contents for Elation ARENA ZOOM Q7IP
- Page 1 ARENA ZOOM Q7IP User Manual...
- Page 2 ©2023 ELATION PROFESSIONAL all rights reserved. Information, specifications, diagrams, images, and instructions herein are subject to change without notice. ELATION PROFES- SIONAL logo and identifying product names and numbers herein are trademarks of ELATION PROFESSIONAL. Copyright protection claimed includes all forms and matters of copyrightable materials and information now allowed by statutory or judicial law or hereinafter granted.
-
Page 3: Table Of Contents
TA B L E O F C O N T E N T S Introduction IP65 Rated Limited Warranty (USA Only) Safety Guidelines Maintenance Guidelines Overview Installation Guidelines Remote Device Management (RDM) System Menu Dimmer Curve Modes DMX Traits Specifications Dimensional Drawings | Optional Accessories... -
Page 4: Introduction
Please do not discard the shipping carton in the trash. Please recycle whenever possible. BOX CONTENTS Power Cable (x1) CUSTOMER SUPPORT Contact ELATION Service for any product related service and support needs. Also visit forums.elationlighting.com with questions, comments or suggestions. -
Page 5: Ip65 Rated
I P 6 5 R AT E D The International Protection (IP) rating system is commonly expressed as “IP” (Ingress Protection) followed by two numbers (i.e. IP65), where the numbers define the degree of protection. The first digit (Foreign Bodies Protection) indicates the extent of protection against particles entering the fixture, and the second digit (Water Protection) indicates the extent of protection against water entering the fixture. -
Page 6: Limited Warranty (Usa Only)
No accessories should be shipped with the product. If any accesso- ries are shipped with the product, Elation Professional shall have no liability what so ever for loss and/or or damage to any such accessories, nor for the safe return thereof. -
Page 7: Safety Guidelines
This fixture is a sophisticated piece of electronic equipment. To guarantee a smooth opera- tion, it is important to follow all instructions and guidelines in this manual. Elation Profes- sional is not responsible for injuries and/or damages resulting from the misuse of this fixture due to the disregard of the information printed in this manual. - Page 8 S A F E T Y G U I D E L I N E S • DO NOT TOUCH the fixture housing during operation. Turn OFF the power and allow ap- proximately 15 minutes for the fixture to cool down before servicing. •...
-
Page 9: Maintenance Guidelines
Regular inspections are recommended to insure proper function and extended life. There are no user serviceable parts inside this fixture. Please refer all other service issues to an autho- rized Elation service technician. Should you need any spare parts, please order genuine parts from your local Elation dealer. -
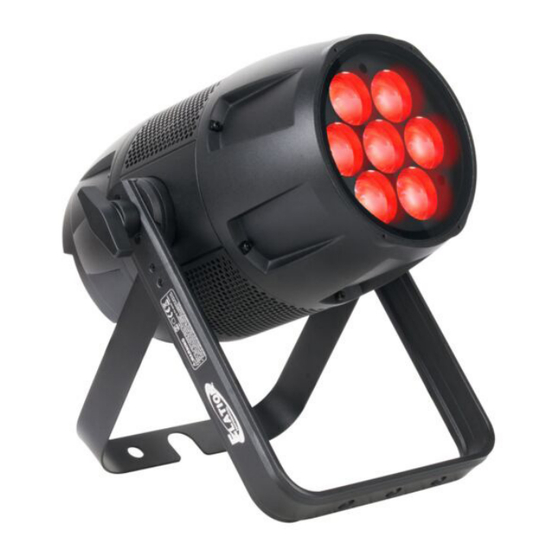
Page 10: Overview
O V E R V I E W 1. OLED Menu Control Display 2. Menu / Up / Down / Enter Buttons 3. IP Rated 5pin DMX In 4. IP Rated 5pin DMX Out 5. Power In 6. Power Out... -
Page 11: Installation Guidelines
I N S TA L L AT I O N G U I D E L I N E S FLAMMABLE MATERIAL WARNING Keep fixture minimum 5.0 feet (1.m) away from flammable materials and/or pyro- technics. ELECTRICAL CONNECTIONS A qualified electrician should be used for all electrical connections and/or installa- tions. - Page 12 • 6units @ 120V • 12 units @ 240V NOTE: Use caution when power linking fixtures of other make and model types, as the power consumption of other fixtures may exceed the maximum output of this Elation fix- ture. CLAMP MOUNTING This fixture includes an adjustable mounting yoke and safety cable rigging point attached to the fixture (see the illustration below).
- Page 13 I N S TA L L AT I O N G U I D E L I N E S RIGGING Overhead rigging requires extensive experience, including calculating working load limits, installation material being used, and periodic safety inspection of all installation mate- rial and the fixture, among other skills.
-
Page 14: Remote Device Management (Rdm)
R E M O T E D E V I C E M A N A G E M E N T ( R D M ) NOTE: In order for RDM to work properly, RDM enabled equipment must be used through- out the entire system, including DMX data splitters and wireless systems. -
Page 15: System Menu
S Y S T E M M E N U The fixture features an easy to navigate system menu. The OLED control panel display (see image below), which is located on the back of the fixture, provides access to the main system menu and is where all necessary system adjustments are made to the fixture. - Page 16 S Y S T E M M E N U ELATION ARENA ZOOM Q7IP SYSTEM MENU Supports Software Versions: > 1.5 Features subject to change without notice. Rotation direction (clockwise/counter-clockwise) and control of effects depend on head orientation and pan/tilt settings.
- Page 17 S Y S T E M M E N U MAIN MENU SUB MENU OPTIONS / VALUES DESCRIPTION Set total number of scenes to use; scenes 1 - 4 set by default as follows: 1 - 50 Total Scenes Scene 1 - Red = 255 (Default = 4) Scene 2 - Green = 255 Scene 3 - Blue = 255...
-
Page 18: Dimmer Curve Modes
D I M M E R C U R V E M O D E S DIMMER 100% Time (ms) 0 Sec Rise Time Down Time 0 sec Fade Time 1 sec Fade Time Dimming Curve Ramp Effect Rise Time (ms) Down Time (ms) Rise Time (ms) Down Time (ms) -
Page 19: Dmx Traits
D M X T R A I T S ELATION ARENA ZOOM Q7IP DMX Channel Traits Supports Software Versions: 1.5 Features subject to change without notice. Rotation direction (clockwise/counter-clockwise) and control of effects depends on head orientation and pan/tilt settings. - Page 20 D M X T R A I T S CHANNEL FUNCTION VALUES 11CH 12CH Color Macros (continued) 155 - 159 LEE 021 - Gold Amber 160 - 164 LEE 778 - Millennium Gold 165 - 169 LEE 135 - Deep Golden Amber 170 - 174 LEE 164 - Flame Red 175 - 179 White 3200K 180 - 201 White 4000K...
- Page 21 D M X T R A I T S NOTES: Zoom Disable/Enable Via DMX: Zoom control via DMX can be disabled such that it can only be controlled via Manual Mode on the OLED menu control panel. • To disable Zoom control via DMX, set DMX channel 6, 7, 8, 9, 11, or 12 to a value of 85-95 and hold this value for a minimum of 5 seconds.
-
Page 22: Specifications
S P E C I F I C AT I O N S SOURCE 7x 30W Osram™ Quad-Color RGBW LEDs 30,000 Hour Average LED Life* *LED Life may vary depending on several factors including but not limited to: Environmental Conditions, Power/Voltage, Usage Patterns (On-Off Cycling), Control and Dimming. PHOTOMETRIC DATA 3,200+ Total Lumen Output Zoom Range 7°... -
Page 23: Dimensional Drawings | Optional Accessories
D I M E N S I O N A L D R A W I N G S Drawings not shown to scale. O P T I O N A L A C C E S S O R I E S ORDER CODE ITEM QUICK RIG CLAMP...
Need help?
Do you have a question about the ARENA ZOOM Q7IP and is the answer not in the manual?
Questions and answers