
Subscribe to Our Youtube Channel
Related Manuals for Wenglor PNBC1 Series


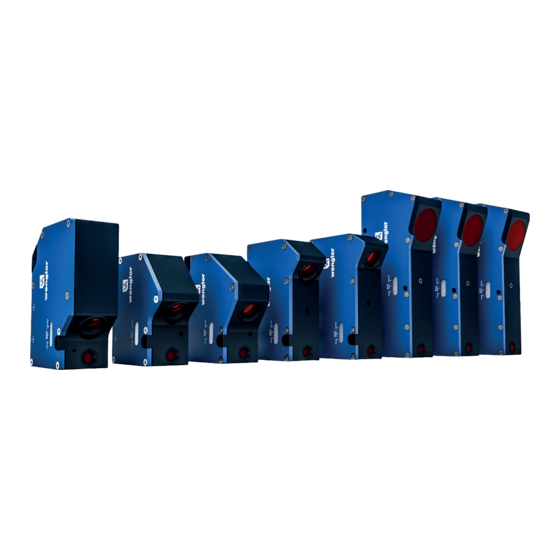
Summary of Contents for Wenglor PNBC1 Series
- Page 1 PNBC1xx Laser Distance Sensors High-Precision Operating Instructions Available as PDF file only Status: 16.03.2023 Version: 1.0.0 www.wenglor.com...
-
Page 2: Table Of Contents
Table of Contents Change Index, Operating Instructions .....................5 General ................................5 Information Concerning these Instructions ..................5 Explanations of Symbols ........................5 Limitation of Liability ..........................6 Copyrights ............................6 For Your Safety ............................7 Use for Intended Purpose ........................7 Use for Other than the Intended Purpose ....................7 Personnel Qualifications ........................7 Modification of Products ........................7 General Safety Precautions .........................8... - Page 3 8.2.3 Surface Damage on the Object to be Measured ..............24 8.2.4 Extraneous Light ........................24 8.2.5 Changes in Remission ......................24 8.2.6 Dependence of Measurement on Angle .................24 Settings ..............................25 Accessing the Website ........................25 Page Layout (website) ........................27 Device Settings (website) ........................29 I/O Settings (website) .........................31 10.
- Page 4 10.4.10 Adjusting Offset ........................41 10.4.11 Protective Screen Compensation ...................41 10.4.12 Encoder Reset ........................41 10.4.13 Encoder Counter Right Shift ....................42 10.4.14 Reset to Default Values ......................42 10.5 I/O Settings ............................42 10.5.1 Selecting the Analog Mode ....................42 10.5.2 Quering the Input Status ......................42 10.5.3 Quering the Input/Output Status of All Inputs/Outputs ............43 10.5.4...
-
Page 5: Change Index, Operating Instructions
• The product is subject to further technical development, and thus the information contained in these operating instructions may also be subject to change. The current version can be found at www.wenglor.com in the product’s separate download area. NOTE! The operating instructions must be read carefully before using the product and must be kept on hand for later reference. -
Page 6: Limitation Of Liability
• wenglor assumes no liability with regard to printing errors or other inaccuracies contained in this operating manual, unless it can be proven that wenglor was aware of the errors at the time the operating manual was created. -
Page 7: For Your Safety
For Your Safety 3.1 Use for Intended Purpose This wenglor product is intended for use in accordance with the following functional principle: Laser Distance Sensor High-Precision This product group includes Laser Distance Sensors High-Precision for measuring distance, which function in accordance with various principles in scanning mode operation. -
Page 8: General Safety Precautions
• In the event of possible changes, the respectively current version of the operating instructions can be accessed at www.wenglor.com in the product’s separate download area. • Read the operating instructions carefully before using the product. -
Page 9: Technical Data
Technical Data PNBC101 PNBC102 PNBC103 PNBC104 Optical Characteristics Working range [mm] 20…24 25…35 40 to 60 58 to 108 Resolution 0.06 µm 0.15 µm 0.3 µm 0.8 µm Linearity deviation 2 µm 5 µm 10 µm 25 µm Reproducibility maximum 4 µm 5 µm 8 µm... - Page 10 PNBC101 PNBC102 PNBC103 PNBC104 Housing material Aluminum Aluminum Aluminum Aluminum Degree of protection IP 67 IP 67 IP 67 IP 67 Connection M12×1, 8-pin M12×1, 8-pin M12×1, 8-pin M12×1, 8-pin Type of connection Ethernet M12× 1, 4-pin M12×1, 4-pin M12×1, 4-pin M12×1, 4-pin Optic cover Glass...
-
Page 11: Surface Effects
PNBC105 PNBC106 PNBC107 PNBC108 Overload protection Teach-in-Modus VT/FT VT/FT VT/FT VT/FT Ethernet TCP/IP Ethernet TCP/IP Ethernet TCP/IP Ethernet TCP/IP Interface EtherCAT EtherCAT EtherCAT EtherCAT Baud rate 100 Mbit/s 100 Mbit/s 100 Mbit/s 100 Mbit/s Protection class Webserver Mechanical Characteristics Setting method Teach-in Teach-in Teach-in... -
Page 12: Wiring Diagram
4.2 Wiring Diagram Pin assignment power supply: Pin assignment Ethernet: Legend Supply Voltage + Not connected Encoder B/ (TTL) RS422 – Supply Voltage 0 V Test Input Encoder A Supply Voltage (AC Voltage) Test Input inverted Encoder B Switching Output (NO) Trigger Input Digital output MIN Ā... -
Page 13: Housing Dimensions
4.3 Housing Dimensions PNBC101 PNBC102 Laser Distance Sensor High-Precision... - Page 14 PNBC103 PNBC104 Technical Data...
- Page 15 PNBC105 PNBC106 / PNBC107 / PNBC108 Laser Distance Sensor High-Precision...
-
Page 16: Sensor Construction
4.4 Sensor Construction = Connector power supply = Connector Ethernet = LED display = Laser exit = Receiver = Thread for fixing the screening grid retainer Technical Data... -
Page 17: Control Panel
No signal, sensor contaminated and/or overranging Link available (TCP/IP) Yellow Link/Act Communication Blinking yellow 4.6 Complementary Products wenglor offers Connection Technology for field wiring. Suitable mounting technology no. Suitable connection technology no. Switch ZAC51xN01 Cooling unit Screening Grid Retainer Screening Grids... -
Page 18: System Overview
System Overview Connection Lines M12, 8-polig to open end ZAS89R201 straight ZAS89R501 straight ZAS89R601 straight 10 m ZAS89R701 straight 20 m ZAS89R202 angled ZAS89R502 angled ZAS89R602 angled 10 m Connection Cables M12, 4-pin ZAV51R201 straight ZAV51R601 straight 10 m M12, 4-pin to RJ45 ZAV51R202 straight ZAV51R602... -
Page 19: Installation Instructions
Screening Grid Sets (optional) ZNBE002 (Plastic) for ZNBS001, ZNBS002; ZNBS003, ZNBS004, ZNBS005 ZNBE003 (Plastic) for ZNBS006 ZNBE004 (Glass) for ZNBS001, ZNBS002; ZNBS003, ZNBS004, ZNBS005 ZNBE005 (Glass) for ZNBS006 Installation Instructions During use of the sensor, applicable electrical and mechanical regulations, standards and safety precautions must be adhered to. -
Page 20: Default Settings
6.1 Default Settings Description Default value IP address 192.168.0.225 Subnet mask 255.255.0.0 Evaluation method Average filter 0 (corresponds to the off state) Sampling rate Auto Output rate 10 kHz Laser Auto Offset 0.0 mm Analog mode 4 to 20 mA Ext. -
Page 21: Function Descriptions
Function Descriptions PNCB Laser Distance Sensors High-Precision work with a high resolution CMOS line array and determine distance by means of an angular measurement at a sampling rate of up to 30 kHz. The sensor is equipped with integrated electronics and no additional controller is required as a result. Ascertained distance values are read out as process data via the interface and at the analogue output with16- bit resolution. -
Page 22: Evaluation Method
8.1 Evaluation method 8.1.1 Center of Gravity (Cog) The Cog evaluation method calculates the peak’s center of gravity, whose×-coordinate is the sought crude result. The peak has to be separated from the “sink” for the purpose of center of gravity analysis, which neces- sitates calculation of the threshold. -
Page 23: Measuring Accuracy And Error Influence
8.2 Measuring Accuracy and Error Influence 8.2.1 Calibration Report A calibration report is included with the sensor, which graphically represents linearity error as a percentage for the measured value on a matte white surface. The following is an example of a calibration report: Calibration Protocol Order Number: PNBC107... -
Page 24: Surface Material
8.2.2 Surface Material Possible objects to be measured include all sorts of materials such as metal, plastic, ceramic, rubber and paper. Suitability for use only needs to be tested individually for highly reflective surfaces and liquids. 8.2.3 Surface Damage on the Object to be Measured A scratch on the surface of the object to be measured which runs perpendicular to the axis of the lens may cause stronger light emissions, whose maxima are located next to the center of the spot. -
Page 25: Settings
(the default IP address is listed in section 6.1). • With the help of w-Teach configuration and display software which is available for download from www.wenglor.com Settings are explained below based on the descriptive example provided by the website which is integrated into the sensor. - Page 26 Settings...
-
Page 27: Page Layout (Website)
In order to be able to access the product’s website (in this example the PNBC102), the IP address must be entered to the browser’s address line as described. Default IP address: 192.168.0.225 The initial page appears with general information concerning the connected sensor. 9.2 Page Layout (website) ... - Page 28 The website is subdivided into the following areas: Language selection The website can be changed from English (default language) to other languages with the language selection function. Status display Measured value Displays the current distance between the edge of the sensor’s housing and the object..
-
Page 29: Device Settings (Website)
9.3 Device Settings (website) Network settings: The IP address and the addresses for the subnet mask and the gateway can be changed in the respective fields. Changes are activated by entering the “admin” password and by restarting the device. Please make sure that the selected subnet mask is actually available within the network. - Page 30 Measured value settings: Evaluation method Functions description (see section 8) Average filter Adjustable, rolling average filter from 1 to 1000 measured values. The smaller the selected value, the faster the measured value reacts to jumps. The larger the selected value, the more smoothed the measured value becomes. Max.
-
Page 31: I/O Settings (Website)
EtherCAT Activate EtherCAT is activated by pressing the "Apply" button. Update Update of EtherCAT interface NOTE! In the EtherCAT operating mode the sensor can only be configured via EtherCAT. The data can only be received via this interface. NOTE! To return from EtherCAT mode to TCP/IP mode, the configuration must be changed via the EtherCAT interface (see section 11). - Page 32 Pin function Switching output The selected output operates as a swiching output External teach-in The switching input can be taught in again by applying an electrical signal Encoder E1+E2 A 2-channel rotary encoder with HTL square-wave signal must be used. Channel A is displaced 90 °...
- Page 33 Teach-in mode Teach-in A function by means of which the sensor is caused to automatically calculate and save future settings based upon currently recorded values by pressing a button or applying a control signal. FT teach-in mode There are two switching points in the case of window teach-in. The distance between (window teach-in) the two switching points is called the window.
- Page 34 Change switching point: Shifts the switching point to the entered distance. In the case of foreground teach-in this is the teach-in dis- tance described above, and in the case of window teach-in it’s the distance to the middle of the window. Switching Hysteresis: Describes the distance between the switch-on and switch-off points.
-
Page 35: Interface Protocol Ethernet Tcp/Ip
10. Interface Protocol Ethernet TCP/IP This section describes the structure and the function of the TCP commands for controlling and configuring the Laser Distance Sensor High-Precision PNBCxxx. The commands are send via the port 3000. After opening the port, the sensor transmits data packets without any further prompting. -
Page 36: Setting Packet Length
10.1.4 Setting Packet Length Command (Set) set_packet_size=x<CR> Command (Get) get_packet_size<CR> Response OK:packet_size=x<CR> Description The desired number of distance values per packet can be selected here. Possible values for “x” include: • 1...450 (continuous measurement) • 1...150 (extended continuous measurement) The entered value remains valid until the data format is changed. The values are then reset to the default values (150/450). -
Page 37: Querying The Manufacturer
10.2.3 Querying the Manufacturer Command get_manufacturer<CR> Response OK:manufacturer=wenglor_sensoric_GmbH<CR> Description The manufacturer is read out. Blanks are replaced by underlines! 10.2.4 Querying the Description Command get_description<CR> Response OK:description=High_Performance_Distance_Sensor<CR> Description The description is read out. Blanks are replaced by underlines! 10.2.5 Querying the Serial Number Command get_serial<CR>... -
Page 38: Setting The Subnet Mask Address
10.3.2 Setting the Subnet Mask Address Command (Set) set_netmask_addr=255.255.0.0<CR> Command (Get) get_net_mask<CR> Response OK:net_mask=255.255.0.0<CR> Description The new subnet mask becomes active after restarting the sensor. 10.3.3 Setting the Gateway Address Command (Set) set_gateway_addr=192.168.0.1<CR> Command (Get) get_gateway<CR> Response OK:gateway_addr=192.168.0.1<CR> Description The new gateway address becomes active after restarting the sensor. 10.3.4 Reset the Network Settings to Default Values Command set_activate_network_default<CR>... -
Page 39: Setting The Sampling Rate
10.4.3 Setting the Sampling Rate Command (Set) set_meas_freq=x<CR> Command (Get) get_meas_freq<CR> Response OK:meas_freq=x<CR> Description The sampling rate is set in Hertz. Possible values for “x” include: 900...30 000 • Depending on the selected value, the measurement rate is set to the closest level (5 000, 10 000, 20 000, 30 000). -
Page 40: Setting Laser Power
10.4.6 Setting Laser Power Command (Set) set_laser=x<CR> Command (Get) get_laser<CR> Response OK:laser=x<CR> Description Laser power can be adjusted in 1/10 mW steps. Possible values: 0: Auto (default setting) 1: (0,1 mW) 10: 1 mW This setting is only active in case of manual laser power regulation (see section 10.4.9) 10.4.7 Exposure Time Command (Set) set_shutter=x<CR>... -
Page 41: Setting Regulation Of Laser Power And Exposure Time
10.4.9 Setting Regulation of Laser Power and Exposure Time Command (Set) set_regulator=x<CR> Command (Get) get_regulator<CR> Response OK:regulator=x<CR> Description Regulation of the exposure time and laser power is set here. Possible values for “x” include: 0: Automatic exposure time regulation AND laser power regulation (default setting) 1: Automatic exposure time , laser power manually adjustable 2: Automatic laser power, exposure time manually adjustable 3: Laser power and exposure time manually adjustable... -
Page 42: Encoder Counter Right Shift
10.4.13 Encoder Counter Right Shift Command (Set) set_enc_right_shift=x<CR> Command (Get) get_enc_rshift<CR> Response OK:enc_rshift=x<CR> Description The scaling factor of the encoder input can be set with this command. Possible values for “x” include: 0: Every encoder pulse is counted 1: Every 2nd encoder pulse is counted 2: Every 4th encoder pulse is counted (default setting) 8: Every 256th encoder pulse is counted 10.4.14 Reset to Default Values... -
Page 43: Quering The Input/Output Status Of All Inputs/Outputs
10.5.3 Quering the Input/Output Status of All Inputs/Outputs Command get_usr_allinputs<CR> Response OK:usr_io_allinputs=0110<CR> Description Reads out the status of all inputs/outputs in the following order: IO4, IO3, IO2 and IO1. Possible values include: 0 and 1. The following applies to the example included above: IO4: 0 (inactive) IO3: 1 (active) IO2: 1 (active) -
Page 44: Setting The Output Function
Description Sets the output mode. Possible values for “x” include: 1: PNP 2: NPN 3: Push-pull 10.5.6 Setting the Output Function Command (Set) set_usrio1_output_function=x<CR> set_usrio2_output_function=x<CR> set_usrio3_output_function=x<CR> set_usrio4_output_function=x<CR> Command (Get) get_usrio1_output_function<CR> get_usrio2_output_function<CR> get_usrio3_output_function<CR> get_usrio4_output_function<CR> Response (e.g. I/O1): OK:usr_io1_output_function=x<CR> Description Configures the output function. Possible values for “x”... -
Page 45: Teaching The Switching Distance (Teach-In)
10.5.8 Teaching the Switching Distance (Teach-in) Command set_usrio1_teach_in=x<CR> set_usrio2_teach_in=x<CR> set_usrio3_teach_in=x<CR> set_usrio4_teach_in=x<CR> Response (e.g. I/O3): OK:usr_io3_switch_dist_mm=87.614<CR> Description A function by means of which the sensor is caused to automatically calculate and save future settings based on momentarily acquired values by pressing a button or applying a control signal. -
Page 46: Setting The Switching Point
10.5.10 Setting the Switching Point Command (Set) set_usrio1_switch_dist_mm=x<CR> set_usrio2_switch_dist_mm=x<CR> set_usrio3_switch_dist_mm=x<CR> set_usrio4_switch_dist_mm=x<CR> Command (Get) get_usrio1_switch_dist_mm<CR> get_usrio2_switch_dist_mm<CR> get_usrio3_switch_dist_mm<CR> get_usrio4_switch_dist_mm<CR> Response (e.g. I/O1): OK:usr_io1_switch_dist_mm=x<CR> Description The switching point is shifted to the entered distance. In the case of foreground teach-in, this is the teach-in distance (see section 10.5.7), while in the case of window teach-in, it is the distance to the middle of the window. -
Page 47: Setting Switching Reserve
10.5.12 Setting Switching Reserve Command (Set) set_usrio1_switch_res_mm=x<CR> set_usrio2_switch_res_mm=x<CR> set_usrio3_switch_res_mm=x<CR> set_usrio4_switch_res_mm=x<CR> Command (Get) get_usrio1_switch_res_mm<CR> get_usrio2_switch_res_mm<CR> get_usrio3_switch_res_mm<CR> get_usrio4_switch_res_mm<CR> Response (e.g. I/O1): OK:usr_io1_switch_res_mm=x<CR> Description Switching reserve describes the clearance between the teach-in distance and the sensor’s switching point. Switching reserve ensures reliable object detection even in the case of slightly fluctuating distances between the objects and the sensor. -
Page 48: Setting The Input Function
10.5.14 Setting the Input Function Command (Set) set_usrio1_input_function=x<CR> set_usrio2_input_function=x<CR> set_usrio3_input_function=x<CR> set_usrio4_input_function=x<CR> Command (Get) get_usrio1_input_function<CR> get_usrio2_input_function<CR> get_usrio3_input_function<CR> get_usrio4_input_function<CR> Response (e.g. I/O1): OK:usr_io1_input_function=x<CR> Description Configures the input function. Possible values for “x” include: 1: Ub active (pending tasks are executed when input voltage is on, default setting) 2: Ub inactive (pending tasks are executed when input voltage = 0 V) 10.5.15 Minimum Intensity Command (Set) -
Page 49: Header And Data Format
10.6 Header and Data Format After opening port 3000, the sensor transmits data packets in the selected data format (exception: peak data, see section 10.6.3). The following data formats are possible: • Continuous distance measurement (default setting) • Extended continuous measurement •... -
Page 50: Continuous Distance Measurement
10.6.1 Continuous Distance Measurement This data format should be used for processes which do not require an encoder. All measured distance values are transmitted uninterruptedly. Designation Offset Length Type Read-out/Comment [bytes] [bytes] Data format unsigned int 17520 Internal Order number (zero-terminated) string PNBC102* Serial number (zero-terminated) -
Page 51: Extended Continuous Measurement (Distance, Intensity, Encoder)
10.6.2 Extended Continuous Measurement (Distance, Intensity, Encoder) This data format should be selected when an encoder is used in the application. In this case, intensity and the encoder value (encoder counter in the PNBC Sensor) are transmitted for each individual measurement in addition to distance values. This makes it possible to obtain an actual position value synchronous to the distance values. -
Page 52: Peak Data
10.6.3 Peak Data This data format is suitable for diagnosis purposes. All 1024 pixel intensities of the sensor’s CMOS line array are transmitted. This data format is not retained after a restart. The sensor is automatically reset to the previously selected format. -
Page 53: Description Of The Measurement Data
10.6.4 Description of the Measurement Data Status: The status is represented as a 7-bit value: Bit 0: Out of range error: intensity or distance is outside of the valid working range Bit 1: Internal peak memory overflow error Bit 2: Sensor FIFO overflow: CPU processing is unable to keep up with the measurement data Bit 3...7: = 0 I/Ox and Laser Status:... - Page 54 Intensity Value: The intensity value is represented as a 16-bit value: Bit 0 to 11: Intensity value (=peak value; 0...4095) Bit 12: Reserved (=0) Bit 13: Reserved (=0) Bit 14: Error bit: intensity too low or too high Bit 15: Error bit: distance outside of working range The following formula for converting the digital value into a percentage is used to obtain the signal strength displayed on the website:...
-
Page 55: Interface Protocoll Ethercat
11. Interface Protocoll EtherCAT The Ethernet interface can be switched from TCP/IP to EtherCAT via the website (see section 9.3). EtherCAT is an industry standard that is real-time capable and offers easy connection to all EtherCAT compat- ible devices. ATTENTION: In the activated EtherCAT mode, the sensor website cannot be called up and no commands can be executed via TCP/IP. - Page 56 Index 0x1c12 - Sync Manager 1PDO Assignment Factory Name of element Data type Access Description index size settings Number of ele- USINT ments Subindex 001 DT1C12ARR 16 Index 0x1c13 - Sync Manager 2PDO Assignment Factory Name of element Data type Access Description index size...
- Page 57 Factory Name of element Data type Access Description index size settings CalcMode UDINT Determination of Peak evaluation method. Values: ▪ 2: COG ▪ 5: Edge LaserActive BOOL Switching the laser on/off. When the pin function of a USRIO ist set to the input function Laser on/ off, then the pin level is dominant.
- Page 58 Factory Name of element Data type Access Description index size settings IP Address * UDINT Used only in TCP/IP mode. #C0A800E1 The new IP address becomes active after restarting the sensor. Input in hex format. Subnet Mask * UDINT Used only in TCP/IP mode. #FFFFFF00 The new subnet mask becomes active after restarting the sensor.
- Page 59 Factory Name of element Data type Access Description index size settings Offset Input of zero point shift. The offset is input as 16 bit value. Conversion of offset from digital to Offset [digits] = Offset [mm] / MeasurementRange × 65536 Values: ▪...
- Page 60 Index 0x5100 - USRIO1 Factory Name of element Data type Access Description index size settings Number of ele- USINT ments Pin Function USINT Selects the Pin function. Values: 0: Switching output 1: External teach-in input for O1 2: External teach-in input for O2 3: External teach-in input for O3 4: External teach-in input for O4 5: Encoder input (I1+I2)
- Page 61 Factory Name of element Data type Access Description index size settings Teach Mode USINT Teach-in mode selection. Foreground teach-in: Teach-in is performed while the sensor is aligned to the object. The teach-in distance is set automatically, so that the sensor switches as soon as the distance between the sensor and the object is less than or equal to the previously taught in distance.
- Page 62 Factory Name of element Data type Access Description index size settings Hysteresis UINT Distance in mm between switch-on and switch-off point. The hysteresis is specified as a 16 bit value. Conversion to mm takes place via MeasurementRange: Hysteresis [digits] = Hysteresis [mm] / MeasurementRange [mm] ×...
- Page 63 Factory Name of element Data type Access Description index size settings Input Function USINT Determintation of input function. Ub active: Pending tasks are execu- ted if Ub = on. Ub inactive: Pending tasks are executed if Ub = 0 V) Values: ▪...
- Page 64 Factory Name of element Data type Access Description index size settings Teach Mode USINT Teach-in mode selection. Foreground teach-in: Teach-in is performed while the sensor is aligned to the object. The teach-in distance is set automatically, so that the sensor switches as soon as the distance between the sensor and the object is less than or equal to the previously taught in distance.
- Page 65 Factory Name of element Data type Access Description index size settings Hysteresis UINT Distance in mm between switch-on and switch-off point. The hysteresis is specified as a 16 bit value. Conversion to mm takes place via MeasurementRange: Hysteresis [digits] = Hysteresis [mm] / MeasurementRange [mm] ×...
- Page 66 Factory Name of element Data type Access Description index size settings Input Function USINT Determintation of input function. Ub active: Pending tasks are execu- ted if Ub = on. Ub inactive: Pending tasks are executed if Ub = 0 V) Values: ▪...
- Page 67 Factory Name of element Data type Access Description index size settings Teach Mode USINT Teach-in mode selection. Foreground teach-in: Teach-in is performed while the sensor is aligned to the object. The teach-in distance is set automatically, so that the sensor switches as soon as the distance between the sensor and the object is less than or equal to the previously taught in distance.
- Page 68 Factory Name of element Data type Access Description index size settings Hysteresis UINT Distance in mm between switch-on and switch-off point. The hysteresis is specified as a 16 bit value. Conversion to mm takes place via MeasurementRange: Hysteresis [digits] = Hysteresis [mm] / MeasurementRange [mm] ×...
- Page 69 Factory Name of element Data type Access Description index size settings Input Function USINT Determintation of input function. Ub active: Pending tasks are execu- ted if Ub = on. Ub inactive: Pending tasks are executed if Ub = 0 V) Values: ▪...
- Page 70 Factory Name of element Data type Access Description index size settings Teach Mode USINT Teach-in mode selection. Foreground teach-in: Teach-in is performed while the sensor is aligned to the object. The teach-in distance is set automatically, so that the sensor switches as soon as the distance between the sensor and the object is less than or equal to the previously taught in distance.
- Page 71 Factory Name of element Data type Access Description index size settings Hysteresis UINT Distance in mm between switch-on and switch-off point. The hysteresis is specified as a 16 bit value. Conversion to mm takes place via MeasurementRange: Hysteresis [digits] = Hysteresis [mm] / MeasurementRange [mm] ×...
- Page 72 Factory Name of element Data type Access Description index size settings Input Function USINT Determintation of input function. Ub active: Pending tasks are execu- ted if Ub = on. Ub inactive: Pending tasks are executed if Ub = 0 V) Values: ▪...
-
Page 73: Maintenance Instructions
GmbH does not accept the return of unusable or irreparable products. Respectively valid national waste disposal regulations apply to product disposal. 14. EU Declaration of Conformity The EU declaration of conformity can be found on our website at www.wenglor.com in the product’s separate download area. Laser Distance Sensor High-Precision...
Need help?
Do you have a question about the PNBC1 Series and is the answer not in the manual?
Questions and answers