
Related Manuals for Wine Enthusiast VinoView L 155 Professional


Summary of Contents for Wine Enthusiast VinoView L 155 Professional
- Page 1 VinoView ® 155 Professional Smart Wi-Fi Wine Cellars Wi-Fi Enabled Use and Care Manual features and sizes may vary please read this manual carefully before installing and operating save these instructions...
- Page 2 A Message from Wine Enthusiast: Thank you for purchasing your wine cellar from Wine Enthusiast. We have been dedicated to developing and offering the best selection of wine products for more than 40 years. Our devoted team of wine experts apply their knowledge and passion to develop high-quality, innovative cellars to protect and showcase wines for every wine drinker.
-
Page 3: Table Of Contents
Table of Contents Important Safeguards ....................................3 Safety Precautions ......................................4 Wine Cellar Features and Use ..................................5 Initial Setup ......................................5 Temperature Adjustment ................................5 VinoView® Shelving (type and number of shelves will vary per model).............6 Removing the Rolling Shelf ................................6 Installation as a Built-In Wine Cellar ..............................7 Installing the Handle .......................................8 Operating Your Wine Cellar ..................................8 Control Panel Display and Icon Glossary ..........................9... -
Page 4: Important Safeguards
Important Safeguards When using this appliance, always exercise basic safety precautions, including the following: 1. Read all of the instructions before using this appliance. 2. This appliance is not intended for use by persons (including children) with reduced physical, sensory or mental capabilities, or lack of experience and knowledge, unless they have been given supervision or instruction concerning use of the appliance by a person responsible for their safety. -
Page 5: Safety Precautions
Safety Precautions Electrical Requirement • Make sure there is a suitable power outlet with proper grounding to power the wine cellar. • Avoid the use of three plug adapters or cutting off the third grounding in order to accommodate a two plug WARNING! outlet. -
Page 6: Wine Cellar Features And Use
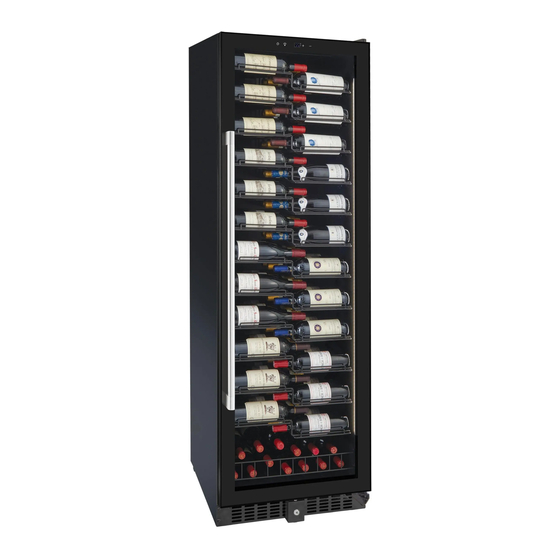
Wine Cellar Features and Use Control Panel LED Lights (Both Sides) Handle 12 VinoView Shelves Storage Bin Front Venting Grill Lock Lockable Casters (2 Front) Initial Setup • Before connecting the wine cellar to the power source, let it stand upright for approximately 24 hours. -
Page 7: Vinoview® Shelving (Type And Number Of Shelves Will Vary Per Model)
VinoView® Shelving 155 Bottles (Type and number of shelves will vary per model) Your wine cabinet was designed with our patented (U.S. Design Patent No. D847,220) VinoView shelving allowing you to showcase your prized wines and easily view your collection. We recommend that you observe the tips below to optimize loading and performance: •... -
Page 8: Installation As A Built-In Wine Cellar
Installation as a Built-In Cellar These cut out dimensions show the minimum space required for your wine cellar to perform as designed, 23½" 26¾" 28¾" 75¾" 75¼" 24½" VI NOVIE W L 1 5 5 PR O F E S SI O N AL MODEL CELLAR DIMENSIONS DIMENSIONS OF BUILT-IN... -
Page 9: Installing The Handle
Installing the Handle 1. Pull back the door seal/gasket behind handle location. 2. Insert screws into pre-drilled screw holes. 3. Attach handle and tighten screws. 4. Press door seal back into place. Gasket Handle Operating Your Wine Cellar Each wine cellar includes an operating panel on the front of the unit. This operating panel includes several features to operate and control the temperature. -
Page 10: Control Panel Display And Icon Glossary
Control Panel Display ºF ºF CURRENT TEMP SET TEMP Icon Glossary CONTROL PANEL TEMP ALERT CALL FOR SERVICE LOCK ºF ADJUST LIGHTING WI-FI COMPRESSOR ADJUST LIGHTING ACTIVE 800.648.6058 WineEnthusiast.com... -
Page 11: Before You Start
Before You Start The wine cellar should be placed in a location where the ambient temperature is between 61-90° Fahrenheit. If the ambient temperature is above or below this range, the performance of the unit may be affected. For example, placing your unit in extreme cold or hot conditions may cause interior temperatures to fluctuate. -
Page 12: Adjusting The Light Intensity
• The thermostat control will click when it cycles on and off. Wi-Fi Pairing • When connecting your VinoView wine cellar to the Wine Enthusiast Cellars Smart Remote App you might need to activate the pairing mode to make a connection. -
Page 13: Installing The App
Read and press ‘ A gree’ . Press ‘Sign Up’ to download the free to the User Agreement create an account. Wine Enthusiast Cellars and Privacy Policy. Smart Remote App. Enter your email address, and Check your email for the Set your password. -
Page 14: How To Connect Your Wine Cellars
How to Connect to Your Wine Cellars Press the ‘ A dd Device’ The App will automatically search The App should list icon on the screen to for an available wine cellar. Discovering Devices. add a new wine cellar. Press ‘ A dd’ on the wine a. - Page 15 How to Connect to Your Wine Cellars (continued) You can view and adjust the temperature by sliding your finger over the wheel. a. Change the temperature display from Fahrenheit to Celsius by pressing the F or C, pressing the LOCK icon. b.
-
Page 16: Technical Data
Technical Data V I N OV I E W L 15 5 PR OF E S SI ON AL Each Unit INSTALLATION T YPE Freestanding or Built-In ELECTRICAL REQUIREMENTS 115 ~ 60Hz PROTECTION CLASS CLIMATE CLASS AMBIENT TEMPERATURE 60°F – 90°F TEMPERATURE CONTROL RANGE 40°F –... -
Page 17: Proper Wine Cellar Care, Cleaning And Maintenance
Proper Wine Cellar Care, Cleaning & Maintenance General • Prepare a cleaning solution of 3-4 tablespoons of baking soda mixed with 2 cups of warm water or use one part Borax for ten parts water (about one cup per gallon). Use sponge or soft cloth, dampened with the cleaning solution, to wipe down your wine cellar. -
Page 18: Troubleshooting Guide
Troubleshooting Guide Many common issues with your wine cellar can be easily solved. Try the troubleshooting tips below if you experience any problems. Wine Cellar Does Not Operate: • Check if wine cellar is plugged in. • Check if there is power in the AC outlet, by checking the circuit breaker. Wine Appears Too Warm: •... -
Page 19: Limited Warranty
Limited Warranty. Exclusion of Certain Damages: Wine Enthusiast’s liability is limited to replacement or repair of the defective wine cellar. Wine Enthusiast shall not be liable for any damages, whether incidental, consequential or otherwise, because of any defective wine cellar. - Page 20 Your Cheat Sheet to Wine Serving Temperatures Too many people pour wine at the wrong temperature destroying its decadent flavors and aromas. Serve your bottlings at perfect temperatures. Here’s everything you need to know. R E CO M M E N DE D ST YLE O F WI N E E X AM PLE SER VI NG TE M PER AT U R E...
Need help?
Do you have a question about the VinoView L 155 Professional and is the answer not in the manual?
Questions and answers
What is the clearance of the shelves? I am going to use the unit for champagne storage, and need to ensure that it can fit all types of champagne bottles.