Oki B411d User Manual
Oki b411d: user guide
Hide thumbs
Also See for B411d:
- Guide utilisateur (157 pages) ,
- Guía del usuario (154 pages) ,
- User manual (82 pages)
Table of Contents
Advertisement
Quick Links
Advertisement
Table of Contents

Related Manuals for Oki B411d


Summary of Contents for Oki B411d
- Page 1 B411 / B431 User’s Guide 59321901 my.okidata.com...
-
Page 2: Copyright Information
The most up-to-date drivers and manuals are available from the web site: http://www.okiprintingsolutions.com Trademark Information Oki is a registered trademarks of Oki Electric Industry Company Ltd. Apple, Macintosh, Mac and Mac OS are registered trademarks of Apple Computers Inc. Microsoft, MS-DOS, Windows,... -
Page 3: Table Of Contents
Interfaces ........66 Printer Drivers ........67 . - Page 4 Operation ........68 Printer settings in Windows..... . .68 Printing preferences in Windows applications .
- Page 5 Feed jam or exit jam ......119 Print quality problems ......128 Paper feed problems .
- Page 6 Notes, Cautions and Warnings Note A note provides additional information to supplement the main text. A caution provides additional information which, if ignored, may result in equipment malfunction or damage. A warning provides additional information which, if ignored, may result in a risk of personal injury. For the protection of your product, and in order to ensure that you benefit from its full functionality, this model has been designed to operate only with genuine original toner...
-
Page 7: Introduction
Introduction Printer features • Four different models to choose from: B411d, B411dn, B431d, B431dn (d denotes Duplex included and n denotes Network Interface Card included). • Memory: 64 MB. • High speed printing: - B411: 40 ppm for Letter and 38 ppm for A4. - Page 8 Additionally, the following optional features are available: • 64 and 256 MB RAM DIMM: to extend the main memory of your printer and speed up the processing of large files. • Second paper tray: to increase your printer’s paper handling capacity by 530 sheets (20-lb. US Bond, 75 g/ m²).
-
Page 9: About This Manual
About This Manual This manual has been written using more than one printer as a model and the illustrations/screenshots reflect this. What you see will be appropriate to the model you are using. Abbreviations Used The following abbreviations are used in this manual:... -
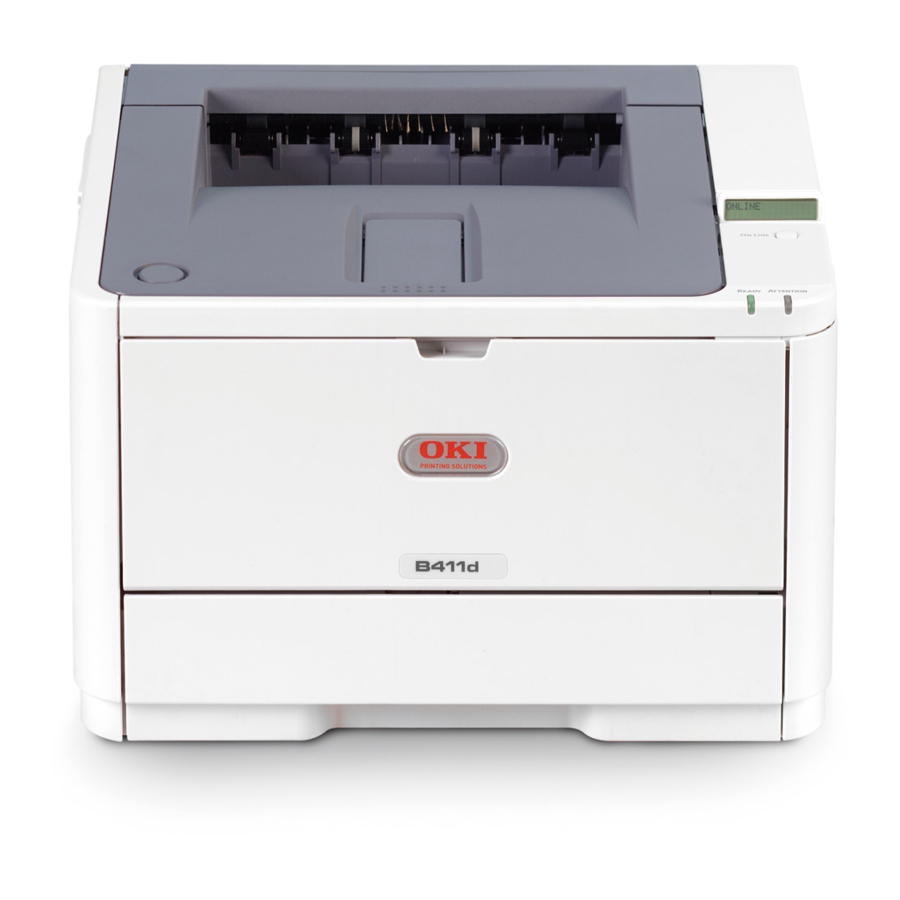
Page 10: Printer Components
Operator panel (B431dn shown) Output Stacker (150 sheets, face down) Output Stacker extension Top cover release button Multi Purpose Tray (only for B431; 50 sheets), shown in open position Multi Purpose Tray extension Paper Tray (250 sheets) 10 > B411/B431 Printer Components... -
Page 11: Interior View
Interior View ON/OFF switch LED array Image drum Manual Feed Tray (only for B411, single sheet feed), (shown in open position Toner cartridge Fuser unit Top cover 11 > B411/B431 Printer Components... -
Page 12: Rear View
Rear View Power cable connection Parallel interface connection USB interface connection LAN interface connection (only for B411dn and B431dn) Memory panel (to upgrade your printer’s memory RAM DIMM) Cooling fan 12 > B411/B431 Printer Components... -
Page 13: Operator Panels
Operator Panels This chapter describes the function of the operator panel on your printer. It is useful to describe the Configuration Tool at this point as it provides the B411 with the equivalent of the menu control panel on the B431.) -
Page 14: B411 Operator Panel
B411 Operator Panel Note For model B431, see page 31 The B411 operator panel consists of 2 indicating LEDs, an LCD (3) and an Online (4) button. The LEDs indicate Ready (1) and Attention (2). 14 > B411/B431 Operator Panels... -
Page 15: Led Indicators
Both LED indicators come on momentarily when power is switched on using the main power switch. Ready LED (green) • Indicator on - the printer is on-line and ready to receive data. • Indicator off - the printer is off-line and cannot receive data. Attention LED (red) •... -
Page 16: Lcd
• Resuming data processing. The secondary functions of the Online button are activated after turning the printer off line, then pressing and holding the switch for four seconds before releasing. The secondary functions are as follows: • Printing the demo and menu pages. -
Page 17: Changing Language
• Resetting the printer and clearing the buffer after printing has been cancelled. Note To reset the printer to the default settings of the manufacturer, the Online button is pressed and held down while the printer is switched on with the main power switch. -
Page 18: Menu Functions
The settings are grouped into categories or “menus” such as Information Menu or Print Menu. Some of these settings are similar to those found in your printer driver or application software. The settings that you can change using this software act as the printer’s defaults. These can be overridden by the settings in your printer driver or application. - Page 19 For example, if you have set the number of copies in the Configuration Tool to one, this will be overridden if you select three copies of your document in the printer driver. 19 > B411/B431 Operator Panels...
- Page 20 Information menu: B411 Configuration Tool This menu provides a quick method of listing various items stored within the printer. ITEM PRINT MENU MAP NETWORK DEMO1 PRINT FILE LIST PRINT PCL FONT PRINT PPR FONT PRINT FX FONT PRINT ERROR LOG USAGE REPORT 20 >...
- Page 21 Print menu: B411 Configuration Tool This menu provides adjustment of various print job related functions. ITEM COPIES DUPLEX MANUAL PAPER FEED AUTO TRAY SWITCH TRAY SEQUENCE MEDIA CHECK RESOLUTION TONER SAVE MODE ORIENTATION LINES PER PAGE EDIT SIZE 21 > B411/B431 Operator Panels DEFAULT TRAY1 DOWN...
- Page 22 Media menu: B411 Configuration Tool This menu provides adjustment to suit a wide range of print media. ITEM TRAY1 PAPERSIZE TRAY1 MEDIATYPE TRAY1 MEDIAWEIGHT TRAY2 PAPERSIZE TRAY2 MEDIATYPE TRAY2 MEDIAWEIGHT MN PAPERSIZE MN MEDIATYPE MN MEDIAWEIGHT UNIT OF MEASURE X DIMENSION Y DIMENSION 22 >...
- Page 23 Syst config menu: B411 Configuration Tool This menu adjusts general printer settings to suit the way you prefer to work. ITEM POW SAVE TIME PERSONALITY CLRABLE WARNING AUTO CONTINUE MANUAL TIMEOUT TIMEOUT INJOB TIMEOUT LOCAL TIMEOUT NET LOW TONER JAM RECOVERY ERROR REPORT 23 >...
- Page 24 PCL Emulation: B411 Configuration Tool This menu controls the printer’s PCL emulation. ITEM FONT SOURCE FONT NO. FONT PITCH SYMBOL SET A4 PRINT WIDTH WHITE PAGE SKIP CR FUNCTION LF FUNCTION PRINT MARGIN PEN WIDTH ADJUST TRAY ID PCL MNID...
- Page 25 PPR Emulation: B411 Configuration Tool This menu controls the printer’s PPR emulation. ITEM CHARACTER PITCH FONT CONDENSE CHARACTER SET SYMBOL SET LETTER O STYLE ZERO CHARACTER LINE PITCH WHITE PAGE SKIP CR FUNCTION LF FUNCTION LINE LENGTH FORM LENGTH TOF POSITION...
- Page 26 FX Emulation: B411 Configuration Tool This menu controls the printer’s FX emulation. ITEM CHARACTER PITCH CHARACTER SET SYMBOL SET LETTER O STYLE ZERO CHARACTER LINE PITCH WHITE PAGE SKIP CR FUNCTION LINE LENGTH FORM LENGTH TOF POSITION LEFT MARGIN FIT TO LETTER TEXT HEIGHT 26 >...
- Page 27 Parallel menu: B411 Configuration Tool This menu controls the operation of the printer’s parallel data interface. ITEM PARALLEL BI-DIRECTION ACK WIDTH ACK/BUSY TIMING I-PRIME USB menu: B411 Configuration Tool This menu controls the operation of the printer’s USB data interface.
- Page 28 Network menu: B411 Configuration Tool This menu controls the operation of the printer’s 10Base-T/ 100Base-TX network interface. NOTE This is applicable to the B411dn network model. ITEM TCP/IP IP VERSION NETBEUI NETWARE ETHERTALK FRAMETYPE IP ADDRESS SET IP ADDRESS SUBNET MASK...
-
Page 29: Printing Menu Settings
Usage menu: B411 Configuration Tool This menu is for information only, and provides an indication of total usage of the printer and the expected life left in its consumable items. This is particularly useful if you do not have a full set of replacement consumables to hand and you need to know how soon you will need them. -
Page 30: Using The Online Button
Press the Online button to take the printer off-line. Press and hold down the Online button for at least four seconds, but less than seven seconds. The printer prints a list of the menu settings and a demo print page. See “Online button” on page 16. -
Page 31: B431 Operator Panel
B431 Operator Panel The B431 operator panel consists of a menu driven control panel (2 through 6), an LCD display (1) and two LED indicators (7, 8). Panel Elements Liquid crystal display. (LCD) panel. Two rows of up to 16 alphanumeric digits displaying print status, menu items in menu mode and error messages. - Page 32 LCD. Note When pressed with DATA displayed (press and hold for five seconds), it forces the printer to print out the remaining data in the printer. Online button. Press to switch between ONLINE and OFFLINE status.
-
Page 33: Menu Functions
These can be overridden by the settings in your printer driver or application. For example, if you have set the number of copies in the printer menu settings to one, this will be overridden if you select three copies of your document in the printer driver. - Page 34 PRINT PCL FONT PRINT PSE FONT PRINT PPR FONT PRINT FX FONT DEMO 1 PRINT ERROR LOG USAGE REPORT Shutdown menu: B431 Printer Menu This menu shuts down the printer. ITEM SHUTDOWN START 34 > B411/B431 Operator Panels ACTION REMARKS EXECUTE EXECUTE...
- Page 35 Print menu: B431 Printer Menu This menu provides adjustment of various print job related functions. ITEM COPIES DUPLEX PAPER FEED AUTO TRAY SWITCH TRAY SEQUENCE MP TRAY USAGE MEDIA CHECK RESOLUTION TONER SAVE MODE ORIENTATION LINES PER PAGE EDIT SIZE 35 >...
- Page 36 Media Menu: B431 Printer Menu This menu provides adjustment to suit a wide range of print media. ITEM TRAY 1 PAPERSIZE TRAY 1 MEDIATYPE TRAY 1 MEDIAWEIGHT TRAY2 PAPERSIZE TRAY2 MEDIATYPE TRAY2 MEDIAWEIGHT MPT PAPERSIZE MPT MEDIATYPE MPT MEDIAWEIGHT UNIT OF MEASURE...
- Page 37 System configuration menu: B431 Printer Menu This menu adjusts general printer settings to suit the way you prefer to work. ITEM POW SAVE TIME PERSONALITY PARA PS-PROTOCOL USB PS-PROTOCOL NET PS-PROTOCOL CLRABLE WARNING AUTO CONTINUE MANUAL TIMEOUT TIMEOUT INJOB TIMEOUT LOCAL...
- Page 38 PCL emulation: B431 Printer Menu This menu controls the printer’s PCL emulation. ITEM FONT SOURCE FONT NO. FONT PITCH SYMBOL SET A4 PRINT WIDTH WHITE PAGE SKIP CR FUNCTION LF FUNCTION PRINT MARGIN PEN WIDTH ADJUST TRAY ID PCL T0ID...
- Page 39 PPR Emulation: B431 Printer Menu This menu controls the printer’s PPR emulation. ITEM CHARACTER PITCH FONT CONDENSE CHARACTER SET SYMBOL SET LETTER O STYLE ZERO CHARACTER LINE PITCH WHITE PAGE SKIP CR FUNCTION LF FUNCTION LINE LENGTH FORM LENGTH TOF POSITION...
- Page 40 FX Emulation: B431 Printer Menu This menu controls the printer’s FX emulation. ITEM CHARACTER PITCH CHARACTER SET SYMBOL SET LETTER O STYLE ZERO CHARACTER LINE PITCH WHITE PAGE SKIP CR FUNCTION LINE LENGTH FORM LENGTH TOF POSITION LEFT MARGIN FIT TO LETTER TEXT HEIGHT 40 >...
- Page 41 Parallel menu: B431 Printer Menu This menu controls the operation of the printer’s parallel data interface. ITEM PARALLEL BI-DIRECTION ACK WIDTH ACK/BUSY TIMING I-PRIME OFFLINE RECEIVE USB menu: B431 Printer Menu This menu controls the operation of the printer’s USB data interface.
- Page 42 ITEM TCP/IP IP VERSION NETBEUI NETWARE ETHERTALK FRAMETYPE IP ADDRESS SET IP ADDRESS SUBNET MASK GATEWAY ADDRESS TELNET SNMP NETWORK SCALE HUB LINK SETTING FACTORY DEFAULTS 42 > B411/B431 Operator Panels DEFAULT ENABLE IPv4 ENABLE ENABLE ENABLE AUTO AUTO xxx.xxx.xxx.xxx xxx.xxx.xxx.xxx xxx.xxx.xxx.xxx ENABLE...
- Page 43 ITEM USAGE REPORT RESET COUNTER GROUP COUNTER CHANGE PASSWORD Maintenance menu: B431 Printer Menu This menu provides access to various printer maintenance functions. ITEM MENU RESET SAVE MENU POWER SAVE PAPER BLACK SET...
-
Page 44: Printing Menu Settings
Usage menu: B431 Printer Menu This menu is for information only, and provides an indication of total usage of the printer and the expected life left in its consumable items. This is particularly useful if you do not have a full set of replacement consumables to hand and you need to know how soon you will need them. -
Page 45: Paper Recommendations
Paper Recommendations For guidance on the media you can use with your printer, which input tray and which ejection method to use, see the section entitled “Paper and tray information” in the “Specifications” chapter. Note The reference to Manual Feed Tray is for the B411 models and the Multi Purpose Tray is for the B431 models. -
Page 46: Transparencies And Adhesive Labels
Use the following guidelines when selecting postcards for use in your printer: • Always manually feed single postcards using the Manual Feed Tray or Multi Purpose Tray, depending on your printer model. • Use unfolded double postcards. • Use postcards designed for use in laser type printers •... -
Page 47: Installing Paper
Installing paper Paper Tray Tray 1 • Paper sizes 4.1 inches x 5.8 inches (105 x 148 mm) to 8.5 inches x 12 inches (216 x 356 mm) • Paper weight: 16-32 lb. US Bond (60-120 g/m²) Optional Tray 2 •... - Page 48 Remove the paper tray from the printer. 48 > B411/B431 Paper Recommendations...
- Page 49 For loading A4 or Legal size paper, push the lever (2) in the arrow direction and extend the paper tray using the rear paper support. Note Load letterhead paper face down and top edge towards the front of the paper tray. 49 >...
- Page 50 Adjust the side paper guides. It is important to adjust the paper guides correctly to ensure that the paper is not skewed in the print process. Paper jams may occur if this operation is not carried out correctly. 50 > B411/B431 Paper Recommendations...
- Page 51 Place paper in the tray, keeping the level of the paper in the tray below the paper full guide arrowheads shown on the paper guides (1). 51 > B411/B431 Paper Recommendations...
-
Page 52: Automatic Feed Sequence
Replace the tray in the printer. Note If you have the optional second paper tray (Tray 2) and you are printing from the first (upper) tray (Tray 1), you can pull out the second (lower) tray to reload it. However, if printing from the second (lower) tray, do not pull out the first (upper) tray as this will result in a paper jam. -
Page 53: Multi Purpose Tray (B431)
Multi purpose tray (B431) Open the rear exit path (see page 60). 53 > B411/B431 Paper Recommendations... - Page 54 Pull down the Multi Purpose Tray (1), slide out the paper support (2), and flip open the support extension. 54 > B411/B431 Paper Recommendations...
- Page 55 Do not exceed the paper capacity of approximately 50 sheets or 10 envelopes depending on the media weight. • For single-sided printing on headed paper load the paper with the pre-printed side up and top edge into the printer. 55 > B411/B431 Paper Recommendations...
- Page 56 • Envelopes should be loaded flap down, face up with the top edge to the left and short edge into the printer. Note Do not select Duplex printing on envelopes.
-
Page 57: Manual Feed Tray (B411)
Manual feed tray (B411) Open the rear exit path (see page 60). 57 > B411/B431 Paper Recommendations... - Page 58 • Envelopes should be loaded flap down, face up with the top edge to the left and short edge into the printer. Note Do not select Duplex printing on envelopes.
-
Page 59: Paper Exit Paths
Note > You can also set the media type in your printer driver. However, the printer driver settings will override the settings on the control panel or Configuration Tool. >... - Page 60 Feed Tray, Multi Purpose Tray or for heavyweight stocks to reduce the possibility of paper jams. • The paper exits from the rear of the printer. • Provides straight-through paper path for heavyweight stock (28 to 32 lb. US Bond [105-120 g/m²]).
-
Page 61: Setting The Paper Feed, Size And Media
To open the rear exit: Setting the Paper feed, size and media The process used to fuse (fix) the printed image to the paper involves a mixture of pressure and heat. Too much heat will cause lightweight paper to crease or curl and corrugations in 61 >... -
Page 62: B411
Too little heat will cause the image not to fuse fully into heavyweight paper. Note Although media properties can be set in the printer driver for particular jobs, when filling a tray with media it is recommended that you manually set the printer to match the media as described here. -
Page 63: B431
B431 Using the control panel on your B431 printer, you can choose: • which paper to use • the size of the paper you wish to use • the weight of the paper (thickness) • the type of paper Note >... - Page 64 Press the Cancel or Online or the Back button repeatedly to exit the MENU mode. Select the correct paper settings in the printer driver before printing the file. Media type and weight Set media type and weight as follows:...
- Page 65 Press the Cancel or Online or the Back button repeatedly to exit the MENU mode. Select the correct paper settings in the printer driver before printing the file. 65 > B411/B431 Paper Recommendations...
-
Page 66: Interfaces
If you are connecting your printer directly to a stand alone computer proceed to the chapter entitled “Printer Drivers”. If your printer is to be installed as a network printer, please refer to the relevant section in the User’s Guide for the network interface card for further details on how to configure the network connection before installing the printer drivers. -
Page 67: Printer Drivers
Printer Drivers The printer drivers are all contained on the CD-ROM supplied with your printer. See the Setup Guide for information on installing the drivers and utilities for your printer. Please refer to the readme file on this CD for the latest information on printer driver installation. -
Page 68: Operation
The Windows printer driver also contains settings for many of these items. Where items in the printer driver are the same as those in the operator panel and Configuration Tool menus, and you print documents from Windows, the settings in the Windows printer driver will override those settings in the operator panel and Configuration Tool menus. -
Page 69: Pcl Emulation
(unless you wish to scale the printout to fit another size), and should also be the same as the size of paper you will feed into the printer. You can choose the source of the paper to feed, which... - Page 70 US Bond [124 g/m²]). Under manual 2-sided Printing choose 2-sided printing (duplex printing) to carry out manual duplex printing. You must pass the paper through the printer twice. For more information, see page 83. The Duplex Help button also offers guidelines on how to carry out manual duplex printing.
- Page 71 In Raster (bitmap) mode, processing of the page image is done in the computer leaving little processing for the printer to do, although the file size may be large. In Vector mode, file sizes may be smaller and so transmission over a network, for example, may be faster.
-
Page 72: Ps Emulation (B431)
Image tab Dithering produces an intermediate greyscale by adjusting the combination of dots used in printing. Selecting a setting determines the degree of detail with which a graphics image will be printed. Mesh determines that a screen of dots is used for dithering while Line Art determines that an array of lines is used for dithering. -
Page 73: Layout Tab
Layout tab My Printer Printing Preferences Page orientation can be set to portrait (tall), landscape (wide) or landscape rotated by 180 degrees. Print on both sides (duplex printing) can be set to long edge or shirt edge of the document. - Page 74 My Printer Advanced Options Select the required printed paper size. You can substitute another font for TrueType Font. You can set other document options as required, including PostScript options and printer features. 74 > B411/B431 Operation...
- Page 75 Paper/Quality tab You can set the paper source or leave it as automatic selection and by using the Advanced button you have access to the same set of options as described above for the Layout Tab. 75 > B411/B431 Operation...
- Page 76 Job options tab The output resolution of the printed page can be set as follows. • The High Quality setting prints at 600 x 2400 dpi or 600 x 1200 dpi for B411, and 1200 x 1200 dpi for B431 and is the best option for printing vector objects such as graphics and text.
-
Page 77: Setting From Windows Control Panel
You can print watermark text behind the main page image. This is useful for marking documents as draft, confidential, etc. If you would like to print on special stationery, such as forms and letterhead, but do not want to use pre-printed stationery, you can create your own using Overlays (for B431). - Page 78 Changes you make here, however, will become the new default settings for all Windows applications. This button prints a test page to ensure that your printer is working. Note The above features are provided by the Windows XP operating system and will vary with other operating systems.
- Page 79 Advanced tab My Printer Properties You can specify which times of day your printer will be available. Indicates current priority, from 1 (lowest) to 99 (highest). Highest priority documents will print first. Specifies that documents should be spooled (stored in a special print file) before being printed.
- Page 80 If a mismatch is detected, the document is held in the print queue and does not print until the printer setup is changed and the document restarted from the print queue.
- Page 81 Note The above features are provided by the Windows XP operating system and will vary with other operating systems. Device options tab In this window you can select which optional upgrades are installed on your printer.
-
Page 82: Printer Settings In Macintosh
You can make a variety of font settings depending on your application. You can set which optional upgrades are installed on your printer. See the chapter entitled “Installing options”. Printer settings in Macintosh Refer to the readme file on the driver CD and the online help provided in the driver software. -
Page 83: Auto Versus Manual Duplex Printing
The built-in duplex unit adds the function of two-sided printing, using less paper and making large documents easier to handle. It also enables booklet printing, which uses even less paper. This printer has the option of Auto Duplex and Manual Duplex printing. Note The steps in the process relate to Windows XP PCL. -
Page 84: Manual Duplexing: Model B431
• Usable paper sizes: - letter, Executive, Legal 13, Legal 14, Statement (5.5 x 8.5'') - A4, A5, B5, A6 - Custom: width 3.5 to 8.5 inches (90 – 216 mm), length 5.8 to 14 inches (148 – 356 mm) •... - Page 85 If you require further information, click the duplex help button. Click the Print button. 85 > B411/B431...
-
Page 86: Overlays And Macros (Windows Only)
You can use PostScript overlays to generate all your special stationery and store it in the printer for use whenever you need it. If you have chosen to install the PCL driver, macros perform a similar function. -
Page 87: Creating The Overlay Image
Close your application. Create and download the project From the Windows Start menu, start Storage Device Manager (SDM) and allow SDM to discover the printer. Choose Projects→New Project. Choose Projects > Add File to Project. Set the Files of Type drop-down list to PRN Files(*.prn). -
Page 88: Test Printing The Overlay
You can have more than one printer (.PRN) file in a project. For example, one for top pages and another for continuation pages. Use standard Windows techniques (Shift or Ctrl keys) to select multiple files simultaneously if you need to. -
Page 89: Defining Overlays
If you forgot to note the overlay names when you created them, you can find them using Storage Device Manager to view the project file, or the printer’s Information Menu to print a file list and identify them from there. -
Page 90: Printing With Postscript Overlays
Open your application’s Print… dialogue and choose any options you will require, ensuring that the target printer is your PostScript printer driver in which the overlays have been defined. Click the Properties button to open the Printing Preferences window. -
Page 91: Creating Pcl Overlays
(.PRN) file. Use the Storage Device Manager utility software supplied on CD with your printer to create a “project file,” import the .PRN file, and download the generated filter (.BIN) files to the printer. - Page 92 OK to clear the message. The project window will display one .BIN file for each printer file added. Make a careful note of the name and ID number for each of the files. You will need them later.
-
Page 93: Test Printing The Macro
Choose Printers > Test Macro. In the Test Macro window, enter its ID number and click OK. After a short pause the printer will print the macro. When each macro has been tested, click Exit. Click the standard Windows Close (X) button, or choose Projects→... -
Page 94: Printing With Pcl Overlays
Open your application’s Print… dialogue and choose any options you will require, ensuring that the target printer is your PCL printer driver in which the overlays have been defined. -
Page 95: Print Button
On the Overlay tab, check the Use active overlays checkbox (1). In the Defined Overlays list, click on the first overlay (2) you wish to use, and click the Add button (3) to add it to the Active Overlays list. (If you want a reminder of how this overlay looks, click the Test Print button.) -
Page 96: Consumables And Maintenance
4000 pages. Remember, this is only an average:actual results may vary. The first toner cartridge installed in a new printer has to fill the image drum reservoir and saturate the developing roller with toner. -
Page 97: Replacing The Toner Cartridge
It is recommended that you clean the LED array at the same time as you change the toner cartridge. The toner used in this printer is a very fine dry powder contained in the toner cartridge. Have a sheet of paper handy so that you have somewhere to place the used cartridge while you install the new one. - Page 98 Switch off the printer and allow the fuser to cool for about 10 minutes before opening the top cover. If the printer has been powered on, the fuser may be hot. This area is clearly labelled. Do not touch. Press the top cover release button and open the printer’s top cover fully.
- Page 99 Pull the colored lever (1) on the right side of the toner cartridge towards the front of the printer to close the cartridge then remove the used toner cartridge (2). Clean the top of the ID unit (3) with a clean, lint free cloth.
- Page 100 Remove the wrapping material and peel off the adhesive tape from the underside of the cartridge. Holding the cartridge by its top center with the colored lever to the right, lower it into the printer over the image drum unit from which the old cartridge was removed.
- Page 101 Insert the left end of the cartridge into the image drum unit. Align it against the pins (1) on the drum unit. Then lower the right end of the cartridge down into the image drum unit (2). 101 > B411/B431 Consumables and Maintenance...
- Page 102 Pressing gently down on the cartridge to ensure that it is firmly seated, push the colored lever (1) towards the rear of the printer. This will lock the cartridge into place and release toner into the image drum unit. 102 > B411/B431 Consumables and Maintenance...
- Page 103 Gently wipe the LED array surface with a soft tissue. Lower the top cover and press it down to latch it closed. 103 > B411/B431 Consumables and Maintenance...
-
Page 104: Image Drum Life
It is recommended that you change the toner cartridge and clean the LED array at the same time as you change the image drum. > The B431 model has been illustrated below. The principles are the same for the B411 printer. 104 > B411/B431 Consumables and Maintenance WARNING... - Page 105 Press the cover release and open the printer’s top cover fully. If the printer has been powered on, the fuser may be hot. This area is clearly labelled. Do not touch. 105 > B411/B431 Consumables and Maintenance WARNING!
- Page 106 5 minutes. If the drum unit needs to be out of the printer for longer than this, please wrap the cartridge inside a black plastic bag to keep it away from light.
- Page 107 With the colored toner release lever (1) to the right, pull the lever towards you. This will release the bond between the toner cartridge and the image drum unit. Lift the right-hand end of the toner cartridge and then draw the cartridge to the right to release the left-hand end, and withdraw the toner cartridge out of the image drum cartridge.
- Page 108 Push the colored release lever (1) away from you to lock the toner cartridge onto the new image drum unit and release toner into it. 108 > B411/B431 Consumables and Maintenance...
- Page 109 Holding the complete assembly by its top center, lower it into place in the printer locating the pegs (1) at each end into their slots in the sides of the printer cavity (2). 109 > B411/B431 Consumables and Maintenance...
- Page 110 Gently wipe the LED array surface with a soft tissue. Lower the top cover and press it down to latch it closed. 110 > B411/B431 Consumables and Maintenance...
-
Page 111: Generating A Cleaning Page
B411 Press the Online button to take the printer OFF LINE. Open the Manual Feed Tray and insert a sheet of Letter/A4 plain paper between the paper guides. For loading... -
Page 112: B431
B431 Pull down the Multi Purpose Tray (1), slide out the paper support (2), and flip open the support extension (3). 112 > B411/B431 Consumables and Maintenance... - Page 113 Adjust the paper guides to the width of the paper. Insert a sheet of Letter/A4 plain paper between the paper guides and push the colored set button to engage the tray. Press the Menu ▲ or ▼ button repeatedly until MAINTENANCE MENU is displayed, then press the OK button.
- Page 114 Press the OK button. The printer prints a cleaning page. Press Cancel or Online or the Back button repeatedly to exit the Menu mode. The printer should now be ON LINE. If subsequent printing appears faded or uneven, try replacing the toner cartridge.
-
Page 115: Cleaning The Led Array
Clean the LED array whenever a new toner cartridge is installed or if there are faded vertical areas or light printing down a page. Switch off the printer and allow the fuser to cool for about 10 minutes before opening the top cover. - Page 116 Wipe the LED array gently with a soft tissue. Lower the top cover and press it down to latch it closed. 116 > B411/B431 Consumables and Maintenance...
-
Page 117: Troubleshooting
Jams can occur due to paper mis feeding from a paper tray or at any point on the paper path through the printer. When a jam occurs, the printer immediately stops, and the operator panel informs you of the event. - Page 118 The printer may experience a paper jam in one of three areas. INPUT JAM - paper has failed to leave the selected feed tray and enter the internal paper path of the printer. A typical message indicates a paper jam and identifies the tray to check.
-
Page 119: Input Jam
Input jam Remove the paper tray from the printer. Remove any crumpled or folded paper. remove any paper from the underside of the printer. Replace the paper tray. After successful removal of any damaged or misfed paper, the printer should continue printing. - Page 120 Press the cover release and open the printer’s top cover. WARNING! If the printer has been powered on, the fuser area will be hot. This area is clearly marked. Do not touch CAUTION! Never expose the image drum unit to light for more than 5 minutes.
- Page 121 Carefully lift out the image drum, complete with the toner cartridge. Be careful not to touch or scratch the green drum surface. Put the assembly down gently onto a piece of paper to prevent toner from marking your furniture and to avoid damaging the green drum surface, and cover.
- Page 122 Remove any jammed sheets from the paper path. 122 > B411/B431 Troubleshooting...
- Page 123 Remove the Duplex unit and check for any paper in this area. 123 > B411/B431 Troubleshooting...
- Page 124 Remove any paper and replace the duplex unit. 124 > B411/B431 Troubleshooting...
- Page 125 Re-install the image drum complete with toner cartridge, ensuring that the pegs (1) correctly locate into the slots on each side of the printer (2). Lower the top cover but do not press down to latch it closed yet. This will protect the drum from excessive exposure to room lighting, while you check the remaining area for jammed sheets.
- Page 126 Lift the rear cover latch (1), open the rear cover and check for paper in the rear path. • Pull out any paper found in this area. • If you are not using the rear cover, close it once the paper is removed from this area.
- Page 127 B411: Open the Manual Feed Tray and remove any paper that you find. B431: Open the Multi Purpose Tray and remove any paper that you find. Close the tray. Press down to latch the top cover closed. 127 > B411/B431 Troubleshooting...
-
Page 128: Print Quality Problems
The printer will warm up and commence printing when ready. The page lost through the jam will normally be reprinted. Note If the edge of the jammed paper protrudes (or can be seen) from the exit, reinstall the image drum, close the top cover and switch the printer on. - Page 129 LED array is dirty. Distorted Paper path, lamp print. assembly, or fusing unit problem. Smeared or Dirty rollers; toner blotched dropped inside printer or print. image drum problem. Printed page Is toner low? is light/ blurred. Is paper meant for laser printers? LED array is dirty.
- Page 130 SYMPTOM PROBLEM Print is darker Darkness setting is too than usual. high. Pages curl Printing on wrong side of excessively. paper. Moisture in paper. Improper storage. High humidity. 130 > B411/B431 Troubleshooting SOLUTION Change darkness setting. Turn paper over in tray. (Note arrow on paper package).
-
Page 131: Paper Feed Problems
Paper feed problems SYMPTOM PROBLEM Paper Jams The printer is tilted. occur frequently. Paper is too thick or too Multiple thin. Paper is moist, sheets of folded, creased or warped. paper are fed at the same time. Paper is not aligned. - Page 132 SYMPTOM PROBLEM Paper is not Improper setting is fed into the selected for Paper Source printer. in the printer driver. The printer menu setting is incorrect. Printing does Printing does not resume not resume only by removing paper after jam.
-
Page 133: Software Problems
Software problems Your software (operating environment, applications and printer drivers) controls the printing process. Make sure you have selected the right driver for use with your printer. See your software documentation for more information. SYMPTOM PROBLEM Printing is Incorrect driver is installed. - Page 134 Garbage Incorrect cable prints. configuration. Also, see Software Problems. Printer freezes Booting the computer while or displays the printer is on can cause error message a communications error. when computer is rebooted. Odors. Gases are given off by forms or adhesives passing through the hot fusing unit.
-
Page 135: Options
• 64 and 256 MB RAM DIMM: to extend the main memory of your printer and speed up the processing of large files • Second paper tray: to increase your printer’s paper handling capacity by 530 sheets (75g/m²) -
Page 136: Specifications
Resolution Operating platform Emulations Interfaces Processor Memory Printer/Fuser life 136 > B411/B431 Specifications SPECIFICATION 14.5 x 15.5 x 10.5 inches (369 mm x 395 mm x 268 mm ) 22.7 lbs. (10.3 kg) approximately (without second tray) Electro-photographic printing using LEDs as... - Page 137 ITEM Toner life Image drum life Paper sizes Paper feed Paper feed capacity at 20 lb. US Bond (75 g/m²) Paper output Power consumption Paper output capacity at 20 lb. US Bond (75 g/ m²) 137 > B411/B431 Specifications SPECIFICATION Starter: 2,000 pages Replacement: (ISO/IEC19752) B411: 4,000 pages...
- Page 138 Standby mode: 30 dB(A) Power saving mode: Background level Operation: 50 to 89°F (10 - 32°C), 20% - 80% Storage: 50 to 109°F (10-43°C), 10% - 90% When the printer is stored, it should be in its original packaging, with no moisture formation.