
Related Manuals for Novation REMOTE25SL


![Recording Equipment Novation Launchpad Mini [MK3] User Manual](https://static-data2.manualslib.com/product-images/282/1649453/60x60/novation-launchpad-mini-mk3-.jpg)


Summary of Contents for Novation REMOTE25SL
- Page 1 Copyright: Novation E.M.S Limited 2003 ReMOTE User Guide Version 1.5 Features and specifications subject to change without notice due to improvements www.novationmusic.com...
-
Page 2: Table Of Contents
CONTENTS Introduction... Using This Manual... Main Features... Conventions Used In This Manual... Quick Start Guide... Getting Started - Connecting Up to equipment using MIDI... Power Supply and Battery Operation... Connecting to a Computer System using USB... Installing the USB driver Software... Connecting to a Computer Using the USB Port... -
Page 3: Introduction
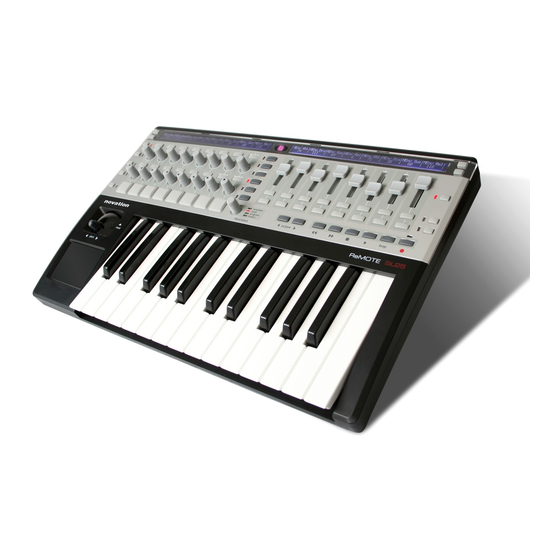
Using This Manual - Main Features Thank you for purchasing the Novation ReMOTE 25 controller keyboard. This device may be used to con- trol sequencers, popular software virtual instrument applications on a computer or traditional hardware instruments via either a USB connection or a standard MIDI interface. The ReMOTE 25 front panel pro- vides a wealth of programmable controls, each of which can be configured to exactly suit your needs and stored within a Template memory for later instant recall. -
Page 4: Conventions Used In This Manual
INTRODUCTION Conventions Used In This Manual Conventions Used In This Manual The word ‘Template’ refers to a collection of knobs, encoders and button settings and the function of the footswitch, pedal and X-Y touchpad. Each Template is numbered from 1 to 64 and can be saved in the ReMOTE 25’s non-volatile memory. -
Page 5: Quick Start Guide
MIDI port 1 If batteries are not fitted then an external power supply (Novation PSU6) must be connected - See next page for battery information. Connect any other devices such as pedals to the ReMOTE 25. Switch on the power to all devices. -
Page 6: Power Supply And Battery Operation
(See Appendix), if so, fit as described on page 10. Press the PLAY mode button. Power Supply or Battery operation The ReMOTE 25 may be powered by an external Power Supply (Novation PSU6) or by batteries. It will run on all types of ‘C’ size dry or re-chargeable cells. -
Page 7: Connecting To A Computer System Using Usb
Click 'Next'. A dialogue box will inform: 'search for the best driver for your device (recommended)' already optioned. Click 'next'. Insert the Novation driver CD into the CD-ROM drive of the computer. Tick the 'CD-ROM' option and 'spec- ify location' option. In the space below 'specify location' Type in the drive letter appropriate for your CD- ROM drive letter followed by a colon. - Page 8 Windows XP Installation Insert the Novation driver CD into the CD-ROM drive of the computer. A small balloon may pop up for a short time in the corner of the taskbar (depending on Windows XP settings) and a dialogue box will open on titled ‘Found New Hardware Wizard’.
-
Page 9: Connecting To A Computer Using The Usb Port
Connecting to a Computer Using the USB Port 2 Connection to a Computer System using the USB Port The illustration below shows a typical arrangement. - note the simplicity! The USB cable will already be connected. Connect expression and sustain pedals if required. Expression Pedal ReMOTE 25 Rear Panel... -
Page 10: Connecting To Midi And A Computer Using The Usb Port
QUICK START GUIDE 3 Connecting to equipment using MIDI In and Out AND connecting to a computer using the USB port This is an advanced setup where the ReMOTE 25 is connected to two external sound modules using both the MIDI 1 and MIDI 2 ports as well as being connected to a computer via USB. Sound Module 1 MIDI In... -
Page 11: Using Preset Template Labels
Using Preset Templates Using Preset template Labels A total of twenty sets of template labels are supplied with the ReMOTE 25. Seventeen sets are preprinted for use with popular software and hardware devices and three sets are blank which can be customised (written, using a pen or pencil) for use with any setup - For a complete list, see the Appendix. - Page 12 It is this grouping of more than one template memory that allows for fast editing of numerous controls. There are three such template memories, 1 2 and 3, for the Novation V Station. Locate template No. 1 V Station as shown above. Play Mode must be selected to view the realtime values of any control being moved.
- Page 13 Using Preset Templates Rotate any of the first four encoders as shown in the illustration and notice how the realtime values of the controls are displayed. Rotate the first encoder and the display will appear similar to illustration below. The V Station sofware synthesizer has three sets of oscillators OSC 1 OSC 2 and OSC 3. The current template memory (V Station 1) only allows access to the first oscillators, (OSC 1) controls.
-
Page 14: Using The Programmable Template Controls
QUICK START GUIDE When using a Template, it often necessary to be able to quickly change the MIDI channel of all controls in the current template to match the receive channel of the connected MIDI device. (This is the case for example when using a VST software instrument and each instance has a different MIDI channel) A convenient way of doing this when in Play Mode is by using the CURSOR buttons located beneath the display. -
Page 15: Sending A Snapshot Of The Controls
Sending a Snapshot of the controls The screen display when a control moved is slightly different for buttons using MMC : This is similar to the normal display shown when other types of MIDI information are transmitted, except that the top line displays the type of MMC command defined, while the bottom line at the left is the MMC number of the command defined for the button. -
Page 16: Selecting A Sound On External Midi Devices
QUICK START GUIDE Selecting a Sound on External MIDI Devices In Play Mode, it is possible to select sounds on external MIDI devices directly by using the DATA / VALUE encoder and the PAGE UP / DOWN buttons. Use the DATA / VALUE encoder to transmit a MIDI Bank Select message to a MIDI device. When the DATA / VALUE encoder is moved, the display shows : and a Bank Select message is immediately sent. -
Page 17: Midi Tutorial
Introduction - How MIDI Ports Are Used Introduction MIDI is an acronym for Musical Instrument Digital Interface. The MIDI standard was devised in the early 80’s as a means for allowing musical instruments to communicate with each other as well as with other devices such as sequencers and computers. -
Page 18: Midi Messages
Many Control Change numbers have no set purpose within the MIDI specification. For example, whenever a Novation K-Station’s Filter FREQUENCY knob is moved, it will transmit using CC109. There is no guar- antee however that other makes of synthesizer will use this control change number for the same purpose. -
Page 19: Midi Messages
MIDI Messages Non-Registered Parameter Messages Some synthesizers (such as the Novation K-Station) actually have many more than 128 different parame- ters that can be transmitted by MIDI, but because the number of different types of control change message is limited to just 128, a more complicated arrangement for transmitting additional parameters is used. This arrangement is known as Non-Registered Parameter Numbers (NRPNs for short). - Page 20 When the MIDI specification was originally designed, this was rarely a problem since synthesizers seldom had more than 128 memories. Modern synthesizers such as the Novation K-Station offer many more mem- ories than this (the K-Station for example, actually has 400 memories divided into four ‘banks’ of 100 mem- ories each), so it is often convenient to send a MIDI program change preceded by an additional MIDI mes- sage which specifies which ‘bank’...
- Page 21 MIDI. The latest operating system for the ReMOTE 25 is always available free of charge at the Novation web site. From there, it can be downloaded as an SMF (Standard MIDI File). See page 48 for details.
-
Page 22: Main Features And Operation
MAIN FEATURES AND OPERATION octave pitch 9 10 1. Eight Programmable Knobs 2. Eight Programmable Rotary Encoders 3. Twenty-four Programmable Buttons 4. PROG / PAGE Buttons Selects Menu pages or sends a MIDI Program Change message in Play Mode. 5. CURSOR Buttons Moves the cursor position while editing a setting or changes the Template’s MIDI channel in Play Mode. -
Page 23: Modes And Menus
Modes And Menus Modes And Menus The ReMOTE 25 has four modes of operation. Each mode is selected by pressing a button in the Modes section of the front panel. The LED above each button indicates which mode is currently active. template select The Modes available are :... -
Page 24: Using Menus
DATA / VALUE encoder. The CURSOR LEFT / RIGHT buttons are used to move the cursor and select a different setting for editing. prog / page value midi chan midi port cursor data / value Novation V-Station Control Type: SYSEX MESSAGE: F0 30 2A 20 4D • •... -
Page 25: Entering Text
Entering Text Entering Text When entering text, a cursor indicates the character in a name currently selected for editing. For example, when naming a control : The DATA / VALUE encoder alters the character at the current cursor position. The CURSOR LEFT / RIGHT buttons select a different character in the name for editing. -
Page 26: The Template Select Mode Menu
MAIN FEATURES AND OPERATION The Template Select Mode Menu The menu in Template Select Mode is used to alter settings which apply to the Template as a whole and are not specific to a single programmable control. The menu pages available are : Template Select Menu Page Function... - Page 27 The Template Select Mode Menu This channel value is over-ridden if the Overide MIDI Channel setting on page 4 of this menu or in Play Mode is used. Keyboard MIDI Port (Menu Page 4) Determines which MIDI / USB port is used to send the MIDI information generated by playing the key- board.
-
Page 28: The Template Edit Mode Menu (Editing A Template)
MAIN FEATURES AND OPERATION The Template Edit Mode (Editing A Template) The menu in Template Edit Mode is used to define the settings of each of the programmable front panel controls which comprise a Template. The pages which make up the menu are different according to the type of MIDI information to be transmitted by the control. -
Page 29: The Template Edit 'Cc' Pages
The Template Edit ‘CC’ Pages The Template Edit ‘CC’ Pages The following Menu pages are available if Control Type on menu page 1 is set to ‘CC’ : Template Edit 'CC' Pages Page Function Controller Number Value Display Type Low Value High Value Button Action Type Pot / Slider Control Type... - Page 30 MAIN FEATURES AND OPERATION Button Action Type (Menu Page 6) This menu page is only accessible if a button has been selected as the control for editing. Otherwise, pressing PAGE UP from menu page 5 will bypass this page. This setting determines how the button will behave. There are four available options : Normal The High data (as on Menu page 5) value will be transmitted when the button is pressed.
-
Page 31: The Template Edit 'Nrpn' Pages
Sets the MSB (Most significant byte) of the NRPN number. For NRPN numbers less than 128 (such as those used by the Novation Supernova 1 Rack and Nova Laptop), ensure that this setting is zero. The remaining menu pages are exactly the same in operation as those already described for the Template Edit ‘CC’... -
Page 32: The Template Edit 'Rpn' Pages
MAIN FEATURES AND OPERATION The Template Edit ‘RPN’ Pages The following Menu pages are available if Control Type on menu page 1 is set to ‘RPN’ : Template Edit 'RPN' Pages Page Function RPN LSB Number RPN MSB Number Value Display Type Low Value High Value Button Action Type... -
Page 33: The Template Edit 'Mmc' Pages
The Template Edit ‘MMC’ Pages The Template Edit ‘MMC’ Pages The following Menu pages are available if Control Type on menu page 1 is set to ‘MMC’. These are only available if the control being edited is a button and would typically be used to control a sequencer or recording device : Template Edit 'MMC' Pages Page... -
Page 34: The Template Edit 'Note On/Off' Pages
MAIN FEATURES AND OPERATION The Template Edit ‘Note On/Off’ Pages The following Menu pages are available if Control Type on menu page 1 is set to ‘Note On/Off’. These are only available if the control being edited is a button : Template Edit 'Note On/Off' Pages Page Function... -
Page 35: The Template Edit 'Sysex Message' Pages
The Template Edit ‘SYSEX MESSAGE’ Pages The Template Edit ‘SYSEX MESSAGE’ Pages The following Menu pages are available if Control Type on menu page 1 is set to ‘SYSEX MESSAGE’ : Template Edit 'SYSEX MESSAGE' Pages Page Function Value Display Type Low Value High Value Button Action Type... - Page 36 MAIN FEATURES AND OPERATION Control Name (Menu Page 9) Here, a name is given to the control for easy reference. This is the name displayed on the screen when a Template control is moved (see page 12). A cursor indicates which character in the name can be altered. Use the CURSOR buttons to select a differ- ent character position and the DATA / VALUE encoder to alter the character in the name.
-
Page 37: The Template Edit 'Program Change' Pages
The Template Edit ‘Program Change’ Pages The Template Edit ‘Program Change’ Pages The following Menu pages are available if Control Type on menu page 1 is set to ‘Program Change’. These are only available if the control being edited is a button : Template Edit 'Program Change' Pages Page Function... -
Page 38: Using The X/Y Touchpad
MAIN FEATURES AND OPERATION Using The X / Y Touchpad The touchpad allows transmission of up to four MIDI data values. The values depend on how a finger moves along the touchpad’s X axis (across) and Y axis (up / down). By moving a finger in a diagonal direc- tion, both X &... -
Page 39: Filter Freq
Using The X / Y Touchpad Press the touchpad in any of the four labeled quadrants to select the control for edit If the pad is pressed and kept pressed the display will show the name (if already programmed in the Template) of the control and its type of control and additional MIDI information in the same format than for any other control. -
Page 40: Using The Footswitch & Pedal
MAIN FEATURES AND OPERATION Using The Footswitch & Pedal In A Template Normally, MIDI Continuous Controller Numbers (CCs) 11 and 64 are used for the Expression Pedal and Sustain On/Off Pedal. These CC numbers are defined in all Factory Preset Templates, but of course may be edited within a Template to transmit any other type of Controller data instead. -
Page 41: Saving A Template To Memory
Saving A Template To Memory Saving A Template To Memory Once a Template has been configured in Template Edit Mode, it may be written to any of the ReMOTE 25’s 64 Template memories. Note that it is possible to overwrite any of the Template presets loaded into the ReMOTE 25 at the factory. - Page 42 Note : It is possible to abandon the Template saving procedure at any point by pressing any of the TEM- PLATE Mode buttons. Saving A Template To Memory Manufact Name ? Novation TEMPLATE SAVED • •...
-
Page 43: Advanced Features
ADVANCED FEATURES Using The Transport Buttons Using The Transport Buttons The transport buttons may defined in the same manner as any of the other programmable buttons in Template Edit Mode. However, they are ideally suited to controlling sequencers or recording device. Therefore, they can alternatively be assigned to transmit MIDI MMC (MIDI Machine Control) commands. -
Page 44: The Global Mode Menu
ADVANCED FEATURES The Global Mode Menu The menu in Global Mode is used to alter settings which apply to globally across all Templates. Also found here are various utilities and information displays. When Global Mode is selected by pressing the GLOBAL button, page 1 of the Global menu is automatically selected. - Page 45 ADVANCED FEATURES The Global Mode Menu F3 Key Function (Menu Page 4) Defines how the F3 FUNCTION button behaves. It is possible to define the button to automatically select any one of the 64 Templates directly when pressed. The last option, Up configures the button to directly increment the currently Selected Template.
- Page 46 ADVANCED FEATURES Pot / Slider Overide (Menu Page 9) Allows the individual Pot / Slider Control settings for each knob or slider (set in the Template Edit menu - see page 29) to be overidden. Three options are available : Each knob or slider will behave according to its own settings as stored in the Template.
- Page 47 Operating System Upgrade from USB (Menu Page 14) This menu page is used to upgrade to a newer Operating System (O/S) via the USB port that Novation may publish from time to time. The display will prompt to press the WRITE button. After pressing the WRITE button the display will show, The new O/S is then sent from the host computer.
-
Page 48: Saving The Global Settings To Memory
ADVANCED FEATURES Saving The Global settings To Memory Once any of the Global settings have been altered in Global Mode, they may be written to a special area of ReMOTE 25 memory for instant recall the next time the ReMOTE 25 is powered on. The Global write procedure is invoked by pressing the WRITE button while in Global Mode. -
Page 49: Upgrading The Operating System
‘.MID’ standard MIDI file from a sequencer into the MIDI in port. The latest version of the operating system which Novation may publish from time to time is available for download free of charge from the Novation web site : http://www.novationmusic.com... -
Page 50: Troubleshooting
USB socket. The solution is to either : Power the ReMOTE from a suitable AC:DC power adaptor (such as Novation PSU6) or Insert Dry or (recommended) insert rechargeable batteries. When rechargeable batteries are fitted an option in the GLOBAL menu may be used to set the charge rate for the batteries. -
Page 51: Appendix
Using the ReMOTE 25 with Reason Using the ReMOTE 25 with Reason It is possible that when using the Reason instrument templates that certain controls don’t respond as would be expected. If this is the case, it is most likely that the version of Reason being used is not responding to the incoming MIDI controller information correctly. -
Page 52: Midi Implementation Chart
APPENDIX MIDI Implementation Chart Model : Novation ReMOTE 25 Function Basic Default 1 - 16 Channel Changed 1 - 16 Mode Default Messages Altered **************** Note True 0 - 127 Number Voice **************** Velocity Note On O v = 1 - 127... -
Page 53: Control Summary
Control Summary Control Summary Play Mode Control TEMPLATE SELECT TEMPLATE EDIT WRITE GLOBAL PLAY REWIND FORWARD STOP PLAY RECORD OCTAVE UP OCTAVE DOWN CURSOR LEFT / RIGHT PROG / PAGE UP / DOWN DATA / VALUE Rotary Pots 1-8 Buttons 1-8 Encoders 1-8 Buttons 9-16 Sliders 1-8... - Page 54 APPENDIX Template Select Mode Control TEMPLATE SELECT TEMPLATE EDIT WRITE GLOBAL PLAY REWIND FORWARD STOP PLAY RECORD OCTAVE UP OCTAVE DOWN CURSOR LEFT / RIGHT PROG / PAGE UP / DOWN DATA / VALUE Rotary Pots 1-8 Buttons 1-8 Encoders 1-8 Buttons 9-16 Sliders 1-8 Buttons 17-24...
- Page 55 Control Summary Template Edit Mode Control TEMPLATE SELECT TEMPLATE EDIT WRITE GLOBAL PLAY REWIND FORWARD STOP PLAY RECORD OCTAVE UP OCTAVE DOWN CURSOR LEFT / RIGHT PROG / PAGE UP / DOWN DATA / VALUE Rotary Pots 1-8 Buttons 1-8 Encoders 1-8 Buttons 9-16 Sliders 1-8...
- Page 56 APPENDIX Global Mode Control TEMPLATE SELECT TEMPLATE EDIT WRITE GLOBAL PLAY REWIND FORWARD STOP PLAY RECORD OCTAVE UP OCTAVE DOWN CURSOR LEFT / RIGHT PROG / PAGE UP / DOWN DATA / VALUE Rotary Pots 1-8 Buttons 1-8 Encoders 1-8 Buttons 9-16 Sliders 1-8 Buttons 17-24...
-
Page 57: Preset Template Listing
Sonar 1 Sonar 2 Ableton Live 2 1 Ableton Live 2 2 60-64 User Defined Manufacturer Use Template or Group Name Label Novation VA Synth 1-2-3 Novation VA Synth 1-2-3 Novation VA Synth 1-2-3 Reason Subtractor 1-2 Reason Subtractor 1-2... -
Page 58: Preset Template Listing
The FM7 does not have specific control numbers for parameters. There is a Remote 25 FM7 set-up file which can be loaded into the FM7. This can be found on the CD ROM supplied with the remote 25 and also on the Novation website at www.novationmusic.com. - Page 59 Use the VA Synth template label. Switch between templates 1,2 and 3 to control each set of Oscillators. The implementation set will control the Novation NOVA I and NOVA II and SUPERNOVA I AND II keyboards or Racks. Filter slope is implemented on button 7. Only the first two trigger buttons below the envelope controls are programmed.
- Page 60 Logic uses a set up file which is included on the Remote Driver CD Rom. This file is also available from the Novation website. To import this into Logic Click on the Options tab at the top of the Logic menu bar and select ‘key commands’...
-
Page 61: Fcc Information ( U.s.a.)
Specifications subject to change: The information contained in this manual is believed to be correct at the time of going to press. However, Novation reserves the right to change or modify the specification without notice or obligation to update existing units.
Need help?
Do you have a question about the REMOTE25SL and is the answer not in the manual?
Questions and answers