
Related Manuals for Techni Mobili RTA-S07


Summary of Contents for Techni Mobili RTA-S07
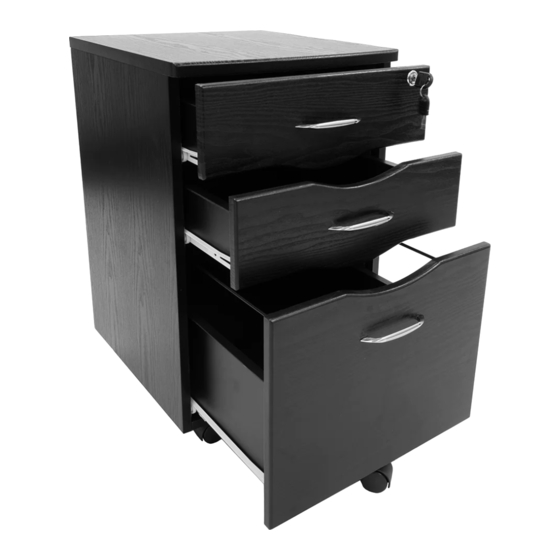
- Page 1 ROLLING STORAGE AND FILE CABINET MODEL RTA-S07 ASSEMBLY INSTRUCTIONS Thank you for purchasing our product Scan QR to view full assembly video REV.OL-6983-1022...
- Page 2 RTA-S07 • Do not discard this manual or any of the packaging material until the unit has been completely assembled. • Please read carefully the assembly instructions before the installation. • Scan this QR code to view the complete assembly video online.
-
Page 3: Main Parts List
RTA-S07 The replacement parts service is limited to Do a quick inventory Missing, damaged and defective the 48 contiguous United States. parts can be replaced at no cost of all the parts and If you reside in AK, HI, PR, U.S. territories to you. -
Page 4: Included Tools
RTA-S07 Middle drawer front panel Bracket and nut File drawer wheel Locking fit piece A, Locking fit piece B, Locking fit piece C, SET of 2 pieces SET of 3 pieces SET of 3 pieces Lock and 2 matching Metal locking bar keys 19.75"... - Page 5 RTA-S07 CAM BOLT AND CAM LOCK TUTORIAL THE INSTRUCTIONS BELOW ARE NOT ACTUAL ASSEMBLY STEPS This unit uses cam bolts and locks (also known as mini fixes). If you are not familiar with this kind of hardware, the below is a tutorial that explains how to use them on the steps where they are required.
- Page 6 RTA-S07 BEFORE YOU START THE ASSEMBLY, PLEASE READ THE FOLLOWING TIPS AND WARNINGS. • Do not discard this manual or any of the packaging material until the unit has been completely assembled. • If during assembly you find an issue or need clarification, please contact our Customer Service for assistance.
-
Page 7: Assembly Steps
RTA-S07 ASSEMBLY STEPS STEP 1 INSERT THE PIECES IN THE EXACT ORDER SHOWN Tools (included) Slide one piece of the locking fitting 22A through the metal bar 22E with its flat side UP. Slide all 3 pieces of the locking fitting 22C facing UP, align each piece within the... - Page 8 RTA-S07 STEP 3 Grab all the 3 sets of sliders 12 and separate them into 2 groups according to Scan QR to view step their shape: The "flat" ones will be used on the next step. The "L" shaped will be used until step 17, set them aside.
- Page 9 RTA-S07 STEP 5 Attach the bolts A to the indicated holes on panels 4, 9, 14, 15, 18 and 21. Hardware M6x40 Bolt Tools (included) Scan QR to view step ( T o ( T o STEP 6 Use screws E to attach the Locking casters 3L to the bottom surface of the Hardware bottom panel 16 at the front, and the non-locking casters 3N at the back.
- Page 10 RTA-S07 STEP 7 On the bottom panel 16, first make sure that the cam locks are properly aligned Tools (included) to receive the bolts. Join the side panels 14 and 15 to panel 16, and turn the cam locks to lock all the pieces together as explained in page 4.
- Page 11 RTA-S07 P.10 P.10 STEP 9 Attach the metal fittings 22B to each of the small drawers' right panels 2 and to Hardware the file drawer's right panel 8 with screws C. NOTE: The "U" on the fitting must face DOWN.
- Page 12 RTA-S07 P.11 P.11 STEP 12 Slide the drawer bottom board 5 through the grooves of the side panels on all 3 Scan QR to view step drawers, and into the groove of the front panels respectivelly, as shown. STEP 13...
- Page 13 RTA-S07 P.12 P.12 STEP 15 For the file drawer, insert the file tubes 11 through the holes on the back panel Scan QR to view step 10 and screw them into the front panel 9, but DO NOT OVERTIGHTEN to avoid accidental damage humps or perforation.
- Page 14 RTA-S07 P.13 P.13 STEP 17 With all the drawers upside-down, attach to them the "L" shaped sets of sliders Hardware 12 with screws C. Please note that the wheels go facing towards the back of the drawers, and they should not protrude, otherwise, the drawers rise 1" and won't M3x15 fit in the cabinet.
- Page 15 RTA-S07 P.14 P.14 ALL DONE! Give yourself a nice pat on the back, you did a great job! ENJOY YOUR NEW UNIT! TROUBLESHOOTING THE LOCK SYSTEM If the item does not want to lock, review the assembly done in pages 6, 7, 10, 12 and 17 for the correct assembly of the locking fittings and the drawer sliders.
-
Page 16: Weight Limits
RTA-S07 P.15 P.15 WEIGHT LIMITS 66 Lbs (27.3 Kg) 22 Lbs (10 Kg) WARNINGS Do not exceed the indicated weight limits. Do not expose the surfaces to direct sunlight or to extreme environmental conditions. Do not use solvents or abrasive materials to clean the unit. - Page 17 RTA-S07 P.16 P.16 TECHNI MOBILI WARRANTY DESKS/LAPTOP CARTS/FILE CABINETS: LIMITED 5-YEAR WARRANTY RTA Products, LLC warrants to the Original Purchaser who acquired a new product from RTA Products or its authorized resellers that this product will be free from defects in its workmanship and materials, under normal use and service conditions, as described herein.
- Page 18 FOR SEVERAL HELP OPTIONS INCLUDING REPLACEMENT PARTS ORDERS VISIT: WWW.TECHNIMOBILI.COM AND CLICK ON SUPPORT TAB Or scan the following QR Code: Scan the following QR Code to order replacement parts: EMAIL US: support@rtaproducts.com...
Need help?
Do you have a question about the RTA-S07 and is the answer not in the manual?
Questions and answers