Advertisement
Quick Links
SKU# 100 749 0542
Model# FRN-801960-S2-2
USE AND CARE GUIDE
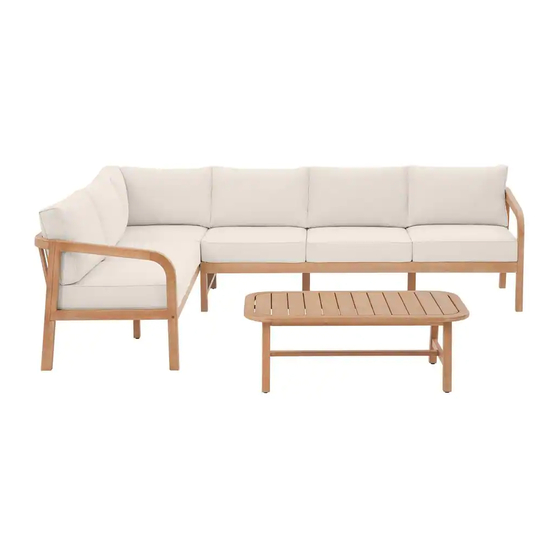
ORLEANS SECTIONAL - CORNER AND TABLE
Questions, problems, missing parts? Before returning to the store,
call Hampton Bay Customer Service
8 a.m. - 7 p.m., EST, Monday – Friday, 9 a.m. – 6 p.m., EST, Saturday
1-855-HD-HAMPTON
HAMPTONBAY.COM
THANK YOU
seat and table
quality products designed to enhance your home. Visit us online to see our full line of products available for your home improvement needs.
Thank you for choosing Hampton Bay!
Advertisement

Related Manuals for HAMPTON BAY ORLEANS FRN-801960-S2-2


Summary of Contents for HAMPTON BAY ORLEANS FRN-801960-S2-2
- Page 1 8 a.m. - 7 p.m., EST, Monday – Friday, 9 a.m. – 6 p.m., EST, Saturday 1-855-HD-HAMPTON HAMPTONBAY.COM THANK YOU seat and table quality products designed to enhance your home. Visit us online to see our full line of products available for your home improvement needs. Thank you for choosing Hampton Bay!
-
Page 2: Table Of Contents
The frame is warranted to be free of manufacturing defects for two years from the purchase date. If the frame of your furniture fails (ie. broken frame or weld) within 2 years of ownership, Hampton Bay will repair, provide replacement parts, or replace the product at our 2 years warranty only. -
Page 3: Pre-Assembly
Pre-assembly PLANNING ASSEMBLY Before beginning the assembly of this product, make sure all parts are present. Compare parts with Package Contents and Hardware Included lists. If any part is missing or damaged, do not attempt to assemble the product, and return it to the place of purchase. Assembly requires two people. -
Page 4: Package Contents
Pre-assembly (continued) PACKAGE CONTENTS Part Description Quantity Table Top Bar Connect Table Legs Frame Backrest Frame R Backrest Frame L Side Leg R Side Leg L Seat Frame Seat Cushion Back Cushion R Back Cushion L... -
Page 5: Assembly
Corner Bench Assembly Attaching both Backrest Frames Together Attach the Backrest Frame R (M) to the Backrest Frame L (N) by using the Bolt M8x50 (II), Nut M8x18 (JJ), and Allen Key (CC), then use the Allen Key (CC) to secure. Do not fully tighen all the bolts in this step. - Page 6 Corner Bench Assembly (continued) Attaching the Side Leg Put the Seat Frame (Q) and the Side Leg L (P) to the assembled Backrest Frame (M&N). Attach the Side Leg L (P) to the assembled frame, by using the Screw M7x110 (DD), Screw M7x80 (EE), Bolt M8x60 (HH), Bolt M8x70 (GG), Nut M8 (JJ) and Allen Key (CC), then use the Allen Key (CC) to secure.
- Page 7 Corner Bench Assembly (continued) Completing the Assembly Place the corner seat Seat Cushion (R), Back Cushion R (S) and Back Cushion L (T) on the bench. leveling feet if the four legs are not level. The Corner bench is ready to use now. Connecting the Right Bench and Left Bench to the Corner (Optional) sectional set, you can use 4 straps (1) to connect the...
- Page 8 Coffee Table Assembly Attaching the Legs to the Table Top Attach the Table Leg Frame (C) to the Table Top (A) by using the Screw M7x70 (BB) then use the Allen Key (CC) to secure. Attaching the Table Leg Frame and Bar Connect Attach the Table Leg Frame (C) and the Bar Connect (B) to the assembled frame, by using the Screw M7x70 (BB), and...
- Page 9 Coffee Table Assembly (continued) Completing the Assembly Adjust the plastic leveling feet if the four legs are not level. The table is ready to use now. HAMPTONBAY.COM Please contact 1-855-HD-HAMPTON for further assistance.
-
Page 10: Care And Cleaning
Care and Cleaning Always make certain to cover your outdoor wood furniture with waterproof covers when you are not using it. Using covers will protect your furniture from all weather elements and prolong the life of the wood furniture. Do not use plastic covers to protect your furniture as this may cause mold to grow on your furniture. - Page 11 Questions, problems, missing parts? Before returning to the store, call Hampton Bay Customer Service 8 a.m. - 7 p.m., EST, Monday-Friday, 9 a.m. - 6 p.m., EST, Saturday 1-855-HD-HAMPTON HAMPTONBAY.COM Retain this manual for future use. Factory corner bench ID # HUC39618...
Need help?
Do you have a question about the ORLEANS FRN-801960-S2-2 and is the answer not in the manual?
Questions and answers