
Related Manuals for Case SDX30


Summary of Contents for Case SDX30
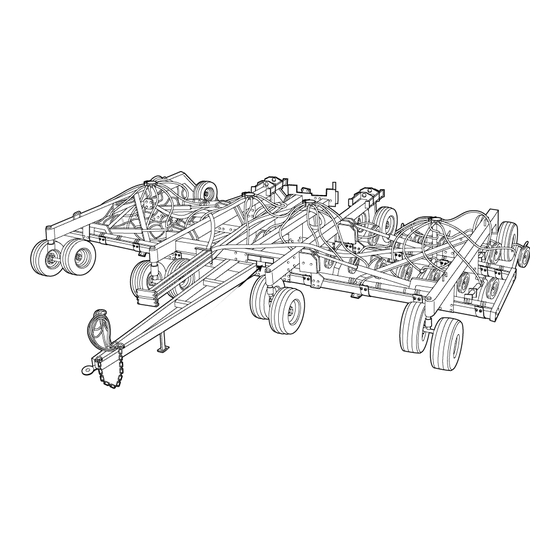
- Page 1 SDX30/SDX40 Single Disk No-Till Air Drill Repair Manual 87605427 Issued May, 2007 Replaces 6-12432...
- Page 2 REPAIR PARTS REPAIR PART IDENTIFICATION - SDX30 The drill is identified by the use of a Product Identification Number Plate like the one shown. The plate is located on the front bar of the machine. This number should be provided when requesting parts or...
- Page 3 REPAIR PARTS REPAIR PART IDENTIFICATION - SDX40 The drill is identified by the use of a Product Identification Number Plate like the one shown. The plate is located on the front bar of the machine. This number should be provided when requesting parts or service.
-
Page 4: Table Of Contents
Theory of Operation Storage To Determine Adequate Carrying Velocities Welding Procedures Air System Components - Concord Air System SDX30 Frame Brace Kit Air System Components - ADX Air System Fold Linkages Wheel Bolt Torque Hub / Spindles / Wheels - HYDRAULIC SYSTEM SERVICE ..3-1 - ENDMARKER SERVICE . - Page 5 This Page is Left Blank...
- Page 6 SDX30 Safety Decal Locations ........
-
Page 7: Safety
SECTION 1 - SAFETY This Page is Left Blank page 1-2... - Page 8 SECTION 1 - SAFETY SAFETY SAFETY-ALERT SYMBOL This symbol is used to denote possible danger and care should be taken to prevent bodily injury. This symbol means ATTENTION! BECOME ALERT! YOUR SAFETY IS INVOLVED! THIS SYMBOL APPEARS WITH TEXT READING “DANGER!”, “CAUTION!”, OR “WARNING!” THESE WORDS INDICATE THREE LEVELS OF POSSIBLE HAZARDS, THAT ARE DESCRIBED BELOW.
-
Page 9: General Safety Practices
SECTION 1 - SAFETY GENERAL SAFETY PRACTICES REVIEW this manual and operator’s manual before It is PREFERRED to transport the drill separately without servicing equipment. an air cart attached. However, this is not always practical. If you are transporting the drill with a tow between air cart, NEVER allow anyone unfamiliar, untrained, or the air cart should be full. -
Page 10: Safety During Operation
SECTION 1 - SAFETY SAFETY DURING OPERATION DO NOT ALLOW ANYONE ON THE DRILL while operating the drill hydraulics. NEVER disconnect the tractor from the drill while the drill wings are raised. KEEP CHILDREN AWAY from the drill during operation. NEVER STAND within the radius of the raised wings. - Page 11 SECTION 1 - SAFETY READ the operators manual thoroughly. KEEP the service area clean. 098002M1 DO NOT enter tight areas. BE CERTAIN machine is tagged ‘out of order’ or work area is supervised. 098003M1 DO NOT work around rotating equipment. Loose clothing, rings, watchbands, etc., may get caught and cause serious injury.
- Page 12 SECTION 1 - SAFETY AVOID toxic vapors. Breath clean air. 0960039S DO NOT permit smoking. 196150S WEAR protective clothing. 192078S page 1-7...
-
Page 13: Air And Air Hoses
SECTION 1 - SAFETY AIR AND AIR HOSES COMPRESSOR HOSES may move unexpectedly when suddenly disconnected. 098005M1 USE PROPER air nozzles. Do not use compressed air to clean clothing or otherwise direct it toward yourself. 098006M1 AVOID getting chemicals into eyes. Use eye protection. 098007M1 HYDRAULICS AND HYDRAULIC LEAKS AVOID high-pressure fluids. -
Page 14: Shields
SECTION 1 - SAFETY SHIELDS REPAIR damaged shields. KEEP all shields in place. BE EXTRA CAUTIOUS when repairing or servicing without protective shields. 098008M1 ELECTRICAL REMOVE the ground wire to avoid arcing contacts. REMOVE GROUND WIRE when welding. 098009M1 TIRES USE A CAGE IF POSSIBLE when setting tires on rims. -
Page 15: Safety During Transport
SECTION 1 - SAFETY SAFETY DURING TRANSPORT CHECK with local authorities regarding transport on BE SURE all the wheel bolts are torqued to proper public roads. Obey all applicable laws and regulations. specifications before transporting the drill. ONLY TOW at a safe speed [32 km/hr (20 mph)]. Use WATCH for power poles and overhead power lines. -
Page 16: Safety
SECTION 1 - SAFETY DECAL LOCATIONS SDX30 SAFETY DECAL LOCATIONS The following safety decals are affixed to the drill. 350336A1 312479A1 311865A1 311863A1 350401A1 350401A1 350335A1 311864A1 23251 Located on Endmarker Outer Arm (not shown) page 1-11... -
Page 17: Sdx40 Safety Decal Locations
SECTION 1 - SAFETY SDX40 SAFETY DECAL LOCATIONS The following safety decals are affixed to the drill. 23251 350401A1 Located on front of Endmarker Mount (not shown) 350336A1 350335A1 350401A1 350336A1 312479A1 page 1-12... -
Page 18: Reflector Decals, Slow Moving Vehicle Sign And Transport Lighting
SECTION 1 - SAFETY REFLECTOR DECALS, SLOW MOVING VEHICLE SIGN AND TRANSPORT LIGHTING SDX30 1 SERIAL RANGE - to Serial Number BSN CKB0028188 DESCRIPTION DESCRIPTION BRACKET LIGHT PLAIN BOLT 5/16-18 X3/4 GR5 ZND CRG LIGHT ASSY. WARNING BRACKET SOCKET SMV SIGN / LAMP MOUNT HARNESS LIGHTING SDX (Non-AFS Only) NUT .313 UNC YZD NYL INS... -
Page 19: Sdx30 2 Nd Serial Range - Starting At Serial Number Cbj0007001
SECTION 1 - SAFETY SDX30 2 SERIAL RANGE - starting at Serial Number CBJ0007001 DESCRIPTION DESCRIPTION NUT .5 UNC GR2 YZD REFLECTOR RED WASHER, LOCK .5 YZD REFLECTOR AMBER LIGHT ASSY. TAIL/SIGNAL RED REFLECTOR ORANGE CONSOLE IMPLEMENT LIGHTNG BRACKET SDX TRANSPORT LIGHT PTD... - Page 20 SECTION 1 - SAFETY Transport Lighting Assembly 201063C page 1-15...
-
Page 21: Sdx40 Transport Lighting And Reflector Decals
WASHER .531 X 1.062 X .095 REFLECTOR RED WASHER .813 ID 1.5 YZD SAE DECAL SDX DOWN PRESSURE CHART DECAL "CASE IH" 70 MM LOGO DECAL SDX WING LOCK DECAL DANGER SDX OPENER LOCK DECAL SDX40 LH STRIPE REFLECTOR ORANGE DECAL SDX40 RH STRIPE NUT .5 UNF GR5 YZD... - Page 22 SECTION 1 - SAFETY 202074C Transport Lighting Assembly page 1-17...
- Page 23 SECTION 1 - SAFETY TRANSPORT LIGHTING WIRING SCHEMATIC - for SDX30 2 Serial Number Range and SDX40 Transport Lighting Wiring Schematic page 1-18...
-
Page 24: Mechanical Service
SDX30 Main Frame Caster Assembly ........2-28... - Page 25 SECTION 2 - MECHANICAL SERVICE This Page is Left Blank page 2-2...
-
Page 26: General Service Information
SECTION 2 - MECHANICAL SERVICE GENERAL SERVICE INFORMATION DANGER! Be alert for overhead electrical wires. Failure to stay clear of electrical wires will result in electrocution. Electrocution can occur without direct contact with overhead electrical wires. CAUTION! To prevent personal injury when assembling the implement, always block up the raised section. -
Page 27: Bolt Torque Information
SECTION 2 - MECHANICAL SERVICE BOLT TORQUE INFORMATION GRADE 1 OR 2 L9 (ALLOY) MARKINGS BOLTS AND CAP SCREWS L9 (ALLOY) MARKINGS FOR HEX NUTS Bolt and Nut Grade Information 1. Fasteners should be replaced with the same or higher grade fastener. If higher grade fasteners are used, these should only be tightened to the strength of the original. - Page 28 SECTION 2 - MECHANICAL SERVICE GRADE 2* GRADE 5, 5.1, OR 5.2 GRADE 8 OR 8.2 L9 (ALLOY) Dry ** Lubricated** Dry ** Lubricated** Dry ** Lubricated** Head N A m lbf A ft N A m lbf A ft N A m lbf A ft N A m...
-
Page 29: Specifications
SPECIFICATIONS IMPLEMENT DIMENSIONS MODEL DRILL number WORKING TRANSPORT LENGTH WEIGHT SPACING WIDTH WIDTH HEIGHT CLEARANCE openers SDX30 19.1 cm 9.1 m 4.27 m 3.561 m 20 cm 8.5 m 10,900 kg (30') (14') (11'6") (8") (27' 10") (24,000 lb) (7.5") 9.1 m... -
Page 30: Replacing The Serial / Pin Plate
SECTION 2 - MECHANICAL SERVICE REPLACING SERIAL/PIN PLATE In cases where the frame member that the Identification Plate is attached to is damaged and the owner wishes to replace that part of the frame, the replacement part will not have a pin plate on it because it is a replacement part and not part of the machine as shipped. -
Page 31: Grease Locations And General Maintenance
Preventive maintenance, such as greasing the required locations at the correct times, making the correct adjustments and greasing the machine thoroughly before storing will help to avoid costly repairs. Always use Case IH 251H-EP grease, available from your Case dealer in the following quantities: PART NUMBER QUANTITY 132096A1 14.5 ounce tube... -
Page 32: Grease Locations
Every 50 hours of operation, use a pressure lubrication gun and apply enough Case 251H-EP or equivalent NGLI No. 2 Multi-Purpose Lithium grease to flush out the old grease and dirt. The old grease will be flushed out at the seal. - Page 33 SECTION 2 - MECHANICAL SERVICE SDX40 There are three locations on the secondary pivot. Secondary Endmarker Pivot 202173M1 There is one (1) grease location on the release arm pivot. Release Arm Pivot 202176M1 4. Grease the opener hub bearings weekly. Grease Opener Hub Bearings 202330M1 page 2-10...
- Page 34 SECTION 2 - MECHANICAL SERVICE 5. Grease the jack stand yearly. Lubricate Jack Stand 202163M2 SDX40 Shown, SDX30 Similar) 6. Lubricate the hitch pivot yearly. There is a grease location on each of the hitch arms. Grease Hitch Pivots 202164M1 (SDX40 Shown, SDX30 Similar) 7.
-
Page 35: Storage
Before storing, apply Til-coat (Part Number 1131548R2, available from your dealer) to the surfaces of ground working tools. Apply Case 251H-EP grease to hydraulic cylinder rods to prevent rust. 3. Paint any surfaces that can rust. -
Page 36: Welding Procedures
SECTION 2 - MECHANICAL SERVICE WELDING PROCEDURES CAUTION! Always follow all necessary safety procedures when welding. Remove all flammable and explosive materials from the area around the welding location and shield flammable material that cannot be removed for the immediate area. Always have a fire guard and a fire extinguisher readily available. -
Page 37: Sdx30 Frame Brace Kit
SDX30 FRAME BRACE KIT NOTE: This kit was a mandatory update on SDX30 drills up to and including Serial Number CKB0028188. 1. Install the left hand plate weld bolting brace (1) (P/N 425016A1) to 6" x 10" truss wing weld and left rear wing lift as shown. - Page 38 SECTION 2 - MECHANICAL SERVICE 3. Install the tube wing brace (P/N 425010A1) onto the two brackets assembled in step 1 and 2. Install 1" x 3 1/2" bolts and nuts. Refer to step 2 for installation view if needed. Torque to 280 N-m (205 lbf-ft).
- Page 39 SECTION 2 - MECHANICAL SERVICE NOTE: For reference only, SDX30 with brace kit installed (1) and gussets (2) added to pull points at front hitch area. SDX30 With Frame Brace Updates Installed 202349M1 page 2-16...
-
Page 40: Fold Linkages
SECTION 2 - MECHANICAL SERVICE FOLD LINKAGES SECURING THE FRAME FOR REPAIR WORK CAUTION! Before disconnecting the wings, the openers should be resting on the ground. 1. Pins and bolts on the frame are difficult to remove NOTE: Refer to center section and wing section because of the frames shifting. -
Page 41: Sdx30 Main Frame Assembly
BOLT .75 X 6 UNC GR8 YZD PLATE ANGLE BRACKET RED BOLT .75 X 2.5 UNC GR5 YZD TUBE .375 X 4 X 6 W/ HOLES PTD PIN /W SDX30 Main Frame Components - 1 Serial Range SDX30 Main Frame Components - 1 Serial Range mainfrti... - Page 42 BOLT .750 X 8.0 GR8 ZND TUBE .375 X 4 X 6 W/ HOLES PTD BOLT 1 X 3 UNC GR8 YZD SDX30 Main Frame Assembly Showing Concord Hitch - 2 Serial Range SDX30 Main Frame Assembly Showing Concord Hitch - 2...
- Page 43 BOLT .750 X 8.0 GR8 ZND PIVOT LINK/W BOLT .75 X 8.5 UNC GR8 YZD BRACKET MOUNTING PIN, PIVOT 1.5OD X 5.630UL YZD BAR BOLTING PIN, HITCH 1 X 3.5 UL SDX30 Main Frame Assembly Showing ADX Hitch - 2 Serial Range page 2-20...
- Page 44 SECTION 2 - MECHANICAL SERVICE SDX30 Main Frame Assembly Showing ADX Hitch - 2 Serial Range 202066C page 2-21...
-
Page 45: Sdx30 Wing Frame Assembly
SECTION 2 - MECHANICAL SERVICE SDX30 WING FRAME ASSEMBLY DESCRIPTION TUBE /W WING 30 FT TUBE, SUPPORT TRUSS/W WING TUBE /W WING END BOLT .75 X 6 UNC GR8 YZD NUT, LOCK .75 UNC GR C YZD SDX30 Wing Frame Assembly... -
Page 46: Sdx40 Center Section Assembly
SECTION 2 - MECHANICAL SERVICE SDX40 CENTER SECTION ASSEMBLY DESCRIPTION TUBE TRUSS/W MAIN FRAME LH - 40 FT (Includes bronze bushings) TUBE TRUSS/A MAIN FRAME RH - 40 FT (Includes bronze bushings) TUBE FRONT CROSS TUBE, SUPPORT TRUSS/W CENTER HITCH LH TUBE REAR CROSS TUBE TRUSS/W CENTER HITCH RH TUBE, SUPPORT TIE ROD... -
Page 47: Sdx40 Wing Assembly
SECTION 2 - MECHANICAL SERVICE SDX40 WING ASSEMBLY DESCRIPTION DESCRIPTION SPLIT PIN/SAFETY PIN ROLL PIN .312 X 2 TUBE TRUSS/A MAIN FRAME RH - 40FT BLKHEAVY (Includes bronze bushings) NUT LOCK JAM 1.5-6 THIN YZD TUBE TRUSS/W MAIN FRAME LH - 40FT (Includes bronze bushings) NUT LOCK 1 UNC GR B YZD NYL LK CUSHION CYL RUBBER... - Page 48 SECTION 2 - MECHANICAL SERVICE SDX40 Wing Assembly 202019C page 2-25...
-
Page 49: Wheel Bolt Torque
SECTION 2 - MECHANICAL SERVICE WHEEL BOLT TORQUE LOCATION TIRE SIZE TIRE PRESSURE WHEEL BOLT TORQUE 115 to 128 N-m CENTER SECTION 31 x 13.5 x 15 14PR 621 kPa (85 to 95 lbf- ft) (90 psi ) WING 31 x 13.5 x 15 10PR 115 to 128 N-m ( 85 to 95 lbf- ft) (60 psi) -
Page 50: Hub / Spindles / Wheels
SECTION 2 - MECHANICAL SERVICE HUB / SPINDLES / WHEELS CAUTION! To prevent personal injury when servicing the implement, always block up the raised section. Be sure the section is stable before assembly and never rely on a jack or hydraulic device to support the raised implement. -
Page 51: Sdx30 Main Frame Caster Assembly
NOTE: The standard heavy duty 8 bolt hub is shown. This caster is used on all SDX30 machines from Serial No CBJ0007001. The other 6 and 8 bolts hubs previously used on this machine are similar. Refer to your parts book. - Page 52 SECTION 2 - MECHANICAL SERVICE Caster Assembly 201092C page 2-29...
-
Page 53: Sdx40 Main Frame Front Caster Assembly
SECTION 2 - MECHANICAL SERVICE SDX40 MAIN FRAME FRONT CASTER ASSEMBLY NOTE: The main frame caster hubs are shown. For information on repacking the 812 hubs, refer to the SDX40 Bogie Section. DESCRIPTION DESCRIPTION CASTER ASSY FRONT (Includes tension BEARING, CUP #3720 bushings) BUSHING TNSN 1.75 X 1.5 X 1LG BEARING, CONE TM#3780... - Page 54 SECTION 2 - MECHANICAL SERVICE Main Frame Front Caster Assembly 203185C page 2-31...
-
Page 55: Sdx40 Wing Frame Front Caster Assembly
SECTION 2 - MECHANICAL SERVICE SDX40 WING FRAME FRONT CASTER ASSEMBLY NOTE: The wing frame caster hubs are shown. For information on repacking the 811 hubs, refer to the SDX40 Bogie Section. DESCRIPTION DESCRIPTION CASTER ASSY FRONT (Includes tension BEARING CUP #25520 bushings) BUSHING TNSN 1.75 X 1.5 X 1LG BEARING CONE #25590... - Page 56 SECTION 2 - MECHANICAL SERVICE Wing Frame Front Caster Assembly 203187C page 2-33...
-
Page 57: Sdx40 Main Frame Rear Bogie Wheel Service
SECTION 2 - MECHANICAL SERVICE SDX40 MAIN FRAME REAR BOGIE WHEEL SERVICE NOTE: The main frame bogies are shown. For information on repacking the 812 hubs, refer to the SDX40 Caster Section. DESCRIPTION DESCRIPTION BOLT STUD .625 UNF GR5 WB46 WASHER 1.531 ID X 2.125 8GA BLK NUT WHEEL .625-18UNF GR B YZD BEARING, CUP #13621... - Page 58 SECTION 2 - MECHANICAL SERVICE Main Frame Rear Bogie Assembly 203186C page 2-35...
-
Page 59: Sdx40 Wing Frame Rear Bogie Wheel Service
SECTION 2 - MECHANICAL SERVICE SDX40 WING FRAME REAR BOGIE WHEEL SERVICE NOTE: The wing frame bogies are shown. For information on repacking the 811 hubs, refer to the SDX40 Caster Section. DESCRIPTION DESCRIPTION STUD .563 UNF GR5 WB41 WASHER 1.531 ID X 2.125 8GA BLK NUT WHEEL .563 UNF CTD# WB40 BEARING, CUP #13621 NUT LOCK .75 UNC GR B YZD... - Page 60 SECTION 2 - MECHANICAL SERVICE Wing Frame Rear Bogie Assembly 203189C page 2-37...
-
Page 61: Sdx40 Caster Pivot Service
SECTION 2 - MECHANICAL SERVICE SDX40 CASTER PIVOT SERVICE DESCRIPTION NUT, LOCK .5 UNC GR A YZD NYL LK RETAINER KING PIN PNT BOLT .5 X 5 UNC GR5 YZD WASHER, THRUST 3.04 ID 4.0 OD .188 SHIM SPLIT .25'' THK PLN BUSHING BRONZE 3 ID X 3.5 OD NIPPLE, LUBE GREASE ZERK STR .25NF TAPER... -
Page 62: Hydraulic System Service
SDX30 Wing Lift Cylinder ........ - Page 63 SECTION 3 - HYDRAULIC SYSTEM SERVICE This Page is Left Blank page 3-2...
-
Page 64: Hydraulics
SECTION 3 - HYDRAULIC SYSTEM SERVICE HYDRAULICS DANGER! After hydraulic repair or maintenance, bleed the air from the hydraulic system. Air in the system could cause a loss in pressure. This loss in pressure could cause wings fall unexpectedly causing death or serious injury. Stand clear of the machine when the hydraulic cylinders are being extended and retracted. - Page 65 SECTION 3 - HYDRAULIC SYSTEM SERVICE 7. Remove the clevis end (1) by loosening the set screw. Loosening Clevis Set Screw 202036M1 8. Use a rod (1) inserted in the clevis (2) to unscrew the clevis end off of the shaft. Removing the Clevis 202039M1 9.
- Page 66 SECTION 3 - HYDRAULIC SYSTEM SERVICE 11. Remove the clevis cap (1). Remove Clevis End Cap 202042M1 12. Remove the rod cap (1) by sliding it off of the shaft. Remove Rod Cap 202043M1 13. Remove the shaft (1) and check the piston for any damage.
- Page 67 SECTION 3 - HYDRAULIC SYSTEM SERVICE DESCRIPTION DESCRIPTION CYLINDER ASSY. HYD 4 X 30 MONARCH CYLINDER TUBE (SDX30) CYLINDER ASSY. HYD 5 X 30 MONARCH BOLT (SDX40) HEAD NUT, 5/8" HEAD NUT, LOCK, 1 1/8" PISTON PLUG, 3/4" List of Seals, Washers, and O-Rings (3000 PSI)
-
Page 68: Reassembly Of Cylinder
SECTION 3 - HYDRAULIC SYSTEM SERVICE NOTES: Use a tool with a rounded or conical tip for removal and assembly of seals, O-rings, and back-up washers. Do not use sharp tools such as knives or screwdrivers. To avoid leaks after repairs, always use new seals, O- rings, and back-up washers. - Page 69 SECTION 3 - HYDRAULIC SYSTEM SERVICE 17. Replace the piston (1) into the cylinder barrel (2). Piston inserted into the cylinder barrel (below). Replace Piston in Cylinder 202044M1 18. Inserting piston rod cap assembly into the cylinder. Replace End Cap 202043M1 19.
- Page 70 SECTION 3 - HYDRAULIC SYSTEM SERVICE 20. Install nuts on shorter threaded end of the tie rods. At lease one full tread must show past the end of the nut. Install tie rods with nuts through clevis cap first then through rod cap.
- Page 71 SECTION 3 - HYDRAULIC SYSTEM SERVICE 22. Install rod clevis, visually inspect to see if the rod clevis is square and aligned to the center line of the cylinder. The set screw should be in the center of the casting. Rod clevis must thread freely; don’t force rod clevis to thread to position.
-
Page 72: Replacing The Cylinder On The Machine And Bleeding The Hydraulic System
SECTION 3 - HYDRAULIC SYSTEM SERVICE REPLACING THE CYLINDER ON THE MACHINE AND BLEEDING THE HYDRAULIC SYSTEM 23. Prop the cylinder body up with a block of wood or other suitable material. Attach the cylinders at the base end on the frame, leaving the rod end detached. 24. -
Page 73: Hydraulic Cylinder Components
PIN, 1 X 2.41 UL YZD ROD, PISTON, 1 1/2" CLIP, HAIRPIN, .177" x 3.25" SEAL - ROD PISTON CYLINDER SEAL - WIPER O-RING BUSHING TUBE STOP TUBE SDX30 Subbar 4" x 24" Cylinder SDX30 Subbar Hydraulic Cylinder 202217C page 3-12... -
Page 74: Sdx40 Subbar Cylinder
SECTION 3 - HYDRAULIC SYSTEM SERVICE SDX40 SUBBAR CYLINDER NOTE: Can either be a 4" x 12" (for 15" spacing) or 4.5" x 12" (for 7.5" and 10" spacing) cylinder. DESCRIPTION DESCRIPTION CYLINDER ASSY. HYD 4.5 X 12 MONARCH ROD ASSY. PISTON COLLAR PNTD RING - wear PLATE, END CYL HEAD 4.5 CTD... -
Page 75: Sdx30 Wing Lift Cylinder
ROD ASSY. CYL O-RING ROD - tie SEAL - piston NUT .625 UNC GR5 YZD O-RING RETAINER COTTER PIN O-RING PIN KEEPER U-CUP Hydraulic Cylinder Parts for SDX30 Wing Lift Cylinder SDX30 Wing Lift Hydraulic Cylinder Components 00000010 page 3-14... - Page 76 SECTION 3 - HYDRAULIC SYSTEM SERVICE DESCRIPTION DESCRIPTION CYLINDER 4X12 3000PSI W/ 1 PIN MON CYLINDER TUBE HEAD BOLT HEAD NU, 5/8" PISTON NUT, LOCK, 1 1/8" PLUG, 3/4" SDX30 Wing Lift Hydraulic Cylinder Components SDX30 Wing Lift Hydraulic Cylinder Components 645548 page 3-15...
-
Page 77: Sdx40 Wing Lift Cylinder
SECTION 3 - HYDRAULIC SYSTEM SERVICE SDX40 WING LIFT CYLINDER DESCRIPTION DESCRIPTION CYLINDER ASSY. HYD 5.00 X 30 IOWA TUBE - CYLINDER SEAL KIT (INCLUDES REF #2, 3, 5, 6, 8, 12 ROD ASSY. CYL AND 13) HEAD CYLINDER HEAD CYLINDER, FRONT BACKUP U-CUP O-RING... - Page 78 SECTION 3 - HYDRAULIC SYSTEM SERVICE DESCRIPTION DESCRIPTION CYLINDER 5X12 3000PSI W/ 1 PIN MON CYLINDER TUBE HEAD BOLT HEAD NUT, 3/4" PISTON NUT, LOCK, 1 1/2" PLUG, 3/4" SDX40 Wing Lift Hydraulic Cylinder Components SDX40 Wing Lift Hydraulic Cylinder Components 645548 page 3-17...
-
Page 79: Wing Lift Ball Valve
SECTION 3 - HYDRAULIC SYSTEM SERVICE WING LIFT BALL VALVE DESCRIPTION DESCRIPTION VALVE /A BALL RETAINER SEPARATE BODY STEM KIT SEAL SCREW - STEM GLAND SEAT - TFE NUT, LOCK .312-18 SER FLNGE GR.5 ZND SEAL - TFE THRUSTWASHER HANDLE VALVE RING - TFE STUFFING BOX GRIP HANDLE VINYL 1 X 1.88 X3.88LG BALL... -
Page 80: Wing Lift Hydraulic Schematics
BRACKET VALVE MOUNT PNT O-RING 1/2 OD TUBE CLASS 6 NUT LOCK BULKHEAD .75-16 YZD HOSE ASSY. HYD .375 X 90 FL CROSS FIT STL .5MJ SDX30 Wing Lift Hydraulics SDX30 Wing Lift Schematic - 1 Serial Range MA99N062 page 3-19... -
Page 81: Nd Serial Range - Starting With Serial Number
HOSE ASSY. HYD .375 X 26 FL CUSHION CYL RUBBER HOSE ASSY. HYD .375 X 90 FL SPACER 33MM ID X2''ODX22MM YZD FASTENER TIE-WRAP .18 X 15.5LG BLK PIN WINGLIFT VALVE /A BALL SDX30 Wing Lift Hydraulics - 2 Serial Range page 3-20... - Page 82 SECTION 3 - HYDRAULIC SYSTEM SERVICE SDX30 - 2 Serial Range 201113C page 3-21...
-
Page 83: Sdx40 Wing Lift Hydraulics
SECTION 3 - HYDRAULIC SYSTEM SERVICE SDX40 WING LIFT HYDRAULICS DESCRIPTION FITTING PIO CPLR .5M-TIP .5FP CYLINDER ASSY. HYD 5.00 X 30 IOWA CYLINDER ASSY. HYD 5.00 X 30 MON VALVE BALL FITTING STL .5MP .5MJ BULKHD YZD WASHER .438 ID 1.0 .083 YZD FITTING STL 90DEG .5MB .5MJ CROSS FIT STL .5MJ ADAPTER TMK#2404-8-8... - Page 84 SECTION 3 - HYDRAULIC SYSTEM SERVICE SDX40 Wing Lift Hydraulics 202077C page 3-23...
-
Page 85: Subbar Hydraulics
SECTION 3 - HYDRAULIC SYSTEM SERVICE SUBBAR HYDRAULICS SDX30 1 SERIAL RANGE SUBBAR HYDRAULICS - up to Serial Number CKB0028188 DESCRIPTION CYLINDER 4X12 CTD 3000PSI W/ 1 PIN HOSE ASSY. HYD .375 X 190 FL HOSE ASSY. HYD .375 X 189 FL HOSE ASSY. - Page 86 SECTION 3 - HYDRAULIC SYSTEM SERVICE SDX30 Subbar Hydraulics - 1 Serial Range 00000004 page 3-25...
- Page 87 HOSE HYD .375 X 188 HOSE HYD .25 X 188 FL HOSE HYD .375 X 100 FL HOSE HYD .25 X 100 FL FASTENER TIE-WRAP .18 X 15.5LG BLK NYL SDX30 Subbar 2 Serial Range - Part 1 of 2 page 3-26...
- Page 88 SECTION 3 - HYDRAULIC SYSTEM SERVICE SDX30 Subbar Hydraulics - 2 Serial Range - Part 1 of 2 201114C page 3-27...
- Page 89 HOSE ASSY. HYD .375 X 189 FL HOSE ASSY. HYD .375 X 168 FL HOSE ASSY. HYD .375 X 100 FL FASTENER TIE-WRAP .18 X 15.5LG BLK NYL SDX30 Subbar 2 Serial Range - Part 2 of 2 page 3-28...
- Page 90 SECTION 3 - HYDRAULIC SYSTEM SERVICE SDX30 Subbar Hydraulics - 2 Serial Range Part 2 of 2 201143C page 3-29...
-
Page 91: Sdx40 Subbar Hydraulics
SECTION 3 - HYDRAULIC SYSTEM SERVICE SDX40 SUBBAR HYDRAULICS DESCRIPTION DESCRIPTION FITTING STL 90DEG .5MB .5MJ VALVE, PILOT CART HYD CHECK CYLINDER ASSY. HYD 4.5 X 12 MONARCH PNTD ELBOW FIT STL 90DEG .5MB .375MJ CONNECTOR FIT STL T .5MJ .5MJ .5MB CYLINDER ASSY. - Page 92 SECTION 3 - HYDRAULIC SYSTEM SERVICE SDX40 Subbar Cylinder 202078C page 3-31...
- Page 93 SECTION 3 - HYDRAULIC SYSTEM SERVICE This Page is Left Blank page 3-32...
-
Page 94: Electrical System Service
CLUTCHES AND WORK SWITCH ........4-4 Remote Clutch - For SDX30 Drills Used with Concord Air Systems ... 4-4 Remote Work Switch - used with SDX30 and SDX40 with ADX Air Systems . -
Page 95: Electrical System Service
SECTION 4 - ELECTRICAL SYSTEM SERVICE This Page is Left Blank page 4-2... -
Page 96: Turn Signal And Flasher Lamp Bulbs
SECTION 4 - ELECTRICAL SYSTEM SERVICE ELECTRICAL SYSTEM SERVICE TURN SIGNAL AND FLASHER LAMP BULBS 1. Remove the screws. 2. Push down and rotate counterclockwise to remove bulb. 3. Install the new bulb. 4. Install the cover and screws. TAIL LAMP 1. -
Page 97: Clutches And Work Switch
SECTION 4 - ELECTRICAL SYSTEM SERVICE CLUTCHES AND WORK SWITCH REMOTE CLUTCH - For SDX30 Drills Used with Concord Air Systems A remote clutch attachment is available for the SDX30 drill. This attachment automatically engages the air system meter clutch when the openers are lowered into the ground and disengages the clutch when the openers are raised out of the ground. -
Page 98: Remote Work Switch - Used With Sdx30 And Sdx40 With Adx Air Systems
SECTION 4 - ELECTRICAL SYSTEM SERVICE REMOTE WORK SWITCH - Used with SDX30 and SDX40 with ADX Air Systems NOTE: Before attaching the switch assembly to the implement, connect the appropriate length of electrical cable to the switch. 1. Insert the electrical cable ends through the rubber grommet. - Page 99 SECTION 4 - ELECTRICAL SYSTEM SERVICE REMOTE SWITCH ASSEMBLY DESCRIPTION REMOTE SWITCH ASSEMBLY U-BOLT 5/16" x 4 1/8" W x 4 3/4" D U-BOLT BRACKET FOR 2,3 & 4 LOCKNUT 5/16" UNC SPRING-E .08WR .75D 9L CHAIN #8, 24"LONG KEY RING 107018C Remote Switch Installation Fasten the remote switch assembly (1) to the to the center...
- Page 100 SECTION 4 - ELECTRICAL SYSTEM SERVICE SWITCH WIRE ROUTING (TOW BEHIND) Use the switch cable supplied to connect the switch to the remote switch connector located at the front of the air cart harness (Detail B). 203214C NOTE: Be sure the switch wires will not be stretched or tangled and the switch will not be damaged as the machine is raised and lowered.
- Page 101 SECTION 4 - ELECTRICAL SYSTEM SERVICE SWITCH WIRE ROUTING (TOW BETWEEN) Use the longest switch cable supplied to connect the switch to the remote switch connector located at the rear of the air cart harness. 203213C NOTES: Remove the dust cap to connect the switch cable plug. The end of the cable with the ring terminals is fastened to the terminals of the switch.
- Page 102 SECTION 4 - ELECTRICAL SYSTEM SERVICE REMOTE SWITCH ADJUSTMENTS Lower the seeding tool until the ground openers are NOTE: The spring mounted to the fixed support must resting on the ground. be in place to allow for over-extension as the seeding tool is lowered further into the ground.
-
Page 103: Connector Service Kit
SECTION 4 - ELECTRICAL SYSTEM SERVICE CONNECTOR SERVICE KIT Connector service kits are available from the manufacturer for maintenance and repair of electrical connectors on tillage equipment and air seeders. For a drill connected to a ADX3360, order part number 14531; for a drill connected to an ADX2180 or a ADX2230, order part number 13345V2. -
Page 104: Contact Removal (Grommet)
SECTION 4 - ELECTRICAL SYSTEM SERVICE 7. The result will be a perfect termination. NOTE: Ensure that there are no unterminated wire strands and that some strand ends can be seen at the forward edge of the crimp. Also note that the insulator is gripped by the smaller Perfect Termination 902001S... -
Page 105: Contact Insertion (Grommet)
SECTION 4 - ELECTRICAL SYSTEM SERVICE 3. Pull contact-wire (4) assembly out of connector with the extractor tool (3). Remove Wire and Extraction Tool 902010M1 CONTACT INSERTION (GROMMET) 1. Grasp contact approximately 25.4 mm (1") behind the contact crimp barrel. 2. - Page 106 SECTION 4 - ELECTRICAL SYSTEM SERVICE VENDOR CONNECTOR CONTACTS WIRE LOCKS PLUGS EXTRACTION CRIMP TOOL TOOLS DEUTSCH 1352506A1 (1) 280384A1 (1) 8-10 S107261 (4) 425278A1 (1) 13951 (20) 12-14 453133C1 (10) 461829C1 (1) 225348C1 (20) 16-20 453133C1 (10) 12119 (1) 425266A1 DEUTSCH 279043A1 (2)
- Page 107 SECTION 4 - ELECTRICAL SYSTEM SERVICE VENDOR CONNECTOR CONTACTS SEALS PN EXTRACTION TOOLS CRIMP TOOL 225349C1-18AWG (20) DEUTSCH 425264A1 (2) 12119 (1) 425266A1(1) 225404C1-14AWG (20) 225348C1-18AWG (20) DEUTSCH 425264A1 (2) 12119 (1) 425266A1 (1) 225406C1-14AWG (20) 225349C1-18AWG (20) DEUTSCH 225227C1 (2) 12119 (1) 425266A1 (1) 225404C1-14AWG (20)
-
Page 108: Contact Removal (Packard Weather Pack)
SECTION 4 - ELECTRICAL SYSTEM SERVICE CONTACT REMOVAL (PACKARD WEATHER PACK) Terminal Removal This tool is designed to remove Weather Pack and Compac 1 terminals from the connector. 1. Open connector secondary lock (1). 2. Grasp the lead and push the terminal to the forward most position. -
Page 109: Terminal Replacement (Weather Pack)
SECTION 4 - ELECTRICAL SYSTEM SERVICE TERMINAL REPLACEMENT (WEATHER PACK) Crimp Tool - Weather Pack (Crimp Tool 14623, Pioneer Packard P/N 12085115). This tool is designed for crimping male and female weather pack terminals to 14, 16, 18 and 20 gauge wires (2 mm - 5 mm). - Page 110 SECTION 4 - ELECTRICAL SYSTEM SERVICE 9. Check crimp and seal for damage; re-terminate if necessary. 902013S Perfect Termination 10. Emergency release level (4) on crimping tool. Emergency Release Lever 902013M1 VENDOR CONNECTOR CONTACTS SEALS EXTRACTION CRIMP TOOL TOOLS PN PACKARD 10752 (5) 225123C1-18/20AWG (10)
-
Page 111: Contact Removal (Dtm Series)
SECTION 4 - ELECTRICAL SYSTEM SERVICE CONTACT REMOVAL (DTM SERIES) 1. Remove orange wedge receptacle (1) using needle nose pliers (2) to pull the wedge straight out. Remove the Receptacle 902018M2 2. To remove the contacts, gently pull wire backwards, while at the same time releasing the locking finger by moving it away from the contact with a screwdriver. -
Page 112: Contact Insertion (Dtm Series)
SECTION 4 - ELECTRICAL SYSTEM SERVICE CONTACT INSERTION (DTM SERIES) 1. Grasp the crimped contact approximately 24.5 mm (1") behind the contact barrel. 2. Hold connector with rear grommet facing you. 3. Push contact straight into the connector grommet until a click is felt. - Page 113 SECTION 4 - ELECTRICAL SYSTEM SERVICE VENDOR CONNECTOR CONTACTS WIRE LOCKS PLUGS EXTRACTION CRIMP TOOL TOOLS 12235 (1) 12311 (4) 8-10 PACKARD 13999 (2) 425056A1 (1) 18-20 PACKARD 13012 (1) 13011 (2) 425279A1 (1) 14-16 VENDOR CONNECTOR TERMINAL WIRE LOCKS PLUGS EXTRACTION CRIMP...
-
Page 114: Amp Crimping Procedure
SECTION 4 - ELECTRICAL SYSTEM SERVICE AMP CRIMPING PROCEDURE Strip wire to 6 mm (1/4"), taking care not to nick or cut wire strands. Select the required contact and identify the appropriate crimp section of the tool according to the wire size markings. - Page 115 SECTION 4 - ELECTRICAL SYSTEM SERVICE VENDOR CONNECTOR CONTACTS SEALS EXTRACTION TOOLS CRIMP TOOL 425057A1 (2) 425285A1-20AWG (10) INCLUDED 12118 (1) ZJI2 (1) 10565 (2) 10563-20AWG (10) INCLUDED 12118 (1) ZJI2 (1) 131498C1 (2) 425260A1-20AWG (20) NONE 12118 (1) ZJI2 (1) 425285A1-20AWG (20) 12369-14AWG (10) 225171C1 (2)
-
Page 116: Opener Service
ECTION PENER ERVICE CONTENTS OF THIS SECTION Page TROUBLESHOOTING TABLES ........5-3 ADJUSTMENTS . - Page 117 SECTION 5 - OPENER SERVICE This Page is Left Blank page 5-2...
-
Page 118: Troubleshooting Tables
SECTION 5 - OPENER SERVICE TROUBLESHOOTING TABLES PROBLEM POSSIBLE CAUSES POSSIBLE SOLUTIONS Excessive seed bounce in furrow. 1. Worn seed retention tab. 1. Replace tab. Seeds sitting on the surface. 1. Inadequate disk penetration. 1. Increase disk penetration adjustment. 2. Broken/worn seed retaining tab. 2. - Page 119 SECTION 5 - OPENER SERVICE PROBLEM POSSIBLE CAUSES POSSIBLE SOLUTIONS Poor seed placement 1. Worn scrapers. 1. Replace scrapers . 2. Inadequate down pressure . 2. Increase opener down pressure adjustment. 3. Improper packing force. 3. Ensure adequate and proper packing force.
-
Page 120: Adjustments
SECTION 5 - OPENER SERVICE ADJUSTMENTS GENERAL ADJUSTMENTS 1. Check the torque on the disk bolts after the first 90 ha (200 ac) and periodically throughout the season as recommended on the maintenance chart. 2. Wear on the disk is normal. The disks should be replaced if the diameter has reached 53.3 cm (21") or when disk penetration suffers. - Page 121 SECTION 5 - OPENER SERVICE To change the opener down pressure: 1. Insert the spring assembly pin so the hairpin is on the disk side of the opener. 2. Fully insert the hairpin onto the spring assembly pin. This will reduce the chance of residue (e.g. corn and sunflower stalks) from accidentally removing the hair pin.
-
Page 122: Scraper Adjustments
SECTION 5 - OPENER SERVICE SCRAPER ADJUSTMENTS The scraper creates the opposite side of the seed trench to the disk. The scraper is designed to be self-aligning, using a spring behind the scraper to maintain contact between the scraper and the disk. 1. -
Page 123: Gauge Wheel
Gauge Wheel Lock Handle 207046C New Style Depth Handle (After PIN CBJ0017520 (SDX30) and After PIN CBJ0017459 (SDX40)) The gauge wheel position is adjusted by unlocking the handle (1). To unlock the handle (1), push down on it and then press down on the locking spring (2) to release it. - Page 124 SECTION 5 - OPENER SERVICE 2. The gauge wheel also removes soil build-up on the disk. Therefore, the gap between the disk and gauge wheel is very important. If the gap is too wide, the wheel will plug with mud or residue. The gap between the gauge wheel and the disk should be between lightly touching to 3 mm (1/8").
-
Page 125: Seed Firming Wheel
SECTION 5 - OPENER SERVICE SEED FIRMING WHEEL The seed firming wheel pushes the seed to the bottom of The press wheel places soil over the seed and packs the the furrow and helps to ensure good seed-to-soil contact. seed and soil into the furrow. This eliminates air pockets Check seed placement routinely and whenever planting and firms the soil around the seed. -
Page 126: Opener Service
Shims should be used to adjust the spacing as required. Gauge Wheel Assembly 207047C (With Old Style Depth Handle; Up to PIN CKB0028188 and Before PIN CBJ0007520 for SDX30 and CBJ0017459 for SDX40) page 5-11... - Page 127 SECTION 5 - OPENER SERVICE Gauge Wheel Assembly 207050C (With New Style Depth Handle, After PIN CBJ0007520 for SDX30, and PIN CBJ0017459 for the SDX40) page 5-12...
-
Page 128: Packer Wheel Assembly
SECTION 5 - OPENER SERVICE PACKER WHEEL ASSEMBLY 1. Ensure all components are free of foreign materials 4. Remove roll pin (4) and washer from packer wheel such as dirt, straw or fertilizer. arm (3) and slide packer wheel arm out of main casting. -
Page 129: Seed Firming Wheel
SECTION 5 - OPENER SERVICE SEED FIRMING WHEEL 1. Ensure all components are free of foreign materials 5. Inspect bushings in main casting and seed firming such as dirt, straw or fertilizer. wheel arm shaft (4) for wear. Replace if necessary. 2. -
Page 130: Scraper Assembly
SECTION 5 - OPENER SERVICE SCRAPER ASSEMBLY 1. Ensure all components are free of foreign materials such as dirt, straw or fertilizer. 2. Remove the nuts (18) and spring (15) holding the scraper (16) to the scraper bracket (14). 3. Inspect the scraper for wear. Replace if necessary. Scrapers should be replaced if the bottom edge of the scraper is worn more than 12 mm (1/2") or when seed placement is affected. -
Page 131: Repair The Seed Tube
SECTION 5 - OPENER SERVICE REPAIR THE SEED TUBE 1. Ensure all components are free of foreign materials 4. Inspect the seed tube for wear. Replace if necessary. such as dirt, straw or fertilizer. 5. Inspect the seed retention tab (20). Replace if 2. -
Page 132: Main Cast Arm Bushings
SECTION 5 - OPENER SERVICE MAIN CAST ARM BUSHINGS To maintain or repair the main cast arm bushings: 1. Ensure all components are free of foreign materials such as dirt, straw or fertilizer. 2. Remove bolt (7) and pivot pin (6) from main cast arm (3). - Page 133 SECTION 5 - OPENER SERVICE This Page is Left Blank page 5-18...
-
Page 134: Air System Service
ECTION YSTEM ERVICE CONTENTS OF THIS SECTION Page TROUBLESHOOTING TABLES ........6-3 SINGLE RANK OPERATION . - Page 135 SECTION 6 - AIR SYSTEM SERVICE This Page is Left Blank page 6-2...
-
Page 136: Troubleshooting Tables
SECTION 6 - AIR SYSTEM SERVICE TROUBLESHOOTING TABLES PROBLEM POSSIBLE CAUSES POSSIBLE SOLUTIONS The center manifold lines are 1. Not enough air velocity. 1. Adjust the air dampers. plugged. 2. Fan turning too slowly. 2. Increase the fan RPM. 3. Fan inlet is restricted. 3. - Page 137 SECTION 6 - AIR SYSTEM SERVICE PROBLEM POSSIBLE CAUSES POSSIBLE SOLUTIONS Lines are plugged - outside 1. Line length differences are too 1. Remove excess length, or add (longest) lines only. great. length to shortest lines. 2. Hoses make too many sharp 2.
- Page 138 SECTION 6 - AIR SYSTEM SERVICE PROBLEM POSSIBLE CAUSES POSSIBLE SOLUTIONS Product buildup/accumulation in 1. Humid air conditions. 1. Change to a different product. air passage ways (high moisture product). 2. Moisture sensitive product. 2. A full tank reduces potential for this problem.
-
Page 139: Single Rank Operation
SECTION 6 - AIR SYSTEM SERVICE SINGLE RANK OPERATION Either the front or the back rank of the drill can be locked up to change row spacing. On the 7.5” spacing drill, the rear rank can be locked up for planting on 15” rows. Thirty inch row spacing can be achieved by locking up the front rank and using every other opener on the back rank. -
Page 140: Setting The Fan Speed - Concord Air Systems
SECTION 6 - AIR SYSTEM SERVICE SETTING THE FAN SPEED - CONCORD AIR SYSTEMS IMPORTANT: Fan speed charts have been calculated to provide a starting point only! Conditions such as humidity, type of fertilizer, % of the rate that is fertilizer, hose routings, temperature, etc. will affect the way the product moves through the air stream. -
Page 141: Hoses
SECTION 6 - AIR SYSTEM SERVICE HOSES When installing hoses, first measure them. Leave some slack for folding and hose equalization and then cut and install. Refer to the air package assembly manuals for more detailed information on hose layout and assembly. Primary Hoses - the 2 1/2"... -
Page 142: Theory Of Operation - Air System
SECTION 6 - AIR SYSTEM SERVICE THEORY OF OPERATION - AIR SYSTEM NOTE: Refer to your air cart service manual for more It is important that no hose ever be looped, causing the product to do a 360 / change in direction. The air flow information on the air delivery system from the air cart to the tillage equipment. -
Page 143: To Determine Adequate Carrying Velocities
SECTION 6 - AIR SYSTEM SERVICE TO DETERMINE ADEQUATE CARRYING VELOCITIES OPEN HOSE METHOD NOTE: The Velocity Chart Method is another way of determining velocity, if the air cart is equipped with velocity sensors. Refer to the air cart service manual for more information. NOTE: The appropriate method to be used depends on the configuration of the air cart. - Page 144 SECTION 6 - AIR SYSTEM SERVICE Open Hose Method - Single Shoot Shown page 6-11...
-
Page 145: Air System Components - Concord Air System
SECTION 6 - AIR SYSTEM SERVICE AIR SYSTEM COMPONENTS - CONCORD AIR SYSTEM FRONT TOW PRIMARY MANIFOLD STAND DESCRIPTION CLAMP #44 - STAINLESS NUT, LOCK .375 UNC GR B YZD BOLT .375 X 1 UNC GR5 YZD BOLT .375 X 1.25 UNC GR5 YZD NUT JAM .375 UNC GR2 YZD CLAMP MUFFLER, 2.5 .312 ROD PLT COVER PLATE HOSE CONNECT... -
Page 146: Rear Tow Primary Manifold Stands
SECTION 6 - AIR SYSTEM SERVICE REAR TOW PRIMARY MANIFOLD STANDS DESCRIPTION DESCRIPTION MOUNTING SPACER BOLT .5 X 7.5 UNC GR5 YZD BOLT .375 X 4 UNC GR5 YZD WASHER .531 X 1.062 X .095 MOUNTING LOWER PLATE, LARGE BACKUP NUT .375 UNC GR5 YZD NUT, LOCK .5 UNC GR A YZD NYL LK WASHER, LOCK .375 YZD... -
Page 147: Pivot Assembly Manifold Stands
SECTION 6 - AIR SYSTEM SERVICE PIVOT ASSEMBLY MANIFOLD STANDS DESCRIPTION DESCRIPTION FITTING 1/4-28 TAPER THREAD BUSHING POLYLUBE 1.25OD 1 ID NUT, LOCK .5 UNC GR A YZD NYL LK ARM ASSY. PRIMARY MANIFOLD STAND BOLT 1/2-13 X 8 GR 5 ZND. PLATE BOLTING NUT .375 UNC GR5 YZD SUPPORT ASSY. -
Page 148: Primary Manifold
SECTION 6 - AIR SYSTEM SERVICE PRIMARY MANIFOLD DESCRIPTION DESCRIPTION CLAMP HOSE #600 5.00-5.75 YZD COVER MANIFOLD PRIM 4PRT 2.50 HOSE 5.0 ID PVC BLACK BULK NUT JAM .25 UNC GR5 YZD CLAMP BOLT .25 X 1 UNC GR8 YZD TUBE PRIMARY MANIFOLD NUT WING .25 UNC YZD TUBE PRIMARY SS... -
Page 149: Secondary Manifold
SECTION 6 - AIR SYSTEM SERVICE SECONDARY MANIFOLD DESCRIPTION DESCRIPTION BRACKET SECONDARY MFLD PTD BOLT .25 X 1 UNC GR8 YZD CLAMP MUFFLER ASSY 2.44''NOMINAL SCREW SET .25-20X1.25HL HX SKT CLAMP MUFFLER 2.5 .312 ROD PLT CUSHION GASKET NEOPRENE 7.5 OD NUT, LOCK .5 UNC GR A YZD NYL LK NUT WING .25 UNC YZD BOLT "U"... -
Page 150: Air System Components - Adx Air System
SECTION 6 - AIR SYSTEM SERVICE AIR SYSTEM COMPONENTS - ADX AIR SYSTEM HEADER ASSEMBLIES DESCRIPTION DESCRIPTION SPRING CLIP LID EZ FLOW HEADER INSERT HEADER EZ FLOW GLUED SCREW TAP .25-15 X .5 PH B PI INSERT NOSE HEADER INSERT HEADER PORT CLAMP MUFFLER, 2.5 .312 ROD PLT LID EZ FLOW HEADER C/W SEAL NUT . - Page 151 SECTION 6 - AIR SYSTEM SERVICE This Page is Left Blank page 6-18...
-
Page 152: Endmarker Service
SDX30 ENDMARKER ........ - Page 153 SECTION 7 - ENDMARKER SERVICE This Page is Left Blank page 7-2...
-
Page 154: Endmarkers
SECTION 7 - ENDMARKER SERVICE ENDMARKERS SAFETY DURING OPERATION DANGER! Stand clear of implement when end marker is being folded or unfolded. Disc blade on end of boom swings out fast and covers a large area. Failure to follow these instructions will result in death or serious injury. -
Page 155: Sdx30 Endmarker
SECTION 7 - ENDMARKER SERVICE SDX30 ENDMARKER ASSEMBLY DESCRIPTION DESCRIPTION NUT .625 UNC GR5 YZD SPRING, TENSION .406 WIRE NUT, LOCK .438 UNC GR B YZD PIN, PIVOT CHROME HORIZONTAL WASHER, LOCK .625 YZD SPACER TUBE SPRING BIAS EM NUT, LOCK .625 UNC GR B YZD SPACER TUBE HORIZ PIVOT EM CAPSCREW .5 X 3.5 UNC GR5 YZD... - Page 156 SECTION 7 - ENDMARKER SERVICE SDX30 Endmarker Assembly Parts page 7-5...
- Page 157 HOSE ASSY. HYD .25 X 277 FL FITTING STL T .375MJ BULKHD HOSE ASSY. HYD .25 X 261 FL FITTING STL T .5MB .5MJ RES 0.0625 FITTING PIO CPLR .5MP .375FP FITTING, REDUCER STL .375MJ .5FJ Endmarker Hydraulic Components SDX30 Endmarker Hydraulic Schematic page 7-6...
-
Page 158: Adjustments
SECTION 7 - ENDMARKER SERVICE ADJUSTMENTS 1. Endmarker adjustments. Bifold pivot (1). Knuckle pivot (4). For correct adjustment of the endmarker the primary arm (3) needs to be parallel to the toolbar. The secondary arm (2) needs to be parallel to the primary arm (3). - Page 159 SECTION 7 - ENDMARKER SERVICE 3. Offset pin at bifold pivot. Adjust the offset pin at the bifold pivot to align the bifold portion of the endmarker, making it parallel to the toolbar. Loosen the 5/8" bolt (1). Turn the offset pivot pin (2) on the head until the endmarker is aligned.
- Page 160 SECTION 7 - ENDMARKER SERVICE 5. Marker weight bias spring. The marker bias spring should be adjusted to give efficient weight on the disc to give a good mark in the field and to have tension on the spring when the marker is folded in.
-
Page 161: Sdx40 Endmarker
SECTION 7 - ENDMARKER SERVICE SDX40 ENDMARKER ASSEMBLY The endmarker is mounted to the SDX40 drill as shown. Endmarker Mount 202357S DESCRIPTION DESCRIPTION PIN, SPLIT (COTTER) HAIR .243 X 4 YZD U-BOLT US .75 4.06W 8D WASHER .938 ID 2.25 YZD WASHER .813 ID YZD SPRING (COIL) -C .313 WR 1.625 OD 12.5 BOLT .313 X 4 UNC GR5 YZD... - Page 162 SECTION 7 - ENDMARKER SERVICE Endmarker Mount Assembly 202083C page 7-11...
- Page 163 SECTION 7 - ENDMARKER SERVICE ENDMARKER HYDRAULICS DESCRIPTION DESCRIPTION VALVE HYD SEQUENCE 2 WAY BOLT .375 X 1 UNC GR5 YZD FITTING PIO CPLR .5M-TIP .5FP PLUG FIT STL .5MB HEX VALVE, PRESSURE RELIEF 1000PSI ISOLATOR HOSE CLAMP SMALL FITTING STL .5MB .5MJ RES 0.0625 CLAMP HOSE FORMED 2.88X.94PNT CYLINDER ASSY.
- Page 164 SECTION 7 - ENDMARKER SERVICE Endmarker Hydraulics Assembly 202088C page 7-13...
-
Page 165: Adjustments
SECTION 7 - ENDMARKER SERVICE ADJUSTMENTS ADJUSTING DISC ANGLE The angle of the marking disc can be adjusted to be more or less aggressive depending on the field condition. Harder ground or thicker stubble may require a greater angle to make the mark more visible. To adjust the disc angle: 1. -
Page 166: Endmarker Bias Spring Adjustment
SECTION 7 - ENDMARKER SERVICE ENDMARKER BIAS SPRING ADJUSTMENT The spring bias adjusts the amount of down pressure on the marking disc. More pressure will leave deeper marks in the field. If possible, adjust the spring so it is tensioned when the endmarker is retracted. -
Page 167: Endmarker Service
SECTION 7 - ENDMARKER SERVICE ENDMARKER SERVICE BEARING REPLACEMENT Refer to the following table and figure for the parts and parts descriptions for the bearing replacement. Remove dust cap, cotterpin and spindle nut. Before installing the bearings in the housing, partially fill the housing with grease. - Page 168 SECTION 7 - ENDMARKER SERVICE DESCRIPTION DESCRIPTION NUT, LOCK .625 UNC GR B YZD DISC 16'' CONCAVE NOTCHED BOLT .625 X 1.75 UNC GR5 YZD CAP HUB DC11 YZD NUT, LOCK .5 UNC GR B YZD SCREW WHEEL .5 UNF GR5 WB96 BEARING, CUP #L44610 HUB ASSY.
- Page 169 SECTION 7 - ENDMARKER SERVICE This Page is Left Blank page 7-18...
-
Page 170: Index
Frame Brace Kit ..... . . 2-13 SDX30 ......2-14 Bogie Hub and Spindle . - Page 171 Repair Part Identification ....i SDX30 ....... i Wing Lift Ball Valve .
Need help?
Do you have a question about the SDX30 and is the answer not in the manual?
Questions and answers