Stihl KB-MM Instruction Manual
Hide thumbs
Also See for KB-MM:
- Instruction manual (44 pages) ,
- Instruction manual (36 pages) ,
- Instruction manual (22 pages)
Table of Contents
Advertisement
Quick Links
Advertisement
Table of Contents

Subscribe to Our Youtube Channel
Related Manuals for Stihl KB-MM


Summary of Contents for Stihl KB-MM
- Page 1 KB-MM, KW-MM 2 - 17 Instruction Manual...
-
Page 2: Table Of Contents
Caution where there is a risk of damaging the machine or its individual components. Engineering improvements STIHL's philosophy is to continually improve all of its products. For this reason we may modify the design, engineering and appearance of our products periodically. - Page 3 Only use attachments and accessories that are explicitly approved for this power tool model by STIHL offers a comprehensive range of personal STIHL or are technically identical. If you have protective equipment. any questions in this respect, consult your Transporting the machine dealer.
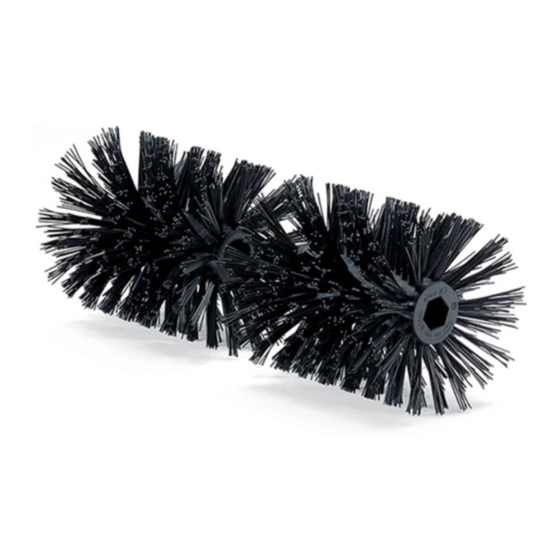
- Page 4 Use this position for: The correct engine idle speed is important to – KB-MM bristle brush ensure that the work tool stops moving when you – KW-MM sweeper drum assembly let go of the throttle trigger. Check and correct the idle speed setting at regular intervals.
- Page 5 3 Safety Precautions and Working Techniques English To reduce the risk of injury from thrown objects Work calmly and carefully – in daylight conditions or contact with the attachment, never operate the and only when visibility is good. Proceed with unit without a properly mounted deflector caution, do not put others in danger.
-
Page 6: Using The Unit
English 4 Using the Unit Bristle Brush STIHL recommends that you have servicing and repair work carried out exclusively by an author‐ ized STIHL servicing dealer. STIHL dealers are regularly given the opportunity to attend training courses and are supplied with the necessary technical information. - Page 7 4 Using the Unit English WARNING WARNING Never work without the properly mounted deflec‐ The bristle brush pushes back towards the oper‐ tor and two extensions. ator. These devices divert material away from the PowerSweep machine and the operator. ► Secure the handlebar in the normal operating position.
-
Page 8: Approved Multiengines
► Guide the PowerSweep at right angles to the Only use MultiEngines supplied by STIHL or direction of travel (1). Sweepings are thrown expressly approved by STIHL for use with the forwards, ahead of the operator. MultiTool. This MultiTool may only be used in combination WARNING with the STIHL MM 56 MultiEngine. - Page 9 6 Mounting the MultiTool English Checking Position of Gearbox NOTICE WARNING It must not be possible to rotate the gearbox on the shaft. Check and potentially adjust the gearbox posi‐ tion – risk of injury by the MultiTool rotating in the Installing the MultiTool wrong direction! ►...
-
Page 10: Starting / Stopping The Engine
English 7 Starting / Stopping the Engine 6.7.2 Removing the Deflector Extensions WARNING ► Use the combination wrench to disengage the tabs (1) and then pull off the extensions. Always install both bristle brushes! Starting / Stopping the Installing the Sweeper Drum Engine Assembly Starting the Engine... -
Page 11: Application With Ka
► Pull the protective cap off the end of the shaft only with the following basic power tool: and keep it in a safe place. – STIHL KA 235.0 R If the plug comes out of the shaft when you pull off the cap: ►... - Page 12 English 8 Application with KA 8.1.2 Removing the Gearbox or Attachment Remove any existing gearbox or interchangeable attachment from the basic power tool. SP 10 ► Loosen but do not remove the clamp screws (arrows) on the gearbox housing. ► Pull the gearbox off the shaft. If the drive shaft slips out of the tube when you pull off the gearbox: ►...
- Page 13 8 Application with KA English ► Push the sleeve (4) onto the shaft (3) as far as stop. The drive shaft must not project from the tube by more than L = 22 mm (7/8 in). ► Loosen the clamp screws (5). If the length (L) is not correct: ►...
-
Page 14: Storing The Machine
English 9 Storing the Machine Balancing the Machine ► Place the unit on the ground. The sweeping attachments may touch the ► Loosen the screw (3). ground, but no other obstacles – risk of acci‐ dents. ► Make sure you have a firm footing, either standing, stooping or kneeling. -
Page 15: Maintenance And Care
(if fit‐ be performed by a servicing dealer. ted). STIHL recommends that you have servicing and ► Store the machine in a dry and secure location repair work carried out exclusively by an author‐ Keep out of the reach of children and other ized STIHL servicing dealer. -
Page 16: Specifications
MultiTool complete with axle and grass shield When repairing the machine, only use replace‐ KB‑MM with deflector extensions: 4.2 kg ment parts which have been approved by STIHL KW‑MM: 3.9 kg for this power tool or are technically identical. 13.3... -
Page 17: Ec Declaration Of Conformity
Improper disposal can be harmful to health and pollute the environment. Robert Olma, Vice President, Regulatory Affairs & Global Governmental Relations ► Take STIHL products including packaging to a suitable collection point for recycling in accord‐ ance with local regulations. ► Do not dispose with domestic waste. - Page 18 English 16 EC Declaration of Conformity 0458-486-0121-B...
- Page 19 16 EC Declaration of Conformity English 0458-486-0121-B...
- Page 20 *04584860121B* 0458-486-0121-B...
Need help?
Do you have a question about the KB-MM and is the answer not in the manual?
Questions and answers