Table of Contents
Advertisement
Quick Links
Advertisement
Table of Contents

Related Manuals for Aquatica Digital Mark Sadler Zen Spa Pro


Summary of Contents for Aquatica Digital Mark Sadler Zen Spa Pro
- Page 1 Zen Spa Pro by Mark Sadler Pre-Installation Manual...
- Page 2 Proper preparation of the premises and systems will ensure a safe and rapid installation of the spa. For this reason we advise you to read this manual carefully and to carefully fol- low all the information contained herein. The Aquatica team is always available for any information or request for assistance that may be required during preparation.
-
Page 3: Table Of Contents
CONTENTS MEASUREMENTS AND TECHNICAL SPECIFICATIONS ................. TEMPORARY POSITIONING ............................. WHAT PREPARATIONS ARE REQUIRED? ....................IDENTIFICATION OF THE INSTALLATION SITE ................... OUTDOOR INSTALLATION ............................INDOOR INSTALLATION ............................PREPARATION OF THE INSTALLATION SITE ....................FREESTANDING INSTALLATIONS ......................... RECESSED INSTALLATIONS ........................... PLUMBING PREPARATIONS .......................... -
Page 4: Measurements And Technical Specifications
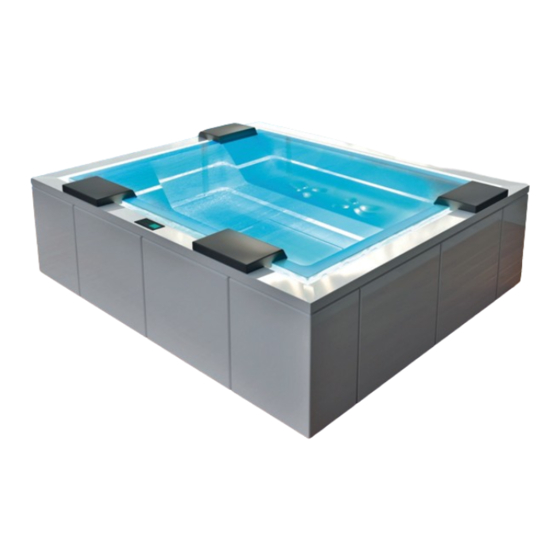
PRE-INSTALLATION MEASUREMENTS AND TECHNICAL SPECIFICATIONS PLATFORM 280 x 235 x 85 cm (110.2 x 92.5 x 33.4 inches) Packaging Freestanding Recessed Insulation Emergency Drain for pipes maximum 2500 litres The manufacturer suggests a water minimum load of 425 kg/m . (660 gal) content weight... -
Page 5: Temporary Positioning
PRE-INSTALLATION The spa works efficiently and safely if it is installed 80°C correctly and in compliance with the regulations in force in the country of use. 176°F This per-installation guide provides information for a proper preparation of the environments and the plumbing and electrical connections. -
Page 6: What Preparations Are Required
PRE-INSTALLATION WHAT PREPARATIONS ARE REQUIRED? Room for To be installed, the minipool the electrical connections requires: Identification of the installation site. Preparation of the installation site. Preparation of the plumbing. Preparation of the electrical system. a possible external heat exchanger (optional), see next page for details. - Page 7 PRE-INSTALLATION PREPARA TION OF CONNECTION TO AN OPTIONAL EXTERNAL HEAT EXCHANGER (NOT SUPPLIED ) Room for the electrical connections The Exchanger is the device with which domestic Inlet connection: Outlet connection: water is heated 1 “1/4 female - socket 1 “1/4 female - socket (in this manual represented by a boiler connected...
-
Page 8: Identification Of The Installation Site
PRE-INSTALLATION IDENTIFICATION OF THE INSTALLATION SITE When choosing the position, take into account the local regulations that prohibit any electrical installation (plug sockets, switches, lamps, etc.) in the area surrounding the spa for a distance of at least 60 cm (24") and a height of 230 cm (90"). When choosing the position, bear in mind that the inspection side (electrical/plumbing components side) must always remain... -
Page 9: Preparation Of The Installation Site
PRE-INSTALLATION PREPARATION OF THE INSTALLATION SITE FREESTANDING INSTALLATIONS As a base, build a platform or flooring in reinforced B non-slip flooring around the minipool. concrete, at least 10 cm thick, perfectly flat and suit- able for supporting the weight of the spa and the peo- For the preparation of the water and electrical ple using it. -
Page 10: Recessed Installations
PRE-INSTALLATION RECESSED INSTALLATIONS As a base, create a reinforced concrete recess having Prepare: a thickness of at least 10 cm, perfectly flat and able to • A A technical inspection port at least 50 cm wide on support the weight of the minipool and the people us- all sides of the minipool. -
Page 11: Plumbing Preparations
PRE-INSTALLATION PLUMBING PREPARATIONS The water connection must be dedicated exclusively to the spa (it is not possible to connect other equipment to the same connection) and carried out with new and never used hoses and couplings. It is recommended to use ONLY tap water as it guarantees microbiological purity and absence of metallic particles (not blocked by the filter) or organic substances. -
Page 12: Tap Water And Well Water
PRE-INSTALLATION More information TAP WATER AND WELL WATER To ensure maximum hygiene and durability of the minipool it is essential to pay close attention to the quality of the water that will be used to fill it. It is important that the water used be drinkable. It is always advisable not to use well water because it may be very hard, rich in metals like iron and manganese, and have bacterial loads. -
Page 13: Characteristics Of The Water Supply
PRE-INSTALLATION CHARACTERISTICS OF THE WATER SUPPLY OPTIMAL VALUES PARAMETER VALUES ABOVE OR BELOW CAN... between..cause problems related to the safety and well-being of Refer to the specific regulations POTABILITY users of the country of use SUPPLY maximum: 300,000 PA (3 bar) PRESSURE minimum: 150,000 PA (1.5 bar) ...cause build-up that over time can cause damage to the... -
Page 14: Electrical Preparations
Electrical Wiring Manual PRE-INSTALLATION Typical Wiring Connection for USA & Canadian installations ELECTRICAL PREPARATIONS Zen Spa Pro Bond in accordance with national and local codes. Open bonding lugs are located at the top of the junction box. 120/240 VAC Source Breaker Box * Connections to be made Typical Two-Pole... - Page 15 Note...
- Page 16 Function : For m : Fashion aquaticausa.com aquaticabath.ca aquaticabath.co.uk aquaticabath.eu...
Need help?
Do you have a question about the Mark Sadler Zen Spa Pro and is the answer not in the manual?
Questions and answers