Advertisement
Quick Links
Advertisement

Related Manuals for MEGAMO PULSE ELITE


Summary of Contents for MEGAMO PULSE ELITE
- Page 1 USER MANUAL www.megamo.com...
- Page 2 THANK YOU FOR YOUR TRUST IN MEGAMO. ENJOY YOUR RIDE!
- Page 3 INDEX INTRODUCTION PARTS OF THE BICYCLE USES IN ACCORDANCE WITH THE CONDITIONS LIFESPAN INFORMATION ON THE MAXIMUM PERMITTED TOTAL WEIGHT BEFORE FIRST USE HANDLING OF QUICK-RELEASE FASTENERS AND THRU AXLES SUSPENSION COMPONENTS BREAK SYSTEM TYRE PRESSURE CLEANING RECOMMENDATIONS IN THE EVENT OF IMPACTS OR FALLS BICYCLE MAINTENANCE AND CARE RECOMMENDED TIGHTENING TORQUES...
- Page 4 WARNING This user manual contains informa- This symbol indicates actions required to tion you need to use your Megamo avoid a potential hazard that could endanger bike and get the most out of it. the physical integrity and even the life of the user, as well as damage to property.
- Page 5 PARTS OF THE BICYCLE The different parts and components of a Megamo mountain bike are shown below. *Although it may be the case that the model of bike shown does not exactly match the model of bike purchased, the main components shown are the same for both.
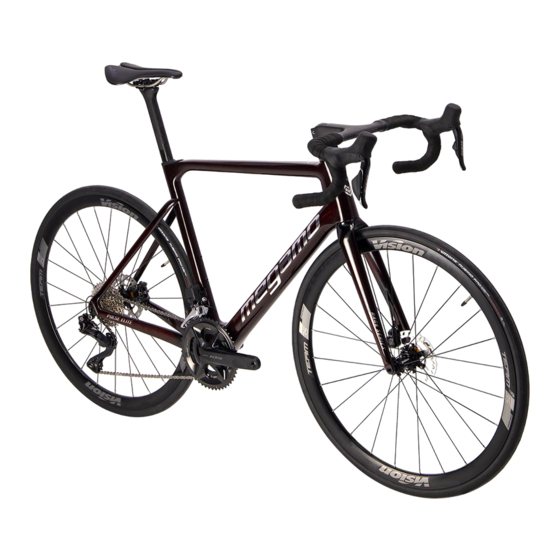
- Page 6 PARTS OF THE BICYCLE ROAD The different parts and components of a Megamo road bike are shown below. *Although it may be the case that the model of bicycle shown does not exactly match the model of bicycle purchased, the main components shown are the same for both.
- Page 7 PARTS OF THE BICYCLE GRAVEL The different parts and components of a Megamo gravel bike are shown below. *Although it may be the case that the model of bike shown does not exactly match the model of bike purchased, the main components shown are the same for both.
- Page 8 ALL-USE The following shows the different parts and components of a Trekking/City Megamo bicycle. *Although it may be the case that the bike model shown does not exactly match the bike model purchased, the main components shown are the same for both.
- Page 9 Use contrary to the intended use will result in the loss of warranty. There is no one type of bicycle that is suitable for all purposes. Your Megamo dealer will help you find the right Megamo bike for your needs.
- Page 10 (lighting, bell). Observe the traffic regulations when riding on public roads. Megamo bicycles according to condition of use 2 are not designed for use on rough terrain or for jumping, sliding, stoppies, wheelies, tricks, use on stairs or competitions of any kind.
- Page 11 The mounting of pannier racks on Megamo bicycles according to condition of use 2 is only permitted if your Megamo bicycle is equipped with a pannier rack attachment mechanism on the upper rear stays or dropouts. In these cases, you can mount the appropriate luggage rack at the above mentioned points. If necessary, please consult your Megamo dealer before installation.
- Page 12 They are used, for example, for sport and competition use with moderate technical demands on the roads. Megamo bicycles according to condition of use 3 are suitable for use on rough, unpaved roads and paths as well as difficult terrain and unconditioned trails.
- Page 13 These bicycles are used, for example, for sport and competition with very high technical demands on the roads. Megamo bicycles according to condition of use 4 are suitable for use on rough, unpaved roads and paths as well as on difficult and partly rocky terrain and unconditioned trails.
- Page 14 Before using Megamo bicycles in accordance with the condition of use 6 on public roads, you must equip them with the prescribed devices (lighting, bell). Megamo bikes according to condition of use 5 are not designed for use on rough terrain or for jumping, slides, stoppies, wheelies, tricks, use on stairs or off-road, nor for cyclocross or touring with pannier racks or panniers.
- Page 15 Therefore, and given that when the useful life of the bicycle is exceeded, it is advisable to periodically check the bicycle and consult an official Megamo dealer whenever there are doubts in this respect. Excessive flexing, abnormal functioning, cracks or colour changes in areas of high mechanical stress may be symptoms that the bicycle or a specific com- ponent has reached the end of its useful life and needs to be replaced.
- Page 16 • Seat clamp. respect. • Tyre pressures. further information, please consult an official Megamo dealer or • Check brakes. a biomechanical specialist. • Check front and rear derailleur for When making adjustments there is a proper operation. specific risk of entrapment.
- Page 17 • Lubrication and chain cleaning. Do not use your Megamo bike if you have not previously adjusted and checked its components. A defective Megamo bicycle can cause serious accidents. If you are not completely sure or have any doubts, please consult your official Megamo dealer.
- Page 18 Most Megamo bicycles are equipped with quick releases and thru axles that allow you to quickly adjust, mount and dismount components. Each time you use your Megamo bicycle you should check that all quick releases/ thru axles are tightened securely before use. Handle quick releases/thru axles with the utmost care, as your safety depends directly on them.
- Page 19 This will avoid mounting the front wheel with the sides reversed. For Megamo bikes with disc brakes and quick releases with 5 mm axle it may be useful to mount both levers on the chain side. This will prevent you from touching the hot brake disc and burning your fingers.
- Page 20 Many Megamo bikes, especially mountain bikes and trekking bikes, are equipped with a suspension fork. This fork improves the control of the Megamo bike when riding over rough terrain or on rough road surfaces, as it improves the contact between the ground and the tyre. This significantly limits the impacts to which the Megamo bike and its user are exposed.
- Page 21 Rebound and compression adjustment influences the damping and response of the suspension fork and rear suspension. The relationship between rebound and compression is critical. Depending on the model of the Megamo bike, the suspension will be equipped with a rebound adjustment. The ratio between rebound and compression is determined by the nature of the terrain.
- Page 22 We strongly recommend that you leave this adjustment work to your official Megamo dealer at the time of delivery. In the case of frames with full suspension, the movable rear part is designed in such a way that it can or must attenuate impacts.
- Page 23 BRAKE SYSTEM Brakes are an essential tool for adapting driving speed to terrain and traffic conditions. In an emergency, they must be able to stop the bicycle quickly and safely. When the brakes are applied with force, body weight often shifts forward, which can cause the rear wheel to lift and the bicycle to tip over.
- Page 24 RIM BRAKE SYSTEMS There are several types of rim brake systems, such as Cantilever, V-Brake and Horseshoe. These systems are composed of levers which are connected to the brake by cables or hydraulics. When pressure is applied to the levers, the brake pads act on the rim to brake the wheels, which slows the bicycle.
- Page 25 The vertical adjustment of the brake shoe must be such that the edge of the rim is 1 mm above the end of the shoe. The shoe must contact the rim perfectly perpendicular to the braking surface. The shoe must be slightly inclined in the direction of rotation of the wheel.
- Page 26 HOW TO ADJUST THE TRAVEL OF BRAKE LEVERS On some brake levers it is possible to Lever adjustment adjust the brake lever travel. Locate screw the lever travel adjustment screw. To increase the travel, turn the screw clock- wise. To reduce the travel, turn the screw counter-clockwise.
- Page 27 · For Cantilever and Horseshoe brakes: release the sliding cable. With one hand press the brake pads against the rim; with the other hand pull the end of the cable end from the retaining fork. When you release the brake pads the brake will open.
- Page 28 contact with the handlebars. If the lever touches the handlebars, the system must be bled. This should be done by your authorised dealer, as it requires special equipment and knowledge. Check that there is no oil, grease or other dirt on the disc. The disc is an essen- tial part of the braking system and must be kept clean.
- Page 29 HOW TO REMOVE THE WHEEL To remove the wheel in case of disc brakes it is not necessary to dismantle the brake system. Carefully slide the disc off the brake when removing it from the brake. When installing the wheel, carefully guide the disc between the brake pads. If you press the disc rim hard against the pads, the pads may fracture or be damaged and need to be replaced..
- Page 30 the discs as little as possible. The tightening torque for the disc brake bolts are: - Shoe mounting bolts: 11.5-12.5Nm - Adapter mounting bolts: 11.5-12.5Nm - Disc coupling bolt: 5-6Nm - Cable clamp bolt: 6-8Nm Every month check your bike’s brake cables for kinks, rust, broken wires and frayed ends, and check the casings for bent ends, cuts or fraying.
- Page 31 When installing the wheel, carefully guide the disc between the brake pads. If you press the disc rim hard against the pads, the pads may fracture or be damaged and need to be replaced. LUBRICATION Every three months lubricate the pivots with synthetic lubricant, as for the chain.
- Page 32 TYRE PRESSURE For correct operation of the bicycle, it is necessary to use a tyre pressure in accordance with the type of use and the weight of the user. Check the tyre pressure regularly. FRONT DERAILLEUR AND REAR DERAILLEUR ADJUSTMENT In order to keep the gearbox in perfect condition, it is necessary to regulate it periodically according to the following instructions.
- Page 33 C To check that the derailleur works correctly on all chainrings and sprockets, ride the bike with the derailleur and derailleur controls to ensure that the derail- leur works properly. If in any gear the chain falls towards the bottom bracket, adjust screw 5 in figure 5 by turning the adjusting screw 1/4 turn clockwise.
- Page 34 CAUTION! Avoid, as far as possible, shifting gears in full effort and the pairing of chainrings and sprockets according to the following picture. Correct Incorrect Sprockets Chainrings Sprockets Chainrings INSTALLATION OF THE PEDALS ATTENTION! The two pedals are not identical. It is essential not to force the adjustment in case of difficulty in screwing.
- Page 35 RECOMMENDATIONS For safe cycling, it is recommended to wear a helmet and protective and sig- nalling elements. The product and its use must comply with current legisla- tion. When riding in the rain or on wet roads, visibility and grip are reduced and braking distances are longer, so the rider must adapt speed and anticipate braking.
- Page 36 IN THE EVENT OF IMPACTS OR FALLS After a collision or impact with your Megamo, you must first of all ensure your own safety and that of any persons or animals involved in the accident.. A fall can prevent your bicycle from working properly and this can cause future damage if it is not checked properly.
- Page 37 If you have any doubts about the condition of your bike after a crash, take it to a Megamo dealer for a professional check. Hidden damage can be dangerous and can cause sudden failure and loss of control. It is crucial to keep your bike...
- Page 38 BICYCLE MAINTENANCE AND CARE Megamo will deliver your bike ready for use, but it is important that you have it regularly serviced and maintained by your Megamo dealer to ensure the long- term performance of all components. It is recommended that the first service should be carried out after about 250 kilometres, after 10 hours of use, after a period of four to six weeks or after a maximum of three months.
- Page 39 MAINTENANCE TIPS RECOMMENDED PART USE AND MAINTENANCE UNDER WARRANTY PRODUCTS Check quick-release fasteners Clean the rim with soap and before use (in closed position). water. Axle or hub locking. Wheels Check the wheels after a heavy Grease the wheel axles with Deformed rim.
- Page 40 Megamo. The cost of any type of part or accessory that is necessary for the final assembly of these accessories or installed components will be at the customer’s expense and expense.
- Page 41 CARBON FIBER E-BIKES = 120 KG • This lifetime guarantee is subject to the study and decision of our Megamo brand technicians regarding the nature of the defect, who will determine, after carrying out an analysis of the bicycle, if the nature of the defect is covered by this guarantee.
- Page 42 B. LEGAL AND LIFETIME WARRANTY EXCLUSIONS • Breaks or cracks derived from negligent, inappropriate use or misuse of the bicycle. The use of the bicycle in competition, rental or for use in commercial activities will be considered as unusual or inappropriate use. •...
- Page 43 ADDITIONAL INFORMATION Up-to-date information on bike models, technical and commercial specifica- tions can be found on the official Megamo website: https://www.megamo.com Follow us on our social networks to keep up to date with all the latest news: Instagram: @megamo_bicycles Facebook: facebook.com/megamobicycles...
- Page 44 Mosquerola, Nº 61 - Nave 2ª 17180 VILABLAREIX (Girona) Spain Description: Brand: Megamo Models: PULSE ELITE, RAISE, FACTORY, NATURAL, TRACK, WEST, JAKAR Year of manufacture: 2022, 2023 Bicycle: Megamo complies with all provisions according to Royal Decree 339/2014 and in accordance with EU regulations.
- Page 45 Models: ADVENTURE, PARK, EXECUTIVE, TACAMA, KIBO, RONDA, TRIVIA, MAXI, ZAMBRA Year of manufacture: 2022, 2023 Bicycle: Megamo complies with all provisions according to Royal Decree 339/2014 and in accordance with EU regulations. Standards: Designed and manufactured according to ISO 4210-2 standard.
- Page 46 Models: AIR BOY, AIR GIRL, KID 18”, KID 16”, KID 14” Year of manufacture: 2022, 2023 Bicycle: Megamo complies with all provisions according to Royal Decree 339/2014 and in accordance with EU regulations. Standards: Designed and manufactured according to EN - ISO 8098 standard.
- Page 47 Models: DX3, KU2, FUN, FUN LADY, OPEN, OPEN JUNIOR Year of manufacture: 2022, 2023 Bicycle: Megamo complies with all provisions according to Royal Decree 339/2014 and in accordance with EU regulations. Standards: Designed and manufactured according to ISO 4210-2 standard.
- Page 48 www.megamo.com...
Need help?
Do you have a question about the PULSE ELITE and is the answer not in the manual?
Questions and answers