Table of Contents
Advertisement
Quick Links
EN
With your inspiring rating, COSTWAY will be more consistent to offer you EASY
SHOPPING EXPERIENCE, GOOD PRODUCTS and EFFICIENT SERVICE!
DE
Mit Ihrer inspirierenden Bewertung wird COSTWAY konsistenter sein, um Ihnen EIN
SCHÖNES EINKAUFSERLEBNIS, GUTE PRODUKTE und EFFIZIENTEN SERVICE zu
bieten!
FR
Avec votre évaluation inspirante, COSTWAY continuera à fournir une EXPÉRIENCE
D'ACHAT PRATIQUE, des PRODUITS DE QUALITÉ et un SERVICE EFFICACE !
ES
Con su calificación inspiradora, COSTWAY será más consistente para ofrecerle
EXPERIENCIA DE COMPRA FÁCIL, BUENOS PRODUCTOS y SERVICIO EFICIENTE.
IT
Con la tua valutazione incoraggiante, COSTWAY sarà più coerente per offrirti
ESPERIENZA DI ACQUISTO FACILE, BUONI PRODOTTI e SERVIZIO EFFICIENTE!
PL
Dzięki twojej opinii COSTWAY będzie mógł oferować jeszcze WYGODNIEJSZE
ZAKUPY, LEPSZE PRODUKTY i SPRAWNIEJSZĄ OBSŁUGĘ KLIENTA.
US office: Fontana
UK office: Ipswich
DE office: FDS GmbH, Neuer Höltigbaum 36, 22143 Hamburg, Deutschland
FR office: Saint Vigor d'Ymonville
AU office: Truganina
PL office: Gdańsk
EN
DE
FR
ES
IT
/MANUEL DE L'UTILISATEUR/MANUAL DEL USUARIO
/MANUALE UTENTE/INSTRUKCJA OBSŁUGI
/ Horno para Pizzas / Forno per Pizza / Piec do pizzy
THIS INSTRUCTION BOOKLET CONTAINS IMPORTANT SAFETY INFORMATION. PLEASE READ AND KEEP FOR FUTURE REFERENCE.
PL
USER'S MANUAL/HANDBUCH
NP10437
Pizza oven / Pizzaofen / Four à Pizza
Advertisement
Table of Contents

Subscribe to Our Youtube Channel
Related Manuals for Costway NP10437


Summary of Contents for Costway NP10437
- Page 1 With your inspiring rating, COSTWAY will be more consistent to offer you EASY SHOPPING EXPERIENCE, GOOD PRODUCTS and EFFICIENT SERVICE! Mit Ihrer inspirierenden Bewertung wird COSTWAY konsistenter sein, um Ihnen EIN SCHÖNES EINKAUFSERLEBNIS, GUTE PRODUKTE und EFFIZIENTEN SERVICE zu bieten! Avec votre évaluation inspirante, COSTWAY continuera à...
- Page 2 Attach the gas mould onto the back of the body (G) with the 2 remaining screws at back of the body. Befestigen Sie das Gasgerät an der Rückseite des Ofengehäuses (G) mit den 2 verbleibenden Schrauben an der Rückseite des Ofengehäuses.
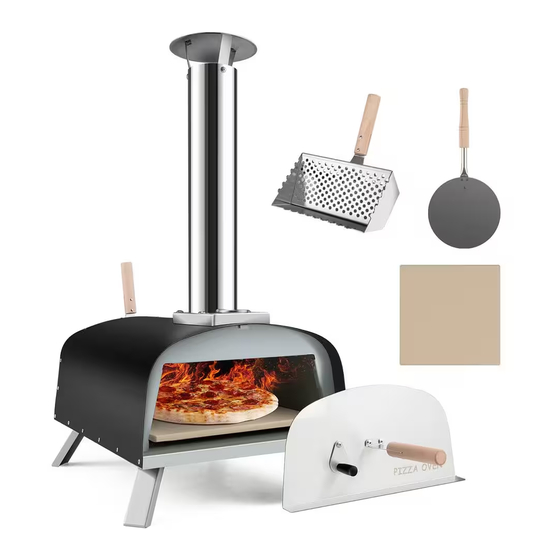
- Page 3 DES MATIÈRES / Lista de Piezas / Lista delle Parti / LISTA CZĘŚCI With your inspiring rating, COSTWAY will be more consistent to offer you EASY SHOPPING EXPERIENCE, GOOD PRODUCTS and EFFICIENT SERVICE! Mit Ihrer inspirierenden Bewertung wird COSTWAY konsistenter sein, um Ihnen EIN SCHÖNES EINKAUFSERLEBNIS, GUTE PRODUKTE und EFFIZIENTEN SERVICE zu...
- Page 4 Bezeichnung Teil Name Menge Bezeichnung Teil Name Menge Nachfüllschacht Schornstein Handgriff Schornsteinkappe Feuerbox Isolierplatte Pizzastein Pizzaschaufel Fensterabdeckung M5-Schraube Ofentür M5-Schulterschraube Ofengehäuse Réf. Nom des Pièces Quantité Réf. Nom des Pièces Quantité Trémie Cheminée Poignée Capuchon de cheminée Boîte de bois Plaque d'isolation Pierre à...
- Page 5 FOR GAS PIZZA OVEN / FÜR GAS-PIZZAOFEN / POUR FOUR À PIZZA À GAZ / PARA HORNO Núm. Nombre Cantidad Núm. Nombre Cantidad DE PIZZAS A GAS / PER FORNO PIZZA A GAS Tolva Chimenea / UŻYTKOWANIE PIECA Z GAZEM Manija Tapa de chimenea Caja de madera...
- Page 6 Oznaczenie Nazwa części Ilość Oznaczenie Nazwa części Ilość Podajnik pelletu Komin Uchwyt Nasada komina Zasobnik na pellet Płyta izolacyjna Kamienna płyta Łopata do pizzy Osłona okna Śruba M5 Drzwiczki Śruba M5 do osłony okna Korpus Put pizza stone (D) in and door on. Setzen Sie den Pizzastein (D) ein und schließen Sie die Ofentür.
- Page 7 TIPS: How to remove the chimney? Shake the chimney from side to side and pull it up. TIPPS: Wie kann man den Schornstein abnehmen? Schütteln Sie den Schornstein von einer Seite zur anderen und ziehen Sie ihn hoch. EN: Attach the wooden handles (B) onto the hopper (A) and wood Attach the chimney cap (I) box (C).
- Page 8 Attach the hopper (A) onto the body (G) and wood box (C) to the body (G) too. Attach the isolation plate (J) to the body (G). (The narrow curved side faces the bottom of the body). Befestigen Sie den Nachfüllschacht (A) am Ofengehäuse (G) und den Feuerbox (C) ebenfalls am Ofengehäuse (G).
Need help?
Do you have a question about the NP10437 and is the answer not in the manual?
Questions and answers