
Subscribe to Our Youtube Channel
Related Manuals for Pegasus Astro NYX-101

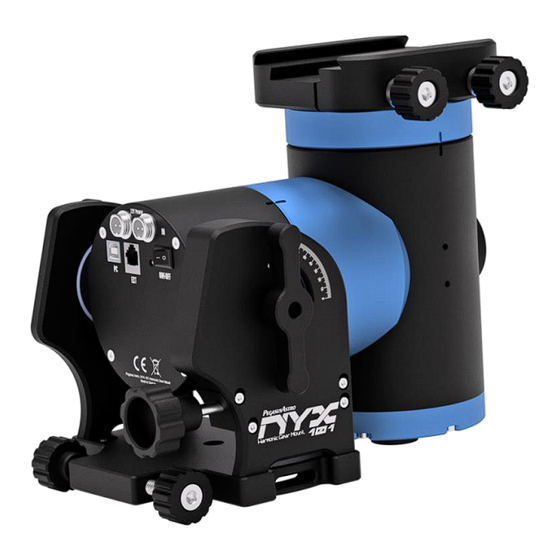
Summary of Contents for Pegasus Astro NYX-101
- Page 1 NYX-101 Harmonic Gear Mount NYX-101 S TRAIN OUNT RODUCT ANUAL 1.0 - 2022-NOV-25 ERSION Page 1 of 68 Pegasus Astro – NYX-101 Product Manual...
- Page 2 NYX-101 Harmonic Gear Mount Version History Version # Implemented By Revision Date Reason Evans Souglakos 25/10/2022 Initial Document Page 2 of 68 Pegasus Astro – NYX-101 Product Manual...
-
Page 3: Table Of Contents
P ayload Capac i ty and Coun te r w e ig hts ..............27 Com patible Counte r W e ig hts and Sha ft ..............27 Page 3 of 68 Pegasus Astro – NYX-101 Product Manual... - Page 4 W i-Fi Clie n t Config ur a tion ..................49 W i-Fi H ots pot Config ur at ion ................... 50 Channe l Infor m a tion ..................... 50 Page 4 of 68 Pegasus Astro – NYX-101 Product Manual...
- Page 5 ADAPT E R S M E CHANI CAL DR AWI NG ................68 Page 5 of 68 Pegasus Astro – NYX-101 Product Manual...
-
Page 6: Preface
NYX-101 is compatible with ASCOM, INDI, and any software that supports the LX200 command set. The purpose of this document is to support the user in the operation of the NYX-101. Please read carefully the manual before using the NYX-101 mount. -
Page 7: Product Overview
13. Safety limits on RA axis. Safety limit sensors on RA Axis prevent internal cable snags. 14. Firmware Upgradable via Wireless OTA. An easy firmware upgrade process allows you to stay up to date with bug fixes and the latest features of the mount. Page 7 of 68 Pegasus Astro – NYX-101 Product Manual... -
Page 8: Technical Data
USB2 and Wi-Fi (2.4GHz) Operating Temperature -20° C to + 50°C Warranty 3 years Made in (designed, assembled and Greece. We carefully curate the entire manufacturing, testing and packing tested) process. Page 8 of 68 Pegasus Astro – NYX-101 Product Manual... -
Page 9: Packaging
Persistent rubbing with a cloth on logo marking areas may wear them. IGH TORQUE WARNING NYX-101 produces very high torque on both axes which can be dangerous if cables, your hand fingers or any other obstacle collide with the mount or suck between moving parts! In this unlike event, mount can easily crash or cut anything that is left unattended. -
Page 10: Included Items
Power Supply 12V / 5A with GX12 jack Hard Shell Case - Carry Bag USB2 Type A to B Cable 2 x Pitch Tensioners 2 x Azimuth Locking Knobs Azimuth Dowel 1 x M12 Hand Knob Page 10 of 68 Pegasus Astro – NYX-101 Product Manual... -
Page 11: Mount Key Points
Accessory Holes: These M4 holes on each side allow you to securely attach accessories to the mount’s body. Polarscope camera screw holes: A QHY PoleMaster adapter is already installed onto the mount. Use this hole pattern to install the polar scope camera onto the mount. Page 11 of 68 Pegasus Astro – NYX-101 Product Manual... - Page 12 As the mount steps up the input voltage up to 42V DC it is important that you will not undervalue the risk of electric shocks. Keep this mount back plate clear of dew and water. Page 12 of 68 Pegasus Astro – NYX-101 Product Manual...
-
Page 13: Carbon Fiber Tripod (Peg-Trpd101)
Max Load Capacity: 50 Kg 2 x Allen hex keys ▪ ▪ Angle of legs: Fixed 35° Triangular plate with M12 locking knob ▪ Metallic (3 pcs) nails to replace rubber foot pads Page 13 of 68 Pegasus Astro – NYX-101 Product Manual... -
Page 14: Setting Up The Carbon Fiber Tripod
3. Lock the Tray Fixed Knob to secure the adapter to the desired orientation. To release an adapter: 1. Unlock the Tray Fixed Knob. 2. Press the Tray Safety Button. 3. Slide out the adapter. Page 14 of 68 Pegasus Astro – NYX-101 Product Manual... - Page 15 The tripod bag includes, in the zipper, three (3) foot nails that you can exchange with the stock foot pads. As shown in the figure, the foot pad and foot nail can be exchanged according to the terrain and your shooting requirements. Page 15 of 68 Pegasus Astro – NYX-101 Product Manual...
-
Page 16: Base Plate - Tripod Adapter
3. Use the M12 nut along with the M10 bolt (use a 8 mm Allen hex tool) to stack the EQ6 adapter with the aluminum tripod base. 4. Use the stock hand knob screw (pass it under the legs of the tripod) to secure the adapter onto the tripod. Page 16 of 68 Pegasus Astro – NYX-101 Product Manual... -
Page 17: Half Pier
Note 2: Three (3) additional standoffs can be purchased to increase pier stability. Half Pier accepts up to 6 standoffs. Note 3: The PEG-ADAPT101-STDOFF package includes 6 x M12 cheese-head and 6 x M12 countersunk screws. Page 17 of 68 Pegasus Astro – NYX-101 Product Manual... - Page 18 NYX-101 Harmonic Gear Mount How to assemble the Half-Pier Extension Assembly Scenarios Page 18 of 68 Pegasus Astro – NYX-101 Product Manual...
-
Page 19: Installation And Usage
3. Ensure that the two azimuth adjustment knobs are loose so the azimuth dowel can be placed between the two azimuth adjustment knobs. 4. Gently lower the mount onto the tripod adapter as shown in the figure below. Page 19 of 68 Pegasus Astro – NYX-101 Product Manual... - Page 20 NYX-101 Harmonic Gear Mount Pitch Adjustment Knob Azimuth fine adjustment knobs Page 20 of 68 Pegasus Astro – NYX-101 Product Manual...
- Page 21 6. Insert and gently screw the 2 x Altitude Tensioners on the left and right side (do not fully tighten them yet). Pitch Tensioner right Pitch Tensioner right Azimuth Pitch Adjustment Locking Knob Knob Azimuth Locking Knob Page 21 of 68 Pegasus Astro – NYX-101 Product Manual...
- Page 22 At this point, you can additionally tighten, the pitch and azimuth adjustment knobs. Do not over tighten them as you will have to perform a polar alignment (if you are in equatorial mode) which requires fine adjustments of pitch and azimuth axis. Page 22 of 68 Pegasus Astro – NYX-101 Product Manual...
-
Page 23: Altitude Adjustment
Latitude 90° - ALT-AZ • The pitch of the mount can be adjusted by the pitch adjustment knob. • Before you make any action, make sure that the Pitch Tensioner is not tightened. Page 23 of 68 Pegasus Astro – NYX-101 Product Manual... -
Page 24: Azimuth Adjustment
Turn the azimuth fine adjustment knobs to fine-slide the mount left or right in the azimuth axis. When you finish, tighten both Azimuth locking knobs to secure the mount’s position. Page 24 of 68 Pegasus Astro – NYX-101 Product Manual... -
Page 25: Telescope Placement
You can still use the pitch and azimuth knobs but we strongly suggest to avoid large movements on the pitch knob when the telescope assembly is heavy (above 15 Kg) as it stresses the pitch adjustment mechanism. Page 25 of 68 Pegasus Astro – NYX-101 Product Manual... -
Page 26: Balancing Of Telescope
4. Slowly release the telescope and examine the mount for any rotational movement on the declination axis. 5. If there is movement, adjust the telescope position to the opposite direction. 6. The final position of the telescope should remain stationary without support. Page 26 of 68 Pegasus Astro – NYX-101 Product Manual... -
Page 27: P Ayload Capac I Ty And Coun Te R W E Ig Hts
EIGHTS AND HAFT NYX-101 supports an M12 shaft. As we care about in mount’s portability, we designed an M12 screw hole that accepts shafts and counterweights from other manufacturers and can be easily found across every region in the world. -
Page 28: Installation Of Accessories
On the front of the head, you can locate 6 x M3 screws where you can attach a QHY PoleMaster. Place the camera with its USB cable extended on the left as you look at the figure below and secure it with PoleMaster’s screws. Page 28 of 68 Pegasus Astro – NYX-101 Product Manual... - Page 29 NYX-101 Harmonic Gear Mount 6 x M3 hole pattern Page 29 of 68 Pegasus Astro – NYX-101 Product Manual...
-
Page 30: Mount Modes
The north (or south) celestial pole is the point that the sky rotates around. Example is for Northern Hemisphere In the northern hemisphere, the bright star Polaris sits very close to the celestial pole. South Page 30 of 68 Pegasus Astro – NYX-101 Product Manual... - Page 31 Level the tripod with as much accuracy as you can. You can consult the electronic leveler (pitch and roll readouts) from our software or the classic bubble leveler of the mount. Point the mount to the north (or south) celestial pole. The polar-scope adapter of the NYX-101 should look at the north (or south) celestial pole.
-
Page 32: Use Of Alt -Azimuth Mode
For the visual observer, an Alt-Az setup seems more convenient as it prevents any awkward position of the telescope eyepiece during the observation of different celestial targets. To use the NYX-101 in ALT-AZ mode you need to: Telescope to North Level the tripod as well as you can. -
Page 33: Limits
To remove the mount from the “limited” state use the direction pad to slew the scope away from the limit point. NYX-101 incorporates three (3) software and one (1) hardware limits. The software limits are configurable by the software. Hardware limits are not configurable and have to do with hardware limit sensors for your mount and telescope equipment protection. -
Page 34: Indicator Lamp
10 Amps of total current. Voltage not in this range might cause permanent damage to the motor board. NYX-101 mount consumes 0.4A on idle operation, ∼0.7A during tracking and ∼2.5Amps during slewing (peaks up to 3Amps). -
Page 35: Power Output
VCC (same as input) You can use this power output socket to provide power to your imaging equipment. E.g. if you own a Pegasus Astro Powerbox you can power it from this power output (figure below). The cable you need to provide power to the mount from our Powerbox products is the PEG-CABL-GX12. -
Page 36: Usb2 Protocol
Plug the stock USB2 type A to B cable into the USB socket of the mount and your computer. Mount is automatically discovered from the Unity platform or our ASCOM driver. Any driver that is required to discover the NYX-101 via USB is in the Unity Platform package and automatically configured during Unity installation. -
Page 37: External Port (St-4)
The pinout of the 6C6P socket (image below) is for the ST-4 connectivity and moves the mount in one of the four directions by grounding the direction pin. The pulse time of the correction is proportional to the duration of each contact. VCC (3.3V) DEC+ DEC- Page 37 of 68 Pegasus Astro – NYX-101 Product Manual... -
Page 38: R S T T I Me Ope R Ati On
Mount will initiate the boot sequence, the indication LED with turn on, and after 10 seconds you should hear a four notes welcome melody confirming that the mount’s firmware was loaded successfully. This is the time that the mount is in a fully operational state. South Page 38 of 68 Pegasus Astro – NYX-101 Product Manual... -
Page 39: Boot Sequence
NYX-101 Harmonic Gear Mount EQUENCE Page 39 of 68 Pegasus Astro – NYX-101 Product Manual... -
Page 40: How To Initially Connect To Mount
Mobile (Android or IOS) application by connecting to the NYX-101 Wi-Fi Access Point (hotspot). Wi-Fi Access Point and Mobile application By default, NYX-101 mount launches a Wi-Fi hotspot access point which is accessible through the mobile application. You will have to connect to the network below and open the mobile application. - Page 41 Unity Platform (Windows-based software) and a USB cable. During boot process the electric brake in the Right Ascension axis is engaged and is released only when the NYX-101 mount is fully operational (right ascension motor is locked and ready to accept slew commands).
- Page 42 NYX-101 Harmonic Gear Mount • Click the discovered NYX-101 mount to enter the control panel. Please note that the NYX[xxxxxxxx] is the unique identification code of your NYX-101 mount. • The NYX-101 control panel will load and the following screen will be visible.
-
Page 43: Set Mount Mode
• Enter your site coordinates (latitude, longitude) and your approximate altitude and press Save. Note that you can use the altitude reading reported by the barometric sensor. Page 43 of 68 Pegasus Astro – NYX-101 Product Manual... -
Page 44: Mount Information
NYX-101 Harmonic Gear Mount Click the Push to Mount button to push your observing site coordinates into the NYX-101 mount. Positive latitude is above the equator (N), and negative latitude is below the equator (S). Positive longitude is east (E) of the prime meridian, while negative longitude is west (W) of the prime meridian (a north-south line that runs through Greenwich in the U.K). -
Page 45: Ir Tual K E Ypad
90 degrees at the zenith, the spot directly overhead. Pier Side shows where your telescope points: West or East. Tracking shows the current rate at that your mount tracks the sky. Status prints your mount’s condition messages. It reports if the NYX-101 mount: • Is Tracking •... - Page 46 (there are eight available rates: x2, x8, x16, x64, x128, 1.0°, 2.5°, 5.0°) to e.g. Centre, Guide, Move or Fast Slew the mount to a target. Page 46 of 68 Pegasus Astro – NYX-101 Product Manual...
-
Page 47: Park And Unpark
You can reset the zero initial position by clicking the Reset Zero button. This assumes that your telescope points to the NCP and it will initialize the mount RA and DEC coordinates from this position. Page 47 of 68 Pegasus Astro – NYX-101 Product Manual... -
Page 48: Tracking Rates
NYX-101 Harmonic Gear Mount RACKING ATES NYX-101 mount is capable of the following tracking rates: Sidereal: is the apparent rate of motion of stars across the sky, which is slightly faster than the rate of motion of the sun. Solar: as the name implies, the telescope tracks the sun which also moves across the sky at a different rate than the stars or the moon. -
Page 49: W I -F I Client Configuration
LIENT ONFIGURATION Apart from the Wi-Fi hotspot that is initiated during boot, you can connect the NYX-101 mount to a 2.4GHz * Wi-Fi network. Wi-Fi Access Point and Wi-Fi Client can work simultaneously. * Please note that 5.0 GHz networks are not supported. -
Page 50: W I -F I Hotspot Configuration
HANNEL NFORMATION This section displays the available and active channels that Unity has discovered and utilized. Unity Platform discovers and talks to the NYX-101 mount by using two different channels, simultaneously: • USB (via USB cable) •... - Page 51 The screenshot below displays a Wi-Fi-only discovered channel. Notice that Channel Info displays only a Wi-Fi icon. If you leave your mouse on the Wi-Fi icon you can see the signal strength percentage and the IP address that was assigned by your network to the NYX-101 mount. Page 51 of 68...
-
Page 52: Axes Configuration
The slew rate is the maximum speed in degrees that both mount axes will accelerate and reach when slewing to a target. NYX-101 accepts three different slew rates through the Unity Platform. The selected slew rate is stored in the mount’s internal memory and retrieved on boot. -
Page 53: Environmental Conditions
Keep both values to zero (0). Backlash compensation values are stored in the mount’s internal memory and retrieved on boot. NVIRONMENTAL ONDITIONS NYX-101 mount integrates a set of sensors that report: • Ambient Temperature (in °C or °F). •... -
Page 54: Mount Limits
Limit settings take immediate effect, are stored in the mount’s internal memory and are retrieved on boot. When you hit a limit, the Unity Platform health status dashboard will display the limit type (image below). Page 54 of 68 Pegasus Astro – NYX-101 Product Manual... -
Page 55: Star Alignment
Error Correction (CEC) is not necessary, but for astrophotography and setup of GoTo mounts, cone error correction may be advisable. In Alt-Az mode the preferred star alignment process is the 2 or 3-star alignment. Page 55 of 68 Pegasus Astro – NYX-101 Product Manual... - Page 56 NYX-101 Harmonic Gear Mount To perform a 1–9-star alignment to the NYX-101, in any mode (German Equatorial or ALT-AZ), follow the guide below: (*Unity Mobile accepts 1,2,3 or 5 stars) Locate Star Alignment -> Star Alignment Wizard and click the Next button Before any star alignment the mount should be homed at the zero position and the telescope should roughly points to the NCP or SCP.
- Page 57 You can select up to (9) nine stars. Usually, a 3-star selection is adequate for a satisfactory star alignment result. A good polar alignment requires 2 stars or even 1 star. Click Next button Page 57 of 68 Pegasus Astro – NYX-101 Product Manual...
- Page 58 NYX-101 Harmonic Gear Mount The Star Alignment guide will list all selected stars and be ready to slew (GoTo) the mount to each target. Click Start. Page 58 of 68 Pegasus Astro – NYX-101 Product Manual...
- Page 59 After reaching the star you will see a message to “Center the star in your eyepiece or FOV”. Make the required adjustments with the arrows/keypad to center the star in your eyepiece or FOV as good as you can. Click Confirm when done. Page 59 of 68 Pegasus Astro – NYX-101 Product Manual...
- Page 60 NYX-101 Harmonic Gear Mount The Star Alignment Wizard will slew mount to the next star and the same procedure will be repeated until you have centered all listed stars. Page 60 of 68 Pegasus Astro – NYX-101 Product Manual...
- Page 61 If you move the tripod or do any polar alignment corrections then you will have to re-initiate the star alignment process. Page 61 of 68 Pegasus Astro – NYX-101 Product Manual...
-
Page 62: Polar Alignment
Knowing your latitude, adjust the position of the telescope mount to align with the North celestial pole. The NYX-101 mount has a latitude scale with an indicator of what latitude your mount is currently in line with. You can also consult the NYX-101 electronic leveler to verify and adjust the altitude (pitch) of the mount. -
Page 63: Ascom Software
Use any ASCOM-compatible software to control the mount. We use the “Nighttime Imaging 'N' Astronomy” software in this example. Click ASCOM Telescope settings and select the discovered NYX-101 mount. Connect to the ASCOM driver. All mount information and standard operations such as keypad control, target slewing / GoTo, target sync and all supported ASCOM methods are available through the driver. - Page 64 NYX-101 Harmonic Gear Mount Page 64 of 68 Pegasus Astro – NYX-101 Product Manual...
-
Page 65: Lx200 Software
LX200 S OFTWARE NYX-101 mount can communicate with any software that supports the basic LX200 command set. In the below example, we use the Sky Safari Plus 7. (You need the Plus or Pro version to have the telescope connect functionality). - Page 66 To use this IP, please ensure that your mobile device is connected to the NYX_xxxxxxx wireless network. • Keep the Port Number as is (9999). • To verify that your communication with NYX-101 is successful, press “Check Connection Now”. • On success, you will see the message “Connection verified”...
- Page 67 As you are at the main sky view, select the Scope icon and Press Connect button. The application will communicate with NYX-101 and available controls will be visible. From there, you can select Slew Rates, Move with arrow keys, GoTo, or Sync to targets.
-
Page 68: Mechanical Drawing
NYX-101 Harmonic Gear Mount ECHANICAL RAWING DAPTERS ECHANICAL RAWING Page 68 of 68 Pegasus Astro – NYX-101 Product Manual...
Need help?
Do you have a question about the NYX-101 and is the answer not in the manual?
Questions and answers