Table of Contents
Advertisement
Quick Links
Instructions/Parts List
™
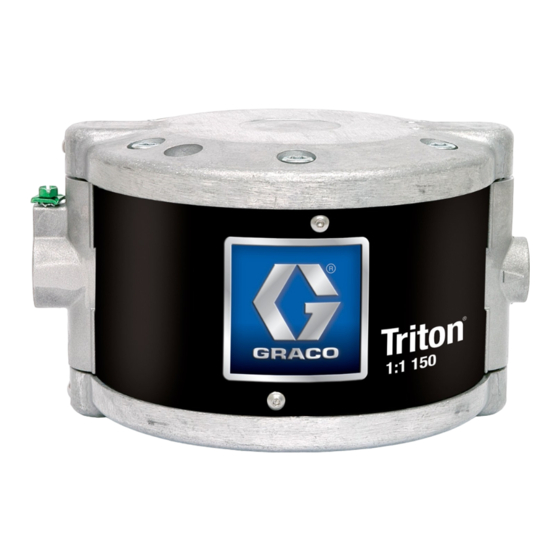
Triton
Diaphragm Pump
Part No. 233805, Series A
3:1 Ratio Air-operated Double Diaphragm Pump, with BSPP Fittings
Part No. 233816, Series A
3:1 Ratio Air-operated Double Diaphragm Pump, with NPT Fittings
100 psi (0.7 MPa, 7 bar) Maximum Air Input Pressure
300 psi (2.1 MPa, 21 bar) Maximum Fluid Working Pressure
Read warnings and instructions.
Graco Inc. P.O. Box 1441 Minneapolis, MN 55440-1441
Copyright 2002, Graco Inc. is registered to I.S. EN ISO 9001
308HP
TI2125A
II 2 G
309479A
Advertisement
Table of Contents

Related Manuals for Graco Triton 308HP


Summary of Contents for Graco Triton 308HP
- Page 1 100 psi (0.7 MPa, 7 bar) Maximum Air Input Pressure 300 psi (2.1 MPa, 21 bar) Maximum Fluid Working Pressure Read warnings and instructions. TI2125A Graco Inc. P.O. Box 1441 Minneapolis, MN 55440-1441 II 2 G Copyright 2002, Graco Inc. is registered to I.S. EN ISO 9001...
-
Page 2: Table Of Contents
Lubrication ......10 Graco Phone Numbers ..... 30 Flushing and Storage . - Page 3 • Route hoses away from traffic areas, sharp edges, moving parts, and hot surfaces. Do not expose Graco hoses to temperatures above 82 ° C (180 ° F) or below -40 ° C (-40 ° F). • Wear hearing protection when operating this equipment.
- Page 4 Warning WARNING FIRE AND EXPLOSION HAZARD Improper grounding, poor ventilation, open flames or sparks can cause a hazardous condition and result in a fire or explosion and serious injury. • Ground the equipment and the object being sprayed. Refer to Grounding on page 8. •...
-
Page 5: Installation
Always use Genuine Graco Parts and Accessories, to ensure proper grounding of the bracket. available from your Graco distributor. If you supply your own accessories, be sure they are adequately 5. Mount the bracket with the pump attached to the sized and pressure-rated for your system. -
Page 6: Air Line
Installation Air Line CAUTION 1. Install the air line accessories as shown in F . 2. The pump must be suction-fed in order to operate Be sure the air line supplying the accessories is properly. Pressure feeding the pump will cause bel- grounded. -
Page 7: Typical Installation Drawing
Installation Key: TRITON 308HP Pump Bleed-type master air valve (required for pump) Air supply line Air line filter Air line shutoff valve Pump air regulator Gun air regulator (used in spray system only) Fluid pressure regulator (used in spray system... -
Page 8: Grounding
Installation Grounding • All solvent pails used when flushing: Follow your local code. Use only conductive metal pails placed on a grounded surface. Do not place the pail on a nonconductive surface, such as paper or cardboard, WARNING which interrupts the grounding continuity. Before operating the pump, ground the system as explained below. -
Page 9: Operation
Operation Operation Pressure Relief 3. Place the suction tube (L) in the fluid to be pumped. 4. Place the end of the fluid hose (P), see F . 2, into an appropriate container. WARNING 5. Close the fluid drain valve (J). 6. -
Page 10: Maintenance
Maintenance Maintenance Lubrication Tightening Threaded Connections CAUTION 1. Before each use, check all hoses for wear or dam- age, and replace as necessary. Lubrication of the pump is not required. Oil is exhausted through the muffler, which could contami- 2. Check to be sure all threaded connections are tight nate the fluid supply or other equipment. - Page 11 Maintenance 309479A...
-
Page 12: Troubleshooting
Troubleshooting Troubleshooting Relieve the pressure (page 9) before checking or Check all possible problems and causes before servicing the equipment. disassembling the pump. Problem Cause Solution Pump cycles at stall or fails to hold Worn check valve balls (26), seats Replace. - Page 13 Troubleshooting Fluid Inlet Diaphragm Outlet Ball Check Inlet Ball Check Piston Fluid Outlet Inlet Ball Check Shaft Diaphragm Outlet Ball Check 309479A...
- Page 14 Troubleshooting 309479A...
-
Page 15: Repair
3, 4, and 6 mm allen wrenches reassembly. • 12, 19, and 22 mm open end wrenches • Use only genuine Graco replacement parts, available from your Graco distributor. • internal snap ring pliers • Be careful not to damage sealing surfaces. -
Page 16: Replace The Diaphragms
Repair Replace the Diaphragms d. Grip the cylinder-side diaphragm firmly and unscrew it from the rod by hand. e. Install a new diaphragm (9*) firmly, by hand. WARNING Wear gloves when removing or assembling the dia- 3. Prepare the pump for repair of the housing-side dia- phragms to reduce the risk of cuts. - Page 17 Repair Torque to 12 N•m (8.8 ft-lb). Housing Side 9* ◆ ◆ †‡ †‡ Cylinder Side 9* ◆ ◆ †‡ †‡ ◆ ti2129 . 5 Replace the Diaphragms 309479A...
-
Page 18: Repair The Air Valve
Repair Repair the Air Valve Reassembly Lubricate all o-rings when reassembling the Air Valve Repair Kit 245066 is available. Parts pump. included in the kit are marked, for example (33†). 1. Assemble in reverse order. For the best results, use all parts in the kit. Disassembly Orient the new flat gasket (19) on the air valve 1. - Page 19 Repair Lubricate. Torque to 3.1 N•m (28 in-lb) Align arrow on housing with point on air valve plate. 13† ◆ 15† 17† ◆ 18† ◆ 11† ◆ 16† 11† ◆ 19† ◆ 13† ◆ ti2130 . 6 Repair the Air Valve 309479A...
-
Page 20: Repair The Shaft
Repair Repair the Shaft Reassembly 1. Replace o-rings (2) (2 internal o-ring grooves inside the diaphragm housing and 1 internal o-ring groove Disassembly inside housing (54)). 1. Remove the diaphragms. See page 16. 2. Replace shaft sections (7, 42, 43) in shaft assembly. 2. - Page 21 Repair Lubricate. Torque to 8.8 ft-lb (12 N•m) Align arrow on housing with point on air valve plate. Torque to 28 in-lb (3.1 N•m) ◆ ◆ ◆ †‡ ◆ †‡ ◆ † ◆ † † † ◆ † ◆ †‡ ◆...
-
Page 22: Replace The Ball Check Valves
Repair Replace the Ball Check 3. Replace all parts provided in Kit 245067. Valves Reassembly 1. Reinstall the inlet and outlet ball checks on one side Ball Check Valve Repair Kit 245067 is available. of the pump. The inlet and outlet checks are assem- Parts included in the kit are marked, for example bled differently, install them exactly as shown in F (26‡). - Page 23 Repair Torque to 8.8ft-lb (12 N•m) Align ‡ ‡ ‡ ‡ ‡ ‡ ‡ Inlet Ball Outlet Ball ‡ ‡ ‡ ‡ ‡ ‡ ‡ ‡ ‡ ti2128A . 8 Replace the Ball Check Valves 309479A...
-
Page 24: Parts
Parts Parts Part No. 233805 Part No. 233816 ◆ †‡ ◆ ‡ ‡ ‡ ‡ ◆ ◆ ◆ † † ◆ ◆ † † ◆ † ‡ † ◆ ‡ †‡ ◆ ti2132 309479A... - Page 25 Parts Part No. 233805 BSPP Part No. 233816 NPT Ref. Ref. Part No. Description Part No. Description 30 ‡ O-RING HOUSING, diaphragm 2 ◆ 31 ‡ SEAT, valve, inlet O-RING 32 ‡ GUIDE, ball 4 117158 O-RING 33 197670 DAMPENER, felt, side 5 197645 CARRIAGE, valve 34 197671...
-
Page 26: Technical Data
Technical Data Technical Data Category Data Maximum fluid working pressure 300 psi (2.1 MPa, 21 bar) Maximum air input pressure 100 psi (0.7 MPa, 7 bar) Ratio Maximum permissible stroke frequency in cycles/min Continuous operation Full load - 65 Partial load - 85 Intermittent operation Full load - 100 Partial load - 120... -
Page 27: Performance Chart
Performance Chart Performance Chart Triton performance test, 40, 70, 100 psi (.27, .48, .69 MPa; 2.7, 4.8, 6.9 bar) Cycles per minute 100 psi (.69 MPa, 6.9 70 psi (.48 MPa, 4.8 100 psi 70 psi 40 psi (.27 MPa, 2.7 40 psi Outlet Flow in gallons per minute 309479A... -
Page 28: Dimensions
Dimensions Dimensions 66 mm 102 mm (2.6 in.) (4.0 in.) Fluid Outlet; 233816 3/8 npt 233805 3/8 BSPP. 234 mm (9.2 in.) Air Inlet 233816 1/4 npt 233805 3/8 BSPP 9 mm (0.35 in.) diameter mounting holes Fluid Inlet; 233816 3/4 npt 233805 M26x1.5. - Page 29 Dimensions 309479A...
-
Page 30: Graco Standard Warranty
Graco distributor to the original purchaser for use. With the exception of any special, extended, or limited warranty published by Graco, Graco will, for a period of twelve months from the date of sale, repair or replace any part of the equipment determined by Graco to be defective.
Need help?
Do you have a question about the Triton 308HP and is the answer not in the manual?
Questions and answers