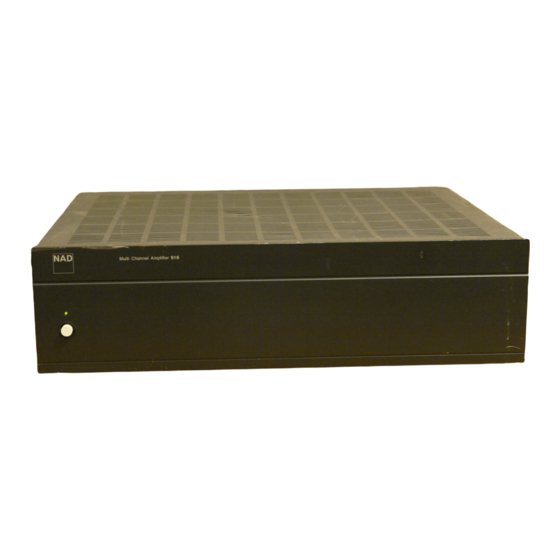
Summary of Contents for NAD 916
- Page 1 • OWNER'S MANUAL • MANUEL D'INSTALLATION • BEDIENUNGSANLEITUNG • MANUAL DEL USUARIO • MANUALE DELLE ISTRUZIONI • BRUKSANVISNING • MANUAL DO PROPRIETÁRIO...
-
Page 2: Rear Panel Connections
WARNING:TO PREVENT FIRE OR ELECTRIC SHOCK, DO NOT EXPOSE THIS APPLIANCE TO RAIN OR MOISTURE Note to CATV system installer: This reminder is provided to call the CATV installer's attention to Article 820-40 of the NEC , which provides guidelines for proper grounding and, in particular, specifies that the cable should be connected to the grounding system of the building, as close to the point of cable entry as practical. -
Page 3: Front Panel Controls
FRONT PANEL CONTROLS Figure 1. - Page 4 2. INPUTS Each of the three independent stereo power ampli- fiers within the 916 has its own pair of inputs and out- puts. Before making connections to the amplifier, make sure the POWER is switched OFF.
-
Page 5: Soft Clipping
(positive) terminal on the amplifier. 6. BRIDGING Each pair of amplifiers within the Model 916 can be “bridged” to form a single amplifier of about three times the power per channel. If you currently need fewer than six channels of amplification, use this fea- ture to increase the available amplifier power. - Page 6 L’amplificateur est équipé de commandes de niveau d’entrée distinctes pour chaque voie. Avant de mettre le 916 sous tension pour la première fois, véri- fier que toutes les commandes sont bien dans leur position normale en butée horaire. Dans certains cas, il peut s’avérer utile d’utiliser d’autres réglages pour...
- Page 7 [ON]. (5) Prendre le câble du haut-parleur qui doit être piloté par la partie pontée du 916. Brancher son con- ducteur “positif” sur la borne CH 3 + et son conduc- teur négatif sur la borne CH 4 + (c’est à dire aux deux bornes rouges).
- Page 8 Verstärkerpaares im 916 angeschlossen werden (siehe #4). 4. EINGANGSPEGEL Für jeden Kanal verfügt der Verstärker über sepa- rate Eingangspegelregler. Vor dem erstmaligen Vor dem erstmaligen Einschalten des 916 stellen Sie bitte sicher, daß alle Lautstärkenregler in der Mittelstellung (12-Uhr-Position) stehen. Unter Bedingungen sind andere Einstellungen sinnvoll: (1) Pegelabstimmung.
- Page 9 4 abkuppeln. (4) Den Überbrückungsschalter auf ON (Ein) stellen. (5) Das Kabel des Lautsprechers, der von dem 916 getrieben werden soll, wählen. Die “Plus”-Kabelader an die Klemme CH3 + und die “Minus”-Kabelader an die Klemme CH4 + anschließen (d.h. an die beiden roten Klemmen).
- Page 10 2. ENTRADAS Cada uno de los tres amplificadores estéreo indepen- dientes que hay en el 916 tiene su propio par de entradas y salidas. Antes de hacer las conexiones al amplificador, asegure que se ponga en OFF (desconectado) POWER (alimentación eléctrica).
- Page 11 Por ejemplo, puenteando dos de los pares de amplificadores del 916 se producen dos amplificadores mono de 90 W cada uno para los canales principales y un amplifi- cador estéreo de 30 W por canal para un juego de altavoces remotos.
- Page 12 é vista do painel traseiro). Se este equipamento for usado numa configuraçäo de saída para várias salas, de um produto NAD, cer- tifique-se que antes de ligar o sistema pela primeira vez, que os comandos do som em qualquer amplifi- cador auxiliar ESTÃO REGULADOS PARA O NÍVEL...
- Page 13 (4) LIGUE o interruptor em ponte. (5) Seleccione o cabo vindo do altifalante que vai ser activado pela secção em ponte do 916. Ligue o condutor “positivo” ao terminal do Canal 3 + e o con- dutor “negativo” ao terminal do Canal 4 + (isto é, os dois terminais vermelhos).
- Page 14 L’amplificatore è dotato di comandi separati per il livello di input per ciascun canale. Prima di accendere il 916 per la prima volta, assicurarsi che tutti i coman- di di livello sia nella posizione normale completa- mente in senso orario. In alcuni casi possono risultare utili altre impostazioni per: (1).
- Page 15 Ad esempio, ponticellando due delle coppia di amplifica- tori del 916 si ottengono due amplificatori mono da 90 watt ciascuno per i canali principali ed un amplifica- tore stereo da 30 watt per un set di altoparlanti a dis- tanza.
- Page 16 Varje linje utgång på 916 har sitt eget buffertsteg så att man kan koppla signalen vidare utan att källan belas- tas och en kortslutning av linjeutgången påverkar inte signalen vid ingången.
- Page 17 2. 4 x 30 Watt och 1 x 90 Watt. 3. 2 x 30 Watt och 2 x 90 Watt. 4. 3 x 90 Watt. Detta gör NAD 916 till en mycket mångsidig förstärkare för surroundanläggningar och applikation- er där man behöver flera effektsteg.
- Page 19 POWER AMPLIFIER SPECIFICATION - NAD 916 Stereo Mode CONTINUOUS AVERAGE POWER 30 W (14.8 dBW) OUTPUT INTO 8 OHMS (Min. power per channel, 20Hz-20kHz, both channels driven, with no more than rated distortion) Rated distortion (THD 20Hz-20kHz) Clipping power IHF dynamic headroom at 8 ohms...
- Page 20 NAD ELECTRONICS LTD LONDON © 1995. 916 I.M. PRINTED IN TAIWAN, R.O.C.


