
Related Manuals for LVI I soft heat YALI DIGITAL


Summary of Contents for LVI I soft heat YALI DIGITAL
- Page 1 YALI DIGITAL YALI PARADA YALI RAMO INSTALLATION AND OPERATING MANUAL A NEW GENERATION THAT TURNS EVOLUTION INTO A REVOLUTION CLASS I - 230V - 50 HZ...
-
Page 2: Product Information
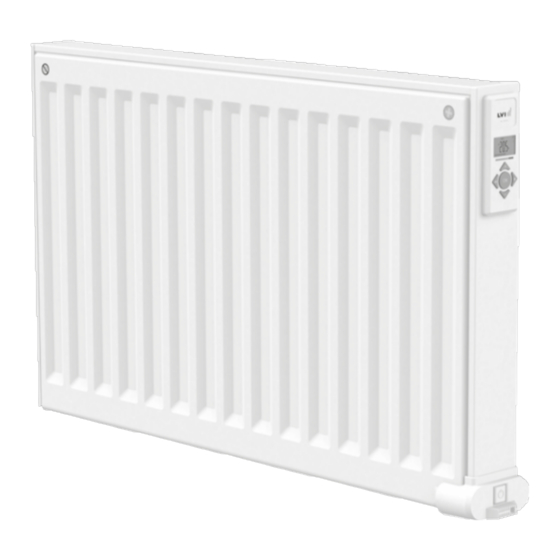
PRODUCT INFORMATION Contents Included: Yali Digital or Yali Parada Radiator Complete Mounting Brackets 1 set Ensto Wall box for wiring connection Ensto wall box splash cover Fixing hardware inc bracket clips 1 set Instruction manual... - Page 3 PRODUCT INFORMATION 200mm...
- Page 4 PRODUCT INFORMATION SINGLE PANEL YALI DIGITAL RADIATOR (mm) (mm) (mm) (mm) 100-150 100-150 DOUBLE PANEL RADIATOR (mm) (mm) (mm) (mm) 100-150 100-150...
- Page 5 PRODUCT INFORMATION...
- Page 6 PRODUCT INFORMATION To maintain IP44 rating, Ensto connection box must be installed with associated splash cover as shown above 230 V L1 / L 2 / L 3 230 V...
- Page 7 PRODUCT INFORMATION...
- Page 8 PRODUCT INFORMATION 0h 1 9 10 11 12 13 14 15 16 17 18 19 20 21 22 23 24 0h 1 9 10 11 12 13 14 15 16 17 18 19 20 21 22 23 24 0h 1 9 10 11 12 13 14 15 16 17 18 19 20 21 22 23 24 0h 1 9 10 11 12 13 14 15 16 17 18 19 20 21 22 23 24...
- Page 9 INFORMATION SAFETY INFORMATION Due to the safety standard out of reach of children aged less than AS/NZS 60335.2.30 and AS/NZS 60335.1 8 years. Children of less than 3 years should be kept away from the unit the text below is obligatory for all electric unless continuously supervised.
-
Page 10: General Info
GENERAL INFORMATION 1. GENERAL INFO • For the correct installation of radiator’s it is essential that the fixing of the radiator is carried out in such a • This appliance is a sealed electric radiator designed way that it is suitable for intended use AND predictable for fixed wall-mounted installation. -
Page 11: General Information
HOW TO VIEW THE MEASURED ROOM TEMPERATURE “Behaviour” indicator or program information bar. “Mode” indicator in “Automatic” mode. Day of week indicator. “RF connection” indicator (with LVI RF Clock or Touch E3). Hand icon. “Window open” function indicator. • Keypad (B, Picture 5) 4 Right navigation key •... -
Page 12: Stand Alone Radiator
LCD display, is constantly displayed. As the radiator regulates, the may not always be displayed due to the NOTE: If connected to an LVI RF Clock or the LVI Touch E3, it is required heating demand. not possible to enter into the time setting mode. -
Page 13: Selecting A Program
• Use the “+” or “-” keys to select a user definable program, U1 to U4, to be modified, then press and hold the “OK” key for 3 NOTE: If connected to an LVI RF Clock or the LVI Touch E3, it seconds. - Page 14 GENERAL INFORMATION NOTE: If a user defined program has already been created and saved, it will be overwritten when the newly defined user program is saved. • The above screen will be shown, where the symbol, the time value 00:00, and the time segment in the program information bar along the bottom of the screen will blink continuously.
- Page 15 GENERAL INFORMATION • Use the “+” and “-“ keys to adjust the time at which the first Comfort period will end. The segments in the program information bar will populate to show the Comfort period. • Press the “OK” key to confirm the time at which the mode will change over from Comfort to Reduced.
-
Page 16: Other Functions
GENERAL INFORMATION the set period, select another mode using the left “3” or right “4” navigation key and confirm with the “OK” key. FRONT PANEL TEMPERATURE LIMITATION This power setting can be used to limit the output of the heating element in the front panel and as a consequence will limit the surface temperature of the front panel. -
Page 17: Behaviour Indicator
GENERAL INFORMATION NOTE: When considering the permanent use of increase in length. The opposite applies when decreasing the radiator at 60°C or 75°C maximum, the the temperature setting. following correction factor should be applied for NOTE: The behavior indicator is replaced by the program the output. -
Page 18: Parameter Menu
LVI RF Clock or LVI Touch E3 to be Press “OK” to enter this parameter. Select with “+” or “-” received (press “3” to cancel radio initialization). - Page 19 , in section 13 of the LCD display, is constantly displayed. NOTE: If connected to an LVI RF Clock or the LVI Touch This function will switch the radiator from any active E3, setting the time will not have any influence on the mode to “Frost Protection”...
-
Page 20: Maintenance, Repair And Disposal
5. MAINTENANCE, REPAIR AND DISPOSAL • WARNING: Disconnect electrical supply before carrying out any maintenance activity. • The product should be cleaned using a soft damp cloth. Do NOT use chemical or abrasive cleaners as they will damage the surface finish. •...
Need help?
Do you have a question about the I soft heat YALI DIGITAL and is the answer not in the manual?
Questions and answers