Table of Contents
Advertisement
Quick Links
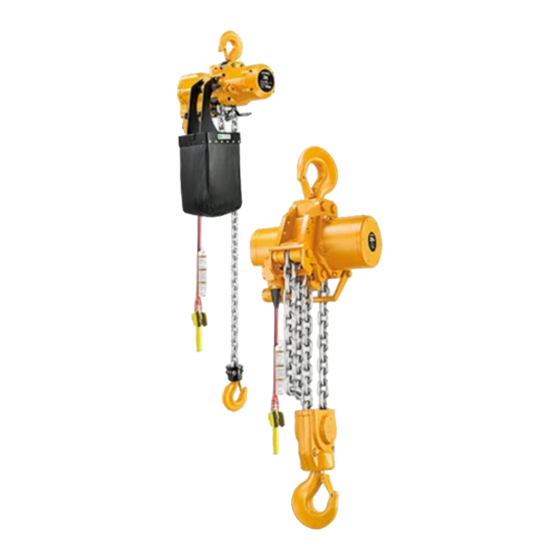
TCH Series Air Hoist
To Customer
- Thank you for purchasing KITO Air Hoist (TCH Series).
- Operators and maintenance engineers are requested to read this manual.
- After reading, please keep this manual at hand for future use.
- This product is designed considering the environment protection. The product
contains none of six hazardous substances specified by European RoHS Directive nor
asbestos.
(3t-25t)
Instruction Manual
Hook Suspended Type
TCHH30CS/PS
TCHH60CD/PD
TCHH2PCD/PD
OM-TCHZZZ-JP0-00
English
Advertisement
Table of Contents

Subscribe to Our Youtube Channel
Related Manuals for KITO TCH Series


Summary of Contents for KITO TCH Series
- Page 1 TCHH60CD/PD TCHH2PCD/PD To Customer - Thank you for purchasing KITO Air Hoist (TCH Series). - Operators and maintenance engineers are requested to read this manual. - After reading, please keep this manual at hand for future use. - This product is designed considering the environment protection. The product contains none of six hazardous substances specified by European RoHS Directive nor asbestos.
-
Page 2: Table Of Contents
Table of Contents Introduction Operation Disclaimer Operating the Cord and Pendant Restriction on Use Precautions for Operation Maintenance Warning Indication General Matters on Handling and Control Daily Inspection Opening the Package Frequent Inspection Checking the Product Periodic Inspection Checking the Product No. Check Sheet for Daily Inspection Recording the Hook Dimensions Check Sheet for Frequent inspection... -
Page 3: Introduction
KITO shall not be liable for any incidental damage due to the use or non-use of the product such as loss of business profit, suspension of business and damage of the lifted load. -
Page 4: Warning Indication
Warning Indication Improper use of air hoist causes danger such as drop of lifted load. Read this instruction manual carefully before installation, operation and maintenance. Use the product after understanding the product knowledge, safety information and precautions. This instruction manual classifies the safety information and precautions into three categories of “DANGER”, “WARNING”... -
Page 5: General Matters On Handling And Control
General Matters on Handling and Control WARNING Only the personnel with expertise and know-how should be allowed to disassemble and repair the air hoist. Do not modify the product and its accessories. Prohibited Failure to comply with these instructions may not only fail to exert the successful functions and performance of the air hoist, but cause unexpected trouble, resulting in a grave accident. -
Page 6: Opening The Package
Opening the Package Checking the Product Make sure that the indications on the package and the packed product coincide with your order. - Make sure that the code indicated on the package label or the nameplate of the product body conforms to the ordered product. -
Page 7: Recording The Hook Dimensions
Type and Country of Manufacturer No.4 class manufacture TCHH30CS/PS JAPAN 3t, 6t 12.5 12Links 4 digits KITO AI-DAT TCHH60CD/PD First mark Second mark Load Chain size: Front side Back side Front side Back side Capacity Product code Mark pitch diameter (mm) -
Page 8: Product Components
Product Components Hook Suspended Type 3 t (TCHH30CS/PS) Top hook Motor section Reduction Gear Name plate Brake section Exhaust outlet Chain lever S shape wire Emergency stop Under hook holder button Grip Bottom hook End washer (only with chain container) Lever Chain down stopper Handle... - Page 9 25 t (TCHH2PCD/PD) Top hook Motor section Reduction Gear Exhaust outlet Brake section Name plate Chain container Chain lever (Option) Chain end S shape wire Under hook block Emergency Bottom hook stop button Grip Lever Handle Pendant...
-
Page 10: Product Specification And
Product Specification Common specification Service air pressure: 0.4 to 0.6 MPa (recommended value: 0.6 MPa) Color: KITO Yellow (Equivalent to Munsell 7.2YR6.5/14.5) 3t, 6t : 84 dB(A), 25t : 84.1 dB(A) Noise level: Brake capacity: 500 % or more (when the rated load is applied) Additional function: Load limiter (activated between over 100% up to 125% of the capacity at service air pressure of 0.6 MPa). -
Page 11: Preparations Before Daily Work
Preparations before Daily Work Selecting the Compressor and Removing the Drain Guide for selection (For max air consumption of each air hoist, see the specifications on Page 12, 13) (Max air consumption x 10) x No. of units used ≤ Compressor horsepower Removing the drain Internal accumulation of water and oil causes rust and trouble. -
Page 12: Preparing And Attaching The Air Supply Hose
Use the air filter, regulator and lubricator larger than the hose size. The pilot type regulator is recommended. If the regulator is not the pilot type, it is recommended to use the regulator one size above in order to secure the performance. For handling of the air filter, regulator and lubricator, follow the instructions in the manufacturer’s instruction manual. - Page 13 Air hose length CAUTION The air supply hose must not be longer than 5 m for 3t or 6t and no longer than 10 m for 25t. If the hose is too long, a drop in pressure will result in insufficient power. If you need to use a hose that exceeds the length specified above, make sure its inner diameter is at least 25 mm for 3t or 6t and at least Mandatory 50 mm for 25t.
- Page 14 Attaching the Air Hose to the Air Hose Joint CAUTION Attach the air supply hose firmly to a hose stem with a hose band. Mandatory Loose connection or air leak may not only fail to exert the successful functions and performance, but detach the hose during operation, coming into contact with the worker and resulting in bodily injury.
-
Page 15: Lubrication
25 t (TCHH2PCD/PD) (1) Wrap seal tape around the hose nipple, and attach the hose firmly to the air hoist. (2) Make sure that the main valve of the compressor is closed and that the compressed air path is shut. (3) Before connecting the hose to the air hoist, apply about 20 drops of lubricant to the connection socket. -
Page 16: Checking The Product Components
Checking the Product Components Checking the chain-down stopper - Check if the chain-down stopper is properly attached with the bolts (M8) and U-nuts (M8). Tighten the bolts and U-nuts if they are loose. Tightening torque = 22 N m - Make sure that the chain is not twisted in its fixed part and that the welded section of the vertical link is facing the direction shown in the diagram below. - Page 17 Checking the double chain type for twist WARNING In the double chain type, a hook block may have passed between chains, twisting them. Before using the air hoist, check the chains for any twist to use it with no twisted chains. Mandatory If used with twisted chains, they may be broken, resulting in a grave accident such as death due to a fall of the suspended load.
-
Page 18: Attaching The Chain Container
Attaching the Chain Container The air hoist body does not come with the chain container attached. Follow the instructions below to attach the container. 3t and 6t・Canvas Chain Container (See the diagram below.) ・Remove the chain from the mount section of the chain end. ・Attach the end washer and chain-down stopper as shown in the diagram below. - Page 19 3t and 6t・Steel Chain Container (See the diagram below.) (1) Shut off the main air supply to the body. (2) Remove the chain end from its mount section as shown in the diagram. (Do not attach the chain end to the body when using the chain container.) (3) Attach the chain container as shown in the diagram.
-
Page 20: Setting The Load Limiter
Setting the Load Limiter When the suspended load exceeding the rated load is lifted by mistake, the air hoist is provided with a load limiter designed to automatically stop lifting operation and inform of an overload. (Except some models) When an overload is lifted, this load limiter is activated by sensing a pressure increase inside the air motor through its valve and finally stops lifting. - Page 21 Disabling the setting When lifting the suspended load equivalent to 125% of the rated load in the completion inspection, and so on, loosen the lock nut as instructed in Step (3) in the state that the load limiter has been set to be properly activated within 125% of the rated load, turn the adjusting screw 3 times clockwise and tighten the lock nut.
-
Page 22: Installing The Product
CAUTION Since the operation load of the load limiter varies by the air pressure that you use, adjust the load limiter for the air pressure that you use. Mandatory The load limiter may not be operated under the low speed operation. Adjust the load limiter for the speed that you operate. -
Page 23: Checking After Installation
Installing the hook suspended type (Single unit of hoist) Installation method and checking the installation site WARNING When using the hook suspended type (single unit of hoist), hook the air hoist properly until the hook latch of the top hook is firmly closed. Mandatory Install the air hoist in such a manner that the top hook and air hoist body can move freely. -
Page 24: Operation
Operation WARNING To use the air hoist, observe its product specifications and operational environment. Do not use the air hoist to lift, support or move a person. Mandatory If the air hoist is used beyond the limits of its product specifications and operational environment, it may not only fail to exert its successful functions and performance, but result in a grave accident. - Page 25 CAUTION Conduct daily inspection before using the air hoist. The maintenance engineer should regularly examine the daily inspection results to check for any abnormality. Mandatory When informed of any abnormality or trouble of the air hoist, the maintenance engineer should immediately prohibit its operation, secure safety and ask for its inspection and repair.
-
Page 26: Operating The Cord And Pendant
Operating the Cord and Pendant Depending on the air hoist model, there are two types of operating the air hoist, cord type and pendant type. Check your model and the type of operating method to operate the air hoist in a correct manner. CAUTION Do not hang a cord or pendant hose on other object or pull them strongly. - Page 27 Cord type The cord type is provided with two cords in the operating portion. Lifting or lowering operation is performed by pulling one of these cords. The air hoist is halted by releasing the handle (grip). Cord Grip Handle The speed is adjusted by how much you pull the cord. As illustrated below, the speed is decreased by pulling the cord less and increased by pulling more, allowing stepless speed adjustment.
- Page 28 Pendant type The pendant type allows lifting, lowering or traversing operation by pressing down the levers in the operating portion. The air hoist is activated by pressing down any lever of the pendant and braked to stop by releasing it. Lifting lever Lowering lever (For hook suspended type)
-
Page 29: Precautions For Operation
Precautions for Operation At the time of slinging WARNING Do not hang the suspended load on the hook end or the hook latch. Do not lift the suspended load with the hook latch left open. Prohibited Do not bind the suspended load with load chain directly. Do not operate the load chain while it is in contact with any sharp edges. - Page 30 WARNING Do not put your hand close to the chain inlets (chain separator and chain lever) at the lower part of the air hoist at the time of overlifting or overlowering. Prohibited Failure to comply with this instruction may have your finger rolled into the chain inlet or have your hand caught between the chain lever and the hoist body, resulting in bodily injury.
- Page 31 At the occurrence of abnormality/trouble WARNING When the air hoist is damaged or emits abnormal sound or vibrations, stop its use immediately, put up a notice “Out of Order” and contact the maintenance engineer. When the power to the air hoist is shut off due to a blackout, leave the air hoist immediately, secure ambient safety and contact the maintenance engineer.
-
Page 32: Maintenance
Maintenance Daily Inspection Daily inspection is mainly conducted by the operator of the air hoist for checking its condition through visual check and no-load operation. WARNING Before using the air hoist, conduct daily inspection. If an abnormality is found during inspection, turn off the air hoist, put up a notice “Out of Order” and contact the maintenance engineer. - Page 33 Load chain Check Item Criteria When failed method Pitch Check No apparent elongation Measure the dimension and visually. replace the part if it exceeds the criterion. Chain diameter Check No apparent abrasion Measure the dimension and visually. replace the part if it exceeds the criterion.
- Page 34 Hook Item Check method Criteria When failed Opening of the hook Check visually. No apparent opening of the hook. Measure the dimension and replace the part if it exceeds the criterion. Abrasion Check visually. No apparent abrasion Measure the dimension and replace the part if it exceeds the criterion.
- Page 35 Peripheral parts of the body Check Item Criteria When failed method Spring Check No apparent shrinkage, twist and Replace the spring. visually. deformation Limit lock Check No apparent deformation, damage, flaw and Replace the Limit washer visually. crack damaged parts. Chain lever Check No apparent deformation, damage, flaw and...
- Page 36 Air pressure and functions Check the following item with no load. Item Check method Criteria When failed Air pressure Check visually. The operating air pressure should be 0.4 to Adjust to the 0.6 MPa (recommended pressure: 0.6 MPa). appropriate pressure. Lubrication Check visually.
-
Page 37: Frequent Inspection
Frequent Inspection Frequent inspection should be conducted by the maintenance engineer or the person designated by the maintenance engineer, mainly through visual check and measurement. Depending on how frequently you use the air hoist, frequent inspection may need to be conducted multiple times a month. Inspect the air hoist after using it for a month, or inspect it after 60 hours of operation, after 18,000 cycles for 3t and 6t, or after 6,000 cycles for 25t, whichever comes first. - Page 38 <After inspecting the load chain> - The use of lubricant has a great effect on wear (service life) of the load chain. Use KITO’s original lubricant. - With no load applied to the load chain, lubricate the load sheave, link engaged with the free chain wheel, and linking part (chain connection) of the chain.
- Page 39 Peripheral parts of the body Use check stand to check the air hoist from the close point. Check Item Criteria When failed method Chain container Check - To be mounted to the body securely Replace the chain visually. - No damage, tear, abrasion or container.
- Page 40 Cord or pendant Check Item Criteria When failed method Cord type: Operating Check Replace the - The S-shaped wire should not portion/supporting visually. damaged parts. be opened. portion No-load - The hanging part of the S-shaped wire should not be deformed. operation - The cord caulked part should not be disengaged.
-
Page 41: Periodic Inspection
Periodic Inspection Periodic inspection requires expertise and know-how. Ask our office or our dealer for periodic inspection because it includes overhaul of the product, operation check under the rated load, and so on, requiring replacement of parts from time to time. Depending on how frequently you use the air hoist, periodic inspection may need to be conducted multiple times a year. - Page 42 <Air Hoist Periodic Inspection Request Sheet> Date 1. Customer Information (1) Company name (2) Address (3) Phone (4) Contact person 2. Product Information (1) Product type (Code) (2) Serial No. (3) Date of purchase (4) Product use period (5) Daily working hours hours (6) Annual working days days...
-
Page 43: Check Sheet For Daily Inspection
Check Sheet for Daily Inspection Model Code Capacity Serial No. Your CTRL No. Installation date Location Air hoist Inspection date/result Category Check item Check method Criteria Nameplates, No peel off. Indication can be seen clearly. labels and tags Body and each part No apparent deformation, dam age, flaw and crack Exhaust section Should be free from considerable adhesion of oil and clean. -
Page 44: Check Sheet For Frequent Inspection
Check Sheet for Frequent Inspection Model Code Capacity Serial No. Your CTRL No. Installation date Location Air hoist Inspection date/result Category Check item Check method Criteria The limit value of the following “ Sum of pitches for a Pitch Measurement specified number of links”... -
Page 45: Warranty
KITO will assign to Purchaser applicable warranties of such other manufacturers. 3) Except for the repair or replacement mentioned in (1) above which is KITO’s sole liability and purchaser’s exclusive remedy under this warranty, KITO shall not be responsible for any other claims arising out of the purchase and use of KlTO’s Products, regardless of whether... - Page 46 > < Memo...
- Page 47 < > Memo...
- Page 48 Global Website: kito.com...
Need help?
Do you have a question about the TCH Series and is the answer not in the manual?
Questions and answers