Advertisement
Table of Contents
Contents
Global link Ultra ES Pro - Smart Lock Quick Start Guide
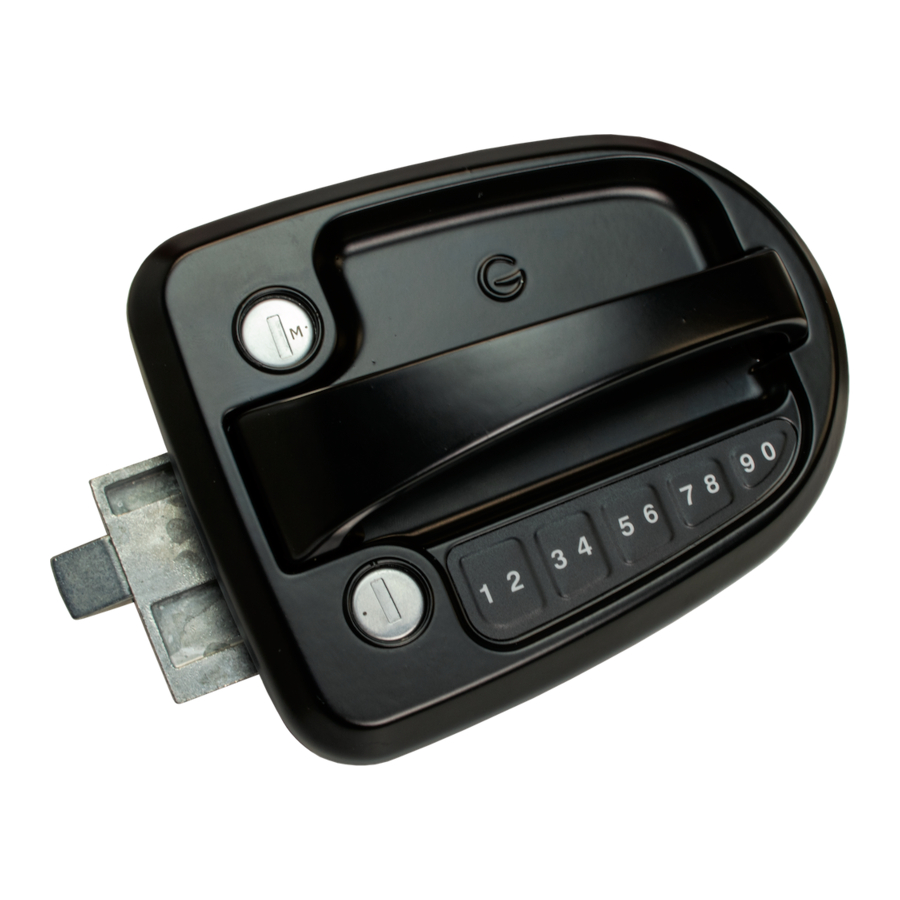
Overview

To lock the door
- Press any key to wake up the keypad.
- Press and hold the 1-2 key and the 3-4 key at the same time. Two descending beeps indicate success.
To unlock the door
- Press any key to wake the keypad.
- Enter the factory default PIN (printed on a label affixed to the inside handle of the lock) or the current customer PIN. Two ascending beeps indicate success.
To add or change the PIN
- Press and hold the 9-0 key for 3 seconds until the lock beeps twice.
- Enter the factory default PIN or the current user PIN. Two beeps indicate a correct PIN.
- Enter the new PIN. Three varied beeps indicate a new PIN was entered.
- Enter the new PIN again to confirm.
Three varied beeps indicate success.
To change the battery
- Use a #2 Phillips screwdriver to loosen the captive battery compartment screw* on the interior of the lock. Do not completely remove the screw.
- Lift off the battery compartment cover.
- Remove the old battery from the battery holder.
- Insert a new battery in the correct orientation.
- Insert the battery door tabs in the slots on the battery compartment and swing the door closed. Tighten the screw to secure the battery door.
To install the lock

- Remove the existing lock.
- Position the exterior lock assembly (with keypad) on the outside of the door, ensuring the plunger assembly is positioned at the edge of the door as shown (1).
- Using the 2 #8-32 x 3/8" flat head screws provided, install the door edge cover on the edge of the door. Ensure the door edge cover is flush to the edge of the door.
- Connect the cable attached to the interior lock housing to the cable attached to the exterior lock housing. Position the cable inside the door as shown (2) to avoid pinching and binding.
- Position the interior lock assembly on the door, ensuring:
- The deadbolt post is inserted in the red deadbolt lever so that the lever operates the deadbolt.
- The interior handle post is positioned on the door edge side of the latch tab so that the handle operates the latch.
- The 3 screw posts on the interior housing align with the 3 screw bosses on the exterior housing. Do not overtighten the screws.
- Secure the lock housings with the 4 #8-32 x 7/8" oval head screws provided.
- Ensure the handle operates the latch and the red deadbolt lever operates the deadbolt.
- Check that the strike plate is properly aligned with the lock. The plunger should extend fully into the strike plate when the door is locked.
Beeps Summary
1 beep: Keypress
2 beeps: Factory default code or user code entered
2 beeps (after 3 seconds): Programming mode entered
2 ascending beeps: Unlocking successful
2 descending beeps: Locking successful
3 varied beeps: New code entered
4 quick beeps: Incorrect code entered
4 quick, descending beeps: Low battery


Documents / ResourcesDownload manual
Here you can download full pdf version of manual, it may contain additional safety instructions, warranty information, FCC rules, etc.
Download Global link Ultra ES Pro - Smart Lock Quick Start Guide
Advertisement


Need help?
Do you have a question about the Ultra ES Pro and is the answer not in the manual?
Questions and answers