Advertisement
Table of Contents
- 1 Table of Contents
- 2 Manufacturer
- 3 Changing the Batteries
- 4 Replacing the Touch Pad
- 5 Replacing the Circuit Board
- 6 Replacing the On/Off Switch
- 7 Replacing the Lift Strap
- 8 LCD Display Messenging
- 9 Exploded View
- 10 Maintenance Checklist
- 11 Checklist Notes
- 12 IC Belt Inspection Notes
- 13 Schematics
- 14 Troubleshooting Flow
- 15 Cleaning & Disinfection
- 16 Terms & Conditions
- Download this manual
Advertisement
Table of Contents

Subscribe to Our Youtube Channel
Related Manuals for Tollos Cirrus


Summary of Contents for Tollos Cirrus
- Page 1 Cirrus Service Manual ® Pinnacle Service Manual ®...
-
Page 3: Table Of Contents
Table of Contents Manufacturer Changing the Batteries Replacing the Touch Pad Replacing the Circuit Board Replacing the On/Off Switch Replacing the Lift Strap LCD Display Messenging Exploded View Maintenance Checklist Checklist Notes IC Belt Inspection Notes Schematics Troubleshooting Flow Cleaning & Disinfection Terms &... -
Page 4: Manufacturer
Phone: 888.363.7224 US & Canada Fax: 410.363.7708 Email: service@tollos.com Website: www.tollos.com Serial Number: _________________________________________ Please have your serial number available when contacting Tollos for service. Please include your serial number in all communications with Tollos. Symbols WARNING, CAUTION, DANGER IMPORTANT... -
Page 5: Changing The Batteries
Batteries Tools needed: • #1 Robertson screwdriver • 9/64” Allen wrench 1. Using a #1 Robertson screwdriver, remove the 3 screws from both the front and back of lift. 2. Remove all cables leading to the batteries. NOTE: Make a note of where the battery connections are. 3. -
Page 6: Replacing The Touch Pad
Touch Pad Tools needed: • #1 Robertson screwdriver • Wire cutters • Utility knife • Isopropyl alcohol 1. Using a #1 Robertson screwdriver, remove the 3 screws from both the front and back of the lift. 2. Using wire cutters, cut away the tie strap holding the touchpad ribbon. -
Page 7: Replacing The Circuit Board
Circuit Board Tools needed: • #1 Robertson screwdriver • Wire cutters • Needlenose pliers • Zip ties (x2) Fuse Holder 1. Using a #1 Robertson screwdriver, remove the 3 screws from both the front and back of the lift. 2. Remove all plug connectors from the circuit board. After Before 3. -
Page 8: Replacing The On/Off Switch
On/Off Switch Tools needed: • #1 Robertson screwdriver 1. Using a #1 Robertson screwdriver, remove the 6 screws holding the front plate in place. Emergency Down On/Off Switch 2. Remove blue strap. 3. Unplug the on/off switch from the wiring harness. 4. -
Page 9: Replacing The Lift Strap
Lift Strap Tools needed: • Drill, R1 bit • 1/8” Allen wrench • 3/16” Allen wrench • 5/32” Allen wrench • Pliers or flat-head screwdriver • Blue Loctite 1. Using the drill with the R1 bit, remove 12 case screws from the end of the lift. - Page 10 Lift Strap (cont.) 8. Using pliers or a flat-head screwdriver, gently pop off the master link from the drive chain. 9. With the 5/32” Allen wrench, loosen the set screws on the shaft collar. 10. With the flat screwdriver, gently tap on the motov spool support to drive the shaft out of the spool.
- Page 11 Lift Strap (cont.) 14. Place the shaft back into the spool and reassemble. NOTE: Use Blue Loctite on the shaft collar screws, the spool shaft screw, and the hex bushings. 15. Wind up the belt by moving the large sprocket towards the motor. 16.
-
Page 12: Lcd Display Messenging
LCD Display Messages Two sets of messages can be displayed, depending on whether the lift is in normal operation mode or charging mode. Normal Operation During normal operation, the lift will display the current action and the number of times that action has been performed during the life of the lift. -
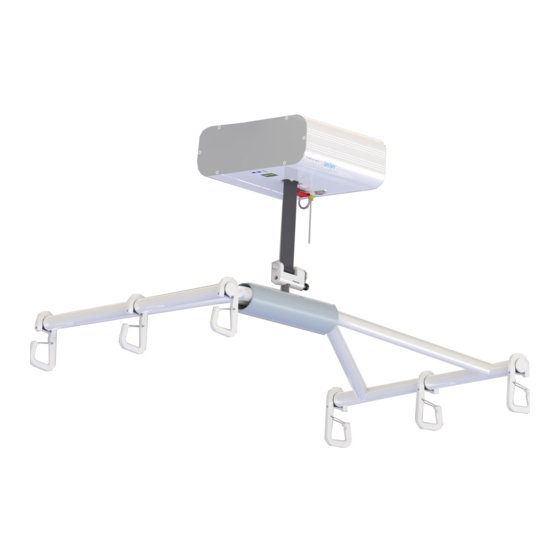
Page 13: Exploded View
Exploded View 1. Lift Shroud 2. Quick Release Trolley 3. Control Board 4. Drive Chain... -
Page 14: Maintenance Checklist
Ceiling Lift Inspection Checklist Date: ______________________________________________________________ Model #: _______________________________________ Facility: ____________________________________________________________ Serial #: _______________________________________ Location: ___________________________________________________________________________________________________________ In Warranty? D.O.P.__________________________ TTL Cycle: _____________________ Belt OK - N/A Replace/Fix Comments Cloth belt: stitching, fraying, folding, cuts IC Belt: weld, folding, cuts, exposed metal strands (see Notes, pages 13-16) Trolley (if applicable) OK - N/A... -
Page 15: Checklist Notes
Batteries much be fully charged. Lifting strap should not be extended to more than 3-4 feet (914 mm - 1219 mm) from the floor and then lifted 19.5” (495 mm) for the Cirrus 750lb (340 kg) lift, or 12” (305 mm)for the Pinnacle 1000lb (454 kg) lift. -
Page 16: Ic Belt Inspection Notes
Discontinue use of any lifts with straps that show signs of excessive wear or damage. • Service your facility’s Pinnacle or Cirrus lift(s) by removing and replacing worn or damaged straps with new straps. Contact Tollos for assistance if needed. - Page 17 IC Belt Inspection Notes Illustration 5 is an example demonstrating wear to the point that the load bearing internal steel cables are showing. Replace any straps that are worn to this point. Illustration 5 Illustrations 6-8 demonstrate creasing. If creasing is deep, sometimes coupled with cracks, or if the strap has exceeded 10,000 cycles the strap must be replaced.
- Page 18 IC Belt Inspection Notes Illustration 9 demonstrates physical damage. Do not use a lift with a damaged strap, and immedi- ately replace any straps found to have physical damage. Illustration 9 Illustrations 10 and 11 demonstrate a specific type of physical damage – damage to the edge of the strap.
- Page 19 IC Belt Inspection Notes Illustrations 12-14 demonstrates the exterior appearance of a strap with severe damage to the load bearing steel cables internally. An x-ray of this strap is included to show the internal damage that corresponds to the exterior appearance. The close-up image of the opposite side shows the broken cable ends visible through the polyurethane covering.
-
Page 20: Schematics
Schematics... -
Page 21: Troubleshooting Flow
If that doesn’t work replace Main Board Press the arrow buttons on the hand controller and the control panel Grinding Noise Call Tollos Remove Shroud. Ensure all Is there clicking Movement connections are tight. If so, or motion? switch the actuator plug. Check for... -
Page 22: Cleaning & Disinfection
Disinfecting Disinfect Tollos lifts, IC Belts, spreader bars, tracks and/or rails using a hospital-grade, non-corrosive disinfectant. Follow the disinfectant manufacturer’s instructions and facility disinfection protocols. Guard against excess liquid infiltrating the lift housing, spreader bar pivot points, or openings in the tracks/rails. -
Page 23: Terms & Conditions
(“Liens”) of creditors of by Customer by U.S. mail. Customer will pay or reimburse Tollos for all delivery and Customer or any other persons until such time as the Customer has paid Tollos in full for handling charges. - Page 24 TOLL FREE Western Zone Office 5560 Skylane Blvd Suite C Santa Rosa, CA 95403 888.363.7224 TOLL FREE Canadian Office 75 Dyment Road Barrie, ON L4N 3H6 705.733.0022 PHONE 800.565.7075 TOLL FREE © 2022 Tollos Inc. All rights reserved. CLSM 2022-09...
Need help?
Do you have a question about the Cirrus and is the answer not in the manual?
Questions and answers