
Related Manuals for Grundig GEBM11400X


Summary of Contents for Grundig GEBM11400X
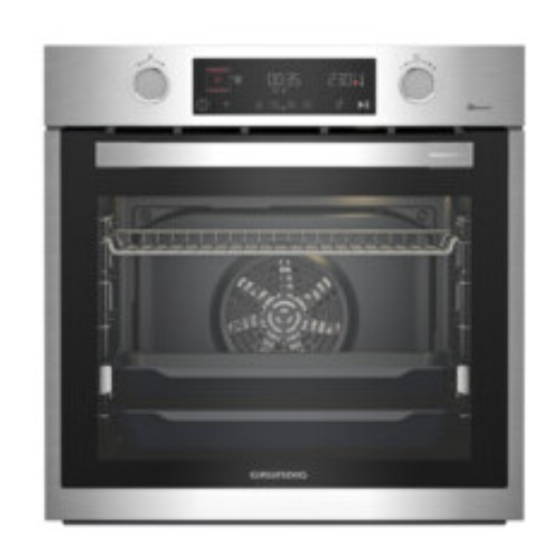
- Page 1 İT Built-in Oven User Manual Forno da incasso Manuale Utente GEBM11400X 385441955/ EN/ İT/ R.AA/ 02/08/2022 14:11 7751788362...
-
Page 2: Table Of Contents
General Warnings About Baking Table of Contents in the Oven ........1 Safety Instructions ......6.1.1 Pastries and oven food ....28 Intended Use......... 6.1.2 Meat, Fish and Poultry ....31 Child, Vulnerable Person and Pet 6.1.3 Grill ..........32 Safety .......... - Page 3 Welcome! Dear Customer, Thank you for choosing the Beko product. We want your product, manufactured with high quality and technology, to offer you the best efficiency. Therefore, carefully read this manual and any other documentation provided before using the product. Keep in mind all the information and warnings stated in the user’s manual.
-
Page 4: Safety Instructions
1 Safety Instructions • This section includes the Intended Use safety instructions necessary • This product is designed to be to prevent the risk of personal used at home. It is not suitable injury or material damage. for commercial use. •... -
Page 5: Electrical Safety
they are supervised or trained • When the door is open, do not about the safe use and haz- put any heavy objects on it or ards of the product. allow children to sit on it. You • Children should not play with may cause the oven to tip over the product. -
Page 6: Transportation Safety
• The product must not be • If the power cable is damaged, plugged into the outlet during it must be replaced by the installation, repair, and trans- manufacturer, an authorized portation. service or a person to be spe- • Plug the product into an outlet cified by the importer com- that meets the voltage and pany in order to prevent pos-... -
Page 7: Installation Safety
• The product is heavy, carry the • To prevent overheating, the product with at least two product should not be in- people. stalled behind decorative • Do not use the door and / or doors. handle to transport or move Safety of Use the product. -
Page 8: Temperature Warnings
• The hinges of the product door Accessory Use move when opening and clos- • It is important that the wire ing the door and might jam. grill and tray are placed prop- When opening / closing the erly on the wire shelves. For door, do not hold the part with detailed information, refer to the hinges. -
Page 9: Maintenance And Cleaning Safety
• Do not heat closed tins and • Food not suitable for grilling glass jars in the oven. The carries a fire hazard. Grill only pressure that would build-up food that is suitable for heavy in the tin/jar may cause it to grill fire. -
Page 10: Environmental Instructions
2 Environmental Instructions 2.1 Waste Directive Regulations. Do not dispose of the pack- aging waste with the household or other 2.1.1 Compliance with the WEEE Dir- wastes, take it to the packaging material ective and Disposing of the collection points designated by the local Waste Product authorities. -
Page 11: Your Product
3 Your product 3.1 Product Introduction 1 Control panel 2 Lamp 3 Wire shelves 4 Fan motor (behind the steel plate) 5 Door 6 Handle 7 Lower heater (under the steel plate) 8 Shelf positions 9 Upper heater 10 Ventilation holes 3.2 Product Control Panel Introduc- Varies depending on the model. -
Page 12: Control Panel
3.2.1 Control Panel 1 Function selection knob 2 Control unit 3 Temperature selection knob If there are knob(s) controlling your Temperature knob product, in some models this/these You can select the temperature you want knob(s) may be so that they come out to cook with the temperature knob. -
Page 13: Oven Operating Functions
: Lamp key : Brightness symbol : Alarm key : Function number : Decrease and advance key : Defrosting symbol : Increase and advance key : Keep warm symbol : Time and settings key : Remove control symbol : Remove control key : Wifi symbol : Baking start/stop key : Low level steam symbol *... -
Page 14: Product Accessories
The lower heater and fan heating work. It is suitable for cook- Pizza function 40-280 ing pizza. Upper heating, lower heating and fan heating functions oper- ate. Each side of the product to be cooked is cooked equally "3D" function 40-280 and quickly. -
Page 15: Use Of Product Accessories
On models without wire shelves : Wire grill It is used for frying or placing the food to be baked, fried and stewed on the desired shelf. On models with wire shelves : Placing the wire grill on the cooking shelves On models without wire shelves : On models with wire shelves :... - Page 16 Stopping function of the wire grill There is a stopping function to prevent the wire grill from tipping out of the wire shelf. With this function, you can easily and safely take out your food. While removing the wire grill, you can pull it forward until it reaches the stopping point.
- Page 17 Proper placement of the wire grill and tray on the telescopic rails-On models with wire shelves and telescopic models Thanks to telescopic rails, trays or the wire grill can be easily installed and removed. When using trays and wire grills with the telescopic rail, care should be taken that the pins on the front and back of the tele- scopic rails, rest against the edges of the...
-
Page 18: Technical Specifications
3.6 Technical Specifications General specifications Product external dimensions (height/width/depth) (mm) 595 /594 /567 Oven installation dimensions (height / width / depth) 590 - 600 /560 /min. 550 (mm) Voltage/Frequency 220-240 V ~; 50 Hz Cable type and section used/suitable for use in the min. -
Page 19: First Use
4 First Use Before you start using your product, it is f. Touch the keys to set the minute. recommended to do the following stated in Confirm the setting by touching the the following sections respectively. key. 4.1 First Timer Setting Always set the time of day before using your oven. - Page 20 Before using the accessories: NOTICE: During the first use, smoke and odour may come up for several hours. This Clean the accessories you remove from the is normal and you just need good ventila- oven with detergent water and a soft tion to remove it.
-
Page 21: Using The Oven
5 Using the Oven 5.1 General Information on Using the If there is key on the control panel: In cases where the oven lamp is automatic- Oven ally switched on or off, you can turn the Cooling fan ( It varies depending on the lamp on and off at any time by touching product model. - Page 22 Keys : : Low level steam symbol * : On/off key : High level steam symbol * : Lamp key : Self-cleaning symbol * : Alarm key : Door lock symbol * : Decrease and advance key : Meat probe symbol * : Increase and advance key It varies depending on the product model.
- Page 23 baking is done without setting the a. Turn on the oven by touching the baking time. You have to control bak- key. ing and turn it off yourself. When the b. Select the operating function you want baking is completed touch the to cook with the function selection to end the baking or touch the knob.
-
Page 24: Settings
turned off if the key is touched. If any key is touched except for these, the audible warning stops. 5.3 Settings The 3-2-1 countdown is shown on To quickly set the baking time, you the display in the menus or set- can touch the key to set the tings that should be activated by... - Page 25 The alarm clock has no effect on the oven b. You can also cancel the alarm by operating functions. It is used for warning pressing the key for a long time. purposes. For example, you can use the Setting the volume alarm clock when you want to turn the You may set the volume of your control food in the oven at a certain time.
- Page 26 a. With the oven turned off (when the time of day is shown on the display), touch key for about 3 seconds to activ- ate the settings menu. b. Touch the keys until the symbol appears on the display. ð The minutes field and the sym- bol flash on the display.
- Page 27 ð When the oven switches to the If the symbol is shown on the setup mode, an animation is display, but an error signal is heard shown on the display where some when the key is pressed and if lines flash. symbol is not displayed on the display or the symbol is...
-
Page 28: General Information About Baking
CE declaration of conformity Arçelik A.Ş. declares that this product complies with the 2014/53/EU Directive. A detailed RED Declaration of Con- formity is available online in the support.grundig.com website within the additional documents in the product page for your product. - Page 29 • If you will cook by using cookware on the • If the cake is moist, use a small amount wire grill, place it in the middle of the of liquid or reduce the temperature by wire grill, not near the back wall. 10°C.
- Page 30 Food Accessory to be Operating func- Shelf position Temperature (°C) Baking time used tion (min) (approx.) Round cake mould, 26 cm in Sponge cake Fan Heating 35 … 45 diameter with clamp on wire grill Top and bottom Cookie Pastry tray * 25 …...
-
Page 31: Meat, Fish And Poultry
Cooking table with operating function • Do not open the oven door when cooking “Eco fan heating” in the “Eco fan heating” operating func- tion. If the door does not open, the in- • Do not change the temperature setting ternal temperature is optimized to save after starting cooking in the operating energy, and this temperature may differ... -
Page 32: Grill
Food Accessory to be Operating func- Shelf position Temperature (°C) Baking time used tion (min) (approx.) 25 mins. 250/ 150 … 210 Turkey (5.5 kg) Standard tray * "3D" function max, after 180 … Wire grill * Fan assisted bot- 20 …... -
Page 33: Test Foods
Food Accessory to be Shelf position Temperature (°C) Baking time (min) used (approx.) 4 - 5 20 … 30 Vegetable gratin Wire grill 1 … 3 Toast bread Wire grill It is recommended to preheat for 5 minutes for all grilled food. Turn pieces of food after 1/2 of the total grilling time. -
Page 34: Maintenance And Cleaning
Suggestions for cooking with two trays Food Accessory to be Operating func- Shelf position Temperature (°C) Baking time used tion (min) (approx.) 2-Standard tray * Small cakes Fan Heating 2 - 4 25 … 35 4-Pastry tray * 2-Standard tray * Shortbread (sweet 2 - 4 15 …... -
Page 35: Cleaning Accessories
• Clean with a soft soapy cloth and liquid • Clean the appliance using dishwashing (non-scratching) detergent suitable for detergent, warm water and a microfiber inox surfaces, taking care to wipe in one cloth specific for glass surfaces and dry direction. -
Page 36: Cleaning The Inside Of The Oven (Cooking Area)
Do not remove the knobs and gaskets underneath to clean the panel. The con- trol panel and knobs may be damaged. • While cleaning the inox panels with knob control, do not use inox cleaning agents around the knob. The indicators around the knob can be erased. -
Page 37: Cleaning The Oven Door
For stubborn dirt, clean the product using Do not use harsh abrasive clean- dishwashing detergent, warm water and a ers, metal scrapers, wire wool or soft cloth or sponge and dry it with a dry bleach materials to clean the oven cloth. -
Page 38: Removing The Inner Glass Of The Oven Door
Illustration 6: Hinges - open position g. Get the oven door to a half-open posi- Illustration 3: Hinges - closed position tion. h. Pull the removed door upwards to re- lease it from the right and left hinges Illustration 4: Hinges - open position and remove it. -
Page 39: Cleaning The Oven Lamp
f. While reassembling the innermost glass (1), pay attention to place the printed side of the glass on the inner glass. It is crucial to place the lower corners of the innermost glass (1) to meet the lower plastic slots. g. -
Page 40: Troubleshooting
c. If your oven lamp is type (A) shown in the figure below, rotate the oven lamp as shown in the figure and replace it c. Lift the lamp's protective glass cover with a new one. If it is type (B) model, with a screwdriver. - Page 41 • (If there is timer on your appliance) Keys The command you would like to send from on the control panel do not work. >>> If the "HomeWhiz" application does not go your product has a key lock, the key lock through.
- Page 42 6.1.1 Pasticcini e alimenti da forno ..70 Indice 6.1.2 Carne, pesce e pollame ....73 1 Istruzioni relative alla sicurezza .. 44 6.1.3 Grill ..........74 Uso previsto........44 6.1.4 Alimenti di prova......75 Sicurezza di bambini, persone di- 7 Manutenzione e pulizia ....
- Page 43 Benvenuto! Gentile cliente, Grazie per aver scelto il prodotto Beko . Vogliamo che il tuo prodotto, realizzato con alta qualità e tecnologia, ti offra la massima efficienza. Quindi, prima di utilizzare il prodotto leggere con attenzione il presente manuale e qualsiasi altra documentazione fornita in dotazione.
-
Page 44: Istruzioni Relative Alla Sicurezza
1 Istruzioni relative alla sicurezza • Questa sezione contiene istru- Uso previsto zioni di sicurezza necessarie a • Questo prodotto è progettato prevenire rischi di lesioni per- per essere usato in casa. Non sonali o danni alle cose. è utilizzabile per scopi com- •... -
Page 45: Sicurezza Elettrica
non sono in grado di sviluppa- • AVVERTENZA: Durante l'uso, re le proprie capacità fisiche, le superfici accessibili del pro- sensoriali o mentali, o che non dotto sono calde. Tenere i hanno esperienza e conoscen- bambini lontano dal forno. za, purché siano sorvegliati o •... - Page 46 un piano cottura). Qualora ciò superficie posteriore, i colle- non fosse possibile, sull'im- gamenti potrebbero danneg- pianto elettrico al quale il pro- giarsi. dotto è collegato dovrebbe es- • Non incastrare i cavi elettrici sere presente un meccanismo nello sportello del forno e non (fusibile, interruttore, commu- passarli su superfici calde.
-
Page 47: Sicurezza In Fase Di Trasporto
tatto con l'acqua (ad esempio, • Controllare l'aspetto generale acqua che potrebbe fuoriusci- del prodotto per eventuali re dal contatore). danni che potrebbero essersi • Non toccare la presa con le verificati durante il trasporto. mani umide! Non scollegare Installazione in sicu- mai tirando il cavo, estrarre rezza sempre la presa. -
Page 48: Avvertenze Sulla Temperatura
• Non utilizzare l'apparecchiatu- dotto e i suoi elementi riscal- ra se il vetro dello sportello danti. I bambini di età inferiore anteriore è stato rimosso o si agli 8 anni non dovrebbero av- è incrinato. vicinarsi al prodotto se non •... -
Page 49: Sicurezza Nella Cottura
• Gli accessori possono dan- elementi del riscaldatore, ri- neggiare il vetro dello sportello muovere eventuali pezzi ec- quando lo si chiude. Spingere cessivi di carta oleata appesi sempre gli accessori all'estre- all'accessorio o al contenitore. mità dell’area di cottura. Non utilizzare mai carta anti- grasso a una temperatura del Sicurezza nella cot-... -
Page 50: Istruzioni Relative All'ambiente
• Non lavare il prodotto spruz- aggressivi, raschietti metallici, zando o versandovi acqua! C'è pagliette d’acciaio o candeg- rischio di scossa elettrica! gina. Questi materiali possono • Non utilizzare pulitori a vapore causare graffi e rotture delle per pulire il prodotto, poiché superfici di vetro. - Page 51 • Se specificato nella ricetta o nel manuale sulla griglia. Inoltre, se si cucinano i pa- utente, preriscaldare sempre. Non aprire sti uno dopo l'altro, si risparmia energia lo sportello del forno frequentemente perché il forno non perde il suo calore. durante la cottura.
-
Page 52: Il Prodotto
3 Il prodotto 3.1 Presentazione del prodotto 1 Pannello di controllo 2 Lampada 3 Ripiani a filo 4 Motorino ventola (dietro alla piastra in acciaio) 5 Sportello 6 Maniglia 7 Riscaldatore inferiore (sotto la pia- 8 Posizioni del ripiano stra d'acciaio) 9 Riscaldatore superiore 10 Fori di ventilazione 3.2 Introduzione e utilizzo del pan-... -
Page 53: Pannello Di Controllo
3.2.1 Pannello di controllo 1 Manopola selezione funzione 2 Unità di controllo 3 Manopola di selezione della tempe- ratura IT / 53... -
Page 54: Introduzione Al Pannello Di Controllo Del Forno
Se ci sono delle manopole che controllano Manopola temperatura il prodotto, in alcuni modelli queste mano- Con la manopola della temperatura è pos- pole possono essere tali da uscire quando sibile selezionare la temperatura alla quale vengono premute (manopole a scompar- si vuole cuocere. -
Page 55: Funzioni Operative Del Forno
: Numero della funzione : Simbolo della sonda per la carne * : Simbolo di sbrinamento Varia a seconda del modello di forno. Potrebbe non essere disponibile sul proprio prodotto. : Simbolo del mantenimento del calore : Simbolo del telecomando 3.3 Funzioni operative del forno : Simbolo Wifi Nella tabella delle funzioni sono indicate le... -
Page 56: Accessori Del Prodotto
Funziona il grill grande sulla parte superiore del forno. Adatta Grill completo 40-280 per grigliare grandi quantità di cibo. Grazie alla ventola, l'aria calda riscaldata dal grill più grande viene distribuita rapidamente in tutto il forno. Adatta per gri- Grill completo a ventola 40-280 gliare grandi quantità... -
Page 57: Uso Degli Accessori Del Prodotto
cottura, il grill a filo deve essere fissato sul Si consiglia di non utilizzare vassoi punto di arresto del ripiano a filo. Non deve e griglie a contatto diretto con gli passare sopra il punto di arresto a contatto alimenti. con la parete posteriore del forno. - Page 58 Su modelli con ripiani in filo metallico : Su modelli senza ripiani in filo metallico : è fondamentale posizionare correttamente i vassoi sui ripiani laterali. Il vassoio può essere posizionato sul ripiano in una sola Su modelli senza ripiani in filo metallico : direzione.
- Page 59 Posizionamento corretto del grill a filo e del vassoio sulle guide telescopicheSu modelli con ripiani in filo metallico e gui- de telescopiche Grazie alle guide telescopiche, i vassoi o il grill a filo possono essere facilmente in- stallati e rimossi. Quando si utilizzano vas- soi e grill a filo con guida telescopica, oc- corre fare attenzione che i perni, sulla parte anteriore e posteriore delle guide telesco-...
-
Page 60: Specifiche Tecniche
3.6 Specifiche tecniche Specifiche generiche Dimensioni esterne del prodotto (altezza/larghezza/pro- 595 /594 /567 fondità)(mm) Dimensioni di installazione del forno (altezza/larghezza/ 590 - 600 /560 /min. 550 profondità)(mm) Tensione/Frequenza 220-240 V ~; 50 Hz Tipo di cavo e sezione utilizzati/adatti all'uso nel prodot- min.H05VV-FG 3 x 1,5 mm2 Consumo energetico totale (kW) Tipo di forno... -
Page 61: Primo Utilizzo
4 Primo utilizzo Prima di iniziare ad utilizzare il prodotto, si f. Toccare i tasti per impostare i mi- raccomanda di procedere come segue e nuti. Confermare l'impostazione pre- indicato nelle seguenti sezioni. mendo il tasto 4.1 Prima impostazione del timer Prima di utilizzare il forno, impo- stare sempre l'ora del giorno. -
Page 62: Utilizzo Del Forno
e. Attendere il completamento del raffred- AVVISO: Alcuni detergenti o agenti deter- damento. genti potrebbero danneggiare la superficie. Non utilizzare detergenti abrasivi, polveri f. Pulire le superfici del prodotto con un detergenti, creme detergenti o oggetti ap- panno o una spugna umida e asciugare puntiti durante la pulizia. - Page 63 • Se l'impostazione del preriscaldamento pida. Per le impostazioni di preriscalda- rapido è attivata sull’unità di controllo, il mento rapido, vedere la sezione "Impo- simbolo appare sul display quando si stazioni". avvia la cottura e il forno raggiunge la Unità di controllo temperatura impostata per la cottura ra- Tasti : : Simbolo del mantenimento del calore...
- Page 64 Cottura manuale selezionando la tempera- tura e la modalità di funzionamento del forno Si può cuocere effettuando un controllo manuale (sotto il proprio controllo), senza impostare il tempo di cottura, selezionan- ð Il forno inizia a funzionare immediata- do la temperatura e la funzione operativa mente alla funzione e alla temperatura specifica per i propri alimenti.
-
Page 65: Impostazioni
f. Dopo aver impostato la funzione opera- tiva, la temperatura e il tempo di cottu- ra, toccare il tasto per avviare la cot- tura. ð Il forno inizierà a funzionare im- mediatamente alla funzione e alla temperatura selezionate. Il tempo di cottura impostato sullo scher- mo inizierà... - Page 66 ð Sul display appare il simbolo e il b. Impostare l’ora dell’allarme con i tasti blocco dei tasti viene attivato. Quando, / . Toccare nuovamente il tasto per con il blocco tasti impostato, viene confermare l’impostazione. toccato qualsiasi tasto, viene emesso un segnale acustico e il simbolo lampeggia.
- Page 67 b. Toccare i tasti fino a che il simbo- c. Attivare l'impostazione del preriscalda- mento rapido (booster) toccando nuo- non compare sul display. vamente il tasto c. Attivare l'impostazione del volume pre- d. Con i tasti cambiare l’impostazio- mendo nuovamente il tasto .
- Page 68 e. Toccare i tasti per impostare i mi- b. Aprire l'app “HomeWhiz"" installata sul nuti. Confermare l'impostazione pre- dispositivo smart. Dopo aver configura- mendo il tasto to la casa, selezionare il forno sotto la voce elettrodomestici della cucina e in- ð...
-
Page 69: Informazioni Generali Sulla Cottura
Dichiarazione di conformità CE Arçelik A.Ş. dichiara che questo prodotto è conforme alla Direttiva 2014/53/EU. Una dichiarazione di conformità RED dettagliata è disponibile online sul sito web support.grundig.com tra i documenti aggiuntivi nella pagina del prodotto. 6 Informazioni generali sulla cottura In questa sezione è... -
Page 70: Pasticcini E Alimenti Da Forno
• Il vapore intenso generato durante la • Se sulla tabella di cottura si consiglia il cottura potrebbe formare delle gocce preriscaldamento, assicurarsi di mettere d'acqua condensata all'interno e il cibo nel forno dopo il preriscaldamen- all'esterno del forno e sulle parti superio- ri del mobile a causa della differenza di •... - Page 71 Suggerimenti per la pasticceria • Se l’impasto è dorato in superficie ma il fondo non è cotto, assicurarsi che la • Se l’impasto è troppo secco, aumentare quantità di intingolo che userete non sia la temperatura di 10 ˚C e diminuire il eccessiva sul fondo.
- Page 72 Alimento Accessorio da Funzione opera- Posizione del ri- Temperatura (°C) Tempo di cottu- utilizzare tiva piano ra (min) (appros- simativ.) Stampo rotondo in metallo nero di 20 Riscaldamento su- 50 … 65 Torta di mele cm di diametro su periore e inferiore grill a filo ** Stampo rotondo in metallo nero di 20...
-
Page 73: Carne, Pesce E Pollame
Alimento Accessorio da utiliz- Posizione del ripia- Temperatura (°C) Tempo di cottura zare (min) (approssima- tiv.) Torte di piccole di- Vassoio standard * 25 … 35 mensioni Vassoio standard * 25 … 35 Biscotti Vassoio standard * 45 … 55 Pasticceria Vassoio standard * 35 …... -
Page 74: Grill
Alimento Accessorio da Funzione opera- Posizione del ri- Temperatura (°C) Tempo di cottu- utilizzare tiva piano ra (min) (appros- simativ.) 25 min. 250/max, 150 … 210 Turchia (5,5 kg) Vassoio standard * Funzione "3D" dopo 180 … 190 Grill a filo * Riscaldamento a Mettere un vasso- 20 …... -
Page 75: Alimenti Di Prova
Alimento Accessorio da utiliz- Posizione del ripia- Temperatura (°C) Tempo di cottura zare (min) (approssima- tiv.) 4 - 5 20 … 25 Costoletta di agnello Grill a filo Bistecca - (cubetti di Grill a filo 4 - 5 25 … 30 carne) 4 - 5 25 …... -
Page 76: Manutenzione E Pulizia
Suggerimenti per cucinare con due vassoi Alimento Accessorio da Funzione opera- Posizione del ri- Temperatura (°C) Tempo di cottu- utilizzare tiva piano ra (min) (appros- simativ.) 2-Vassoio stan- dard * Torte di piccole di- Riscaldamento 2 - 4 25 … 35 mensioni ventola 4-Vassoio per pa-... - Page 77 • Assicurarsi di pulire completamente il li- • Prima di effettuare la pulizia dell’area quido rimasto dopo la pulizia e di pulire cottura, il forno deve essere raffreddato. immediatamente gli eventuali schizzi di La pulizia su superfici calde creerà sia cibo creatisi durante la cottura.
-
Page 78: Accessori Per La Pulizia
• Gli scolorimenti e le macchie sulla su- 7.4 Pulizia dell'interno del forno (area perficie del vetro sono normali e non so- di cottura) no difetti. A seconda del tipo di superficie del forno, Parti in plastica e superfici verniciate seguire le fasi di pulizia descritte nella se- •... -
Page 79: Pulizia A Vapore Facile
7.5 Pulizia a vapore facile (Varia a seconda del modello di forno. Po- trebbe non essere disponibile sul proprio Questo permette di pulire facilmente lo prodotto.) Dopo la formazione di condensa sporco (che non sia rimasto per troppo all'interno del forno, nel canale della va- tempo) che viene ammorbidito dal vapore schetta sotto il forno potrebbe crearsi un all'interno del forno e dalle gocce d'acqua... - Page 80 d. la cerniera di tipo (A) è disponibile nei normali tipi di sportelli. Illustrazione 4: Cerniere - posizione aperta Illustrazione 1: Cerniere - posizione chiusa f. la cerniera di tipo (C) è disponibile nei tipi di sportelli ad apertura/chiusura morbida. Illustrazione 2: Cerniere - posizione aperta e.
-
Page 81: Rimuovere Il Vetro Interno Dello Sportello Del Forno
h. Tirare lo sportello rimosso verso l'alto c. Come mostrato in figura, sollevare deli- per sganciarlo dalle cerniere di destra e catamente il vetro più interno (1) verso di sinistra e rimuoverlo. “A” e poi rimuoverlo tirando verso “B”. Per riattaccare lo sportello, le pro- cedure applicate per la sua rimo- zione devono essere ripetute, però... -
Page 82: Pulizia Della Lampada Del Forno
7.8 Pulizia della lampada del forno Nel caso in cui lo sportello in vetro della lampada del forno nell’area di cottura si sporchi, pulire con detersivo per piatti, ac- qua calda e un panno morbido o una spu- gna e asciugare con un panno asciutto. In caso di guasto della lampada del forno, è... -
Page 83: Risoluzione Dei Problemi
d. Se la lampada del forno è del tipo (A), come mostrato in figura, ruotare la lam- pada come mostrato in figura e sosti- tuirla con una nuova. Se è un modello del tipo (B), estrarla come mostrato in figura e sostituirla con una nuova. e. - Page 84 (Per i modelli con timer) Il display del timer Durante l'installazione del prodotto lampeggia o il simbolo del timer rimane at- nell’app “HomeWhiz", viene visualizzato tivo. l’avviso “Rilevate reti bluetooth multiple”. • C'è stata un'interruzione di corrente. >>> • Nel caso in cui più apparecchi domestici Impostare l'ora/Portare su off le mano- siano impostati contemporaneamente pole di funzionamento del prodotto e...
Need help?
Do you have a question about the GEBM11400X and is the answer not in the manual?
Questions and answers