Advertisement
Advertisement
Table of Contents

Related Manuals for THIEYE CarView 4


Summary of Contents for THIEYE CarView 4
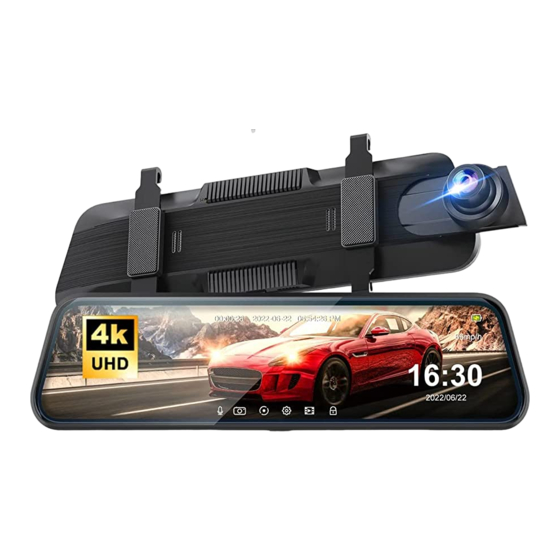
- Page 1 Dual Lens Mirror Dash Cam CarView 4 USER MANUAL...
- Page 2 ........... USER MANUAL Guide de démarrage rapide ......Deutsche Anleitung ........Guida di Operazione Rapida ......取り扱い説明書 ..................Manual de usuario Руководство пользователя ......
-
Page 3: What's Included
English What’s Included Mirror Dash Cam Rear Camera With 0.5M Cable 7.5M Rear GPS Module Mounting Strap × 4 Car Charger Camera Cable With Additional USB Rear Camera 3M Glue For User Manual Pry Tool Screw × 2 Rear Camera... - Page 4 Layout 9 10 Reset Touch Screen Front Lens Back Clip Fixed Hook Power Button Mini USB Port Speaker Rear Camera Port Rear Lens TF Card Slot GPS Port...
-
Page 5: Installation Instructions
Installation Instructions 1.Insert A TF Card (Not included) Supports up to 128GB (Over U1). Please format the TF Card in the camera before first use. Note: 1.To keep your TF card in good condition, please format it regularly. As reformatting erases all of your contents, be sure to back up your photos and videos first. - Page 6 2.Install the Mirror Dash Cam to the Car 3.Front Camera Installation Wiring Diagram...
- Page 7 4.Install the Rear Camera The installation location of rear camera is actually quite flexible, so there are some recommended locations with different angles of visions. Mount the rear camera properly as shown in the picture A:Installed on the front windshield for in-car recording B:Installed on the rear windshield for recording outside the car C:Installed near the license plate for recording the rear areas of the car...
- Page 8 Mounting Bracket 7.5 Meters Rear Camera Cable AV Out Connect to Dash Cam Rear Camera Trigger Wire for Reverse Light (Red) Connecting the Red Wire with the Reversing Light Please identify the wire that feeding the Reverse Light from the rear light cluster, although its placement may vary, so be sure to refer to your car’s manual.
- Page 9 5.Connect to Power Mini USB Port AV-IN Port Front Camera Car Charger Rear Camera The Red Wire...
-
Page 10: Get Started
Get Started 1.Power On / Off ① Auto Power On / Off with Ignition When powered by the car charger, the dash cam will automatically turn on when you start your car engine. When turning off your car, the camera will automatically turn off after approximately 5 seconds. ②... - Page 11 Operation Function Tap the Audio On / Off Icon Open / Close Audio Recording Tap the Photo Taking Icon Take a photo Tap the video recording icon Start / stop video recording Tap the menu icon Enter into the setting menu Tap the playback icon Enter into the playback mode Tap the emergency lock icon...
- Page 12 5.Video Mode In the main interface, tap the video recording icon to start recording, the screen will appear a red dot and flash slowly, indicating the video is recording. Tap the lock icon to lock the recording, the screen will appear a yellow dot and flash slowly,indicating the video is locked. Tap the photo taking icon to take a photo.
-
Page 13: Menu Settings Instruction
Menu Settings Instruction Back Resolution Loop Record Time-Lapse Record Audio Datestamp G-Sensor Parking Guard z z z 50Hz License Auto Power Off Screen Saver Power Frequency Back Mirror Speaker Boot Sound Key Sound *When in video mode, tap “ ” to enter into video setting menu and the recording stops. Start recording again when returns. - Page 14 Time-Lapse Note: An extra hardwire kit (also called the step-down line or buck line, sold separately) is required for using the Time-lapse function (Off / 1s / 2s / 3s). Mini USB Port: Connect to the dash cam GND Wire (Black ): Connect to any metal in the car Hardwire Kit Battery Wire(Yellow): Connect to always powered constant fuse ACC Wire (Red): Connect to ACC...
- Page 15 After parking, the dash cam will auto-start and record when it detects a collision. It will turn off after continuously recording 30 seconds. License Auto Power Off When your camera is not recording, CarView 4 will automatically power off after 1 / 3 / 5 minutes. z z z Screen Saver Off / 1 / 3 / 5 min...
-
Page 16: Troubleshooting
Speaker Boot Sound Key Sound Language Date/Time Format All files will be deleted in format mode. Default In default setting, all user information set before will be cleared. Asr (Automatic speech recognition) Off by default, turn on Asr to control specific operations by speaking specific English or Japanese sentences. Version Troubleshooting If the machine freezes, reboots repeatedly and fails to boot, please try the following methods:... - Page 17 GPS Antenna 1.Getting Started 1.Install the external GPS antenna at the corner of the center console. 66mp/h Best mounting location...
- Page 18 2.Connect the external GPS antenna to the GPS slot of the dash cam Power on dash cam. A yellow “ ” will appear in the upper left corner of the screen while the GPS module is establishing satellite and location. This will be replaced by a green “ ”...
- Page 19 3.Setting Once connect the GPS antenna to the GPS slot of the dash cam, 3 new GPS setting options will appear in the setting mode. Tap the “ ” button to enter the setting mode and set GPS options. 1. GPS Test Check the GPS information, including GPS status, GPS satellites in view, Accuracy(feet), Azimuth(degrees), Coordinate(Lon/Lat), Speed and UTC Time.
- Page 20 4.Open GPS Video File on PC 1.Import video files from TF card to computer. 2.Download the dedicate GPS player via link, click here: http://www.thieye.com/download/gpsplayer Note: With TF card inserted, when the GPS Module connects to the dash cam, an installation file of the GPS player will be generated in the root directory of the TF card.
- Page 21 ① Settings Change language English, Chinese,Japanese, German, French, etc. And change your unit of speed measurement from MPH to KMH. ② Map Record and display your location information in real time. The front camera video folder is “front_norm” and the backup camera video folder is “back_norm”. The front camera lock folder is “front_emr”...
Need help?
Do you have a question about the CarView 4 and is the answer not in the manual?
Questions and answers