
Related Manuals for studioduc knox tall bookcase


Summary of Contents for studioduc knox tall bookcase
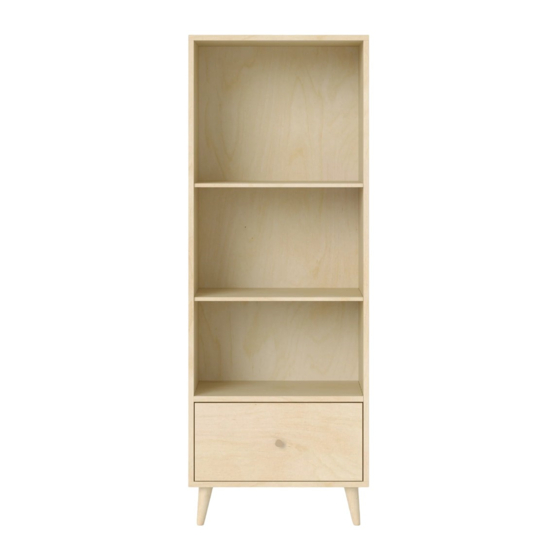
- Page 1 ASSEMBLY INSTRUCTIONS knox tall bookcase a how-to guide that won’t leave you in tears...
- Page 2 parenting is hard. this is easy. no really, it is. MADE HERE™ MADE WELL™ MADE SAFE MADE SMART...
- Page 3 want to watch this assembly IRL? (acronym challenged? that means “in real life”.) open the camera on your phone and place it over the QR code below to see our NYC studio dream team do all the heavy lifting (just kidding, there is none!) if you’re already using your phone, just click the orange button below! ASSEMBLY VIDEO CHANNEL...
- Page 4 thank you for selecting a studio duc product!
-
Page 5: Maintenance
please check contents against the components list in these instructions. also, please ensure there was no damage that may have occurred in shipping. if any components are missing or you find any damage, please contact ducduc before continuing. read all the instructions before use. pay close attention to the safety warnings in these instructions. -
Page 6: What's In The Box
WHAT’S IN THE BOX: R side L side back G (x4) bottom fixed shelf foot H (x8) shelf pin F (x2) adjustable shelf... - Page 7 WHAT’S IN THE BOX: K (x9) I (x6) safety strap screws hammer cap metal spring pins drawer box back drawer face L drawer box side R drawer box side drawer box bottom knox pull hardware screw for knox pull...
-
Page 8: What You'll Need
WHAT YOU’LL NEED: household hammer or phillips head screwdriver rubber mallet 20 minutes a soft surface to assemble on (or less) (like a rug or some of the corrugate box your piece arrived in) 2 people plus a dog for moral support (unless you’re a cat person) - Page 9 lean bottom (C) against a wall as shown. beginning in one corner, take a foot (G) as seen below, and insert the bolt located on foot (G) into the brackets on bottom panel (C). Twist until the foot is fully secure, and repeat for all feet (G) provided.
- Page 10 grab your household hammer and locate the parts listed below. hammer cap K (x9) metal spring pins R side L side back apply hammer cap (J) to the head of your household hammer. starting with R side (A1), line up metal spring pins (K) with the holes located at the top of the panel. fully tap each metal spring pin (K) into all of the holes.
- Page 11 lean R side (A1) against a wall as shown. insert connectors on back (B) into slots on R side (A1). push down at the connection to lock into place. if needed, tap with hammer and hammer cap (J) to lock into place ASSEMBLY VIDEO CHANNEL still confused? click to watch the assembly video...
- Page 12 insert connectors on back (B) into slots on L side (A2). push down at the connection to lock into place. gently lay the partially assembled case on its back as shown. wait! locate bottom panel (C) with attached feet (G) before moving on to the next step.
- Page 13 insert connectors on both side panels (A1 + A2) into slots on bottom panel (C). push down or tap with hammer and hammer cap (J) to lock into place. ASSEMBLY VIDEO CHANNEL still confused? click to watch the assembly video...
- Page 14 lower fixed shelf (D) into the case. align the three pins at the back of the fixed shelf (D) with the 3 holes on the back (B) of the bookcase. push down or use hammer with ham- mer cap (J) to lock into place. fixed shelf important! before locking into place, be...
- Page 15 use screws (I) and your phillips head screwdriver to secure fixed shelf (D) to each side of the bookcase interior. phillips head I (x6) screw driver screws with a friend, flip partially assembled case into upright position. line up holes of top (E) with the connectors of side panels (A1 + A2) and back panel (B).
- Page 16 now we build the drawer! starting with drawer face (DB1) facing down, insert connectors of both drawer box side panels (DB3 + DB4) into slots on drawer face (DB1). push down at the connections to lock into place. rotate the partially assembled drawer box as shown. slide drawer box bottom (DB5) into place using grooves on the drawer box side panels (DB3 + DB4) as guides.
- Page 17 again, rotate partially assembled drawer box as shown. insert connectors of drawer box back (DB2) into slots on drawer box sides (DB3 + DB4). push down at the connections to lock into place. use hammer and hammer cap (J) if needed. using a phillips screwdriver and screw (DB7), attach the pull hardware (DB6) to the front of the drawer face.
- Page 18 pull drawer glides out to extended position as shown. place the assembled drawer box onto extended glides as shown. from underside of drawer, use hands to pull each glide forward until it locks into connection with glide hardware attached to drawer box bottom (DB5). the drawer will be secure when you hear a click on each connection.
- Page 19 insert 8 shelf pins (H) into holes on both sides (A1 + A2) at desired heights. one at a time, place adjustable shelf (F) on top of 4 shelf pins (H) so it sits secure and level. ASSEMBLY VIDEO CHANNEL still confused? click to watch the assembly video...
- Page 20 safety strap installation the last step for your tall bookcase is to install the safety strap included in the box. reference the separate instructions enclosed in the envelope.
- Page 21 woohoo! you did it! give yourself a pat on the back, take a bow, or go house a pint of ice cream…we don’t judge.
- Page 22 prefer to talk to a human instead? we’re here for you! contact our customer advocate team below: 212.226.1868 quack@ducducnyc.com live chat at 200 lexington ave ducducnyc.com ny, ny 10016...
Need help?
Do you have a question about the knox tall bookcase and is the answer not in the manual?
Questions and answers