Table of Contents
Advertisement
Quick Links
XX207-00-02
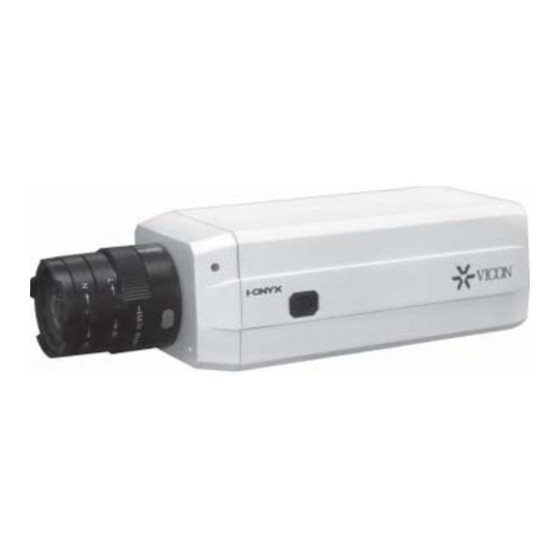
MP-980DN COLOR DAY/NIGHT
MEGAPIXEL CAMERA
Vicon Industries Inc. does not warrant that the functions contained in this equipment will meet your
requirements or that the operation will be entirely error free or perform precisely as described in the
documentation. This system has not been designed to be used in life-critical situations and must not
be used for this purpose.
Warning: To prevent fire or shock hazard, do not expose the unit to rain
or moisture.
Copyright © 2010 Vicon Industries Inc. All rights reserved.
Product specifications subject to change without notice.
Vicon and its logo are registered trademarks of Vicon Industries Inc.
ViconNet, Kollector, I-ONYX and their logos are registered trademarks of Vicon Industries Inc.
VICON INDUSTRIES INC., 89 ARKAY DRIVE, HAUPPAUGE, NY 11788
TEL: 631-952-CCTV (2288) FAX: 631-951-CCTV (2288)
TOLL FREE: 800-645-9116
24-Hour Technical Support: 800-34-VICON (800-348-4266)
UK: 44 (0) 1489-566300
WEB: www.vicon-cctv.com
Vicon part number 8009-8207-00-02
Rev 910
Advertisement
Table of Contents

Subscribe to Our Youtube Channel
Related Manuals for Vicon i-onyx MP-980DN


Summary of Contents for Vicon i-onyx MP-980DN
- Page 1 MP-980DN COLOR DAY/NIGHT MEGAPIXEL CAMERA Vicon Industries Inc. does not warrant that the functions contained in this equipment will meet your requirements or that the operation will be entirely error free or perform precisely as described in the documentation. This system has not been designed to be used in life-critical situations and must not be used for this purpose.
- Page 3 FCC Notice Note: Complies with Federal Communications Commission Rules & Regulations Part 15 for a Class B digital device. WARNING This equipment generates, uses and can radiate radio frequency energy and if not installed and used proper- ly, that is, in strict accordance with the manufacturer’s instruction, may cause interference to radio and tele- vision communications.
-
Page 5: Table Of Contents
Camera Configuration............................. 5 ViconNet Configuration..........................22 Troubleshooting ............................27 Appendix................................ 28 Maintenance ..............................40 Shipping Instructions ............................ 40 Network Cable ..............................41 Technical Information ........................... 42 Vicon Standard Equipment Warranty ......................42 XX207-00-02 Rev 910 MP-980DN Camera... - Page 6 8. Accessories - Do not place the unit on an unstable surface following repair or maintenance to verify proper operation. to avoid falling. Use only UL Listed Vicon recommended mounting 20. ESD Precaution - Take all normal electrostatic discharge accessories.
-
Page 7: Introduction
Introduction The information in this manual covers the installation and operation of the MP-980DN I-Onyx® Megapixel IP Camera. This camera should only be installed by a qualified technician using approved materials and wiring practices in accordance with the National Electrical Code ANSI/NFPA 70, state, and local electrical codes. Read these instructions thoroughly before beginning an installation. -
Page 8: Connectors And Controls
CONNECTORS AND CONTROLS Status LEDs: Green Camera Rear Panel Camera Front ETHERNET (Network Port) RJ-45 port provides connection (RJ-45 connector) to Internet, Ethernet (10Base-T/100Base-T). This connection also provides PoE (Power over Ethernet). When using PoE, a PoE device, such as the NETSWITCHPOE-24, is required. -
Page 9: Installation
INSTALLATION Installing the Lens To install the lens, screw it into the camera’s lens mount turning counterclockwise until it stops. A C/CS adapter is supplied for those applications where a lens with a C-mount is required. Connect the lens cable plug to the connector on the side of the camera. - Page 10 2. The camera allows the transmission of power and data via a single Ethernet cable (the Ethernet cable should meet the specs of UTP Category 5 and not . When powering with PoE, connect exceed 100 meters in length) camera’s Ethernet port to an Ethernet (RJ-45) connector. If the camera has built-in PoE, it can be regard as a Powered Device (PD) and connect it directly to a Power Sourcing Equipment (PSE) device, such as a PoE switch.
-
Page 11: Camera Configuration
The camera supports DHCP by default. If your network supports DHCP, you can connect the camera dome directly to the network and they will automatically get an IP address. You can proceed directly to the Vicon- Net Configuration, but Vicon recommends using a fixed IP address. - Page 12 Note: The screens below are using Internet Explorer as the web browser in MPEG-4 mode; when in JPEG mode, some of the video controls are eliminated. Vicon recommends using Internet Explorer. If Firefox is being used, Quicktime must be installed to view video.
- Page 13 Configuration Screens Select Configuration to access the setup screens. Only an Administrator can access these screens. There are two configuration modes. The Basic mode is for entry level users; for users requiring more advanced functions, an Advanced mode is provided. Simply click Advanced Mode on the left side of the menu. Detailed information is only displayed when a function is selected.
- Page 14 “Use fixed IP address”. The camera supports both DHCP and static IP addresses; Vicon recommends a fixed IP address for easier manageability. The camera can automatically restart and operate normally after a power outage. Users can run the IP Wizard (provided on CD; see...
- Page 15 192.168.0.100 from 80 to 8888, the users must type in the web browser “http://192.168.0. 100:8888” instead of “http://192.168.0.100”. Vicon recommends keeping the default port 80. “Secondary HTTP port”- It supports alternate port to access HTTP server; default is 8080.
- Page 16 “Turn off the LED indicator”- Check this option to shut off the LED on the rear of the camera; this is used as a security measure to prevent the camera’s operation from being detected. Vicon recommends this be checked to have LED turned OFF.
- Page 17 erify that the ViconNet Nucleus is also in sync with the same server.) “Manual”- Adjust the date and time according to what is entered by the Administrator. Notice the format in the related fields while doing the entry (yyyy/mm/dd and hh:mm:ss). Upon camera start up, it will fail if the assigned time-server cannot be reached.
- Page 18 Security This screen is used to create and setup users for the camera. The camera is shipped without a password by default. Therefore, anyone can access the camera, including the configuration screens, as long as the IP address is known. If it is required that the camera only be accessed by authorized personnel, it is suggested to assign a password.
- Page 19 DDNS Settings DDNS stands for Dynamic Domain Name Service. This provides the capability for a networked device to create a hostname when a user has a variable/changing IP address. Once the device has a name, it is not necessary to know its IP address. “Enable DDNS”- This option turns on the DDNS function.
- Page 20 General Settings “Maximum number of concurrent streaming connection(s) limited to”: There is simultaneous live view- ing for 1-10 clients (including stream 1 and stream 2). The default value is 10. If the number is modified and Save is clicked, all current connections are disconnected and automatically attempt to relink. Click View Information to display the connection status window showing a list of the current connections, including the IP address of current connections, how much time each has been at the web page (Elapsed time) and the User ID, if set.
- Page 21 Video and Audio Settings This screen allows for the configuration of various video settings. This camera supports multiple-streaming video. It allows the user to receive video in multiple configurations simultaneously, for example it can be viewed in MPEG-4 and recorded in JPEG. Note that the VMC requires JPEG mode. Video Settings: Enter the name of the camera in the “Video title”...
- Page 22 The “Video orientation” field allows the video to Flip (vertically rotate video) or Mirror (horizontally rotate video). Check the required box(es); check both boxes if the camera is installed upside-down. “Overlay title and time stamp on video”- Check if a title and time stamp is desired on the video. This in- formation is also provided by ViconNet.
- Page 23 “Maximum Exposure Time” adjusts the maximum exposure time in different environments, 1/5 -1/480 seconds. “Exposure Level” manually sets the exposure level from 1 to 8 (dark to bright); the default value is 4. Note that this setting affects autoiris functions and may require adjustment to achieve required image. “Enable AGC”...
- Page 24 Select the type of compression, MPEG-4, H.264 or JPEG. When using a combination of MPEG-4 and JPEG configurations for streams 1 and 2, Vicon recommends that MPEG-4 be designated as stream 1. (Note: For use with ViconNet VMC, set to JPEG.) The fields on the screen vary according to the mode selected. Select a Frame Size from 1600x1200, 800x600, 640x480, 320x240 or 174x144.
- Page 25 Audio Settings: Select Mute (checkbox) in the audio settings section; audio is not available for use with ViconNet. The tables that follow provide a guideline for recording in H.264 mode. 800x600 Fixed Quality Medium Standard Good Detailed Excellent Excellent2 Frame Size (KBytes) 10.11 15.55 21.4...
- Page 26 Motion Detection The camera can be configured for motion detection. ViconNet receives this as an external alarm. Refer to XX206 for details on how to use motion detection with ViconNet. “Enable motion detection” Check this option to turn on motion detection. Click on the New button to add a new window.
- Page 27 Maintenance Five actions can be selected on the maintenance screen. “Reboot system”- Click the Reboot button to restart system. “Restore”- Click the Restore button to reset all settings to factory default except settings in “Network type” on network screen. “Factory default”- Click on Default button to restore the factory default settings. Any changes made so far will be lost and the system will be reset to the initial factory settings.
-
Page 28: Viconnet Configuration
Adding Camera to the ViconNet System The I-Onyx MP-980DN camera will not automatically show up on the site list. It must be added to the Vicon- Net system. Unlike non-ViconNet cameras, this camera does not require a third party license to be used in the system. - Page 29 This screen allows you to add/search a camera, edit an existing camera or delete a camera. Because the same screen is being used for third party cameras, some cameras may already be in the list. To add a camera 1. Click the button on the I-Onyx 9xx and Third party Camera settings screen.
- Page 30 2. Enter a Camera Name for this camera and select IP (DNS is not available). From the Vendor dropdown list, select Vicon. 3. The format for this camera is set from the camera’s Video Settings screen. Select the same format, MPEG-4, M-JPEG or H.264.
- Page 31 4. The Port Number will default to 80. This is the most standard port. The port selected here must be the same as the port selected in the Network Settings - Advanced screen in the browser. 5. Enter a User Name and Password for this camera. This will be the camera’s identity in its browser. It is recommended that the user be administrator level to be able to access all camera features.
- Page 32 Network Considerations The I-Onyx MP-980DN Camera can be connected to any ViconNet network (Version 5.6 software). ViconNet NVRs, DVRs and Workstations can be used for live viewing and recording of network-streamed video. A network can be as simple as a single MP-980DN camera connected to a ViconNet Workstation or can be complex with the addition of several networks interconnected via WAN.
-
Page 33: Troubleshooting
Troubleshooting Status LED The following table lists the Status LED patterns. Reset and Restore There is a button in the back of the Camera. It is used to reset the system or restore the factory default set- tings. Sometimes resetting the system sets the system back to normal state. If the system problems remain after reset, restore the factory settings and install again. -
Page 34: Appendix
Appendix A This Appendix includes the configuration of those features not supported by ViconNet but by the MP-980DN camera software. Video Controls There are a variety of video controls provided on the Main screen. The magnifier can be used to digitally zoom. - Page 35 Client Settings There are three options to set up on the Client Settings screen. “H.264/MPEG-4 Media Options” determines which media will be streaming, video, audio or both. “H.264/MPEG-4 Protocol Options” allows choices on connection protocol between client and server. There are four protocol choices to optimize usage – UDP Unicast, UDP Multicast, TCP and HTTP. •...
- Page 36 Configuration Screens Application The Application section (Advanced Mode) defines how the camera responds to a situation. There are two sections of the Application screen, Event Settings and Customized Script. When an event is added, the trig- ger is defined, a schedule is setup; the Server is where the media resulting from the event is stored (Email, FTP, HTTP or Network Storage) and Media is how the event is captured, snapshot, video clip, or system log.
- Page 37 Media Settings Server Settings Event Settings Media Settings Customized Script Screen The event Trigger, Schedule and Action are defined in event section, as well as what media type it is to be attached to. The server name, type and address/location are shown in server section. The media name and type are shown in media section.
- Page 38 “Time”- Select to show “Always” or input the time interval (24-hr format). “Action”- The actions to be performed when a trigger is activated. “Trigger digital output for _ seconds”- Check to set specific seconds when event is triggered and enter the length of the trigger interval. Server –...
- Page 39 Media Settings – Click Add Media to specify the type of media that will be sent when a trigger is acti- vated. “Media name”- Unique name for media. There are three Media Type, snapshot, video clip and system log. Snapshot “Source”- The source of video stream, stream1 - 4.
- Page 40 Click Add to open the recording page to define the recording source, schedule and capacity. A total of 2 re- cording settings can be configured. “Recording name”- The unique name for recording setting. “Enable this recording”- Check to enable this video recording. “Priority”- Select the relative importance of the event (High, Normal, Low).The recording with higher priority will be executed first.
- Page 41 Local Storage (Advanced Mode) This screen manages the local storage. SD card status and control and searching and viewing recorded files to playback, download, etc. are configured. System Log (Advanced Mode) XX207-00-02 Rev 910 MP-980DN Camera...
- Page 42 The camera support logs the system messages on a remote server. The protocol is compliant to RFC 3164. Before using this feature, it is recommended to install a log recording tool (syslogd service) to allow the unit to receive a log from remote machine. Check “Enable remote log”...
- Page 43 The information in this appendix is intended to explain how to use the Installation Wizard that is on the CD provided with the camera. This utility is similar to VNSetup on Vicon cameras. Vicon recommends that this utility be used only as a tool to find an unknown IP address for a camera and to upgrade the firmware.
- Page 44 Appendix C Upgrade Firmware If you were instructed by Vicon technical support to update the camera firmware, obtain the upgrade files from Vicon and follow these steps: Go to the Maintenance screen under Configuration. Go to the Upgrade firmware field and use Browse to locate the upgrade files.
- Page 45 Appendix D Default Settings Field Default Setting Video Settings Video title Blank Color Color Power line frequency 60 Hz Iris mode Fixed Select caching stream Stream 4 Video orientation Flip/Mirror Not checked Overlay title… and Enable time Not checked shift… Options of Video Video quality first (MAX 15 fps) selected Image Settings...
-
Page 46: Maintenance
Shipping Instructions Use the following procedure when returning a unit to the factory: 1. Call or write Vicon for a Return Authorization (R.A.) at one of the locations listed below. Record the name of the Vicon employee who issued the R.A. -
Page 47: Network Cable
Network Cable Caution: Careful selection of proper cable is essential to obtain the best performance. Vicon assumes no responsibility for poor performance when cables other than the recommended types, or equivalent, are used. Materials Use pure copper stranded conductors to obtain a low DC resistance. The preferred insulation and cable jacket is Poly- vinyl chloride (PVC). -
Page 48: Technical Information
Technical Information Network Video Transmissions MECHANICAL Compression: H.264, MPEG-4 or M-JPEG. Aluminum. Casing: Resolution: 1600 x 1200. CS-mount; C/CS adapter Lens Mount: Supports video cropping for provided. bandwidth efficiency. ¼-20 threaded hole on camera Camera Mount: Image Settings: Adjustable image size, quality top and bottom. -
Page 49: Vicon Standard Equipment Warranty
Vicon Security Management Systems (SMS) All Models: All hardware is warranted for two years from date of original retail purchase. Any product sold as “special” or not listed in Vicon’s commercial price list: One year from date of original retail purchase. - Page 50 Vicon Industries Inc. Corporate Headquarters 89 Arkay Drive Hauppauge, New York 11788 631-952-CCTV (2288) 800-645-9116 Fax: 631-951-CCTV (2288) Vicon Europe Headquarters Brunel Way Fareham, PO15 5TX United Kingdom +44 (0) 1489 566300 Fax: +44 (0) 1489 566322 Vicon Germany Kornstieg 3...
Need help?
Do you have a question about the i-onyx MP-980DN and is the answer not in the manual?
Questions and answers