Table of Contents
Advertisement
Quick Links
®
JENN-AIR
30" AND 36" (76.2 CM AND 91.4 CM)
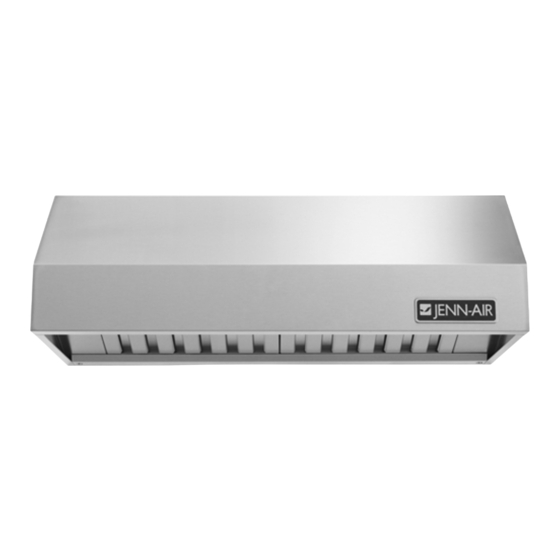
COMMERCIAL STYLE WALL-MOUNT
CANOPY RANGE HOOD
®
HOTTE DE CUISINIÈRE JENN-AIR
POUR
MONTAGE MURAL DE STYLE COMMERCIAL
30" ET 36" (76,2 CM ET 91,4 CM)
Installation Instructions and Use & Care Guide
For questions about features, operation/performance, parts, accessories, or service in the U.S.A., call:
1-800-JENNAIR (1-800-536-6247) or visit our website at www.jennair.com.
In Canada, call: 1-800-JENNAIR (1-800-536-6247), or visit our website at www.jennair.ca.
Instructions d'installation et Guide d'utilisation et d'entretien
Au Canada, pour assistance, installation ou service, composez le 1-800-JENNAIR (1-800-536-6247) ou visitez notre site web à
www.jennair.ca.
Table of Contents/Table des matières ............ 2
IMPORTANT: READ AND SAVE THESE INSTRUCTIONS.
FOR RESIDENTIAL USE ONLY.
IMPORTANT : LIRE ET CONSERVER CES INSTRUCTIONS.
POUR UTILISATION RÉSIDENTIELLE UNIQUEMENT.
LI3V3B/W10274318B
Advertisement
Table of Contents

Subscribe to Our Youtube Channel
Summary of Contents for Jenn-Air JXU9130WP1
- Page 1 30" AND 36" (76.2 CM AND 91.4 CM) COMMERCIAL STYLE WALL-MOUNT CANOPY RANGE HOOD ® HOTTE DE CUISINIÈRE JENN-AIR POUR MONTAGE MURAL DE STYLE COMMERCIAL 30" ET 36" (76,2 CM ET 91,4 CM) Installation Instructions and Use & Care Guide For questions about features, operation/performance, parts, accessories, or service in the U.S.A., call:...
-
Page 2: Table Of Contents
TABLE OF CONTENTS TABLE DES MATIÈRES RANGE HOOD SAFETY ..............2 SÉCURITÉ DE LA HOTTE DE CUISINIÈRE........15 INSTALLATION REQUIREMENTS ..........4 EXIGENCES D'INSTALLATION ...........17 Tools and Parts ................4 Outils et pièces................17 Location Requirements..............4 Exigences d’emplacement............17 Venting Requirements..............5 Exigences concernant l’évacuation ...........18 Electrical Requirements ...............6 Spécifications électriques ............20 INSTALLATION INSTRUCTIONS ..........7 INSTRUCTIONS D'INSTALLATION..........20... - Page 3 IMPORTANT SAFETY INSTRUCTIONS READ AND SAVE THESE INSTRUCTIONS...
-
Page 4: Installation Requirements
INSTALLATION REQUIREMENTS Tools and Parts Location Requirements Gather the required tools and parts before starting installation. IMPORTANT: Observe all governing codes and ordinances. Read and follow the instructions provided with any tools listed Have a qualified technician install the range hood. It is the here. -
Page 5: Venting Requirements
Back View Venting Requirements 8¹⁄₈" (20.6 cm): 30" (76.2 cm) models 11" (27.9 cm): 36" (91.4 cm) models ■ Vent system must terminate to the outdoors. Wiring knockout ■ Do not terminate the vent system in an attic or other enclosed 7⁷⁄₈"... -
Page 6: Electrical Requirements
Rear discharge Example vent system This range hood can be vented directly out the back using the ¹⁄₄ " x 10" 3¼" x 10" (8.3 cm x 25.4 cm) rectangular damper (supplied) along (8.3 x 25.4 cm) with a 3¼" x 10" (8.3 cm x 25.4 cm) rectangular vent system (not elbow 6 ft (1.8 m) Wall cap... -
Page 7: Installation Instructions
INSTALLATION INSTRUCTIONS Prepare Location ■ It is recommended that the vent system be installed before Determine Wiring Hole Location hood is installed. Cut only one 1¹⁄₄" (3.2 cm) diameter wiring access hole. See Step 2 for wiring hole location instructions. ■... - Page 8 4. Repeat steps 1-3 for the underside of the top of the cabinet. For Wall Installations: 1. Determine and mark the centerline on the wall where the canopy hood will be installed. 2. Select a mounting height between a minimum of 30" Cabinet cutouts (76.2 cm) and a suggested maximum of 36"...
-
Page 9: Install Range Hood
NOTE: If the wall cap is directly behind the 3¼" x 10" (8.3 x Complete Preparation 25.4 cm) rectangular vent connector, check that the damper and the wall cap do not interfere with each other. Remove the damper from the 3¼" x 10" (8.3 x 25.4 cm) rectangular vent 1. -
Page 10: Install Vent Covers (Optional)
3. Use UL listed wire connectors and connect black wires (B) 5. Install terminal box cover. together. 6. Check that all light bulbs are secure in their sockets. 7. Reconnect power. WARNING Install Vent Covers (Optional) If you are installing an optional full width duct cover, follow the instructions included with that product. -
Page 11: Range Hood Care
RANGE HOOD CARE Cleaning IMPORTANT: Clean the hood and grease filters frequently according to the following instructions. Replace grease filters Replacing a Halogen Lamp before operating hood. Turn off the range hood and allow the halogen lamp to cool. To Exterior Surfaces: avoid damage or decreasing the life of the new bulb, do not To avoid damage to the exterior surface, do not use steel wool or... -
Page 12: Wiring Diagram
WIRING DIAGRAM YL/GN YL/GN YL/GN... -
Page 13: Assistance Or Service
® ■ Scheduling of service. Jenn-Air appliances designated If you need further assistance, you can write to Jenn-Air ® service technicians are trained to fulfill the product warranty Appliances with any questions or concerns at: and provide after-warranty service anywhere in the United States. -
Page 14: Warranty
DISCLAIMER OF REPRESENTATIONS OUTSIDE OF WARRANTY Jenn-Air makes no representations about the quality, durability, or need for service or repair of this major appliance other than the representations contained in this warranty. If you want a longer or more comprehensive warranty than the limited warranty that comes with this major appliance, you should ask Jenn-Air or your retailer about buying an extended warranty.


Need help?
Do you have a question about the JXU9130WP1 and is the answer not in the manual?
Questions and answers