Table of Contents
Advertisement
Available languages
Available languages
Advertisement
Table of Contents

Related Manuals for Costway FP10140UC-WH


Summary of Contents for Costway FP10140UC-WH
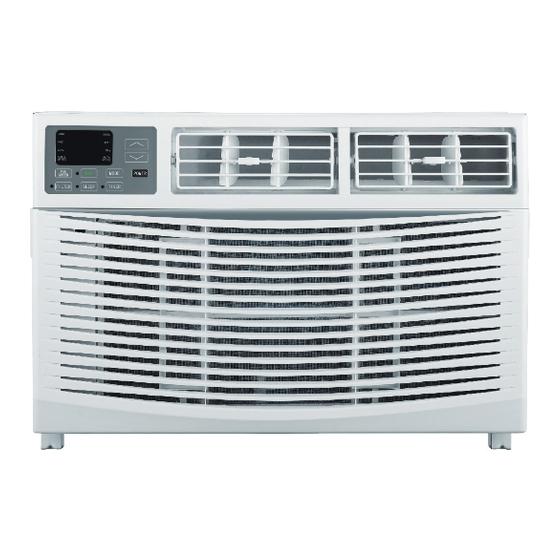
- Page 1 USER'S MANUAL/MANUEL DE L'UTILISATEUR FP10140UC-WH/FP10141UC-WH/FP10142UC-WH Window Air Conditioner/Climatiseur de Fenêtre THIS INSTRUCTION BOOKLET CONTAINS IMPORTANT SAFETY INFORMATION. PLEASE READ AND KEEP FOR FUTURE REFERENCE.
-
Page 2: Important Safety Instructions
IMPORTANT SAFETY INSTRUCTIONS Before installing and using your air conditioner, please read this owner's manual carefully. Store this manual in a safe place for future reference. Your safety and the safety of others are very important to us. Please pay attention to all safety messages outlined in this owner's manual. - Page 3 INTRODUCTION TO REFRIGERANTS R32 The refrigerants used for air conditioners are environmentally friendly hydrocarbons R32. It is combustible and odorless. Moreover, it can burn and explode under certain condition. However, there will be no risk of burning and explosion if you comply with the following table to install your air conditioner in a room with an appropriate area and use it correctly.
-
Page 4: Recommended Ground Method
ELECTRICAL REQUIREMENTS WARNINGS The electrical ratings for your air conditioner are listed on the model and serial number label located on the front left side of the unit (when facing the front). Specific electrical requirements are listed in the chart below. Follow the requirements below for the type of plug on the power supply cord. -
Page 5: Lcdi Power Cord And Plug
LCDI Power Cord and Plug This air conditioner is equipped with an LCDI (L eakage Current Detection and Interruption) power cord that is required by UL. This power supply cord contains state- of-the art electronics that sense leakage current. If the cord is damaged and leakage occurs, power will be disconnected from the unit. - Page 6 PACKING LIST IMAGE PART QUANTITY 5/16" Long Hex-head Screw 5/8" Long Hex-head Screw 1/2" Long Hex-head Screw 5/8" Long Flat Head Bolt and Locknut Sill Angel Bracket 1/2" Long Flat Head Bolt and Locknut Gasket (Only for E-star model) Support Bracket(with R and L remark)
-
Page 7: Window Preparation
DISCL AIMER ALL INFORMATION AND THE TECHNICAL SPECIFI-CATIONS PRESENTED IN THIS USER'S MANUAL ARE THE PRESENTATION OF THE MANUFAC-TURER. INSTALL ATION & ASSEMBLY INSTRUCTIONS Window Preparation Please read all instructions prior to istalling your air conditioner. Two people are recommended to install this product. If a new electrical outlet is required, have the outlet installed by a qualified electrician before installing the unit. -
Page 8: Storm Window Requirements
Storm Window Requirements A storm window frame will not allow the air conditioner to tilt properly which in turn will keep it from draining properly. To adjust for this, attach a board or piece of wood to the sill. The board or wood piece should have a depth of at least 1/2”. - Page 9 Prior to Installing the Air Conditioner 1. Check for anything that could block airflow. Check the area outside of the window for things such as shrubs, trees, or awnings. Check the inside area to make sure curtains, drapes, or blinds will not prevent proper airflow.
- Page 10 FIG.9 FIG.7 FIG.8 4. After removing the screws, gently pull away the faceplate from the air conditioner cabinet (FIG.7 & 8). 5. Remove the one control panel screws from the front panel (FIG.9). INSTALLATION & ASSEMBLY INSTRUCTIONS - WINDOW MOUNTING REMOVE CHASSIS 6.Remove the six screws from 7.
- Page 11 FIG.12 8.Take the pearl cotton for 24K(FIG.12). ASSEMBLY & INSTALLATION (CONT.) Top Angle Rail and Side Bracket Installation The top rail must be assembled prior to installing the air conditioner in the window Tools Needed: Phillips Screw Driver Top Rail Hardware 5/1 6"...
- Page 12 Foam Gasket and Top Angle Rail 3. Secure the top rail to the unit with the 5/16" Screws as shown in FIG. B NOTE: For safety reasons, all 4 screws must be used to attach the top rail. SIDE RETAINER FIG.13a 4.
- Page 13 PLASTIC FIG.14 AIR CONDITIONER FRAME CABINET LOCKING "T" SECTION SCREW WINDOW HOLE FILLER PANEL Placing the Cabinet Inside the Window 1. Open the window and place the cabinet in the middle of the window sill. 2. Make sure the bottom rail is seated over the window sill as shown below.
-
Page 14: Install Support Brackets
Install Support Brackets 1. Hold each support bracket flush against the outside of the window sill. Tighten each bracket to the bottom of the cabinet as shown below. Mark the brackets at top lever of the window sill and then remove. 2. -
Page 15: Install The Window Lock And Sash Seal
Extend the Panels 1. Carefully raise the window to expose the accordion panel and 5/8" Long panel frame. Loosen the locking Hex-head Screw screws so the accordion panels slide easily. 2. Extend each panel to completely fill the width of the window. -
Page 16: Thru-The-Wall Install Ation
Installing the Chassis into the Cabinet 1. Team lift (two people) the air conditioner chassis and carefully slide it into the cabinet. Let the front of the air conditioner hang out approximately 6". 2. CAUTION: DO NOT PUSH ON THE CONTROLS ORFINNED COILS. 3. - Page 17 ASSEMBLY & INSTALLATION - THRU-THE-WALL (CONT.) Carefully measure and cut an opening with the following dimensions depending on your model. WIDTH“X" = inside model plus twice the thickness of the framing material used. HEIGHT“Y”= inside model height plus twice the thickness of framing material used.
- Page 18 NOTE: If wall thickness is 8-1/2”or more, add aluminum flashing over the bottom of the frame opening to assure water is unable to enter the area between the inner and outer wall. ALUMINUM FLASHING OVER BOTTOM OF FRAME OVER 81/2” Prepare and Install the Cabinet 1.
-
Page 19: Masonry Constructio N
ASSEMBLY & INSTALLATION - THRU-THE-WALL (CONT.) Refer to the SUPPORT BRACKET FIG.19 ASSEMBLY in the WINDOW MOUNTING section to assemble the support brackets. A wooden strip nailed to the outside wall should be used in conjunction with the angled sill support brackets. - Page 20 2. Secure the cabinet in place using masonry nails, or masonry anchor screws. Or, build a frame using the instructions found in the THRU-THE WALL installation section. 3. Make sure the masonry above the cabinet is supported well. Use the existing holes in the cabinet or additional drilled holes to fasten the cabinet at various positions.
-
Page 21: Site Safety
1. Site Safety Open Flames Prohibited Ventilation Necessary 2. Operation Safety Open Flames Prohibited Mind Static Must Wear Clothing and Don't use Electricity Protective anti-static gloves mobile phone 3. Installation Safety The left picture is the schematic • Refrigerant Leak Detector diagram of a refrigerant leak •... -
Page 22: Using Your Air Conditioner
5. If the indoor unit suffers refrigerant leak during the installation, all the personnel should go out till the refrigerant leaks completely for 15 minutes. If the product is damaged, it is a must to carry such damaged product back to the maintenance station and it is prohibited to weld the refrigerant pipe or conduct other operations on the user's site. - Page 23 4. Mode Button: Press the mode button to cycle through the various modes: Cool, Dry, Fan and Auto. Cool Mode: The cooling function allows the air conditioner to cool the room and at the same time reduces Air humidify. Press the MODE button to activate the cooling function.
- Page 24 USING YOUR AIR CONDITIONER Electronic Control Panel & Remote Control 6. Eco Button: When the unit is in ECO mode, the light will turn on. In ECO mode, the unit will turn off once the room is cooledto the user-set temperature.
- Page 25 OPERATING YOUR AIR CONDITIONER REMOTE CONTROL 1. Power: Turn the air conditioner on and off. 2. Cool: Press the COOL button to COOL mode. : Use these buttons on the control panel and remote to increase or decrease theSet Temperature or Timer. Temperature range: 61°F~88°F or 16°C~31C.
- Page 26 Note: It can be set to automatically turn off or on in 0.5-24 hours. Each press of the “ ” “ ”buttons will increase or decrease the timer. The Timer can be set in 0.5 hours increment below 10 hours and 1 hour increment for 10 hours or above.
- Page 27 2. Wash the filter using liquid dish soap and warm water. Rinse the filter thoroughly. Gently shake the filter to remove excess water. 3. Let the filter dry completely before placing it into the air conditioner. 4. If you do not wish to wash the filter, you may vacuum the filter to remove the dust and other particles.
-
Page 28: Troubleshooting
TROUBLESHOOTING PROBLEM POSSIBLE CAUSES SOLUTIONS • Make sure the air The air conditioner is plug is conditioner is pushed completely into unplugged the outlet • Check the house The fuse is fuse/circuit blown/circuit breaker box and breaker is replace the fuse tripped. - Page 29 TROUBLESHOOTING PROBLEM POSSIBLE CAUSES SOLUTIONS • Make sure there are no Airflow is curtains, blinds, or restricted furniture blocking the front of the air conditioner The temperature • Lower the set control may not be thermostat temperature set correctly. • Clean the filter.
- Page 30 TROUBLESHOOTING (CONT.) PROBLEM POSSIBLE CAUSES SOLUTIONS • Water is dripping Hot and Humid This is normal outside weather. • For proper water drainage, make sure the air conditioner is slightly Water is dripping The air conditioner is tilted downward from the inside the room not correctly front of the unit to the...
-
Page 31: Consignes De Sécurité Importantes
CONSIGNES DE SÉCURITÉ IMPORTANTES Avant d'installer et d'utiliser votre climatiseur, veuillez lire attentivement ce manuel de l’utilisateur. Conservez ce manuel dans un endroit sûr pour référence future. Votre sécurité et celle des autres est très importante pour nous. Veuillez prêter attention à tous les consignes de sécurité décrits dans ce manuel de l’utilisateur. - Page 32 INTRODUCTION AUX RÉFRIGÉRANTS R32 Les fluides frigorigènes utilisés pour les climatiseurs sont des hydrocarbures écologiques R32. Il est combustible et inodore. De plus, il peut brûler et exploser dans certaines conditions. Cependant, il n'y aura aucun risque de brûlure et d'explosion si vous respectez le tableau suivant pour installer votre climatiseur dans une pièce avec une surface appropriée et l'utiliser correctement.
-
Page 33: Exigences Électriques
EXIGENCES ÉLECTRIQUES Avertissements Les caractéristiques électriques de votre climatiseur sont indiquées sur l'étiquette de numéro de modèle et de série située sur le côté avant gauche de l'appareil (lorsqu'il est face à l'avant). Les exigences électriques spécifiques sont répertoriées dans le tableau ci-dessous. - Page 34 Cordon d'Alimentation LCDI et Fiche Ce climatiseur est équipé d'un cordon d'alimentation LCDI (Leakage Current Detection and Interruption) requis par UL. Ce cordon d'alimentation contient des composants électroniques de pointe qui détectent le courant de fuite. Si le cordon est endommagé et qu'une fuite se produit, l'alimentation sera coupée de l'appareil.
- Page 35 LISTE DES PIÈCE IMAGE PIÈCE QUANTITÉ Climatiseur de Fenêtre Télécommande Traverse de Fixation Supérieure (Avec éponge) Panneaux de Remplissage (avec remarque « gauche » et « droite » sur la face avant) Dispositif de Verrouillage (Deux trous) Joints d'Étanchéité du châssis de la fenêtre (Éponge) 5/16"...
-
Page 36: Avis De Non-Responsabilité
AVERTISSEMENT Évitez les risques d'incendie ou de choc électrique. N'utilisez pas de rallonge ni d'adaptateur. N’enlevez aucune broche du Avis de non-responsabilité cordon d'alimentation. Prise murale de type mise à la terre TOUTES LES INFORMATIONS ET LES Ne coupez, ne SPÉCIFICATIONS TECHNIQUES retirez ou ne contournez en aucun... - Page 37 Exigences de la Contre-fenêtre Un cadre de contre-fenêtre ne permettra pas au climatiseur de s'incliner correctement, ce qui l'empêchera de se vidanger correctement. Pour régler cela, fixez une planche ou un morceau de bois au seuil. La planche ou le morceau de bois doit avoir une profondeur d'au moins 1/2".
- Page 38 Avant Instillation du Climatiseur 1. Vérifiez tout ce qui pourrait bloquer le flux d'air. Vérifiez la zone à l'extérieur de la fenêtre pour des éléments tels que des arbustes, des arbres ou des auvents. Vérifiez la zone intérieure pour vous assurer que les rideaux, les tentures ou les stores n'empêcheront pas une bonne circulation de l'air.
- Page 39 FIG.9 FIG.7 FIG.8 4. Après avoir retiré les vis, retirez délicatement la façade de l'armoire du climatiseur (FIG.7 et 8). 5. Retirez les vis du panneau de commande du panneau avant (FIG.9). INSTRUCTIONS D'INSTALLATION ET D'ASSEMBLAGE - MONTAGE SUR FENÊTRE RETIRER LE CHÂSSIS 6.Retirez les six vis de l'armoire.
- Page 40 FIG.12 8.Prenez le coton perlé pour 24K (FIG.12). ASSEMBLAGE ET INSTALLATION (SUITE) Installation de la Traverse Supérieur et du Support Latéral La traverse supérieur doit être assemblé avant d'installer le climatiseur dans la fenêtre Outils Nécessaires : Tournevis Cruciforme Matériel de Traverse Supérieur Traverse de 5/16"...
- Page 41 Joint en Mousse et Traverse d'Angle Supérieur 3.Fixez la traverse supérieur à l'unité avec les vis 5/16" comme illustré à la FIG. B REMARQUE : Pour des raisons de sécurité, les 4 vis doivent être utilisées pour fixer la traverse supérieur.
- Page 42 CADRE EN FIG.14 ARMOIRE DE PLASTIQUE CLIMATISATION TROU DE VIS DE SECTION « T » PANNEAU VUE DE DESSUS VERROUILLAGE REMPLISSAGE Placer l'Armoire à l'Intérieur de la Fenêtre 1. Ouvrez la fenêtre et placez l'armoire au milieu du rebord de la fenêtre.
- Page 43 Installer la Ferrure de Support 1.Maintenez chaque ferrure de support à plat contre l'extérieur du rebord de la fenêtre. Serrez chaque support au bas de l'armoire comme indiqué ci-dessous. Marquez les supports au niveau du levier Marque supérieur du rebord de la fenêtre, puis retirez-les.
- Page 44 Étendre les Panneaux 1.Soulevez soigneusement la fenêtre pour exposer le panneau en 5/8" Vis à tête accordéon et le cadre du panneau. hexagonale longue Desserrez les vis de blocage pour que les panneaux en accordéon glissent facilement. 2.Étendez chaque panneau pour remplir complètement la largeur de la fenêtre.
-
Page 45: Installation À Travers Le Mur
Installation du Châssis dans l'Armoire 1. L'équipe (deux personnes) soulève le châssis du climatiseur et le glisse avec précaution dans l'armoire. Laissez l'avant du climatiseur pendre d'environ 6". 2. ATTENTION : N'APPUYEZ PAS SUR LES COMMANDES OU LES BOBINES À AILETTES. - Page 46 ASSEMBLAGE ET INSTALLATION - À TRAVERS LE MUR (SUITE) Mesurez soigneusement et coupez une ouverture aux dimensions suivantes en fonction de votre modèle. LARGEUR "X" = modèle intérieur plus deux fois l'épaisseur du matériau d'encadrement utilisé. HAUTEUR "Y" = hauteur intérieure du modèle plus deux fois l'épaisseur du matériau d'encadrement utilisé.
- Page 47 REMARQUE : Si l'épaisseur du mur est de 8-1/2" ou plus, ajoutez un solin en aluminium au bas de l'ouverture du cadre pour vous assurer que l'eau ne puisse pas pénétrer dans la zone entre le mur intérieur et le mur extérieur. SOLIN EN ALUMINIUM SUR LE BAS DU CADRE DÉPASSER...
- Page 48 ASSEMBLAGE ET INSTALLATION - À TRAVERS LE MUR (SUITE) Reportez-vous à la section FIG.19 ASSEMBLAGE DES FERRURES DE SUPPORT dans la section MONTAGE SUR FENÊTRE pour assembler les ferrures de support. Une bande de bois clouée au mur extérieur doit être utilisée conjointement avec les Ferrure de supports de seuil inclinés.
- Page 49 2. Fixez l'armoire en place à l'aide de clous à maçonnerie ou de vis d'ancrage à maçonnerie. Ou, construisez un cadre en utilisant les instructions trouvées dans la section d'installation THRU-THE-WALL. 3. Assurez-vous que la maçonnerie au-dessus de l'armoire est bien soutenue. Utilisez les trous existants dans l'armoire ou des trous percés supplémentaires pour fixer l'armoire à...
-
Page 50: Sécurité De Fonctionnement
1.Sécurité du Site Flammes Nues Interdites Ventilation Nécessaire 2.Sécurité de Fonctionnement Flammes Nues Interdites L'Esprit de Doit Porter des Vêtements de N'utilisez Pas de l'Électricité Protection et des Gants Antistatiques Téléphone Portable Statique 3.Sécurité d'Installation L'image de gauche est le •... -
Page 51: Utilisation De Votre Climatiseur
5. Si l'unité intérieure subit une fuite de réfrigérant pendant l'installation, tout le personnel doit sortir jusqu'à ce que le réfrigérant fuie complètement pendant 15 minutes. Si le produit est endommagé, il est impératif de rapporter ce produit endommagé au poste de maintenance et il est interdit de souder le tuyau de réfrigérant ou d'effectuer d'autres opérations sur le site de l'utilisateur. - Page 52 4.Mode Button (Bouton Mode) : Appuyez sur le bouton de mode pour faire défiler les différents modes : Refroidissement, Séchage, Ventilateur et Auto. Cool Mode (Mode de Refroidissement) : La fonction de refroidissement permet au climatiseur de refroidir la pièce et réduit en même temps l'humidification de l'air.
- Page 53 UTILISATION DE VOTRE CLIMATISEUR Panneau de Commande Électronique & Télécommande 6.Eco Button (Bouton Eco) : Lorsque l'appareil est en mode ECO, le voyant s'allume. En mode ECO, l'appareil s'éteint une fois que la pièce est refroidie à la température définie par l'utilisateur. L'appareil se rallume lorsque la température de la pièce dépasse la température définie par l'utilisateur.
- Page 54 FONCTIONNEMENT DE VOTRE CLIMATISEUR TÉLÉCOMMANDE 1.Power : Allumez et éteignez le climatiseur. 2.COOL (Refroidissement) : Appuyez sur le bouton COOL pour passer en mode COOL (Mode de Refroidissement). : Utilisez ces boutons sur le panneau de commande et la télécommande pour augmenter ou diminuer la température de réglage ou la minuterie.
- Page 55 Remarque : Il peut être réglé pour s'arrêter ou démarrer automatiquement dans un délai de 0,5 à 24 heures. Chaque pression sur le bouton augmentera ou diminuera la minuterie. La minuterie peut être réglée par incréments de 0,5 heure jusqu'à 10 heures et par incréments de 1 heure pendant 10 heures ou plus.
- Page 56 2.Lavez le filtre avec du savon à vaisselle liquide et de l'eau tiède. Rincez soigneusement le filtre. Secouez doucement le filtre pour éliminer l'excès d'eau. 3.Laissez le filtre sécher complètement avant de le placer dans le climatiseur. 4.Si vous ne souhaitez pas laver le filtre, vous pouvez passer l'aspirateur sur le filtre pour éliminer la poussière et les autres particules.
-
Page 57: Dépannage
DÉPANNAGE PROBLÈME CAUSES POSSIBLES SOLUTIONS Assurez-vous que la Le climatiseur fiche du climatiseur est est débranché complètement enfoncée dans la prise Vérifiez le fusibles/le Le fusible a boîtier du disjoncteur sauté/le et remplacez le fusible disjoncteur s'est ou réinitialisez le déclenché. - Page 58 DÉPANNAGE (SUITE) PROBLÈME CAUSES POSSIBLES SOLUTIONS Assurez-vous qu'aucun Le débit d'air est rideau, store ou meuble limité ne bloque l'avant du climatiseur La commande de Baisser la température température n'est de réglage du peut-être pas réglée thermostat correctement. Nettoyez le filtre. Voir la section Nettoyage et Le filtre à...
- Page 59 DÉPANNAGE (SUITE) PROBLÈME CAUSES POSSIBLES SOLUTIONS L'eau coule dehors Temps chaud et C'est normal humide. Pour une bonne évacuation de l'eau, assurez-vous que le L'eau coule à l'intérieur Le climatiseur n'est climatiseur est de la chambre pas correctement légèrement incliné vers le incliné...
- Page 60 With your inspiring rating, COSTWAY will be more consistent to offer you EASY SHOPPING EXPERIENCE, GOOD PRODUCTS and EFFICIENT SERVICE! Mit Ihrer inspirierenden Bewertung wird COSTWAY konsistenter sein, um Ihnen EIN SCHÖNES EINKAUFSERLEBNIS, GUTE PRODUKTE und EFFIZIENTEN SERVICE zu bieten! Avec votre évaluation inspirante, COSTWAY continuera à...
Need help?
Do you have a question about the FP10140UC-WH and is the answer not in the manual?
Questions and answers
Does the fan stop when the cooling cycle stops?
Yes, the fan motor runs for a while, then stops for a while, and repeats this cycle before the compressor starts to provide comfort and save energy, indicating that the fan can stop when the cooling cycle stops.
This answer is automatically generated