Table of Contents
Advertisement
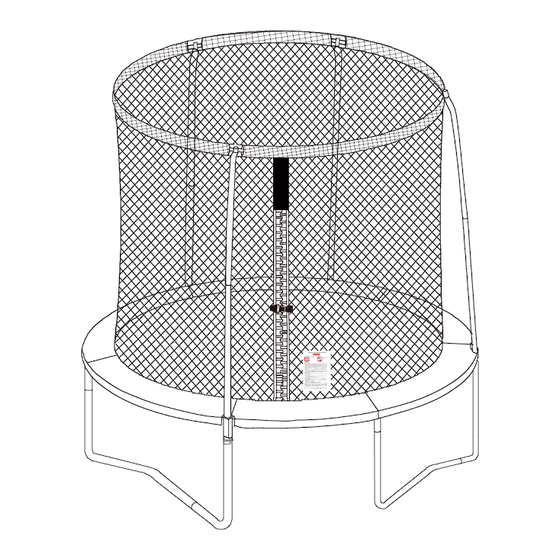
8ft (2.44m) Trampoline and Enclosure
Assembly, Installation, Care, Maintenance and User Instructions
DO NOT attempt somersaults or flips. Paralysis or death can result if you land on your head or neck!
No more than one person on the trampoline at a time. Multiple users increase the risk of injury.
Use trampoline only with mature and knowledgeable supervision.
These instructions are important to minimise chances of injury. Please read each of them
thoroughly before you assemble and use this trampoline. Retain this manual for future reference.
Maximum weight of the user shall NOT exceed 110lbs/50kg for this product.
This product is designed for children ages above 6 years.
Do not allow children under 3 years old nearby during assembly. Small parts – choking hazard!
Estimated assembly time: 2 adults, 2 hours.
Domestic and outdoor use only.
Adult supervision required.
Adequate overhead clearance is essential. A minimum of 8 meters from ground level is recommended. Provide
clearance for wires, tree limbs, and other possible hazards. Always ensure the trampoline is on level ground with a
minimum of 2 meters clear space from any structure or obstruction.
FOR CUSTOMER SERVICE OR REPLACEMENT PARTS, PLEASE CALL
TASMAN SPORTS
CUSTOMER SERVICE : 1-800-333-061
TR-0202-96
Assembly Size: Φ244 x 205 cm
Advertisement
Table of Contents

Related Manuals for BouncePro TR-0202-96

Summary of Contents for BouncePro TR-0202-96
- Page 1 8ft (2.44m) Trampoline and Enclosure Assembly, Installation, Care, Maintenance and User Instructions TR-0202-96 Assembly Size: Φ244 x 205 cm DO NOT attempt somersaults or flips. Paralysis or death can result if you land on your head or neck! No more than one person on the trampoline at a time. Multiple users increase the risk of injury.
- Page 2 NO SOMERSAULTS OR FLIPS – No more than ONE user at a time PARALYSIS OR DEATH can result if you (maximum weight - 110lbs/50kg land on your head or neck! Do not use if in a Remove all hard Do not use Do not allow cast or have or sharp objects...
- Page 3 INTRODUCTION Thank you for purchasing this product! This trampoline was designed and manufactured with quality materials and craftsmanship, providing fun and exercise in the enjoyment of your own backyard. It is very important that the owners and users of this trampoline have adequate knowledge of techniques and rules for proper use.
-
Page 4: Table Of Contents
TABLE OF CONTENTS Use trampoline only with adult supervision. Do not attempt or allow somersaults. Landing on the head or neck can cause serious injury, paralysis, or death, even when landing in the middle of the mat. Do not allow more than one person on the trampoline. -
Page 5: Before You Start To Assemble
BEFORE STARTING… Use trampoline only with adult supervision. Do not attempt or allow somersaults. Landing on the head or neck can cause serious injury, paralysis, or death, even when landing in the middle of the mat. Do not allow more than one person on the trampoline. Use by more than one person at the same time ... -
Page 6: Important Warnings
IMPORTANT WARNINGS Use trampoline only with adult supervision. Do not attempt or allow somersaults. Landing on the head or neck can cause serious injury, paralysis, or death, even when landing in the middle of the mat. Do not allow more than one person on the trampoline. Use by more than one person at the same time ... - Page 7 IMPORTANT WARNINGS Proper Play Conditions: Always use the product in a well-lit area. Do not use without lighting during dawn, dusk or in complete darkness! The trampoline must be placed on a surface that is COMPLETELY FLAT AND LEVEL. If the ground is ...
- Page 8 IMPORTANT WARNINGS Appropriate Use Conditions: Children must always be supervised while they are playing on the trampoline and must be instructed not to use the trampoline in an inappropriate or hazardous manner. Take precautions to prevent access to the trampoline by children when there is no adult supervision.
- Page 9 IMPORTANT WARNINGS ➢ Use trampoline only with adult supervision. ➢ Do not attempt or allow somersaults. Landing on the head or neck can cause serious injury, paralysis, or death, even when landing in the middle of the mat. ➢ Do not allow more than one person on the trampoline. Use by more than one person at the same time increases the chance of injury.
-
Page 10: Important Instructions For Enclosure Netting And Mat
IMPORTANT INSTRUCTIONS FOR ENCLOSURE NETTING AND MAT Important Instructions for Enclosure Netting and Mat Failure to follow these instructions to ensure proper operational condition of your trampoline may lead to serious injury or death. 1. Maintenance of Trampoline Enclosure Net, Mat and Pad Enclosure nets and padding are prone to wear and tear like tires on a car. - Page 11 IMPORTANT INSTRUCTIONS FOR ENCLOSURE NETTING AND MAT How to Inspect the Trampoline Net for Proper Use Always check the enclosure netting for signs of UV damage, deterioration, brittleness, cracking, and tearing every time before using the trampoline and enclosure. Step 1 - Inspect the enclosure netting before EACH use for wear or tear by pinching and pulling a section of the netting between fingers and pulling downward.
-
Page 12: Trampoline And Enclosure Parts List
TRAMPOLINE AND ENCLOSURE PARTS LIST Trampoline Parts List Diagram Description Number Quantity Trampoline Mat, stitched with Triangle-Rings Frame Pad T-Part T-Part with Enclosure Socket Top Rail Long L-Shaped Leg Short L-Shaped Leg Galvanized Springs Spring Loading Tool Allen Wrench Trampoline Safety Instruction Placard... - Page 13 TRAMPOLINE AND ENCLOSURE PARTS LIST Enclosure Parts List Quantity Diagram Description Number Upper Frame Tube with Foam Lower Frame Tube With Foam Flat Steel Plate Flat Steel Connector Wrench Self-Locking Screw Plastic Cap Enclosure Netting Bolt Plastic Cap Trampoline Enclosure Safety Instruction Placard Cord...
-
Page 14: Assembly And Installation Instructions
ASSEMBLY AND INSTALLATION INSTRUCTIONS Assembly and Installation Instructions Review all steps before assembly and read all precautions before using this product. Failure to do so can result in serious injury or death. During periods of non-use, this trampoline and trampoline enclosure can be easily disassembled and stored by reversing the order of installation. -
Page 15: Trampoline Frame Assembly
Trampoline Frame Assembly STEP 1 Layout all parts on clean flat surface as shown below. Note: make sure to assemble the trampoline where it is intended to be used. The trampoline should not be moved after it is assembled. STEP 2 Connect Parts 6 and 7. - Page 16 Trampoline Frame Assembly STEP 3 First connect 3, 4 and 5 to form the trampoline frame, then insert the assembled leg supports. DO NOT PLACE HANDS NEAR THE OPENING WHEN CONNECTING THE TUBES. WEAR PROTECTIVE GLOVES TO PROTECT FROM INJURIES DURING ASSEMBLY.
-
Page 17: Trampoline Mat Assembly
Trampoline Mat Assembly STEP 4– Spring Assembly Place the mat, together with enclosure, flat on the ground in the center of the trampoline frame. Starting with point 1 as shown below, attach the springs by attaching one end into the triangle ring on the mat and then pulling the other end with the spring loading tool underhand. - Page 18 Trampoline Mat Assembly STEP 5 Continue to attach springs in the same manner, ensuring even distribution of tension by attaching springs on the opposite sides of the mat/frame in an alternating manner, i.e. 6 then 27, 17 then 38 as shown below.
- Page 19 Trampoline Mat Assembly STEP 6 Continue to attach springs in the same manner, ensuring even distribution of tension by attaching springs on the opposite sides of the mat/frame in an alternating manner, i.e. 4 then 25, 9 then 30, 15 then 36, 19 then 41 as shown below.
- Page 20 Trampoline Mat Assembly STEP 7 Continue to attach the remaining springs in the same manner as the previous step, i.e. the springs must be placed on opposite sides of the mat in an alternating manner to ensure even distribution of tension.
-
Page 21: Frame Pad Placement
Frame Pad Placement STEP 8 Place Frame Pad (# 2) onto the trampoline. Make sure all metal frame parts and springs are covered. Tie the outer straps on the frame pad to the leg frames and the inner straps to the triangle rings on the mat as shown. -
Page 22: Trampoline Enclosure Assembly
Trampoline Enclosure Assembly STEP 9 Insert Part B into the sockets of Part 4 and attach Part F to the base. IMPORTANT NOTE: make sure the holes at the top of Part B are facing outward. - Page 23 Trampoline Enclosure Assembly STEP 10 Connect C1 with C2 and insert it through the sleeve at the top of the enclosure net.
- Page 24 Trampoline Enclosure Assembly STEP 11 Attach Part J to Part A and secure with #E,#10 then lock the plastic cap into the enclosure steel frame as shown.
- Page 25 Trampoline Enclosure Assembly STEP 12 Connect Parts A and B and secure with #E,#10...
- Page 26 Trampoline Enclosure Assembly STEP 13 Secure the trampoline netting to the trampoline frame using Cords (# L). Lift up the frame pad and tie one end of the cord to any one of the triangle-rings on the trampoline mat as shown below. Loop the other end of the cord through the next hole on the mat and then the adjacent triangle-ring.
- Page 27 Trampoline Enclosure Assembly STEP 14 Secure the frame pad. Make sure all metal frame parts and springs are covered. Tie the inner straps to the triangle rings and the outer straps to the frame tubes.
-
Page 28: Final Assembly
Trampoline Enclosure Assembly Make sure that the knots and bows are tight for all elastic straps. Make sure the frame pad is securely attached to the frame and completely covers the frame and all of the springs before using this trampoline. Do not use the trampoline if even one spring or triangle-ring is damaged or missing. ... -
Page 29: Disassembly Of The Trampoline And Enclosure
DISASSEMBLY OF THE TRAMPOLINE AND ENCLOSURE IMPORTANT Once you have finished the assembly of the trampoline, go back over all of the nuts and bolts and properly tighten all of them before using. Read this entire manual and make sure all jumpers completely understand all of the safety rules printed in the manual and on the various warning signs. -
Page 30: Care And Maintenance
CARE AND MAINTENANCE Care and Maintenance Failure to follow these instructions to ensure proper operational condition of your trampoline may lead to serious injury or death. The springs, trampoline legs and enclosure netting must be inspected prior to every use. The legs should ... -
Page 31: Proper Use Instructions
PROPER USE INSTRUCTIONS Proper Use Instructions Read and understand the use instructions in this manual prior to using this product. Failure to do so can result in serious injury or death. Responsibilities of the user The key here is to stay in control of your jumps. DO NOT move onto more complicated, more difficult maneuvers until you have mastered the basic, fundamental bounce. - Page 32 PROPER USE INSTRUCTIONS Read and understand the use instructions in this manual prior to using this product. Failure to do so can result in serious injury or death. Read all instructions before using the trampoline. Warnings and instructions for the care, ...
-
Page 33: Learning The Fundamental Trampoline Skills
LEARNING THE FUNDAMENTAL TRAMPOLINE SKILLS Learning the fundamental trampoline skills The following lessons are suggested for you to learn basic steps and bounces. Before using the trampoline, you should read and understand all warnings. A complete discussion and demonstration of body mechanics and trampoline guidelines should occur between the supervisor and student as well. - Page 34 LEARNING THE FUNDAMENTAL TRAMPOLINE SKILLS BASIC TRAMPOLINE BOUNCES THE BASIC BOUNCE 1. Start from the standing position, with your feet having shoulder width apart and with head up and eyes on mat 2. Swing arms forward and up in a circular motion 3.
-
Page 35: Product Warranty
PRODUCT WARRANTY Product Warranty Manufacturer warrants its products to be free from defects in material and workmanship under normal use and service conditions for ninety (90) days after the date of purchase. The steel frame on trampolines is warranted for two (2) years after the date of purchase. All warranty coverage extends only to the original purchaser of the product and is not assignable or transferable. - Page 36 ACCEPTABLE QUALITY AND THE FAILURE DOES NOT AMOUNT TO A MAJOR FAILURE. FOR NEW ZEALAND CUSTOMERS, THIS WARRANTY IS IN ADDITION TO STATUTORY RIGHTS OBSERVED UNDER NEW ZEALAND LEGISLATION. TASMAN SPORTS SHEEHAN ROAD, WEST HEIDELBERG, VICTORIA SERVICE PHONE NUMBER 1-800-333-061 ARTICLE NO. : TR-0202-96 ITEM NO. : 0270668 BNG-25-TR-0202-96-21002-0523-AH...
Need help?
Do you have a question about the TR-0202-96 and is the answer not in the manual?
Questions and answers