Advertisement
- 1 Introduction
- 2 Hardware Overview
-
3
Firmware Features
- 3.1 Sequencer View
- 3.2 Templates
- 3.3 Part Settings
- 3.4 Arp
-
3.5
Global Settings, Page 1: MIDI Settings
- 3.5.1 Velocity Curve
- 3.5.2 MIDI Clock Rx/Tx
- 3.5.3 MIDI Out 2
- 3.5.4 Fader Pickup
- 3.5.5 Clock Out PPQN
- 3.5.6 CV Mod 1 Range and CV Mod 2 Range
- 3.5.7 CV Mod 1 CC and CV Mod 2 CC
- 3.5.8 CV Calibration
- 3.5.9 Key LEDs
- 3.5.10 Arp LEDs
- 3.5.11 Sequencer LEDs
- 3.5.12 Ext. MIDI LEDs
- 3.5.13 Firmware and Bootloader Version
- 3.5.14 Standby Animation
- 3.6 CV/Gate
- 3.7 Keyboard Settings
- 3.8 Tempo / Swing View
- 3.9 Transport
-
3.10
Zones
- 3.10.1 Enable / Disable Zones
- 3.10.2 Select a Zone
- 3.10.3 Activate/Deactivate a Zone
- 3.10.4 Set Destination for a Zone
- 3.10.5 Set Keyboard Range for a Zone
- 3.10.6 Set Octave/Transpose Settings for a Zone
- 3.10.7 Enable/Disable Wheels for a Zone
- 3.10.8 Enable/Disable Channel Pressure for a Zone
- 3.10.9 Enable/Disable Pedals for a Zone
- 3.11 Session Management
- 3.12 Scales
- 3.13 MIDI Ports/Routing
- 3.14 Components
- 3.15 InControl
- 4 License
- 5 Videos
- 6 Documents / Resources
Introduction
This guide aims to give you the knowledge needed to get the most out of the SL MkIII. Information throughout this guide applies to both the 49- and 61-key versions of the SL MkIII. This information includes detailed explanations of the hardware, the device's various 'Views' and menus, and how to use the unit with external hardware and/or software. Additionally, we provide 'tips and tricks', as well as common scenarios you might face as a producer or performer. We hope you enjoy creating music with the SL MkIII for years to come.
For additional information, up to date support articles and a form to contact our Technical Support Team please visit the Novation Answerbase at: www.novationmusic.com/answerbase
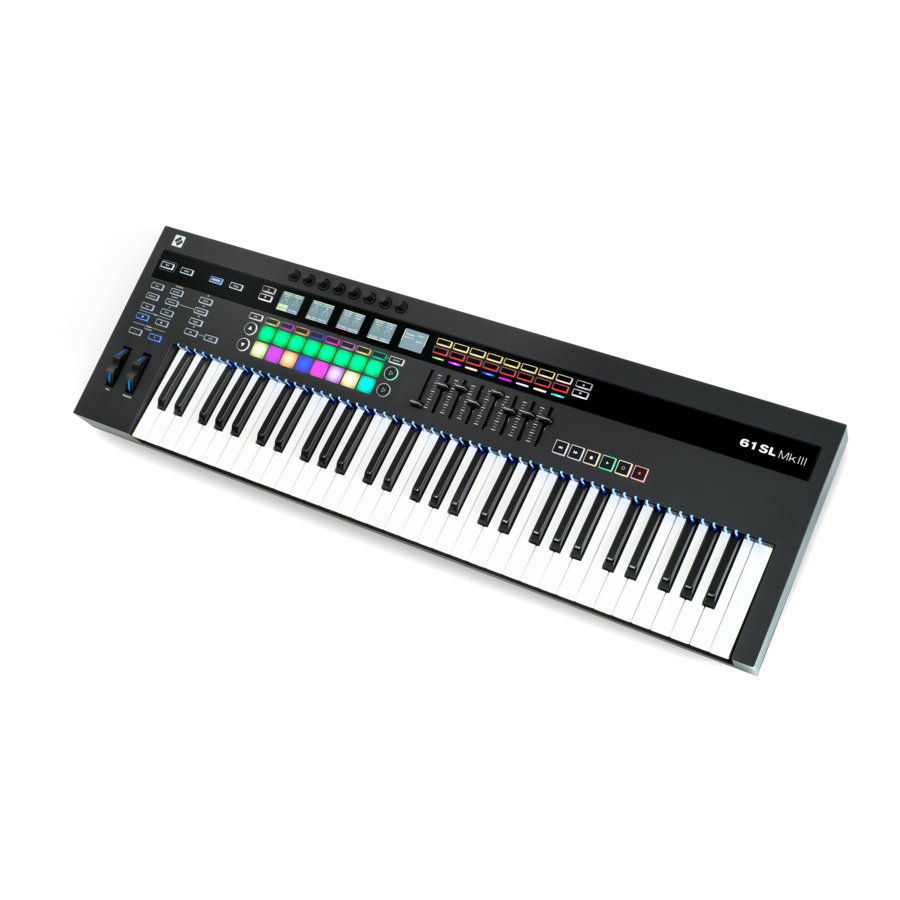
Hardware Overview
The SL MkIII 49- and 61-note versions have the same front panel controls and rear panel connections.

- Power On/Off button
- DC power jack: accepts a 12V/1,200 mA power supply
- USB Type B socket
- Three DIN sockets (5-pin) for MIDI In | Out | Out2/Thru
- Two 1/4" TS or TRS jacks with silver metal rings for Pedal 1 (Sustain) and Pedal 2 (Expression), and one 1/4" jack for Pedal 3 (Footswitch)
- Seven 3.5mm TS jacks with silver metal rings for Clock Out, CV1, Gate1, Mod1, CV2, Gate2 & Mod2 outputs
- Kensington Security Slot
- Teal silicone strip: the 'feet' of the SL MkIII
- Shift button
- Global Settings button
- InControl, Zones, Sequencer, Scales, Arp, Tempo and Latch buttons
- Up/down buttons used to change pages of Sessions 1-4
- Grid button, eight soft buttons, and Options button
- Up/down page buttons
- 8x2 velocity-sensitive pads
- Eight continuous rotary knobs
- Five LCDs, collectively known as 'the screens'
- Right arrow buttons
- and
- 8x2 soft button area
- RGB LEDs
- and
- Rectangular Up/down arrow buttons
- Eight faders
- The Transport
- Ten buttons for Save, Duplicate, Clear, Sessions, Patterns, Steps, Track Left, Track Right, Octave Up and Octave Down
- Pitch and Modulation Wheels with RGB LEDs
- 49 or 61 RGB Key LEDs
- Synth-style, semi-weighted keyboard with aftertouch strip
Firmware Features
Sequencer View
At the heart of the SL MkIII is its Sequencer, which lets you arrange MIDI patterns in fun and creative ways. Press the Shift button followed by the Sequencer button (left side of the controller) to enable/disable the Sequencer. The Sequencer button will turn white when activated, and orange when disabled. After switching on the Sequencer you will notice the Transport buttons (far right of the controller) light up, indicating that they can control the Sequencer.
Press the Sequencer button anytime to enter Sequencer View, which consists of 2 sub views: Steps View and Patterns View (see following sections), accessed via the nearby Steps and Patterns buttons, respectively. While in another view (Zones View, for instance) pressing the Sequencer button will take you back to the last selected Sequencer sub view.
Additionally, the Grid button toggles the function of the 8x2 pads between the last selected Sequencer sub view and Template (see section 2 for more on Templates).
Note: when the Sequencer button is orange (i.e. off) pressing the Sequencer button accesses Sequencer View, where you can view and/or edit the Sequence in the current Session. Transport buttons, however, will be unusable until the Sequencer is re-enabled.
Steps View
Steps View allows you to view and edit 'Steps' of a Pattern. The 16 (8x2) square pads beneath the screens represent the 16 available Pattern Steps.

With the Sequencer enabled, pressing play on the Transport will show the play head 'stepping' through the pads, turning each pad (aka Step) white along the way. Steps that have MIDI notes assigned will light brightly. As the play head reaches one of these bright Steps, it will play any notes assigned to them.
To assign a note/s to a Step, select the Track, press and hold a pad, then press the key/s you want that step to trigger (e.g. C# or Gb). You can also do the reverse: first press and hold the key/s and then push any pads that you wish to populate with notes or sounds. Finally, you can record 'live' by pressing the Record button on the Transport (see 'Live Record' for more information).
In order to remove a note/s from a Step press and hold a pad (which of course represents a Step). LEDs of corresponding keys will light up in red. If the Transport is stopped, notes will play out to the corresponding Part, and with the velocities assigned to them. Remove the note/s by pressing the key/s.
With the Transport either running or stopped, hold the Clear button and press a Step (briefly turning it red) to remove all note and automation data from that Step.
To copy a Step, hold the Duplicate button and press a pad, briefly turning it green. While continuing to hold Duplicate, press the pad/s where you wish to paste. Be careful, since duplicating one pad to another will erase whatever existed on the latter - not add to it.
Steps can also be copied between Tracks. Again, hold the Duplicate button and press a pad to copy a Step. With the Duplicate button still held, change Tracks, then press pads to paste to them. Keep in mind, however, that automation data will not be copied with these Steps.
Options
While in Steps View, press the Options button (to the right of the pads) to see the options for the current Pattern. Use the soft buttons below 'Velocity', 'Gate' and 'Pattern' to call up these settings. Press Options again to return to Steps View.
Velocity
Once in the Options menu, press the soft button below Velocity to edit the velocities of each Step in the current Pattern. By default, you will see Steps 1 to 8 on the screens (2 per screen). Use the up/down arrow buttons to the left of the screens to access steps 9 to 16 (the bottom row of pads).
In order to adjust MIDI note velocity, simply rotate the knob above the Step you want to adjust. You can set a Step's velocity to anywhere between 1 and 127. This allows you to dial desired MIDI velocities with a fine level of precision.
Notice that the screens show a single velocity for any Step of a Pattern containing one or more notes. This value is the highest velocity of all of the notes assigned to that Step, although multiple velocities might actually be present for that Step.
When dealing with multiple notes assigned to a Step, the SL MkIII will raise or lower the Step's velocity to a new, uniform value. When doing so, the SL MkIII favors higher values, and snaps closest to them. To illustrate this process, imagine that a Step contains the velocity values 25 and 89: turning this Step's knob to the right will snap those velocity values to 90 or above (i.e. both 25 and 89 became 90 or above). Alternatively, if you had turned the knob to the left those same velocities would have snapped to 88 or lower.
Note that after all the notes on a Step have been snapped to same velocity (as just described), all new notes assigned to that Step will immediately adopt the 'group' velocity.
Gate
Next in the Options menu is 'Gate'. Select Gate to edit the length of MIDI notes assigned to each Step in the current pattern. Again, use the up/down arrow buttons to the left of the screens to access steps 9 to 16. The screen will show a single Gate value for each step of the pattern containing one or more notes. The value shown is equal to the highest Gate of all of the notes assigned to that Step.

The SL MkIII measures Gate value in two parts: steps and fractions of a step. Each step can be broken down into six fractions. Therefore, Gate value is shown as a step number, followed by a fraction count (five white boxes in the meter below). Notice how the default value for notes is '1 step'; use the knob above each step to lengthen or shorten the Gate for every assigned note.
[Keep in mind that since the SL MkIII operates under the rules of MIDI, how the Gate parameter influences your resulting sound depends on the sound being triggered, as well as the MIDI instrument holding that sound. For example, a Gate of 16 steps will not 'stretch' a short hi-hat sample. However, its MIDI note will indeed become 16 steps long, regardless of the audible result.]
Pattern
The last item in the Options menu is 'Pattern', which itself contains four sub-options: 'Start Position', 'End Position', 'Direction' and 'Sync Rate'. Editing these settings alters playback of Patterns in interesting ways (we recommend playing around here to achieve 'happy accidents'). Keep in mind that Pattern changes will take effect when playback reaches the end of the Pattern. The adjustable settings are as follows:

- Start Position - The rotary knob above 'Start Position' moves the start Step of the Pattern, effectively changing Pattern length. The pad representing this Step will be lit yellow, allowing you to see where the start position is moving.
- End Position - The knob above moves the end step of Pattern playback, effectively changing the Pattern length. End Position can come before the start position. If End Positions changes so that Steps containing notes are no longer heard these pads will light red.
- Direction - This changes the course of Pattern playback. The following directions are available:
Forward - As the default, 'Forward' indicates a typical playback Pattern, which begins at the start Step (start position) and step progresses to the end Step.
Backwards - Conversely, 'Backwards' means playback begins at the end position and step progresses to the start Step. You could think of this as 'reverse'.
Ping-Pong - During the first phase, playback begins at the start position and progresses to the end position. During the second phase, playback starts at the end Step and proceeds backwards to the start position. End Steps are repeated.
Random - The most experimental of the Direction options, this playback option continually selects Steps between the start and end position in a random order, resulting in repeated notes and general chaos. - Sync Rate - This changes the rate at which steps occur relative to the BPM (either internal or external). Choose among the following musical time values:
1/32 Triplet, 1/32, 1/16. Triplet, 1/16 (default), 1/8 Triplet, 1/8, 1/4 Triplet, 1/4 note values
Patterns View
Pressing the 'Patterns' button (between the Steps and Sessions buttons) opens Patterns View, where you can select MIDI patterns within the current Session. The 8 available Patterns for each track are laid out horizontally in rows across the 8x2 pad area. Pads represent each Pattern and take the colour of its Part. Use the up and down buttons (left of the 8x2 pad area) to navigate through the four pages of Patterns.

Just press a pad to select a new pattern. If the Transport is stopped, your newly-selected Pattern will begin when the Transports starts. When you select a new Pattern with the Transport running, the Pattern will change when the current one ends. Otherwise, hold Shift and select a new Pattern to instantly switch to that Pattern as if it had been playing alongside. (This means you do not have to wait until the end of the current Pattern to hear your new one. This also a way of audibly 'combining' Patterns in interesting ways).
Pattern Chains
As you are constructing Patterns on the MkIII you may decide that you want longer ones. However, you can combine Patterns to form longer sequences. Press two or more Patterns simultaneously to create a 'Chain' beginning and ending with the left- and right-most pressed Patterns. Note that this doesn't destructively 'merge' Patterns together, but rather launches discreet Patterns consecutively to form longer musical ideas.
If you wish to see more Tracks at once, or are only working with two-Pattern Chains, press Shift + Patterns to access the Expand View. This will arrange the Patterns for each Track vertically. Use the page buttons to access more Patterns. Just press Patterns to return to the default (horizontal) layout of Patterns.
Hold Clear and press a Pattern (pad) to remove all note and automation data from that Pattern, and reset the Pattern to its default settings.
To copy a Pattern, hold Duplicate and select the Pattern. While continuing to hold Duplicate, press a pad/s to paste to it. You can paste multiple times while holding Duplicate. You can also copy Patterns between Tracks. As with Steps, automation data for a Pattern does not copy across Tracks.
[TRY THIS - If you need some inspiration, or are just in the mode to try something new, try copying Patterns between Tracks. For example, you could copy your drum Pattern to your bass track, and vice-versa. You never know what 'happy accidents' might occur.]
Automation View
With Patterns View selected, press the Options button to enter Automation View. In this View, each control type, as well as the name of any controls that have been automated for the selected Track, are displayed on the screens as 'lanes'. Use the soft buttons below the screens to select a different Track to see its automation.

Hold the Clear button and turn the rotary above a lane to remove all automation for a control. For example, 'Transpose', or 'Ve Attack'. After clearing a lane, you can then use it for another control.
Live Record
The SL MkIII allows you to record a 'live performance' directly into the Sequencer. Press the Record button on the Transport to enable live recording. You can also press Record while playing to 'punch in' ideas. If the Transport is currently stopped, however, press the Record button, then the Play button to begin live recording. While recording, any notes played on the keyboard or from MIDI (both USB and DIN) will record into the Sequence.
When recording from MIDI, Parts will record only the notes received on the selected MIDI channel for that Part. Notes are also forwarded to the output of that Part, whether recording or not.
While live recording, 'note on' events are quantised to the sync rate of the playing pattern; 'note off' events are quantised to the nearest 24 PPQN tick. The sequencer will loop through each pattern chain, which allows you to overdub new notes as the sequence repeats. Be careful to set up your desired Pattern Settings (see Sequencer/Options/Pattern Settings) and Pattern Chain length (see Sequencer/Patterns View) to accommodate your performance before you begin recording.
Automation
With the SL MkIII's Sequencer recording, you can automate the movement of the following Template controls:
- Rotary Knobs
- Faders
- Soft Buttons
- Pads (press/release & pressure)
- Pitch & Modulation Wheels
- Pedals
Once a control moves the corresponding LED or screen will light red, and the control will begin overwriting any of its existing control data as the Transport advances. Movements are recorded and played back at a resolution of 24 PPQN regardless of the current pattern sync rate (equivalent to 6 data points for each Step at the default 1/16 sync rate). Automation will record or overwrite until either recording or playback stops; we, therefore, recommend disabling record as soon as possible to ensure you do not overwrite automation when the Sequencer loops back around.
You can automate up to 8 controls for each Track in a Session. The screen will notify you when you have used another automation lane or if there are no more available lanes for the selected track.
Keep in mind that you cannot record automation for relative rotaries and controls that are assigned to song position. Also, pads and buttons that output note messages are recorded into the note sequence rather than as automation.
Holding the Clear button will highlight all the controls that have automation data in the current Pattern and hide those that do not. For example, if the Pitch Wheel is automated its LED will illuminate as you hold Clear. While still holding Clear, any movement of a control will clear its automation in the current pattern.
You can also manually assign values to a Step, which is very useful when more accuracy is required. While stopped, press the Transport's Record button (Transport). Then, select a Step (by pressing a pad) to enter Step Edit mode. This action will audition the Step. Move a control to the desired value to assign this value to the Step, and deactivate record. In the case of the Pitch Wheel, move it to the desired position, then disable record before letting go of the wheel.
Note that only the most recent control value is assigned to a Step. This means that while in Step Edit mode, pressing and releasing a button or pad with a momentary function will only record the release message. To record the press message of a button or pad, turn off record or select a new Step to record the release before releasing the pad.
Mute/Solo Parts
Whilst in Sequencer View, Mute/Solo View is reached by clicking the soft arrow button on the far right of the controller (just left of where it says 49SL MkIII or 61SL MkIII, depending on your unit). You will know you are in the right place when you see 'Mute' and 'Solo' appear in the far-right screen.

Mute a Part by pressing a Mute button (top row of orange soft buttons) corresponding to that Part. When muted the Sequencer will not output MIDI for that Part, but the user can still play keys or audition pads for that Part.
Solo a Part by pressing the Solo button (bottom row of teal soft buttons) corresponding to that Part. When you solo a Part, any other Part that is not also soloed will be silent (if it was not already muted). The Mute button for a silenced Part/s will pulse yellow to indicate that it is silent.
Templates
Each Part operates according to a Template. In other words, each Part uses a Template to determine which MIDI messages should send for each control. Templates live in the Templates View, which you access by pressing the Shift + Ses-sions buttons. A Template determines the type of MIDI message sent from each control. The Template contains mapping data for:
- 16 Rotary Knobs (across two pages)
- 16 Pads (both hit and pressure)
- 8 Faders
- 16 Buttons
- The Modulation Wheel
- Footswitch, Expression and Sustain Pedals
Templates can be designed and managed with Components, a standalone application available here: https://components.novationmusic.com. With Components, you can configure each control to send one of many different MIDI messages with different ranges, value and behaviours.
If a mapping is not enabled, the LED or screen associated with the control will be blank to indicate that it is disabled.
When a control with a mapping moves, a notification will appear on the far-right screen identifying the message type as well as the associated value (e.g. 0-127).
Part Settings
The SL MkIII lets you customise the destination of your Parts. If you want, you can configure elaborate setups using up to dozens of pieces of external kit or software. You can set these configurations with 'Templates' through the following process:

Select Template
To change the Template for a Part:
- Press Shift and Sessions buttons to enter Templates View.
- Select the Part you want to change using the soft buttons. By default, these Parts have the label 'MIDI'.
- Use the left-most rotary to select a Template. The rectangle around the selected Template will turn grey while the Template loads, and white when the Template has fully loaded.
If the Template doesn't yet have a name, it will appear as 'Template x'.
Select Destination
Each Part can go to one or more destinations. These destinations can be MIDI or analogue CV/Gate/Mod. To change the destination for a Part:
- Press Shift and Sessions buttons to enter Part Settings View.
- Select the Part using the soft buttons beneath the screens.
- Set the rotary knobs above USB, DIN 1, DIN 2, CV/Gate 1 or CV/Gate 2 to modify them (options listed below).
- USB: Off/On
- DIN: Off, 1 or 2 or Both
- CV/Gate: Off, 1, 2, or Both
Your destination preference are stored in the Session, so changing Sessions will change these Destinations.
Channel
The MIDI channel for a Part is set using the Channel control. You can choose from channel 1 through 16.
Note: Channel 16 is used as a global channel for certain messages such as program change and song select. If you set a Part to channel 16 and then change the Session on a connected device (such as Circuit), you might accidentally also change the Session on SL MkIII and lose unsaved progress.
Input Monitoring
When Input Monitoring is on (it is off by default), MIDI note messages received by each Part (on the correct channel) will forward to the Part's destinations. External MIDI note messages will always be recorded by the internal Sequencer regardless of this setting.
Edit Part Colour
The colour for a part can be changed by selecting a Part and pressing one of the eight coloured pads.
Arp
The SL MkIII's Arp (Arpeggiator) gives you the ability to program classic, 'machine-like' arpeggios, perfect for techno and many other electronic genres.

Let's first look at initialising the Arp.
Turn Arp On/Off
To turn the arpeggiator on or off hold Shift and press the Arp button. This Arp button will light white indicating that it is on.
With the arpeggiator on, held notes on the keyboard will arpeggiate.
The Sequencer also routes to the arpeggiator. When recording to the Sequencer, held keys record into the Patterns as long notes. Then, assuming Arp is still turned on, these long notes will be routed back into the Arp for playback.
Arp Latch
Using the Latch feature of the SL MkIII is a fun way of augmenting Arp's functionality. Pressing the 'Latch' button toggles Arp Latch on and off. When on, notes hold as keys are played, and their note-offs are delayed until all arpeggiated notes are released, and a new note/s is played.
Side note: Latch will work whether Arp is on or off – essentially, Latch triggers a continuous MIDI note, regardless of Arp's on/off state. Latch is thus useful, for example, if sending MIDI to an external arpeggiator, or an external synth patch with lots of sustain.
Latch will apply to the selected Arp destination Part only.
Arp Settings
Pressing the Arp button (while not holding Shift) reveals the following settings on the screens.
- Part
- Type
- Gate
- Sync Rate
- Octaves
- Velocity
- Length
Modifying these settings will significantly alter the sound of your arpeggios. The following sections explain these settings in depth.
Arp Part
Arp can only arpeggiate one Part at once, so by default, this is set to 'Selected Part'. However, using the above rotary knob, you can opt to send the arpeggiated pattern to parts 1 through 8 instead. In other words, you can send your arpeggiated patterns to different Parts to audition them on various elements of your song.
Arp Type
You can set Arp to the following pattern 'Types':
- Up (default) - Notes held or latched (with the Latch button) will be played in an upwards direction at the Arp Sync Rate, one after another, then the pattern repeated.
- Down - Notes held or latched will be played in a downwards direction at the Arp Sync Rate, one after another, then the pattern repeated.
- Up/Down 1 - Notes held or latched will be played in an upwards direction, then downwards direction with no repeated notes, at the Arp Sync Rate, then the whole pattern repeated.
- Up/Down 2 - Notes held or latched will be played in an upwards direction, then downwards direction with the highest and lowest notes repeated, at the Arp Sync Rate, then the whole pattern repeated.
- Random - Notes held or latched will play in a random order at the Arp Sync Rate that continues until keys are released.
- Played - Notes held or latched will be output in the order in which they played, at the Arp Sync Rate, then the whole pattern repeated.
- Chord - Notes held or latched will be played as a chord on each Arp step, at the Arp Sync Rate, until the notes are released.
Arp Gate
The Arp's Gate control shortens the length of arpeggiated notes from the maximum length of one arpeggiated step (100%) down to 1/100th of an arpeggiated step (1%). Gate is set to 100% by default, with an adjustable range of 1 to 100%. Gate takes into account Arp Sync Rate and tempo; therefore, as Sync Rate changes and tempo increases/ decreases the Arp gate length will remain a consistent percentage of the Arp step length.
Arp Sync Rate
This setting changes the musical rate at which the Arp runs relative to the SL MkIII's clock. It can be set to sync rates as follows:
- 1
- 1/2
- 1/2 Triplet
- 1/4
- 1/4 Triplet
- 1/8
- 1/8 Triplet
- 1/16 (Default)
- 1/16 Triplet
- 1/32
- 1/32 Triplet
Arp Octaves
This setting increases the output range of the Arp by octaves. For example, if you set Octaves to 2 the sequence is played and then immediately repeated one octave higher. Three (3) means the Sequence will be repeated one octave higher, and then an octave higher still. By default, Octaves is set to 1 but can go as far as 6.
If the arpeggiated notes go out of range, then the Arp will correct the notes to be within the top octave (G#6 to G7).
Octaves interact with Types in a variety of ways. The following scenarios are a good reference when programming your arpeggios with octaves in mind:
- When Type = Up/Down or Up/Down 2 then the Arp will play up through the full octave range before playing down.
- When Type = Played then the sequence of notes play in full in the first octave before repeating in additional octaves.
- When Type = Random, then the sequence of notes is randomised across the whole octave range, and every note is picked at random.
- When Type = Chord, additional octaves will cause the held notes to repeat ac-cording to the octave setting in an upwards direction. For example, if Octaves = 3, the held notes will be played as a chord at the pitch, then +1 octave and then +2 octaves, before the pattern repeats.
There will be no duplicated notes when changing this setting.
Arp Velocity
Arp note Velocity can be between 1 and 127 (standard for MIDI velocities) or 'Played' (default).
When set to Played, the output notes from the arpeggiator will inherit the velocities of the notes you physically played.
When set to a value in the range 1-127, the output notes from the arpeggiator will be played at a fixed velocity as specified by this setting. For example, if set to '65', all notes heard will have a velocity value of 65.
Arp Length
This option determines the length of the Arp pattern, measured in steps. By default, Arp loops through 16 steps, but you can opt to make it shorter (from 1 to 15 steps). The 'Arp Sync Rate' determines the length of a step (1, 1/2, 1/2 Triplet etc.).
You will see your Pattern on the 8x2 pad area, where each pad represents a single step in the Pattern.
Arp Pattern
Finally, the Arp Pattern feature lets you customise the rhythm of your arpeggios. After pressing the Arp button, each pad will represent a step in the arpeggio pattern. You can then toggle a step on or off by pressing its corresponding pad, thus altering your pattern's rhythm. A pad will light brightly when the step is set to play, and dimly when the pad will not play. A white cursor moves across the pads as the arpeggiator plays.
This resulting rhythm only affects the timing of the played notes and does not change the order in which they are played.
Additional Arp Notes
While using Up/Down 1 with octave range greater than 1, if moving in the down direction, reducing the octave range to 1 will cause the Arp to continue falling through all the octaves until 1 is reached, at which point it will stay within the 1-octave range. (Those familiar with Novation's Mininova will recognise this behaviour). If moving in the up direction, the arpeggiator will reset to the first octave after it has completed all the notes in the sequence within the current octave it is playing in.
When using Up/Down 2, if the top/bottom note is released after it has played just once, Arp will immediately switch direction and play the next highest/lowest note only once and continue in that direction. This behaviour maintains timing if the top note is removed and replaced with another note.
When switching between directional arpeggiator types during playback, Arp will not reset position but will continue moving in the same direction (if supported by the new Type) until it reaches an extremity. For example, if switching from Down type to Up/Down 1 Type, the arpeggiator will continue moving down until it reaches the lowest note.
Global Settings, Page 1: MIDI Settings
Press the Global button to enter the Global Settings View. Any settings changed in this View affect the whole device and do not change with the Session. These settings save when the device is turned off via the power switch. If the power cable is removed, however, these settings will not be saved.
Press the Up/Down arrows next to the screen to navigate through three pages of global settings and information.
Velocity Curve
You can change the responsiveness of your SL MkIII keyboard via the 'Velocity Curve' setting:
- Navigate to the Global Settings menu by simply pressing Global.
- The menu item labelled 'Velocity Curve' will indicate the current velocity curve.
- Next, choose from the following velocity options:
- Low
- Low+
- Normal
- Normal+
- High
- Fixed
'Low' skews MIDI toward lower values. In other words, while it is quite easy to render low velocity values, getting velocity values of, say, 127 will require a lot of physical force. With 'Low +' it is slightly easier to get higher velocities; with 'Normal' and 'Normal +' achieving higher velocities gets progressively easier.
'High' means that velocities skew the most readily toward high values. Even when pressing keys very lightly, it is difficult to achieve low velocities. This could be, for example, a helpful feature for a player with a light touch who wants their velocities to lean toward higher values. - Fixed Velocity
Lastly, if you select 'Fixed' the same MIDI velocity will be output regardless of how hard or soft you press a key. A menu item next to Velocity Curve called 'Fixed Velocity' will appear when Fixed is selected, and this is where you specify the MIDI velocity to be sent for each key press.
MIDI Clock Rx/Tx
MIDI Clock Rx
Similar to the case of MIDI Clock transmission (see the following section), the following steps enable or disable the receiving of external MIDI clock messages:
- Press the Global button to reveal its menu.
- The menu item labelled 'MIDI Clock Rx' shows either 'On' or 'Off", indicating whether the device can respond to an external MIDI clock.
- Turn the rotary knob above to the right to enable reception of MIDI clock, or to the left to disable response of MIDI clock.
When set to 'On', if the SL MkIII detects MIDI clock at either of the MIDI inputs (USB or DIN) it will sync to the external clock. Be sure to send MIDI to USB or DIN, and not both, as this might cause a loss of synchronisation or erratic tempo.
To confirm that the SL MkIII is successfully receiving external clock press the Tempo button. Here the screen shows the synced-tempo value, as well as the word 'External'. Changes to the external device's or software's tempo are reflected here. If the SL MkIII loses sync while the transport is playing, the message 'Sync Lost' will appear and the device will not switch to its internal clock until you stop the Transport.
MIDI Clock Tx
The SL MkIII can either send its internal MIDI clock or sync to an external one – convenient when using the SL MkIII alongside other devices or software.
The following steps allow you to enable or disable transmission of MIDI clock messages:
- Press the Global button to reveal its menu.
- The menu item labelled 'MIDI Clock Tx' shows clock transmission as either 'On' or 'Off'.
- Turn the rotary knob above to the right to enable clock transmission ('On'), or to the left to disable clock transmission ('Off').
When set to 'On', the SL MkIII is sending clock tempo. Devices or software correctly configured to receive the SL MkIII's MIDI clock should now operate in sync. MIDI clock messages send at 24 PPQN (pulses per quarter note) to the USB MIDI and two DIN ports.
When using the SL MkIII's analogue clock turn the rotary knob above the menu item labelled 'Clock Out' to choose between 1, 2, 4, 8 or 24 PPQN.
To adjust the tempo of the SL MkIII's internal clock press the Tempo button. The LCD then shows the tempo as a BPM value, which can be raised or lowered with the above rotary knob.
MIDI Out 2
Another essential Global item is 'MIDI Out 2'.
When set to 'Out', the SL MkIII can use two MIDI DIN outputs. This means the device can send MIDI clock to two separate destinations via, for example, the 'OUT' and 'OUT 2' DIN sockets on the back of the unit.
It is possible, however, to change MIDI Out 2 from an output to a 'Thru'. When set to 'Thru', the second MIDI output copies messages from the MIDI DIN input to the MIDI DIN output, and the SL MkIII will not send any internally generated MIDI to this output.
If Parts (see section 2: Part Settings, 'Select Destination') are being routed to MIDI Out 2 when the setting changes to 'Thru', the previously configured Part destination will not change, but MIDI will nevertheless no longer send from the device. MIDI from the Part will no longer send from MIDI Out 2.
Fader Pickup
Fader Pickup changes the way the faders and Mod Wheel behave with respect to their current value. You will find four options for this behaviour:
- Off (Default): Pickup is off for faders and Mod Wheel.
- On: Pickup is on for both faders and Mod Wheel.
- Faders: Pickup is on for faders, but off for the Mod Wheel.
- Mod Wheel: Pickup is on for the Mod Wheel but off for faders.
When pickup is on for faders/Mod Wheel, values will not be sent from that control until the physical position of the control matches (or passes) the previous value. This behaviour prevents sudden jumps in the value after switching between Parts, for example. The default value for these controls will be at the lowest position (i.e. fader all the way down).
Please note that the SL MkIII's fader pickup behaviour does not apply when using InControl. The controller will therefore adopt the pickup behaviour of HUI or your DAW.
Global Settings, Page 2: Analogue Settings
Press the down arrow to the left of the screens to reveal more Global options, as described in the following sections.
Clock Out PPQN
When the Transport is running, 'clock pulses' send for each quarter note via the analogue clock out. How many pulses are sent is determined by this analogue clock setting in PPQN (Pulse Per Quarter Note). PPQN can be set to 1, 2 (default), 4, 8 or 24.
CV Mod 1 Range and CV Mod 2 Range
These two settings allow you to specify the output voltage of each mod port. Available ranges are '-5 to 5V' or '0 to 5V'. Any CC messages directed to the mod port will be mapped to one of these ranges.
CV Mod 1 CC and CV Mod 2 CC
You can give each Mod port a specific CC number, which you can set individually for each port using the rotary knobs above 'Mod 1 CC' and 'Mod 2 CC'. When a message sends with this CC number using the surface, Sequencer automation, or from external MIDI to a part that routes to a CV port, this will control the CV Mod output.
CV Calibration
The CV Pitch output ports may need calibrating in order to precisely represent the pitch range. Press the soft button under 'Calibrate' to enter calibration mode.

- To calibrate a CV Pitch port, first press the soft buttons under 'CV 1 Low' or 'CV 2 Low'. Doing so will set the voltage of the port to approximately 220 Hz (A2). You will need to connect the port to a sound source to either tune by ear or use a tuner. Otherwise, you can connect the port directly to an oscilloscope or measuring device to verify the tuning.
- Use the Tune knob directly above to increase or decrease the voltage and fine tune the output until it matches 220 Hz exactly.
- Next, press the soft buttons under the 'CV 1 High' or 'CV 2 High' and do the same for 880 Hz (A4).
- Once you are happy with both tunings, press the orange soft button under 'Apply' to save these settings.
The full range of the CV Pitch port will now be calibrated. Click the Reset soft button to remove your calibration and restore the factory default settings. Press the Exit soft button to return to Global Settings.
Global Settings, Page 3: Key LEDs
Key LEDs
When 'Keys LEDs' is set to 'On', the key LEDs (directly above each key) will light up white as you play notes on the keyboard.
Arp LEDs
When 'Arp LEDs' is on, the key LEDs will light up white according to which notes the arpeggiator triggers. Arp LEDs help you confirm what notes your arpeggiator is playing.
Sequencer LEDs
When 'Sequencer LEDs' is on, keyboard LEDs will light up white with notes (chords, melodies, etc.) that are playing from either the Sequencer or external MIDI.
Ext. MIDI LEDs
When 'Ext. MIDI LEDs' is on, key LEDs will light up white according to external MIDI notes being received via the SL MkIII's MIDI ports.
Global Settings, Page 4: System
Firmware and Bootloader Version
These areas show important information concerning the firmware on your SL MkIII. Knowing this information may be helpful in the case of troubleshooting.
We recommend periodically checking to confirm that your SL MkIII is using the latest firmware. To check for and download firmware updates, visit https://components.novationmusic.com and follow the instructions for installation.
Standby Animation
When left unattended for 5 minutes, the SL MkIII enters Standby Animation (sometimes referred to as 'Vegas Mode'). This standby animation stops with any interaction with the unit, or if MIDI data arrives at the device. The SL MkIII will not go into Standby Animation while the Sequencer is playing.
Setting 'Standby Animation' to 'Off' will prevent the device from entering the standby animation regardless of how long you leave it unattended.
CV/Gate
Notes
You can route Parts to either or both of the CV/Gate ports using the Part Settings View (press Shift+Sessions to enter this View). Routing Parts this way sends all note information to the specified port(s). MIDI notes 24 to 108 will map into a CV pitch voltage range of 0-7V. Notes outside of this range will clamp to the maximum or minimum voltage.
CV/Gate is only capable of monophonic communication so the polyphonic stream of notes from the sequencer, keys and MIDI will convert to a mono stream using the most recently played note. The Gate port will remain high (open) while a note is active. When all notes are released, the gate signal will fall back to low (closed).
Mod
When a part routes to a CV/Gate port, it will also be able to control the respective Mod port. Each Mod port is set to respond to a single CC number, as configured in the Global Settings (see Global Settings/CV Mod 1 and CV Mod 2). When a part that routes to a CV/Gate port outputs this CC number via the surface, the sequencer or MIDI, it will be output as a voltage in the range of 0 to +5V from the Mod port.
Keyboard Settings
Octave
The octave up and down buttons (+ and - buttons) change the octave offset of the keyboard. Press both together to reset the keyboard octave to its default.
Keyboard zones can have additional or independent octave applied. See the documentation on 'Zones' for details.
Transpose
Pressing Shift and the Octave Up or Octave Down buttons transpose the keyboard MIDI notes in semitones. Press Shift and Octave Up and Octave Down buttons to reset the transpose. This can allow you to, for example, play only white keys, but hear a major/minor scale with another root note.
Keyboard Zones can have additional or independent transposition applied. See the documentation on keyboard Zones for details.
Tempo / Swing View
Set Tempo
When the SL MkIII is controlling tempo (i.e. not slaved to an external device's tempo) it can be adjusted by doing the following:
- Press the Tempo button to enter the Tempo/Swing View.
- The display will change to show Tempo (BPM) and Swing values.
- Turn the leftmost rotary knob to change Tempo to integer values anywhere between 40 and 240 beatsperminute (BPM).
Display Clock Source
When the SL MkIII receives a valid MIDI clock (and MIDI Clock Rx setting is on), the tempo screen will update to show 'External'. Note that the tempo value might fluctuate at first, but it will soon settle to a received clock value. Since the keyboard is 'slaved' to an external clock, it is not possible to change the tempo using the above rotary control.
If the clock signal stops or is lost then the SL MkIII will revert to its internal tempo, and you can again use the rotary knob to adjust tempo.
The clock source can only change while the Transport is stopped. If the Sequencer is running synced to an external clock, and the clock signal stops or is lost, the display will show 'Sync Lost'. The Sequencer will remain in the 'Sync Lost' state until the Transport is stopped. After pushing Stop on the Transport, the Sequencer will revert to using external clock if the external signal is available. Otherwise, it will use the internal clock.
Swing
The SL MkIII's Swing function moves MIDI notes off their usually mathematically precise positions in an attempt at achieving a more natural or human sound. The result is more 'swing' or 'feel'. In other words, if your arpeggios or patterns feel rigid, try adding some swing to them.
More precisely, swing works by pushing even-numbered beats of the swing sync rate closer to the odd-numbered beats. For example, with a common beat pattern of '1-2-3-4-1' etc., positive swing pushes beats '2' and '4' later in time towards beats '3' and '1' (note: this '1' is the start of the next measure). On the other hand, negative swing pushes beats '2' and '4' forward in time towards beats '1' and '3' respectively.
You can adjust global swing from 20% to 80%. By default, swing is 50%, which applies no swing (i.e. no change in the rhythm). Greater than 50% adds positive swing, and less than 50% results in negative swing.
Swing Sync Rate
Changing the Swing Sync Rate adjusts the length of the swing period. The setting defines the tempo interval by which the Swing parameter will shift alternate notes. The default is set to 1/16, meaning that the Sequencer and Arp will swing in pairs of 1/16ths. Triplet sync rates are denoted with a "T" after the sync rate.
Tap Tempo
You can define a tempo by pressing the Tap button at the intended tempo. You must press the Tap button at least three times before a tempo is calculated. If the device is synced to an external clock, tap tempo will be unavailable.
Transport
Located at the far right side of the SL MkIII is a row of buttons known as the 'Transport'.
Start/Stop/Continue
The following points explain how to start, stop or continue the Sequencer in all modes (excluding InControl mode). Note that these messages will only send if MIDI Clock Tx is on:
- Pressing the Play button will start Sequencer playback and send a MIDI Start message.
- Pressing the Stop button will stop Sequencer playback and send a MIDI Stop message.
- Holding Shift and pressing Play will start Sequencer playback from the current position and send a MIDI Continue message.
- Pressing Play while the Sequencer is running will send a MIDI Stop message followed by a MIDI Start message. Pressing Play will restart the sequencer from the beginning of the Session.
External Control
You can control The SL MkIII's Transport externally. If the device receives any of the following external messages then the Sequencer will respond accordingly:
- If a Start message is received, Sequencer playback will start.
- If a Stop message is received, Sequencer playback will stop.
- If a Continue message is received, the Sequencer will begin playback from the current position.
- If a Start message is received while the sequencer is playing the message is ignored.
Note that the above messages (known as system Real time messages) are received at the MIDI In or USB MIDI In ports.
Song Position
The SL MkIII's internal song position can also move according to an external source. Providing you have stopped the Sequencer, if either the MIDI In or USB MIDI In ports receive a Song Position Pointer (SPP) the internal song position will update, and the message will retransmit.
If the sequencer is running, however, the SL MkIII ignores song position messages.
Zones
Zones are a powerful feature that divides the keyboard into areas, aka 'Zones'. These Zones can be one note or the entirety of the keyboard. Zones are highly customizable: you could, for example, set your drum sounds to play in one octave, bass in another, synth sounds in yet another etc. This flexibility makes this feature ideal for live performance or a personalised production setup.

Enable / Disable Zones
Enable Zones by pressing and holding 'Shift' and then pressing and releasing 'Zones'. By enabling Zones, you can take advantage of the following options.
Key LEDs Represent Zones
A coloured LED above each key represents the Zone and destination Part assigned to it. These lights help visually understand where your Zones lie along the keyboard, and these different colours correlate to the destination Parts. Note that the LEDs only light above the active keys in the Zone range; when using Scale, for example, keys outside of the scale will not light up.
When Zones overlap, the zone with the lowest number takes lighting priority. For example, Zone 1 takes priority over Zone 2, so Zone 1's range is shown on the LEDs, overriding the LEDs of Zone 2 where there is an overlap.
Entering Zones View
Zone's View is where you can customise your Zones according to your needs. To enter Zones View press the 'Zones' button.
While in Zones View, only the LEDs for the selected Zone will light up.
Pressing the up/down arrows to the left of the screens will move between pages 1 and 2 of Zone Settings. Between these two pages, there are fourteen adjustable parameters for each Zone.
Select a Zone
After entering Zones View (again, by pushing the Zones button), select a Zone by pressing the soft buttons under their names ('Zone 1',' Zone 2' etc.). The SL MkIII supports up to 8 independent Zones.
Activate/Deactivate a Zone
Having selected a Zone, it can be activated ('On') or made inactive ('Off') by turning the left-most rotary knob (directly above the word 'Active').
When set to 'Off' all other Zone parameters (from 'Dest. Part' to 'Channel Pressure') will be greyed out. When moved to 'On', however, these parameters will brighten.
Set Destination for a Zone
In Zones View, the second rotary knob from the left (above 'Dest. Part') selects the destination Part for a Zone. This destination can be 'Selected' (default) or Parts 1 through 8. Upon choosing a new Part, you will see LED colours change above the keys.
Set Keyboard Range for a Zone
On the 49-key version of the SL MkIII, each Zone's default range is C1 to C5 (all 49 notes), while on the 61-note version of the device the default range is C1 to C6 (all 61 notes).
From a Menu
In Zones View the third and fourth knobs set the range of the Zone from lowest to highest key. This range is inclusive of the low key and high key.
Zones Mode supports overlapping zones. Overlapping is useful if you want to blend sounds, such as a piano with a synth, or an acoustic drum with a synthetic one. Of course, how you layer your Parts is up to you.
From the Keyboard
You can also set the range of a Zone using keys. After selecting Zones View, press and hold a Zone button below the screen. You will then be prompted to choose a low key on the keyboard followed by a high key, thus setting the Zone range.
Set Octave/Transpose Settings for a Zone
In Zones View knobs five to eight select whether the Zone will adhere to the overall keyboard Octave and Transpose settings. Additionally, you can apply an Offset to the selected Zone with the Octave and Transpose parameters. By default, the Offset values are '0', and both Follow settings are 'On'.
Turn the knobs above the 'Follow' settings to select between 'On' and 'Off'. When on, the Zone's behaviour is influenced by the Octave and Transpose buttons; when off it will not be affected by the Octave or Transpose buttons. Turn the knobs above the Offset parameters to set a permanent Octave and Transpose shift for the selected Zone.
Enable/Disable Wheels for a Zone
On page2 of Zones View, the fourth and fifth knobs select whether the 'Pitch' (pitch bend) and 'Modulation' wheels affect with the currently selected Zone. By default, they are both 'On'. Rotate the knob above the respective settings for Pitch and Modulation to turn the effect of these wheels on or off.
Enable/Disable Channel Pressure for a Zone
On page2 of Zones View, the sixth knob selects whether keyboard channel aftertouch (pressure) affects the currently selected Zone. Aftertouch is on by default. Turn the knob above 'Channel Pressure' to choose between on and off.
Enable/Disable Pedals for a Zone
On page2 of Zones View, the first, second and third knobs decide whether expression pedal ('Expr. Pedal'), sustain pedal or footswitch signals will work with the currently selected Zone. All three of these options are set to 'On' by default. Turn the knobs above these settings to move between on and off states.
Session Management
Enter the Sessions View by simply pressing the 'Sessions' button. In Sessions View, the square 8x2 pads become locations for saving and loading your Sessions.
The arrows to the left of the 8x2 pad area are used to change pages of Sessions View. There are four available pages, each containing 16 Sessions laid sequentially across the 16 pads. These four pages give you a total of 64 Sessions.

Sessions have names (to be created with Components), and you can change their colour as well. Press the Save button once, then use the first two soft buttons below the screens to select a colour. Press Save again to confirm.
Load a Session
To load a session, first enter Sessions View, then press a pad in the 8x2 pad area.
Save a Session
You can save your current Session at any time. Press the Save button once, and it will begin to flash. Press Save again to confirm.
In Sessions View selected you also have the option to save the Session to a new location or change the colour of the Session. Press the Save button once so that the Save button is flashing. You will notice that you can now use the two left-most soft buttons below the screen to scroll through different session colours. Once you have found your preferred colour, either press the Save button again to save in place or select a different session pad to save the Session to a new slot. This will overwrite any data that is currently saved to that slot.
Clear a Session
After selecting a Session, hold Clear and press the current Session's respective pad to clear all data and reset the Session's settings to the default.
Cued Session Switch
While the Sequencer is playing, you can prepare a new Session in the Session View. When you press a pad it will begin flashing; this indicates that it is 'cued' to start at the end of the currently playing pattern on track 1 (master track). At this point, the Session pad will turn white to show its selection.
Instant Session Switch
While the Sequencer is playing, it is possible to 'instantly' change to a new Session in the Session View. Just hold Shift and press a pad. The new Session will pick up from the corresponding position in the currently playing pattern.
Loading a Session Using Program Change
It is possible to load a Session by sending a 'program change' message to the device on channel 16. By default, the indicated Session will load instantly. If 64 is added to the program ID the session load will be cued (during playback, see Cued Session Switch).
Loading a Session Using Song Select
It is possible to load a Session by sending a 'song select' message to the SL MkIII while the Sequencer is stopped. The session to load is indicated by the song id.
Save Lock
The 'Save Lock' feature allows you to lock the device to prevent saving Sessions. To do this, turn the unit on while holding Shift + Save buttons. When the device is turned off using the power button, the setting will save. If save lock is on, the LED lighting the Save button will be off, indicating that Sessions cannot save. To turn save lock off, repeat the same procedure.
Scales
Enable/Disable Scales
Scales View provides an excellent entry point for beginners to start learning the fundamentals of chords and scales. It also serves as an excellent refresher for intermediate players whose knowledge of harmony has become rusty.

Hold Shift then press the Scale button to enable/disable Scales View.
When Scales View is active notes will adhere to whatever scale you select, whether playing the keys or using the Sequencer. These scales range from traditional scales of Western music (C Major, E Dorian etc.) to non-Western ones like Marva. You can switch between scales in the Scale Settings (see Scale Settings).
When Scale is enabled the LEDs above the keys have the following behaviour:
- Root notes light brightly.
- Notes in the scale light dimly.
- Notes outside of the scale are off (unlit).
In other words, with Scales View on, playing keys (either dimly or brightly lit) guarantees that you are playing notes within your chosen scale.
Scale Settings
Pressing the 'Scale' button brings many Scale Settings onto the screens.
Root Note
The left-most option labelled 'Root', lets you change the root note of the scale. Turn the rotary knob above to set the root of the scale from the following chromatic notes: C, C#, D, E, Eb, F, F#, G, Ab, A, Bb, and B.
Scale Type
Once you have decided on a root note, you will next need to select a scale type. Turn the rotary knob above 'Type' to choose one of the following scales: Natural Minor, Major, Dorian, Phrygian, Mixolydian, Melodic Minor, Harmonic Minor, Bebop Dorian, Blues, Minor Pentatonic, Hungarian Minor, Ukrainian Minor, Marva, Todi, Whole Tone and Chromatic.
Sequence Transpose
Turning the knob above 'Sequence Transpose' applies a transpose value to the played notes coming from the Sequencer. In other words, it shifts sequenced parts by a set amount (e.g. five semitones). It also functions independently of Root and Type, which apply a scale to Sequencer parts without transposing notes.
You can transpose your Sequence up or down by 11 semitones (halfsteps).
Scale Mode
The screen area labelled 'Scale Mode' changes the way Scale View handles notes that are not in the selected scale. These settings behave as follows:
- Snap - Notes outside the scale are 'snapped' up or down to the nearest scale note.
- Filter - Notes that are not in the scale are not played (i.e. not snapped to a correct note).
- Display Only - Notes that are not in the scale are allowed to pass unmodified. This setting makes key LEDs more of a 'guide' for your playing, leaving you free to use non-diatonic notes (notes not in the scale).
Turn Scale On/Off per Part
Pressing the soft buttons above the pads (and below the screen) toggles Scale functionality on/off per Part. Therefore, you can choose which Parts will be affected by Scale mode (and its settings) and which will not.
A common occurrence for this option pertains to drums. Since a typical drum bank is not arranged according to pitch, playing it with a scale in mind would be a hindrance. Thus, you might want to turn Scale mode off while playing your percussion parts and keep it on for your synth, bass, strings etc.
MIDI Ports/Routing
Host Inputs
- MIDI - This input is used for MIDI from Parts when they route to USB. It is also used to transfer content with Components.
- InControl - This is used for communication with DAWs using the InControl or HUI protocols.
- From DIN 1 - This forwards MIDI received from MIDI DIN 1, allowing the device to be used as a MIDI interface.
Outputs
- MIDI - This output is used to send MIDI to Parts to record into the sequencer. It is also used to transfer content with Components.
- InControl - This is used for communication with DAWs using the InControl or HUI protocols.
- To CV/Gate - Note information sent to this port is sent directly out of the CV/Gate ports, unchanged and with no interference from the SL MkIII's features. MIDI channels 1 and 2 are used to address CV/Gate ports 1 and 2 respectively. CC messages sent to this MIDI port with the CC number assigned to each mod output (see Global Settings/Mod CC) will be output directly to that mod port.
- To DIN 1/DIN 2 - All MIDI sent to these two ports will be forwarded directly out of their respective MIDI DIN ports, unchanged, and with no interference from the device's features.
Components
Template Editor
Templates can be edited using Components, allowing you customize the messages sent and behaviour of rotary knobs, faders, buttons, pads wheels and pedals. Please see 2. Templates for a link to Components.
Librarian
With the SL MkIII's Librarian functionality you can send and receive Sessions and Templates over SysEx. This sending and receiving are primarily done using Components (please see 2. Templates for Components' web address).
When content arrives at the SL MkIII, the device enters 'Content Transfer Mode'. In this mode, it stops the transport and disables UI controls. The screen will show the progress of the transfer.
When the transfer is complete, the device exits Content Transfer Mode and returns to its previous View.
If the transfer is incomplete or not successful, the device will enter the content transfer screen after a short timeout (1 second).
Firmware Upgrade
If new firmware is available, it can be upgraded using Components. Simply follow the link found in 2. Templates to access this standalone application.
InControl
Press the 'InControl' button to enter InControl mode. The aim of InControl is the seamless integration of the SL MkIII with popular DAWs like Pro Tools, Cubase, Reaper, Logic, Reason and Live. The chart below illustrates which DAW features InControl supports.
DAW Feature Support
| Feature | Pro Tools | Cubase | Reaper | Logic | Reason | Ableton |
| Channel Controls | ||||||
| Control Volume using Faders | Yes | Yes | Yes | Yes | N/A | Yes |
| Control Pans using Encoders | Yes | Yes | Yes | Yes | N/A | Yes |
| Select Track | Yes | Yes | Yes | Yes | N/A | Yes |
| Mute Track | Yes | Yes | Yes | Yes | N/A | Yes |
| Solo Track | Yes | Yes | Yes | Yes | N/A | Yes |
| Arm Track | Yes | Yes | Yes | Yes | N/A | Yes |
| Transport Controls | ||||||
| Rewind | Yes | Yes | No | Yes | Yes | Yes |
| Fast-Forward | Yes | Yes | No | Yes | Yes | Yes |
| Stop | Yes | Yes | Yes | Yes | Yes | Yes |
| Play | Yes | Yes | Yes | Yes | Yes | Yes |
| Record(arm) | Yes | Yes | Yes | Yes | Yes | Yes |
| Loop | Yes | Yes | NA | Yes | Yes | Yes |
| Track Navigation | ||||||
| Track left / right | Yes | Yes | Yes | Yes | Yes | Yes |
| Bank left / right | Yes | Yes | Yes | Yes | Yes | Yes |
| Track Name | No | No | No | Yes | No | Yes |
| Other | ||||||
| Save | Yes | Yes | N/A | No | N/A | Yes |
| Undo | Yes | Yes | N/A | Yes | N/A | Yes |
| Pre-Roll | Yes | Yes | N/A | No | N/A | Yes |
| Post-Roll | Yes | Yes | N/A | No | N/A | Yes |
| Count-in | No | No | No | Yes | N/A | No |
| Control Send Groups A-E using Encoders | Yes | Yes | N/A | Yes | N/A | Yes |
| Metronome | No | No | No | Yes | Yes | No |
| Clip Control | N/A | N/A | N/A | N/A | N/A | Yes |
| Device Control | NA | NA | NA | Yes | Yes | Yes |
| Smart Controls | N/A | N/A | N/A | Yes | N/A | N/A |
HUI
The HUI protocol allows the SL MkIII to act like a Mackie HUI device and interact with DAWs that provide HUI support (for example, Steinberg, Cubase and Pro Tools).
HUI Heartbeat
After hitting InControl, the SL MkIII automatically switches to HUI View as soon as it detects a Heartbeat message (sent by a DAW). If the SL MkIII does not receive a heartbeat message for over three seconds, it automatically switches back to InControl mode.
Channel Control
- Volume
You can change channel Volume with the eight faders toward the right side of the SL MkIII. The LED above each fader indicates its value. - Pan
You can change a channel's Pan position using the rotary knobs. Below each knob, the current Pan position is displayed. - Mute/Solo/Arm
The right softbuttons can be used to control Mute, Solo and Arm functions on individual channels. By default, you will only see the Mute and Solo buttons; use the page up button to access the Arm buttons. Depending on the DAW you are using, button LEDs may behave differently. For example, in Pro Tools the Arm button will flash when on. - Send Control
Press the Options button to access the encoder assignment menu, where you can set the encoders to control send levels. Use the page up/down buttons next to the screens to access send groups A through E. As of publication only Pro Tools displays the send names below the displayed rotaries. - Transport Control
The Transport's buttons can control the equivalent functions in each DAW. While mostly similar, the function of each button depends on the DAW. Generally, the functionality is (from left to right) as follows: Rewind, Fast-Forward, Stop, Play, Loop on/off, Arm/Record. - Track Left and Right, Banking Left and Right
The Track Left and Right buttons move the currently controlled bank (8 channels) one channel to the left or right. Hold Shift and press these same buttons to move a full bank left or right. - Keyboard Shortcuts
Hold Shift to access several keyboard shortcuts on the left softbuttons. Again, the way these button LEDs function depends on the DAW. - Press Button 01 (furthest left) to Undo. In Pro Tools this button will flash after undoing, indicating the possibility to Redo.
- Press Button 2/3 to toggle Pre-Roll and Post-Roll.
- Press Button 8 (far right) to save your DAW session. In Pro-tools, for example, the Save button will begin to flash after clicking. This is ProTools' way of asking for confirmation. Press the button once more to save.
DAW Setup
- Cubase
To set the SL MkIII up as a HUI control surface in Cubase, navigate to 'Studio' > 'Studio Setup' > 'MIDI Port Setup'. Be careful to set your ports as shown below, the 'Novation SL MkIII SL MkIII InControl' port MUST NOT have "in 'all MIDI ins'" enabled:
Click the small '+' icon in the Cubase 'Studio Setup' window and select 'Mackie HUI'. Now, in the 'Mackie HUI' tab, set the input and output port to 'Novation SL MkIII SL MkIII InControl' as shown below:
Note: The 'Novation SL MkIII SL MkIII' port may show as 'MIDIIN(put)'/'MIDIOUT2' or something similar on Windows. - Reaper
Please note that Reaper version 5.941 or newer is required to work with the SL MkIII.

To set up the SL MkIII as a HUI control surface in Reaper, navigate to 'Options' > 'Preferences...' > 'MIDI Devices'. Be sure to set your ports as shown below, the 'Focusrite A.E. – Novation SL MkIII – SL MkIII InControl' port MUST NOT say '!! N/A...'. If this is the case the user might solve this by right-clicking the device and choosing 'Forget device':
Navigate to the 'Control/OSC/web' tab in the 'Reaper Preferences' window and click 'Add' to add a new control surface.
Now, in the 'Control Surface Settings' window, set the Control surface mode to HUI (partial) and set the input and output port to 'Focusrite A.E. – Novation SL MkIII – SL MkIII InControl' as shown below:


Pro Tools
To set up the SL MkIII in Pro Tools, navigate to 'Setup' > 'Peripherals...' > 'MIDI Controllers'. Ensure your ports are set up as below. Set Type to 'HUI' and Receive From and Send To to the 'Novation SL MkIII, SL MkIII InControl' port.

Ableton Live
Set Up
The picture below illustrates the proper way to configure Ableton Live to work with the SL MkIII.
Follow these steps to replicate the above set up:
- Navigate to your Live Preferences by going to the 'Live' menu, and choose 'Preferences...', or use the keyboard shortcuts CMD + Comma (Mac) or CTRL + Comma (PC).
- Click the 'Link/MIDI' tab.
- In the 'Control Surface' drop-down menu select 'SL MkIII'.
- Next, select 'Novation SL MkIII' in the drop-down menus of both the Input and Output options.
- Finally, in the 'MIDI Ports' section set 'Track', 'Sync' and 'Remote' to 'On' for 'Novation SL MkIII (SL MkIII MIDI). Be sure to do this for both Input and Output options. Additionally, switch Track to 'On' for both 'SL_MkIII Input' and 'SL-MkIII Output'.
Live Set Navigation
- Selection Ring
With the SL MkIII correctly connected to an Ableton Live Set you will see a 'selection ring' (red rectangle) in Live's Session View. After pressing the InControl button (if you have not already done so), the names of tracks currently inside this selection ring will display at the bottom of the SL MkIII's screens ('Bass' or '7-Audio' for instance). The SL MkIII can control these tracks in various ways: Pads represent and control the clips of tracks enclosed in the selection ring, faders control track volume, and rotary knobs above the screens alter Live device parameters, to name a few of InControl's features. Read on to learn much more about controlling Ableton Live from your SL MkIII. - Track Selection
One way to navigate through the tracks in your Ableton Live Set is with the Track Left and Track Right buttons (shown above, lit green). Press the right Track button to select tracks to the right of the currently selected track; press the left Track button to select tracks to the left. Selecting a track does not arm it, but does allow you to view or modify its devices. (See the section 8x2 Soft Buttons to learn about track arming).
Since the red selection ring is just a visual aid, you can quickly move beyond its scope by pressing the right/left Track buttons. When you do this the selection ring is 'dragged' along to include the newly-selected track. Note that the selection ring can only contain eight tracks at a time.
Holding 'Shift' while pressing the Track Left and Track Right buttons will cause the selection ring to 'jump' in eight-track increments (as track availability allows). A selected track will remain in the same relative position when jumping by eight tracks. For example, if you have selected the second track and you then jump the selection ring eight tracks to the right, the selected track will become the second track inside the new ring position, in other words, the tenth track.
When your selected track is the last track in a given direction, the Track button for that direction will become dark. This indicates that you cannot go further in that direction. For example, if Live's track number one is currently selected (e.g. '1 Simpler'), the left Track button will not light green since there are no tracks to the left. - Up and Down Buttons
Press the Up and Down arrow buttons (left of the pads) to move vertically in Ableton Live's Session View. These buttons move the selection ring up or down by one scene at a time and allow you to launch, record or stop many more clips and scenes in your Live Set. - Soft Keys
Another way to directly select a track/s within the selection ring is to use the eight soft keys (beneath the screens and above the pads). This is sometimes faster than using the Track Left and Track Right buttons. As you would expect, these soft keys correspond to the tracks in order (left to right). For example, if tracks 1-8 are within the selection ring, the left-most soft button selects track 1, the next from the left selects track 2, and so on. - The Screen Label
The screen label (highlighted with a red box in the image above) provides a quick overview of which controls currently display across the screens. When a Live device changes, or the parameters of a device are banked through, this label will update to indicate what you can currently control. (More on viewing and editing Live devices in the Options section). - Control Notifications
At the bottom of the notification screen is an area that gives you instant feedback on the changes you make to certain parameters. This feedback is a 'pop-up' style notification only appears when making changes and disappears again after a brief time. In the image above, the track containing the instrument 'TR-909' has had its input monitoring mode changed to 'In'. This notification area will also show volume changes when a fader is moves.
Pads
- Controlling Clips and Scenes (formerly Clip and Scene Launch/Stop)
By default, the SL MkIII's 8x2 pads represent clips in Ableton Live's Session View. More specifically, the pads show which clips - or empty clip slots - are within the selection ring, and therefore which clips you can record, launch or stop.
If a track is armed, available clip slots turn pads red. Press these red pads to begin recording to them. Press them again to stop clip recording, and start playback.
A clip that has been recorded, and is either ready to launch or playing, will pulse green; a clip that has been recorded but is idle will take the colour of its track. In other words, press any coloured pad (assuming it is not bright red) to launch playback.
[Tip: When the colour of an armed track is red it is naturally hard to differentiate between clip slots available for recording, and already recorded clips since both cases render pads red. In such situations, we recommend looking at your computer, where Live should resolve any confusion].
Press the play button (green right arrow button) to the right of a pad row to launch a scene (i.e. all clips in the same row). This play button, as well as available clips, will flash until the scene successfully launches.
To stop a clip on an unarmed track, press the dim (unlit) pad above or below on the same track.
To stop a clip on an armed track, or to stop all clips, first hold the Shift button (upper-left of the controller). This turns the lower row of pads and the lower scene launch button red. Pressing a red pad will stop the clip on that track, and pressing the red play button will stop all playing clips (equivalent to how the 'stop all clips' button acts in Live). - Grid
Just above and to the left of the pads lies the Grid button. Pressing Grid changes the pads to a 'drum view'. Also, notice how the Grid button turns green. This view is ideal for playing Ableton Live's Drum Racks since it allows you to use pads to play drums or samples, which some producers find to be more 'drummer-friendly' than using a keyboard.
The leftmost pad on the bottom row triggers C1. The pad to its right triggers C#2, and so on until you reach the top row's rightmost pad, which triggers D#2. To access lower or higher octaves click the green up/down buttons directly left of the pad area.
With a Drum Rack on a track, pads containing audio samples will appear yellow. The last played pad will be blue. Muted pads turn orange, while pads in solo mode take on a purple colour. Finally, empty pads will be dark.
Press the Grid button again to return pads to their clip-launch capabilities.
8x2 Soft Buttons
The 8x2 soft buttons area (above the faders) allow you to change the state of your tracks quickly. The button labels (highlighted with a red box below) show on the rightmost screen the current function of the soft buttons.
- Mute and Solo
Looking again at the above image, you will see that the buttons are functioning according to bank 1 (the default) where the top row (the yellow buttons) mutes and unmutes tracks, and the lower row (the dark blue buttons) toggles solo on and off. When muted, the yellow soft buttons will become a dark yellow; conversely, when soloing a track the corresponding soft button will become bright blue. - Monitor and Record Arm
You can move to bank 2 by pressing the green down arrow to the right of the 8x2 soft button area. Now, the rightmost screen will indicate that the top row of soft buttons (again in yellow) cycles through MIDI/Audio Monitoring options. By default, Ableton Live tracks are set to 'Auto', but pressing the top row of buttons will allow you to change monitoring to 'Off' or 'In'. The bottom row (dark red) controls the 'record arm' option. When you set a track to 'Monitor In' its soft button turns ice blue, and when you record arm a track its soft button becomes bright red.
Options
Options View provides functionality for viewing and editing various track parameters as well as displaying device chains and selecting from the devices in the chain.
Within InControl mode, pressing the Options button opens the Options View.
- Displaying Device Chains and Device Selection
Upon entering the Options View, the upper part of the screens will show the device chain on the currently selected track. These devices may be Ableton instruments or audio/MIDI effects, or third-party ones. - Click a pink pad to select the devices you wish to control. This turns the pad bright pink and selects the name of the device on the screen above.
- Press the Options button again to return to the default InControl View (where pads control clips).
- Now, the first eight parameters for the device you just selected are displayed on the screens and moving the rotary knobs above will adjust those parameters.
The images above show an Ableton Live device chain and the corresponding SL MkIII view after clicking the Options button. In this case, we have selected Limiter. This is confirmed by the 'blue hand' symbol on the Ableton Live screen, and by the bright pink pad and highlighted device name on the SL MkIII screen.
The image above shows the selected device's controls displayed in the screens after choosing the Limiter and exiting the Options View.
If you want to select another device (coming from elsewhere in Options, like Pan) the first soft key under the screens called 'DevceSlct' will get you back to the Device Chains and Device Selection View. - Device Parameter Banking
Of course, the SL MkIII allows you to modify device parameters beyond the first eight (most Live devices, after all, contain more than eight parameters). With a device selected, pressing the up or down arrow buttons (to the left of the screens) will switch through available 'banks' of parameters. As per usual, the rotary knobs above will modify these new parameters. - Displaying and Editing Pan Controls
After pressing the Options button, select the yellow 'Pan' button to access the pan controls for the eight tracks within the selection ring. - Displaying and Editing Send Controls
After pressing the Options button, the green soft key selects the Sends View. The screens will display a single send control for each track shown on the screens. To bank through the available sends, click the up and down arrows to the left of the screen. Raise or lower the send amount with the corresponding knob (above the send you wish to edit).
Faders
Faders control track volumes in your Ableton Live set. These eight faders correspond to the eight tracks contained within the selection ring.
- LED Indicators
The LEDs above the faders give visual feedback of the volume settings on the selected tracks. Since you can use the faders on multiple tracks by moving the selection ring (see Live Set Navigation above), the actual position of the physical faders may not match the faders on screen. The LEDs provide a solution by brightening and dimming if the volume on an Ableton Live track is higher or lower, respectively.
Undo, Redo, Metronome and Capture
While in InControl, holding Shift turns the first three soft buttons above the pad area into Undo, Redo and Click controls. As expected, Undo and Redo perform those functions on your Live Set's most recent actions. Pressing Click toggles Live's metronome on or off.
Holding Shift will also display a Capture button if you recently played - but did not record - MIDI notes. Press this last soft button under the screens to grab the MIDI you just played and place it in a clip, even though you were not recording in the traditional sense.
Logic Pro X
Installation
- From the Logic Pro X menu choose 'Control Surfaces', then 'Setup'.
- Choose 'New' followed by 'Install'.
- Choose Novation 49SL MkIII or Novation 69SL MkIII and click 'Add'.
- Select the SL MkIII InControl port for both the output and input port
- Close the control surface window.
Track Select
To select a track, press the button under the track name. It will highlight to indicate that you have chosen it.
Pans
To control track pans press the Options button and choose 'Pans'. From this view, the eight knobs will control the pans for eight tracks at a time.
Volume
To control track volumes, move the faders. The LED above the fader indicates the current track volume.
Sends
To control track sends, press the Options button followed by 'Sends'. The eight knobs will then control Bus levels in Logic. Press the up and down arrows to the left of the screens to change the selected send.
Smart Controls
Logic uses smart controls to choose eight parameters for the selected plug-in on a chosen track. To control these, press the Options button followed by 'Smart'. From this view, the eight knobs will control the eight parameters assigned by Logic to be smart controls for the selected plug-in.
Shortcuts
Press the Options button followed by 'Shortcut' to access shortcuts. These include:
- Undo
- Redo
- Count In
- Toggle Logic's count in on/off
- Metronome
- Toggle Logic's metronome on/off
Mute/Solo
The soft buttons above the faders control mute and solo for eight tracks. When you solo a track, the muted tracks will flash on and off.
Record Arm/Input Monitoring
Press the down button to the right of the soft buttons (above the faders) to change the buttons from mute/solo to record arm/input monitoring.
Transport
The SL MkIII's Transport buttons control Logic's transport. These include:
- Rewind
- Fast-forward
- Stop
- Play
- Cycle on/off
- Record
Reason
Reason Setup
After starting Reason you can easily set up the SL MkIII. Connect the SL MkIII to your computer via USB, then go to Preferences > Control Surfaces and click 'the Auto-detect Surfaces' button. A dialogue window with a progress bar will appear, and once the process is complete the SL MkIII will appear in the list. If 'Use with Reason' is checked, and 'Novation SL MkIII SL MkIII From DIN 1' is enabled, you should be ready to start controlling Reason with the SL MkIII.
Overview
The SL MkIII can control all the Instruments, Effects and Utilities in a Reason Rack (see picture below), as well as move between tracks.
Instruments
Every time you load a new Instrument (and accordingly create a new MIDI track) the SL MkIII will automatically be assigned to that Instrument.
Control Layout
With the SL MkIII's InControl mode you can take advantage of the following features in Reason:
- Track Left and Track Right buttons - Use these buttons to move between tracks in Reason's Sequencer.
- Rotary Knobs - These can modify various parameters for Instruments, Effects, Utilities and Players. Active knobs are displayed on the screens with parameter name and value.
- Pads - The SL MkIII's pads can control various parameters in Reason. When using the Kong Drum Designer Instrument, pads select Kong's individual drum sounds. The drum's main parameters then appear on the screens, and the rotary knobs can adjust those parameter values.
Effects and Utilities
To control Effects and Utilities from the SL MkIII, you need to create an audio track for it. To do so, find the Effect or Utility in the Rack section, right + click (PC) or Ctrl + click (Mac) on the device (e.g. Warm Echo) and select 'Create Track for device name'. At this point a new track will appear in Reason's Sequencer; you can now select this new track using the Track buttons on the SL MkIII. When you select an Effect or Utility its controls will appear in the SL MkIII's screens, which you can then modify with the above knobs.

- Soft Buttons 1-24 - You can use these buttons to navigate inside Reason's devices. For Redrum, the eight soft buttons under the screens select channels 1 through 8; after you choose a Redrum channel, you can adjust its parameters (pitch, pan, sends etc) with the knobs above the screens. With Mixer 14:2, however, the soft but tons above the SL MkIII's faders select mixer channels, at which point you can turn knobs above the screens to adjust parameters like volume, bass, treble, and so on.
- Faders - These control device parameters. When a fader is used to change a parameter value, a notification on the fifth screen (from the left) will display the parameter name and value. For example, if you have selected the Europa Synthesizer the first fader (from the left) will raise and lower the volume of Oscillator 1. 'Osc1 Level' will appear on the fifth screen, along with a decibel value.
- Transport buttons - These buttons on the far-right of the SL MkIII control Reason's transport, including Rewind, Fast Forward, Stop, Play and Record. You can also use the SL MkIII's Loop button to turn Reason's Sequencer Loop On/Off.
- Option button - This toggle's Reason's metronome On/Off. It will light white when active, and orange when off.
- Up/Down buttons - The up/down buttons directly left of the pads change presets when an Instruments, Effects, or Utilities are selected.
- Pitch Wheel - The SL MkIII's Pitch Wheel can be used to modify the pitch of Reason's Instruments.
- Mod Wheel - The SL MkIII's Modulation Wheel can be used to affect various parameters of selected Reason devices. A common destination for the Mod Wheel is an Instrument's filter frequency.
- Sustain Pedal - After plugging a sustain pedal into the SL MkIII's 'Sustain' port it can be used to affect Reason parameters.
- Keyboard - The SL MkIII's keyboard allows you to play Reason's various Instruments.

The normal operation of this product may be affected by a strong electrostatic discharge (ESD). In the event of this happening, simply reset the unit by removing and then replugging the USB cable. Normal operation should return.
Copyright 2016 STMicroelectronics
License
Redistribution and use in source and binary forms, with or without modification, are permitted provided that the following conditions are met:
- Redistributions of source code must retain the above copyright notice, this list of conditions and the following disclaimer.
- Redistributions in binary form must reproduce the above copyright notice, this list of conditions and the following disclaimer in the documentation and/or other materials provided with the distribution.
- Neither the name of STMicroelectronics nor the names of its contributors may be used to endorse or promote products derived from this software without specific prior written permission.
THIS SOFTWARE IS PROVIDED BY THE COPYRIGHT HOLDERS AND CONTRIBUTORS "AS IS" AND ANY EXPRESS OR IMPLIED WARRANTIES, INCLUDING, BUT NOT LIMITED TO, THE IMPLIED WARRANTIES OF MERCHANTABILITY AND FITNESS FOR A PARTICULAR PURPOSE ARE DISCLAIMED. IN NO EVENT SHALL THE COPYRIGHT HOLDER OR CONTRIBUTORS BE LIABLE FOR ANY DIRECT, INDIRECT, INCIDENTAL, SPECIAL, EXEMPLARY, OR CONSEQUENTIAL DAMAGES (INCLUDING, BUT NOT LIMITED TO, PROCUREMENT OF SUBSTITUTE GOODS OR SERVICES; LOSS OF USE, DATA, OR PROFITS; OR BUSINESS INTERRUPTION) HOWEVER CAUSED AND ON ANY THEORY OF LIABILITY, WHETHER IN CONTRACT, STRICT LIABILITY, OR TORT (INCLUDING NEGLIGENCE OR OTHERWISE) ARISING IN ANY WAY OUT OF THE USE OF THIS SOFTWARE, EVEN IF ADVISED OF THE POSSIBILITY OF SUCH DAMAGE.
BY INSTALLING COPYING, DOWNLOADING, ACCESSING OR OTHERWISE USING THIS SOFTWARE OR ANY PART THEREOF (AND THE RELATED DOCUMENTATION) FROM STMICROELECTRONICS INTERNATIONAL N.V, SWISS BRANCH AND/OR ITS AFFILIATED COMPANIES (STMICROELECTRONICS), THE RECIPIENT, ON BEHALF OF HIMSELF OR HERSELF, OR ON BEHALF OF ANY ENTITY BY WHICH SUCH RECIPIENT IS EMPLOYED AND/OR ENGAGED AGREES TO BE BOUND BY THIS SOFTWARE LICENSE AGREEMENT.
Under STMicroelectronics' intellectual property rights, the redistribution, reproduction and use in source and binary forms of the software or any part thereof, with or without modification, are permitted provided that the following conditions are met:
- Redistribution of source code (modified or not) must retain any copyright notice, this list of conditions and the disclaimer set forth below as items 10 and 11.
- Redistributions in binary form, except as embedded into microcontroller or microprocessor device manufactured by or for STMicroelectronics or a software update for such device, must reproduce any copyright notice provided with the binary code, this list of conditions, and the disclaimer set forth below as items 10 and 11, in documentation and/or other materials provided with the distribution.
- Neither the name of STMicroelectronics nor the names of other contributors to this software may be used to endorse or promote products derived from this software or part thereof without specific written permission.
- This software or any part thereof, including modifications and/or derivative works of this software, must be used and execute solely and exclusively on or in combination with a microcontroller or microprocessor device manufactured by or for STMicroelectronics.
- No use, reproduction or redistribution of this software partially or totally may be done in any manner that would subject this software to any Open Source Terms. "Open Source Terms" shall mean any open source license which requires as part of distribution of software that the source code of such software is distributed therewith or otherwise made available, or open source license that substantially complies with the Open Source definition specified at www.opensource.org and any other comparable open source license such as for example GNU General Public License (GPL), Eclipse Public License (EPL), Apache Software License, BSD license or MIT license.
- STMicroelectronics has no obligation to provide any maintenance, support or updates for the software.
- The software is and will remain the exclusive property of STMicroelectronics and its licensors. The recipient will not take any action that jeopardizes STMicroelectronics and its licensors' proprietary rights or acquire any rights in the software, except the limited rights specified hereunder.
- The recipient shall comply with all applicable laws and regulations affecting the use of the software or any part thereof including any applicable export control law or regulation.
- Redistribution and use of this software or any part thereof other than as permitted under this license is void and will automatically terminate your rights under this license.
- THIS SOFTWARE IS PROVIDED BY STMICROELECTRONICS AND CONTRIBUTORS "AS IS" AND ANY EXPRESS, IMPLIED OR STATUTORY WARRANTIES, INCLUDING, BUT NOT LIMITED TO, THE IMPLIED WARRANTIES OF MERCHANTABILITY, FITNESS FOR A PARTICULAR PURPOSE AND NONINFRINGEMENT OF THIRD PARTY INTELLECTUAL PROPERTY RIGHTS, WHICH ARE DISCLAIMED TO THE FULLEST EXTENT PERMITTED BY LAW. IN NO EVENT SHALL STMICROELECTRONICS OR CONTRIBUTORS BE LIABLE FOR ANY DIRECT, INDIRECT, INCIDENTAL, SPECIAL, EXEMPLARY, OR CONSEQUENTIAL DAMAGES (INCLUDING, BUT NOT LIMITED TO, PROCUREMENT OF SUBSTITUTE GOODS OR SERVICES; LOSS OF USE, DATA, OR PROFITS; OR BUSINESS INTERRUPTION) HOWEVER CAUSED AND ON ANY THEORY OF LIABILITY, WHETHER IN CONTRACT, STRICT LIABILITY, OR TORT (INCLUDING NEGLIGENCE OR OTHERWISE) ARISING IN ANY WAY OUT OF THE USE OF THIS SOFTWARE, EVEN IF ADVISED OF THE POSSIBILITY OF SUCH DAMAGE.
- EXCEPT AS EXPRESSLY PERMITTED HEREUNDER, NO LICENSE OR OTHER RIGHTS, WHETHER EXPRESS OR IMPLIED, ARE GRANTED UNDER ANY PATENT OR OTHER INTELLECTUAL PROPERTY RIGHTS OF STMICROELECTRONICS OR ANY THIRD PARTY.
Novation
A division of Focusrite Audio Engineering Ltd.
Windsor House,
Turnpike Road,
Cressex Business Park,
High Wycombe, Bucks, HP12 3FX.
United Kingdom
Tel: +44 1494 462246
Fax: +44 1494 459920
E-mail: sales@novationmusic.com
Web: www.novationmusic.com
Trademarks
The Novation trade mark is owned by Focusrite Audio Engineering Ltd. All other brand, product and company names and any other registered names or trade marks mentioned in this manual belong to their respective owners.
Disclaimer
Novation has taken all possible steps to ensure that the information given here is both correct and complete. In no event can Novation accept any liability or responsibility for any loss or damage to the owner of the equipment, any third party, or any equipment which may result from use of this manual or the equipment which it describes. The information provided in this document may be modified at any time without prior warning. Specifications and appearance may differ from those listed and illustrated.
COPYRIGHT AND LEGAL NOTICES
Novation and Circuit are trade marks of Focusrite Audio Engineering Limited.
Circuit Mono Station is a trade mark of Focusrite Audio Engineering Limited.

2017 © Focusrite Audio Engineering Limited. All rights reserved.
VideosNovation // SL MKIII - Deep Dive Video
Documents / Resources
References
Download manual
Here you can download full pdf version of manual, it may contain additional safety instructions, warranty information, FCC rules, etc.
Advertisement


![Recording Equipment Novation Launchpad Mini [MK3] User Manual](https://static-data2.manualslib.com/product-images/282/1649453/60x60/novation-launchpad-mini-mk3-.jpg)

Need help?
Do you have a question about the SL MkIII and is the answer not in the manual?
Questions and answers