
Subscribe to Our Youtube Channel
Related Manuals for Apera Instruments PC60-Z


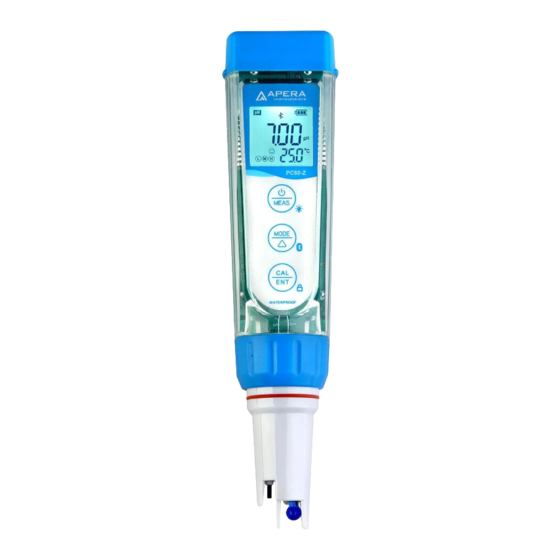
Summary of Contents for Apera Instruments PC60-Z
- Page 1 PC60-Z Smart Water Tester Cond. Salinity Resistivity Temp. User Manual 9001 : 2015 IP67 APERA INSTRUMENTS, LLC aperainst.com - 1 -...
-
Page 2: Table Of Contents
Ը The latest PC60-Z Tester comes with an upgraded probe structure equipped with a sensor shield that prevents glass bulb breakage from accidental collisions (see picture below). Users can remove the shield when cleaning the sensor and put it back on after cleaning. -
Page 3: Introduction
1. Introduction Thank you for choosing Apera Instruments PC60-Z Smart Multi-Parameter Water Tester. This product is designed for accurate measurement of pH, conductivity, TDS, salinity, resistivity, and temperature for general water solution applications such as pools and spas, hydroponics, water treatment, aquarium, environment monitoring, etc. -
Page 4: What's In The Kit
Conductivity Calibration Solutions Calibration Solutions Lanyard Storage Solution pH Calibration Vials PC60-Z Tester Conductivity Calibration Vials 3. Keypad Functions Short press: < 2 seconds Long press: > 2 seconds Battery Cap 1. When turned off, short press to turn on the tester; long press to enter parameter setting. -
Page 5: Preparation Before Use
4. Preparation before Use 5.1 Pull out the battery insulation slip, and take off the probe cap. 5.2 Rinse off the probe in pure water (preferably distilled or deionized water. RO water or tap water is the alternative) , then shake off excess water. 5.3 Perform calibration. -
Page 6: Ph Calibration
6. pH Calibration 6.1 Short press to turn on the meter; rinse the probe in pure water. Shake off excess water. 6.2 Pour buffer solutions into the corresponding calibration vials (to about half volume of the vials). 6.3 Long press to enter calibration mode (screen turns green);... - Page 7 6.8 For the self-diagnosis information, please refer to the table below: Symbol Self-Diagnosis information Potential problems and how to fix 1. Make sure the probe is fully immersed in the calibration solution. 2. Check if calibration solution is expired or polluted. 3.
-
Page 8: Ph Measurement
7. pH Measurement 7.1 How to Take pH measurements Short press to turn on the tester. Rinse the probe in pure water, shake off excess water. Insert the probe in your sample solution, make a quick stir and hold still. Record the reading when it is stabilized ( comes up and stays on screen). - Page 9 8.2 Conductivity Calibration Notes The tester can calibrate 84μS, 1413 μS and 12.88 mS conductivity calibration solution. User can conduct 1 to 3 points calibration. Refer to the table below. Calibration Indication Icon Calibration Standards Measuring Range 84 μS 0 - 200 μS 1413 μS 200 - 2000 μS 12.88 mS...
-
Page 10: Conductivity Measurement
9. Conductivity Measurement 9.1 How to Measure Conductivity, TDS, Salinity, and Resistivity Short press to turn on the tester. Rinse the probe in pure water, shake off excess water. Insert the probe in your sample solution, make a quick stir and hold still. Record the reading when it is stabilized ( comes up and stays on screen). -
Page 11: Orp Measurement
(ORP60-DA) needs to be installed to be able to measure ORP. 2) Power on the PC60-Z tester, unscrew the original probe, and install the ORP60-DA probe, then the tester will automatically switch to ORP measurement mode (Refer to Section 16 for how to replace a probe). -
Page 12: Parameter Settings
13. Parameter Settings 13.1 Table of Settings Factory Symbol Parameter Setting Contents Content Default Temperature Unit ˚C – ˚F ˚F Auto. HOLD 5-20 seconds – Off Automatic Backlight Off 1-8 minutes – Off Automatic Power Off 10-20 minutes – Off pH Buffer Series Selection USA –... -
Page 13: Technical Specifications
4) Auto. Power off (P04) – The auto. power off time can be set to 10 to 20 minutes. For example, if 15 minutes is set, the meter will automatically shut down after 15 minutes if no operation; when “Off” is set, the auto. power off function will be turned off. Long press to manually shut down the meter. -
Page 14: Icons And Functions
5) Screw on the probe ring tightly. Soak the probe in 3M KCL for 5-15 minutes. Then perform calibration before testing. The replacement probes that are compatible with PC60-Z: Ը PC60-DE (Default pH/conductivity probe), PH60-DE (Regular pH probe for water solutions), Ը... -
Page 15: Troubleshooting Guide
17. Troubleshooting Guide Trouble Potential Reasons How to Fix Power on the tester, calibrate pH 7 first, then pH 4. After pH 4 is Incorrect calibration calibrated, if you want to calibrate pH 7 again, you need to reboot order the tester. -
Page 16: Warranty
We warrant this instrument to be free from defects in material and workmanship and agree to repair or replace free of charge, at option of APERA INSTRUMENTS, LLC, any malfunctioned or damaged product attributable to responsibility of APERA INSTRUMENTS, LLC for a period of TWO YEARS (SIX MONTHS for the probe) from the delivery.
Need help?
Do you have a question about the PC60-Z and is the answer not in the manual?
Questions and answers