Advertisement
Quick Links
ENGLISH
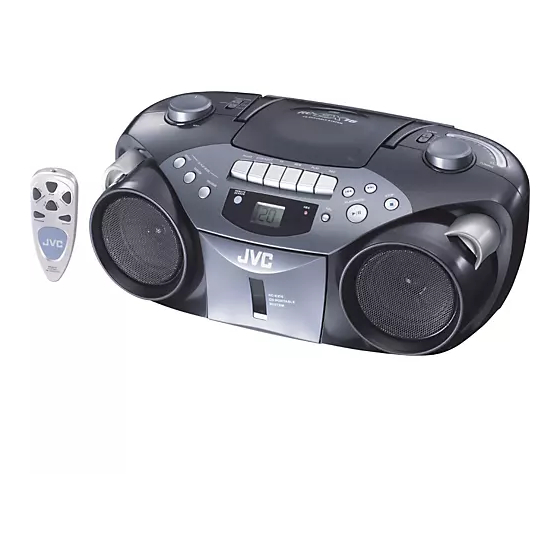
CD PORTABLE SYSTEM
RC-EX16B
For Customer Use:
Enter below the Model No. and Serial No.
which are located either on the rear, bot-
tom or side of the cabinet. Retain this
information for future reference.
Model No.
Serial No.
INSTRUCTIONS
Thank you for purchasing this JVC product.
Please read these instructions carefully before starting operation to be sure to
obtain optimum performance and a longer service life from the unit.
0205NSMBICORI
EN ©2005 Victor Company of Japan, Limited
SAFETY PRECAUTIONS
CAUTION
RISK OF ELECTRIC SHOCK
DO NOT OPEN
DO NOT EXPOSE TO RAIN OR MOISTURE
NE PAS EXPOSER À LA PLUIE NI À L'HUMIDITÉ
ATTENTION:RISQUE DE CHOC ELECTRIQUE, NE PAS OUVRIR
The lightning flash with arrowhead symbol, within
an equilateral triangle is intended to alert the user
to the presence of uninsulated "dangerous voltage"
within the product's enclosure that may be of
sufficient magnitude to constitute a risk of electric
shock to persons.
The exclamation point within an equilateral triangle
is intended to alert the user to the presence of
important operating and maintenance (servicing)
instructions in the literature accompanying the
appliance.
For U.S.A.
This equipment has been tested and found to comply with the limits for a Class B digital device, pursuant to
part 15 of the FCC Rules.
These limits are designed to provide reasonable protection against harmful interference in a residential
installation.
This equipment generates, uses and can radiate radio frequency energy and, if not installed and used in
accordance with the instructions, may cause harmful interference to radio communications. However, there
is no guarantee that interference will not occur in a particular installation. If this equipment does cause
harmful interference to radio or television reception, which can be determined by turning the equipment off
and on, the user is encouraged to try to correct the interference by one or more of the following measures:
Reorient or relocate the receiving antenna.
Increase the separation between the equipment and receiver.
Connect the equipment into an outlet on a circuit different from that to which the receiver is connected.
Consult the dealer or an experienced radio/TV technician for help.
For Canada
CAUTION: TO PREVENT ELECTRIC SHOCK, MATCH WIDE BLADE OF PLUG TO WIDE SLOT, FULLY INSERT.
THIS DIGITAL APPARATUS DOES NOT EXCEED THE CLASS B LIMITS FOR RADIO NOISE EMISSIONS FROM
DIGITAL APPARATUS AS SET OUT IN THE INTERFERENCE-CAUSING EQUIPMENT STANDARD ENTITLED
"DIGITAL APPARATUS," ICES-003 OF THE DEPARTMENT OF COMMUNICATIONS.
WARNING: TO REDUCE THE RISK OF FIRE OR ELECTRIC SHOCK,
DO NOT EXPOSE THIS APPLIANCE TO RAIN OR MOISTURE.
Caution ––
OFF switch!
Disconnect the mains plug to shut the power off completely. The switch in any position does not disconnect
the mains line. The power cannot be remote controlled.
CAUTION
To reduce the risk of electrical shocks, fire, etc.:
1. Do not remove screws, covers or cabinet.
2. Do not expose this appliance to rain or moisture.
IMPORTANT FOR LASER PRODUCTS
1. CLASS 1 LASER PRODUCT
2. CAUTION: Do not open the top cover. There are no user serviceable parts inside the
unit; leave all servicing to qualified service personnel.
3. CAUTION: Visible and invisible laser radiation when open and interlock failed or
defeated. Avoid direct exposure to beam.
4. REPRODUCTION OF LABEL: CAUTION LABEL, PLACED INSIDE THE UNIT.
CAUTION -
INVISIBLE LASER RADIATION WHEN OPEN AND INTERLOCKS
DEFEATED. AVOID EXPOSURE TO BEAM.
VORSICHT !
UNSICHTBARE LASERSTRAHLUNG TRITT AUS, WENN DECKEL
GEÖFFNET UND WENN SICHERHEITSVERRIEGELUNG
ÜBERBRÜCKT IST. NICHT DEM STRAHL AUSSETZEN!
VARNING -
OSYNLIG LASERSTRÅLNING NÄR DENNA DEL ÄR ÖPPNAD OCH
SPÄRR ÄR URKOPPLAD STRÅLEN ÄR FARLIG.
ADVARSEL -
USYNLIG LASERSTRÅLING VED ÅBNING NÅR
SIKKERHEDSAFBRYDERE ER UDE AF FUNKTION. UNDGÅ
UDSÆTTELSE FOR STRÅLING.
GETTING STARTED
POWERING UP
This CD portable system operates on battery or AC power.
Antenna
BATTERY POWER
Insert six R20 (SUM-1)/D (13D)-sized batteries (not supplied) and
you can take your system just about anywhere. Open the battery
compartment door on the back of the unit by pressing down the
two tabs and pulling out the cover. Insert batteries as marked on
the back.
Important Battery Information
Battery compartment
• If you are not going to use your system for a month or more, be
sure to remove batteries because they can leak and cause
damage.
• Dispose of batteries in the proper manner, according to federal,
state, and local regulations.
• Discard leaky batteries immediately. Leaking batteries can
cause skin burns or other personal injury.
AC POWER
Plug the power supply cord into the Ó AC IN jack on the back of the unit, and into an AC power outlet.
CAUTIONS:
1. ONLY USE JVC POWER CORD PROVIDED WITH THIS UNIT TO AVOID MALFUNCTION OR DAMAGE
TO THE UNIT. REMOVE BATTERIES WHEN USING THE POWER CORD.
2. BE SURE TO UNPLUG THE POWER CORD FROM THE OUTLET WHEN GOING OUT OR WHEN THE
UNIT IS NOT IN USE FOR AN EXTENDED PERIOD OF TIME.
USING HEADPHONES
Connect commercially available headphones to the PHONES jack on the rear of the main unit. While the
headphones are connected, the speakers do not produce any sound. Before connecting the headphones, make
sure to turn down the sound volume.
ANTENNAS
The AM antenna is built in, so adjusting the position of the unit may help AM reception. The FM telescopic
LVT1374-001A [J]
antenna on the back of the unit can be extended and rotated for better FM reception.
GENERAL CONTROLS
FUNCTION switch – Move the switch to select which part of this system you want to select – TUNER, TAPE or
CD.
VOLUME – Turn the volume knob to increase or decrease the volume to desired level.
HBS – Press so that the HBS indicator lights. You can enjoy powerful bass sound with the Hyper-Bass Sound
effect.
POWER OFF – Move FUNCTION to
OFF/TAPE with no cassette button pressed, to turn the unit off.
USING THE RADIO
TUNING IN RADIO STATIONS
Move FUNCTION to TUNER to turn the radio on.
• Set BAND to AM or FM.
• Tune in desired station by turning the TUNING knob.
• To turn off the radio, move FUNCTION to
OFF/TAPE.
BEAT CUT/FM MODE SWITCH
• When recording an AM broadcast
When recording an AM broadcast, beats may occur. If this happens, set the switch
to "1" or "2."
• Changing the FM reception mode
When an FM stereo broadcast is hard to receive or noisy, set the switch to "MONO."
Reception improves.
To restore the stereo effect, switch to "STEREO."
USING THE TAPE
PAUSE
– Press to interrupt tape play or record mode. Press a second time to resume tape play or tape record
mode.
STOP/EJECT
– Press to stop the current tape activity, or to open the cassette compartment door when no
buttons are active.
FF
– In stop mode, press to advance the tape toward the end. (When the tape reaches the end, press
STOP/EJECT
to release the depressed button.)
REW
– In stop mode, press to rewind the tape toward the beginning. (When the tape reaches the end, press
STOP/EJECT
to release the depressed button.)
PLAY
– Press to play cassettes.
REC
– Press to record from the radio or CD player.
PLAYING A CASSETTE TAPE
1. Move FUNCTION to
OFF/TAPE.
2. Press STOP/EJECT
to open the cassette compartment door.
3. Insert a cassette tape into the compartment with the exposed part of the tape facing up and the side you want
to play facing toward you.
4. Close the door securely.
5. Press REW
or FF
to move the tape to the desired starting point.
6. Press PLAY
to begin playing the tape. The cassette tape plays until it reaches the end of the side, then it
automatically stops.
RECORDING ON CASSETTE TAPES
You can record from the radio or the CD player.
For best recording, use normal bias tape.
It should be noted that it may be unlawful to re-record pre-recorded tapes, records, or discs without
the consent of the owner of copyright in the sound or video recording, broadcast or cable program
and in any literary, dramatic, musical, or artistic work embodied therein.
ERASE PROTECTION
When you record new material, the cassette deck records over
whatever is on a tape. To protect a tape from accidental erasure,
break off one or both plastic tabs (one for each tape side) on the
top of the cassette tape. If you decide later to record on the tape,
seal the hole with a piece of cellophane tape.
WARNING
A little bit of slack in your tape can cause scratches on the tape, or worse yet, the tape
could break. If you notice some slack in the tape, use a pencil to tighten it up before you
insert it in the tape deck.
TIP
The use of tapes longer than 120 minutes is not recommended, since characteristic deterioration may occur and
these tapes easily jam in the pinch-roller and the capstan.
RECORDING FROM THE RADIO
1. Insert a cassette tape into the tape deck and close the door.
2. Move FUNCTION to TUNER and select a radio station.
3. Press REC
to begin recording. REC
and PLAY
BEAT CUT/FM MODE switch
4. Press STOP/EJECT
to end recording.
5. To turn off the radio, slide FUNCTION to
OFF/TAPE.
RADIO RECORDING TIP
• To temporarily pause the recording, press PAUSE
recording.
SYNCHRONIZED RECORDING FROM A CD
AC IN jack
1. Insert a cassette tape into the tape deck and close the door.
2. Move FUNCTION to CD.
3. Insert the CD you want to record into CD compartment.
4. Select the track you want to record by pressing
PHONES jack
5. Press REC
to start recording.
Note that the tape continues to run when the CD finishes playing, or the CD continues to play when the tape
reaches the end.
TIP
Using the PAUSE
button on the cassette deck instead of the STOP/EJECT
interrupt recording gives you a much cleaner sound recording.
U
USING THE CD
FUNCTION
CD door
REPEAT
RANDOM
REMOTE
SENSOR
PROGRAM
LOADING A CD
1. Move FUNCTION to CD; "– –" flashes, then "no" appears in the display if no CD is loaded.
2. Press ) PUSH to open the CD door.
3. Place a CD into the tray with the label facing up.
4. Close the CD door. Then the total number of tracks appears.
5. To remove the CD, press ) PUSH, grasp the CD by its edges, and carefully pull it out.
PLAYING A CD
Press PLAY/PAUSE
to play all the tracks in order starting with track 1. The current track number appears in
the display.
Note: Press PLAY/PAUSE
to temporarily stop the CD. The
display. Press PLAY/PAUSE
again to resume playing the CD.
• Adjust VOLUME to a comfortable level.
• Press STOP 7 to stop playing the CD. Wait a few seconds for the CD to stop turning, then press ) PUSH to
open the CD compartment door and remove the CD.
AUTOMATIC SEARCH
Automatic search lets you quickly locate the beginning of any track on the CD, including the track currently
playing. If the CD is playing:
• Press
(skip/search) once to return to the beginning of the current track, press twice to return to the
BEAT CUT
beginning of the previous track.
1
2
• Press
(skip/search) to skip to the beginning of the next track.
STEREO
MONO
If the CD is stopped, repeatedly press
(skip/search) or
FM MODE
of the track you want to play, then press PLAY/PAUSE
TRACK SEARCH
• In play mode, press and hold
(skip/search) to move forward through a track at high speed.
• In play mode, press and hold
(skip/search) to move backward through a track at high speed.
REPEAT
The REPEAT button allows you to repeat one track (REP 1) or all tracks (REP ALL). To scroll through the
choices, continuously press and release REPEAT and check the display to see which choice you have selected.
The following chart illustrates how REPEAT works in various modes.
NORMAL
REP 1
RANDOM
Press RANDOM so that "RAND" appears in the display. Start play by pressing PLAY/PAUSE
are played in random order.
To quit random play, press RANDOM again.
PROGRAMMING
Press PROGRAM to enter program edit mode.
"00" and "PROG" will flash in the display. Press
number and press PROGRAM to store the number in program place. You can repeat these steps to program up
to 20 tracks. Note that programming more than 20 tracks will overwrite the tracks already programmed.
During program play, "PROG" lights steadily. To confirm the program order, press PROGRAM in stop mode. Each
time you press PROGRAM, the program number appears, then the corresponding track number flashes in order
from the first programmed track.
To clear the entire program in the memory, turn the unit off, or open the CD door.
This unit has been designed only to play back the following CDs.
• Digital audio CD
• Recordable digital audio CD (CD-R)
• Rewritable digital audio CD (CD-RW)
When playing a CD-R or CD-RW
You can play back finalized CD-R or CD-RW recorded in music CD format. (If a CD-RW has been recorded in a
different format, erase all the data on the CD-RW completely before recording on it.)
• You can play back CD-R or CD-RW like an audio CD.
• Some CD-R or CD-RW may not be played back on this unit because of their disc characteristics, damage or
stain on them, or if the player lens is dirty.
• The reflection factor of CD-RW is lower than that of other CDs, possibly causing CD-RW to take longer time
to read.
• CD-R and CD-RW of MP3 format cannot be played back.
Caution for DualDisc playback
The Non-DVD side of a "DualDisc" does not comply with the "Compact Disc Digital Audio" standard. Therefore,
the use of Non-DVD side of a DualDisc on this product may not be recommended.
CARE AND MAINTENANCE
CLEANING THE EXTERIOR
lock down.
• Disconnect the system from AC power before cleaning the exterior of the unit with a soft dust cloth.
HANDLING CDS
• Do not touch the signal surfaces. Hold by the edges, or by one edge and the hole.
• Do not affix labels or adhesive tape to the label surfaces. Also, do not scratch or damage the label.
on the cassette deck. Press PAUSE
again to resume
• Discs rotate at high speed inside the player. Do not use damaged (cracked or warped) discs.
CLEANING CDS
• Dirty discs can cause poor sound quality. Always keep discs clean by wiping them gently with a soft cloth from
the inner edge toward the outer perimeter.
• If a disc becomes dirty, wet a soft cloth in water, wring it out well, wipe the dirt away gently, and then remove
any water drops with a dry cloth.
(skip/search) or
(skip/search).
• Do not use record cleaning sprays or antistatic agents on discs. Also, never clean discs with benzene, thinner,
or other volatile solvents which may cause damage to the disc surface.
TAPE CARE
• Do not expose tapes to sunlight or store in hot places. High temperatures may warp the shell or damage the
tape itself.
button to momentarily
• Keep cassettes in their boxes when not in use.
• Cassette tapes can be erased by magnetic fields produced by magnets, electric motors, electrical transformers,
and other devices. Keep tapes away from magnets and magnetic fields.
CLEANING THE TAPE HEADS
Iron oxide particles from the magnetic tape can build up on the parts that come in contact with the tape. These
) PUSH
deposits can cause incomplete erasure, muffled playback sound, and might prevent automatic stop.
skip/search
To clean a cassette deck, open the compartment door, press PLAY
backward
pinch wheel with a head cleaner.
skip/search
Always unplug the power cord before cleaning, and allow 30 minutes drying time after using a liquid cleaner.
PUSH
forward
Clean heads after every 25 hours of use.
STOP 7
• Demagnetize the head occasionally with a head demagnetizing cassette (available from many audio equipment
stores).
HBS
HBS
PLAY/PAUSE
• Never use any metal objects on or near the tape heads.
• Do not allow any cleaning material to fall into the tape assembly.
REMOTE FUNCTIONS (FOR CD OPERATION ONLY)
PLAY/PAUSE
SKIP/SEARCH-DOWN
STOP
(backward)
PROGRAM
PROGRAM
indicator and the track number flash in the
TROUBLESHOOTING TIPS
Problem
System doesn't turn on.
No sound
(skip/search) until the display shows the number
Poor radio reception
. The CD player starts playing the selected track.
CD doesn't play.
CD sound skips.
REP ALL
Distorted or noisy
recordings
, and the tracks
SPECIFICATION
CD player
CD capacity
: 1 CD
Dynamic range
: 60 dB
(skip/search) or
(skip/search) to select the track
Signal-to-noise ratio : 75 dB
Tuner
Frequency ranges
: FM 88 - 108 MHz
: AM 540 - 1 700 kHz
Antenna
: Telescopic antenna for FM
Ferrite core antenna for AM
Cassette deck section
Frequency response : 60 Hz - 10 000 Hz
Wow and flutter
: 0.15% (WRMS)
General
Speaker
: 9 cm cone
Power output
: 2 W per channel, min. RMS,
driven into 4 at 1 kHz with
no more than
10 % total harmonic
distortion
and gently clean the heads, capstan, and
When inserting batteries R03 (UM-4) / AAA (24F)
(not supplied)
STOP
Match the polarity (+ and –) on the batteries with the
SKIP/SEARCH-UP
+ and – markings in the battery compartment on the
(forward)
back of the unit.
REPEAT
REPEAT
Solution
• Make sure power cord is securely plugged into the AC power outlet (or that
the batteries are fresh).
• Unplug the unit for a moment, and then plug it back in again.
• Check the outlet by plugging in another device.
• Adjust volume setting.
• Make sure you have selected the correct function: CD, TAPE, or TUNER and
the headphones are disconnected.
• Adjust the FM telescopic antenna for better FM reception.
• Rotate the unit to achieve better AM reception.
• Try turning off electrical appliances near the unit, such as TV, hair dryers,
vacuum cleaners, or fluorrescent lights.
• Make sure the tray contains a CD.
• Make sure the CD's label is facing up.
• Make sure that pause mode is not activated.
• Make sure CD function is selected.
• Clean the CD (as explained in "CARE AND MAINTENANCE").
• Check CD for warping, scratches, or other damage.
• Check for vibration or shock that may affect the unit; move system if
necessary.
• Inspect the recording head and clean it if necessary.
• Demagnetize recording head (as explained in "CARE AND
MAINTENANCE").
Output terminals
: PHONES
1 (
3.5 mm,
stereo)
: AC 120 V Ó, 60 Hz
Power supply
DC 9 V ("R20 (SUM-1)/D
(13D)"
6)
Power consumption
: 12 W (at operation), 3 W (on
standby)
Dimensions
: 420 mm (W)
178 mm (H)
249 mm (D)
(16
9
/
in
7
1
/
in
16
16
9
13
/
in)
16
Mass
: Approx. 3.2 kg (7.1 lbs)
(without batteries)
Accessories provided : AC power cord
1
Remote control unit
1
2 (4 )
Design and specifications are subject to change without
notice.
Advertisement

Related Manuals for JVC RC-EX16AB


Summary of Contents for JVC RC-EX16AB
- Page 1 CAUTIONS: Enter below the Model No. and Serial No. 1. ONLY USE JVC POWER CORD PROVIDED WITH THIS UNIT TO AVOID MALFUNCTION OR DAMAGE which are located either on the rear, bot- TO THE UNIT. REMOVE BATTERIES WHEN USING THE POWER CORD.
- Page 2 CAUTIONS: pursuant to part 15 of the FCC Rules. 1. ONLY USE JVC POWER CORD PROVIDED WITH THIS UNIT TO AVOID MALFUNCTION OR These limits are designed to provide reasonable protection against harmful interference in a residential DAMAGE TO THE UNIT. REMOVE BATTERIES WHEN USING THE POWER CORD.
-
Page 3: Troubleshooting Tips
USING THE TAPE USING THE CD |Forward direction THINGS TO KNOW BEFORE PLAYING CDs Playable CDs: Only CDs bearing these marks can be used with this system. This unit has been designed only to play back the following CDs. • Digital audio CD •... - Page 4 For U.S.A. CAUTIONS: 1. ONLY USE JVC POWER CORD PROVIDED WITH THIS UNIT TO AVOID MALFUNCTION OR This equipment has been tested and found to comply with the limits for a Class B digital device, pursuant to part 15 of the FCC Rules.
- Page 5 RECORDING ON CASSETTE TAPES You can record from the radio or the CD player. • It should be noted that it may be unlawful to re-record pre-recorded tapes, records, or discs without the consent of the owner of copyright in the sound or video recording, broadcast or cable program and in any literary, dramatic, musical, or artistic work embodied therein.