
Subscribe to Our Youtube Channel
Related Manuals for Tatu Marchesan RC2 2600 CL


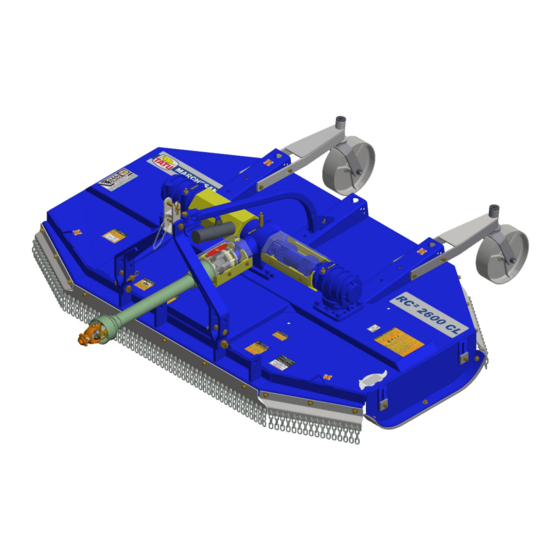
Summary of Contents for Tatu Marchesan RC2 2600 CL
- Page 1 RC² 2600 CL RC² 2600 CL RC² 2600 LSL RC² 2600 LSL RC² 3100 CL RC² 3100 CL OPERATOR’S MANUAL...
- Page 2 IDENTIFICATION Dealer: Owner: Firm / Farm: City: State: No. of the Certificate of Guarantee: Serial / No.: Date: Invoice No.: Product: Notes:...
- Page 3 Introduction The RC² 2600 CL, RC² 2600 LSL and RC² 3100 CL models perform mowing jobs with higher yield and superior quality. These rotary cutters are used for citrus orchards cultivation or similar to eliminate stubbles and also to provide services that need a great speed to execute.
-
Page 4: Table Of Contents
Table of contents 1. To the owner 2. To the operator 4 to 12 Working safely 4 to 6 Transportation over truck or trailer Working safety standards Lifting points Safety decals 10 to 12 3. Data sheet 13 to 15 4. -
Page 5: To The Owner
To the owner The acquisition of any Tatu product assures to the original purchaser the following rights: • Warranty certificate; • Operator's manual; • Technical assistance by the dealer on equipment delivery. However, the owner must check the condition of the equipment on delivery, as well as knowing the warranty terms. -
Page 6: To The Operator
To the operator Be careful with the environment Dear operator! Respect the ecology. Do not throw trash away. This gesture of goodwill helps to protect our environment. Products such as oil, fuel, filters, batteries and others are spilt over the soil and can penetrate to the underground layers, compromising nature. - Page 7 To the operator Never use your bare hands to check hydraulic leaks, the high pressure can cause injuries. Never attempt to change the adjustments, clean or lubricate the equipment when the same is switched on or in movement. Be careful while driving on slopes. Risk of overturn. Prevent that chemical products (i.e.: fertilizers, treated seeds) make any contact with your skin or clothes.
- Page 8 To the operator • Only trained and qualified personnel are allowed to operate the equipment. • While working or during transportation, only the presence of the operator is allowed on the tractor. • Do not allow children to play or to get over the equipment while it is operating, during transportation or storage.
-
Page 9: Transportation Over Truck Or Trailer
To the operator Transportation over truck or trailer Marchesan does not advise the equipment traffic on highways, because this practice involves serious security risks in addition to being prohibited by the current existing traffic law. The transportation for long distances should be done on truck, trailer or other by following these safety guidelines: •... -
Page 10: Working Safety Standards
To the operator Working safety standards It is important to have knowledge not only about the functioning, operation of the equipment and its technology, but also the working legal aspects when using the equipment, such as: safety standards, operator's manual and working safety. The equipment and tools used on the rural area must be properly handled, otherwise health and safety of involved personnel may be compromised. -
Page 11: Lifting Points
To the operator Lifting points This rotary cutter has adequate lifting points located on the frame. When lifting with a hoist, it is essential to hitch the cables to these points. • Use chains, of at least 3 meters long, to lift the equipment safely. •... -
Page 12: Safety Decals
To the operator Safety decals The safety decals warn about the equipment points that require more attention and they should be kept in good repair. If these decals become damaged or illegible, replace them. Marchesan provide decals, upon request and indication of the respective serial number. A A T T E E N N Ç... - Page 13 To the operator Safety decals P P E E R R I I G G O O / / D D A A N N G G E E R R / / P P E E L L I I G G R R O O MANTENHA -SE DISTANTE - FACAS ROTATIVAS Ferimentos graves ou morte podem resultar de fragmentos ou contato com as facas.
- Page 14 To the operator Decal spots Item Quantity Model Serial number RC² 2600 CL decal 05.03.03.4523 RC² 2600 LSL decal 05.03.03.4792 RC² 3100 CL decal 05.03.03.4749 05.03.03.4333 Marchesan logotype decal Read the manual decal 05.03.03.1428 Lubricate and tighten daily decal 05.03.03.1932 540 RPM decal 05.03.03.2949 Side drive shaft decal...
-
Page 15: Data Sheet
Data sheet RC² 2600 CL Model: ....................... RC² 2600 CL Cutting width (mm):....................2600 Number of blades: ...................... 04 Hitching to the tractor (Three-point hitch): ............category II (PTO): ................540 rpm Blades rotation (PTO at 540 rpm): ..............1038 rpm Tractor required power (cv): .................. -
Page 16: Model
Data sheet RC² 3100 CL Model: ....................... RC² 3100 CL Cutting width (mm):....................3100 Number of blades: ...................... 04 Hitching to the tractor (Three-point hitch): ............. categoria II (PTO): ................540 rpm Blades rotation (PTO at 540 rpm): ..............1038 rpm Tractor required power (cv): .................. - Page 17 Data sheet Equipment dimensions Models RC² 2600 CL 1680 2150 2860 RC² 2600 LSL 1700 1120 RC² 3100 CL 2350 1890 3280 NOTE • Measures in millimeters. • * The measures may suffer variations due to different adjustments. Marchesan Implementos e Máquinas Agrícolas “TATU” S.A. RC²...
-
Page 18: Components
Components RC² 2600 CL 01 - Frame 06 - Double divider 02 - Drawbar 07 - Gearbox 03 - Drawbar extension 08 - Side skids 04 - Cardan shaft 09 - Protection cover 05 - Slip clutch 10 - Rear wheel RC²... -
Page 19: Rc² 2600 Lsl
Components RC² 2600 LSL 01 - Frame 06 - Velocity transmission 02 - Drawbar 07 - Gearbox 03 - Drawbar extension 08 - Side skids 04 - Cardan shaft 09 - Protection cover 05 - Slip clutch 10 - Rear wheel Marchesan Implementos e Máquinas Agrícolas “TATU”... - Page 20 Components RC² 3100 CL 01 - Frame 06 - Double divider 02 - Drawbar 07 - Gearbox 03 - Drawbar extension 08 - Side skids 04 - Cardan shaft 09 - Protection cover 05 - Slip clutch 10 - Rear wheel RC²...
-
Page 21: Set-Up Instructions
Set-up instructions Preparing the tractor Before starting the operations, prepare the tractor and equipment appropriately. Check the general conditions of the tractor, especially the good functioning of the hydraulic system that must be in flotation mode. The addition of water ballasts on the tires or a set of weights on the tractor front part or on the rear wheels are the most used ways to increase the traction over the soil and to assure a greater stability of the set. -
Page 22: Hitching To The Tractor
Set-up instructions Hitching to the tractor For hitching, choose a place as flat as possible. Drive the tractor slowly in reverse gear to the planter direction and be ready to brake. When close enough, use the lever to control the hydraulic position, leaving the left lower arm in the same level of the hitch pin. -
Page 23: Coupling The Cardan Shaft
Set-up instructions Coupling the cardan shaft First of all, check the cardan shaft length as follows: 1) Being the equipment properly hitched to the tractor, but without the cardan shaft, move the hydraulics to find the minimum distance (A) between the power take-off and gearbox. -
Page 24: Reducing The Cardan Shaft Length
Set-up instructions Reducing the cardan shaft length If it is necessary, cut similar parts of the male and female drive shaft as well as the protecting covers. But before cutting the shaft, verify all possibilities of usage without reducing its length. The length adjustment will be done when the distance between the equipment and the tractor do not allow coupling. -
Page 25: Cardan Shaft Assembly
Set-up instructions Cardan shaft assembly When assembling the cardan shaft, it is necessary to be careful and leave the terminals on both ends aligned. The discrepancy of the terminals in 90° will cause vibrations and a greater wear on the universal joints, reducing the lifetime of the set. Observe the internal forks alignment Correct assembly Correct assembly... -
Page 26: Equipment Articulation
Set-up instructions Equipment articulation When starting the job, lift the equipment a little to remove the blades direct contact with the field. Couple the PTO and gradually start to increase the rotation to give movement to the set of blades. Right after, move the tractor by releasing the clutch gradually and increase the rotation on the range of the allowed rotation (540 rpm) simultaneously. -
Page 27: Assembly Of The Breather On The Double Divider
Set-up instructions Assembly of the breather on the double divider Remove the plug (A) from the double divider and place the breather (B). At this moment, check the oil level using the plug (C) on the gearbox side. If it is necessary to fill up the gearbox, pour oil until reaching the plug (C) level. The oil level must be adjusted according to the indication in the markers, being the rotary cutter in a flat place. -
Page 28: Assembly Of The Oil Level Marker With Breather
Set-up instructions Assembly of the oil level marker with breather Remove the plug (A) from the gearbox and from the velocity transmission and place the oil level marker with breather (B). At this moment, check the oil level by just placing the marker on the hole without tightening it;... -
Page 29: Longitudinal Leveling
Set-up instructions Longitudinal leveling Use the length variation of the third-point arm (A) to adjust the longitudinal leveling, so it is possible to level or unlevel the front part of the equipment related to the rear part and vice-versa. The more stretched is the third-point (A), the lower will be the rear part of the equipment. -
Page 30: Working Position (Rc² 2600 Cl And Rc² 3100 Cl Models)
Set-up instructions Working position (RC² 2600 CL and RC 3100 CL models) These rotary cutters can work in a central or lateral position related to the tractor. If it is necessary to change the position, follow the instructions below. • Loosen the bolts that fasten the angle bar (A) without removing them. •... -
Page 31: Adjustments And Operations
Adjustments and operations Direction of blades rotation and serial number • The blades feature a double cut so it is possible to use both of their sides NOTE and also for a greater time. To do so, just place the blades that are turning on a clockwise direction on the support that is turning on a counterclockwise direction and vice-versa. -
Page 32: Cutting Height Of The Blades
Adjustments and operations Cutting height of the blades Being the equipment leveled, adjust the cutting height of the blades as follows: Use the hydraulic lever to determine the cutting height. After this adjustment, keep the lever locked during the whole job and just activate it if it necessary to change the cutting height;... -
Page 33: Equipment Transportation
Adjustments and operations Equipment transportation The equipment transportation while it is coupled to the tractor must not be done over public highways or roads. This practice must be limited to rural properties only. If there is the need to transport the equipment over public highways or roads, consult the traffic current laws to check if it is possible to transport the equipment and to avoid any setback. -
Page 34: Slip Clutch
Adjustments and operations Slip clutch The slip clutch is adjusted on the factory, so it is not necessary to adjust it when using the equipment. When facing overloads, the slip clutch starts to work. Immediately lift the equipment to relief the overload. NOTE •... -
Page 35: Troubleshooting Guide
Adjustments and operations Troubleshooting guide PROBLEM CAUSES POSSIBLE SOLUTIONS Worn out or broken blades. Replace them. Incorrect PTO rotation speed. Correct rotation speed: 540 rpm. Excessive speed. Reduce the speed. Blades do not work when the PTO Check the connection of the transmission Blades do not is switched on. -
Page 36: Operations - Important Points
Adjustments and operations Operations - Important points • Before starting working, it is advisable to do a complete check on the cutter. Grease the universal joints, check the oil level in the gearbox and tighten nuts and bolts. • In order to couple and to uncouple the cardan shaft, the PTO should be disengaged. -
Page 37: Optional
Optional Stabilizer set The stabilizr set (A) is optionally supplied to transfer part of the equipment weight to the rear axle of the tractor to relieve the hydraulic system. This set has a chain (B) adjustment, being necessary to loosen up the pins (C) and determine the desired length. - Page 38 Optional Rear laminated tire The rear laminated tire (A) can be optionally supplied to relieve the weight on the three-point hitch and to help on the cutting height adjustment. NOTE • The rear laminated tire can help adjusting the cutting height of the blades through the holes that can be found on the fixation support.
-
Page 39: Maintenance
Maintenance Lubrication Observe daily if the nuts and bolts are tightened and the conditions of the pins and cotter pins. The maintenance of the gearbox should be done in the following way: • When starting to work and everyday of the first working week, check the oil level through the level indications and fill up if necessary. -
Page 40: Reversion Or Replacement Of The Blades
Maintenance Reversion or replacement of the blades Inspect blades before each use to determine if they are properly installed and in good conditions. Replace any blade that is bent, excessively nicked, worn or has any other damage. Besides that, the blades must be replaced as soon as some cutting imperfection is being noticed. -
Page 41: Replacement Of The Skid Guides
Maintenance ATTENTION • When replacing the blades, observe that they are supplied in pairs, which should be kept together until assembled on the cutter spindle. Unbalanced blades may cause excessive vibration and can damage bearings, retainers and the transmission box. • The discrepancy in weight of these blades is within the tolerance specified in the project. -
Page 42: Blades Overlap
Maintenance Blades overlap These rotary cutters have blades that overlap to assure the cut over the whole job area to compensate a possible wearing on the blades, leading to cut failures. If the transmission box (distributor or gearbox) or the supports receive a maintenance that alters the factory- adjusted synchronism, resync the blades to assure that they will not collide when turning. -
Page 43: Transmission Coupling Set Assembly
Maintenance Transmission coupling set assembly For the RC² 2600 CL and RC² 3100 CL models. Assemble the terminals (A) to the gearbox axles without tightening the bolts for now. Position the coupling (B) between the terminals and place the double chains (C) with their respective lock pins. -
Page 44: Slip Clutch
Maintenance Slip clutch The slip clutch is assembled both in the gearbox and in the cardan shaft, being also assembled in the metering box shaft. It is designed to slip, absorb operation loads and to protect the drive shaft. The slip clutch is factory fitted with a specified torque, in order to protect the tractor and equipment. - Page 45 Maintenance Slip clutch Check the average length of the compression springs (D) before disassembling them. Disassemble and sand the metallic parts that are attached to the plates. Being the clutch disassembled, the plates must swing freely between the metallic parts. Replace the plates (B) when their thickness get to 1.5 millimeters.
- Page 46 Maintenance Wheel lubrication The wheels must be lubricated every 150 hours. When there is any clearance, it is necessary to give maintenance to the wheelset hubs. Disassemble the hubs and remove the inner components. Clean all parts with diesel oil or kerosene. Check the existence of clearances and the condition of the bearings and retainers.
- Page 47 Maintenance Gearbox The gearbox must be inspected every time the rotary cutter is about to operate. If the oil level is low, fill up the rotary cutter. The oil level verification must be done in a flat place and adjusted according to the indications of the marker.
-
Page 48: Torque Table
Important data Torque table The table below gives correct torque values for various bolts. Tighten all bolts to the torques specified in chart unless otherwise noted. Check the tightness of bolts periodically, using this bolt torque chart as a guide. Replace hardware with the same strength (Grade/ Class) bolt. -
Page 49: Important
Important MARCHESAN S/A reserves the right at any time to make improvements in ATTENTION the design, material or specifications of machinery, equipment or parts without thereby becoming liable to make similar changes in machinery, equipment or parts previously sold. Images are for illustration purposes only. Some illustrations in this manual appear without the safety devices, removed to allow a better view and detailed instructions. -
Page 50: Notes
Notes RC² 2600 CL / RC² 2600 LSL / RC² 3100 CL Marchesan Implementos e Máquinas Agrícolas “TATU” S.A. - Page 52 www.marchesan.com.br...
Need help?
Do you have a question about the RC2 2600 CL and is the answer not in the manual?
Questions and answers