Advertisement
Quick Links
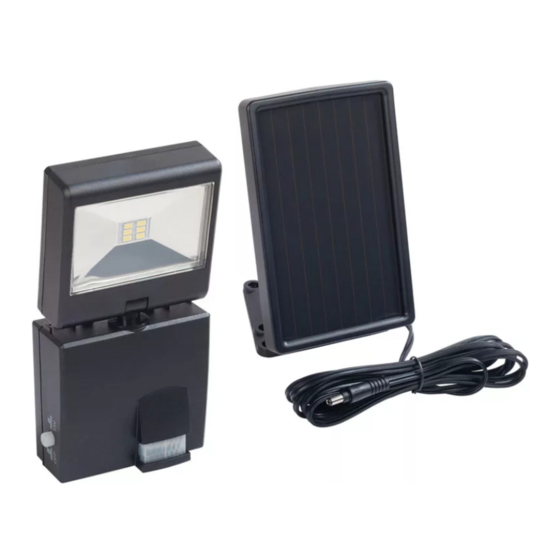
Solar Powered
Motion Sensor Light
Model 7143
*Illustrations may vary from actual unit.
FEATURES
• LED solar powered light.
• Light operates automatically at night only.
• No wiring required.
• Wall mount only.
INITIAL BATTERY CHARGE
The solar panel requires full, direct sunlight to
charge the battery. Clouds, rain, snow, and other
weather conditions may not allow the solar panel to
completely recharge the battery. Other obstructions
such as buildings or trees may block the sun as well.
When installing the solar panel, make sure it is
aimed as described below with a minimum amount
of obstructions. If possible, mount the panel facing
toward the southern sky.
• PRIOR TO USE, the battery will require 3 to 7 days
of full sun to completely charge with the ON-OFF
switch in the OFF position. Plug the solar panel cable
into the connector extending from the bottom of the
battery case. If possible, aim the solar panel toward the
south and tilt it approximately 50° from horizontal (see
illustration on next page). If the solar panel cannot be
aimed toward the south, then tilt the panel approximately
30° if possible.
• Actual operating time will vary depending upon how
frequently the light is turned on by the motion sensor
and amount of sunlight collected.
• Solar lighting is not designed to equal standard 120V
lighting. The amount of light output is reduced to allow
the sun time to fully recharge the battery between
lighting cycles.
© 2014 HeathCo LLC
UNPACKING
Be sure to remove all contents from packaging and verify
all items are present before assembling this light fixture.
This package includes the following items:
Mounting
Screws
and Wall
Anchors
ON/OFF
Switch
Solar Light Fixture
WHERE TO MOUNT YOUR SOLAR
POWERED MOTION SENSOR LIGHT
The most important thing to remember for the operation
of your solar powered motion sensing light is that it works
from the power received from direct sunlight. The more
direct sunlight the solar panel receives in a day, the longer
the light will operate.
Solar Light Fixture:
The main unit contains the LEDs, motion sensor, and
battery. When deciding where to mount this unit, keep
in mind that the motion sensor that activates the light
has a "field of vision" of 30 feet (9 meters) in front of the
light and about 110° detection angle at a surrounding air
temperature of 77° F (25 °C).
Solar Panel:
The solar panel converts the sun's energy into electricity,
thus charging the battery stored in the solar light fixture.
The solar panel requires direct sunlight falling onto the
face of the solar panel for as long as possible over the
course of the day.
When choosing the location for the solar panel, make
sure it is aimed toward the south and is tilted to a suit-
able angle to allow as much direct sunlight to fall upon
it as possible. Make sure there is a minimum amount of
obstructions between the solar panel and the sun.
Also, make sure your solar panel location is not too far
away from the solar light fixture for the wires to reach
and connect.
Light
Solar Panel
Sensor
Advertisement

Subscribe to Our Youtube Channel
Related Manuals for Heath Zenith 7143


Summary of Contents for Heath Zenith 7143
- Page 1 Be sure to remove all contents from packaging and verify all items are present before assembling this light fixture. This package includes the following items: Solar Powered Light Solar Panel Motion Sensor Light Model 7143 Mounting Screws and Wall Anchors *Illustrations may vary from actual unit. ON/OFF...
-
Page 2: Installation
INSTALLATION Mounting the Solar Panel: 1. Using a 3/16" drill bit, drill pilot holes for the wall anchors Mounting the Solar Light Fixture: and insert three wall anchors. Mount the solar panel For best performance, mount the solar light fixture about 6 using four screws. - Page 3 3. Carefully route the solar panel cable to the light fixture. Adjusting Motion Sensor: Plug the solar panel cable into the connector extending After the initial 3-to-7-day charge, press the ON/OFF from the side of the battery case. switch to the ON position. IMPORTANT: Press the ON/OFF switch to the OFF On the bottom of the motion sensor there are two adjust- position and allow the battery to charge with 3 to...
-
Page 4: Things To Remember
THINGS TO REMEMBER Adjusting Lamp Housing: Aim the lamp to face the area you wish to illuminate. • Periodically clean the solar panel with a soft cloth and Walking Test: warm water. Do not hose spray. Keep the panel clear of snow and leaves. -
Page 5: Troubleshooting Guide
TROUBLESHOOTING GUIDE SYMPTOM POSSIBLE CAUSE SOLUTION Lights does not activate in 1. ON/OFF switch is in OFF position. 1. Turn ON/OFF switch to the ON position. normal operation. 2. Lux control is set wrong. 2. Adjust Lux control toward ( 3.
Need help?
Do you have a question about the 7143 and is the answer not in the manual?
Questions and answers