Table of Contents
Advertisement
Available languages
Available languages
Quick Links
Gebrauchs- und Montageanleitung
Instructions for installation and use
Instructions de montage et d'emploi
Wichtig:Unbedingt lesen und aufbewahren!
Important:Read these instructions carefully and then store them in a safe place
Important:Lire attentivement et ranger soigneusemnt ce mode d'emploi
Integrierte Kühlschrank
Integrated Refrigerator
Réfrigérateur a intégrer
Modell: IKE 237-5-2T
DE
GB
FR
2-15
16-29
30-43
200381797
N/Kü/2. (08.)
Advertisement
Chapters
Table of Contents

Subscribe to Our Youtube Channel
Related Manuals for Kuppersbusch IKE 237-5-2T


Summary of Contents for Kuppersbusch IKE 237-5-2T
- Page 1 Wichtig:Unbedingt lesen und aufbewahren! Important:Read these instructions carefully and then store them in a safe place Important:Lire attentivement et ranger soigneusemnt ce mode d’emploi Integrierte Kühlschrank Integrated Refrigerator Réfrigérateur a intégrer Modell: IKE 237-5-2T 2-15 16-29 30-43 200381797 N/Kü/2. (08.)
- Page 2 Bevor Sie Ihr Gerät anschließend in Betrieb nehmen, lesen Sie bitte zuerst die Gebrauchsanleitung durch, die Sicherheitshinweise und wichtige Informationen enthält. Nur so können Sie das Gerät sicher und zuverlässig nutzen und werden viel Freude daran haben. Folgende Zeichen werden Ihnen helfen, sich in der Gebrauchsanleitung besser zurecht zu finden. Sicherheitsvorschriften Die Warnungen mit diesem Symbol dienen Ihrer Sicherheit und der Ihres Gerätes Wichtige Hinweise und Informationen...
-
Page 3: Table Of Contents
Inhalt Sicherheitshinweise ............................4 Entsorgung...............................5 Gebrauch / Vor Inbetriebnahme....................6 Inbetriebnhame / Temperaturregelung / Kühlabteilausstattung ............6 Tipps..................................7 Wartung / Abtauen ........................7 Reinigung...........................8 Wenn etwas nicht funktioniert........................9 Kundendienst und Ersatzteile ........................10 Technische Angabe / Türanschlag wechseln..................10 Wechsel des Türanschlags beim Gefrierfach ................11 Installation / Aufstellung ......................12 Elektrischer Anschluss........................12 Einbau................................13... -
Page 4: Sicherheitshinweise
Sicherheitshinweise Bevor Sie Ihr neues Kältegerät in Betrieb nehmen, lesen Sie bitte diese Gebrauchsanweisung aufmerksam durch. Diese sind Sicherheitshinweise. Wir ersuchen Sie daher, die folgenden Punkte vor der Installation des Gerätes und seiner Inbetriebnahme aufmerksam durchzulesen. Es wird empfohlen, diese Gebrauchsanweisung gut aufzubewahren und bei einem eventuellen Verkauf des Gerätes dem neuen Besitzer auszuhändigen. -
Page 5: Entsorgung
Umweltnormen Das Gerät darf nicht mit dem Hausmüll oder Sperrmüll entsorgt werden. Auskunft über Abholtermine oder Sammelplätze gibt die örtliche Gemeindeverwaltung an. Entsorgung Verpackungsmaterialien Die mit dem Symbol gekennzeichneten Materialien sind recyclingfähig. >PE<=Polyäthylen >PS<=Polystyrol >PP<=Polypropylen Sämtliche Verpackungsmaterialien sind recyclingfähig. In Deutschland können Sie die Verpackung an den Händler zurückgeben, bei dem Sie das Gerät gekauft haben. -
Page 6: Gebrauch / Vor Inbetriebnahme
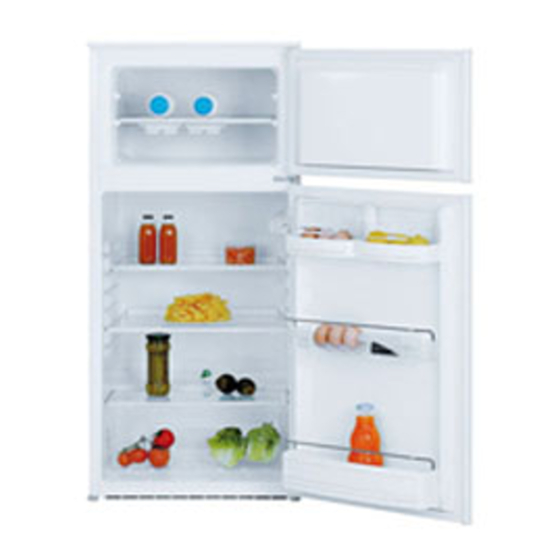
Gebrauch Vor Inbetriebnahme Kühlabteilausstattung Man sollte mindestens 2 Std. warten, bevor das Abstellregale Gerät in Betrieb genommen wird, damit das Zur Einlagerung von Lebensmittel-Packungen Kältemittel zurückströmen kann. verschiedener Größe, sind die Abstellfläche Bevor Sie das Gerät in Betrieb nehmen, beseitigen höhenverstellbar. -
Page 7: Tipps
Wartung Tipps Vor jeder Reinigungsarbeit immer den Netzstecker aus der Steckdose ziehen. Energie-Einsparung Dieses Gerät erhält im Kaltekreislauf Kohlenwasserstoff. Aus diesem Grund darf Das Gerät nicht in der Nähe von Herden, Heizkörpern die Wartung und das Nachfüllen ausschließlich oder anderen Wärmequellen aufstellen. Bei hoher von autorisierten Fachpersonal durchgeführt Umgebungstemperatur läuft der Kompressor häufiger werden. -
Page 8: Reinigung
Tauwasserabführung besteht darin, daß in Papier Um einen sicheren Betrieb des Gerätes zu verpackte Lebensmittel mit der Rückwand des gerwährleisten, einmal im Jahr den Sockel-Grill Kühlbereiches in Berührung kommen und dort abbauen Luftkanäle einem festfrieren. Beim Herausnehmen des Lebensmittels Staubsauger reinigen. Dies begünstigt den guten kann das Papier in die Tauwasserabführung gelangen Betrieb mit folglicher Stromersparnis. -
Page 9: Wenn Etwas Nicht Funktioniert
Wenn etwas nicht funktioniert Falls das Gerät Stärungen aufweisen sollte, bevor Sie den Kundendienst verständigen, überprüfen Sie zuerst folgendes: Störung Abhilfe Im Gerät wird es nicht kalt genug Der Drehknopf auf kältere Temperatur drehen. Die Lebensmittel müssen so eingelagert werden, dass die Kälte um sie frei zirkulieren kann. -
Page 10: Kundendienst Und Ersatzteile
Kundendienst und Ersatzteile Sollten Sie nach o.e. Prüfungen zu keinem Resultat kommen, so wenden Sie sich bitte an unseren nächsten Kundendienst. Um ein rasches Beheben des Schadens zu ermöglichen, ist es beim Anruf an den Kundendienst notwendig anzugeben: Modellbezeichnung Erzeugnis-Nummer (PNC) Fertigungs-Nummer (S-No.) Diese Angaben finden Sie auf dem Typschild links ander Innenseite des Gerätes. -
Page 11: Wechsel Des Türanschlags Beim Gefrierfach
Wechsel des Türanschlags beim Gefrierfach Nachdem Sie den Türanschlag draußen gewechselt haben, müssen Sie es auch beim Gefrierfach tun. Gehen bitte Reihenfolge nachstehenden Beschreibung und Abbildungen vor: Mit Hilfe eines Schraubenziehers drücken Sie die innere Zunge des unteren Scharnierträgers ein. Den unteren Scharnierträger zusammen mit der Gefrierfachtür auskippen und den Scharnierträgen entfernen. -
Page 12: Installation / Aufstellung
Installation Klimaklasse für Umgebungs- temperatur von Vor der Installation sicherstellen, dass das +10 bis +32 °C Gerät nicht beschädigt ist. Mögliche +16 bis +32 °C Transportschäden sind Händler unverzüglich mitzuteilen. +18 bis +38 °C Während das Gerät in Betrieb ist, werden der +18 bis +43 °C Verflüssiger und der Kompressor, die sich auf der Elektrischer Anschluss... -
Page 13: Einbau
Einbau Maßzeichnungen Höhe (1) 1225 mm Tiefe (2) 550 mm Breite (3) 560 mm 1. Gerät in die Nische einschieben, bis die Anschlagleiste (1) oben am Möbel anliegt und die vordere Kante des Scharniers mit der Türöffnungsseite bündig Nischenseitenwand ansteht (2). Ferner ist auch am hinteren Einbauschrankteil ein Lüftungskamin mit folgenden Massen notwendig: Tiefe... - Page 14 6. Die Schiene auf der Innenseite der Möbeltür oben und unten auflegen (siehe Abb.) und die Position der äußeren Bohrlöcher anzeichnen. Nachdem die Löcher gebohrt wurden, die Schiene mit den mitgelieferten Schrauben befestigen. 4. Brechen Sie aus der Plastikabdeckung (E), die das Scharnier mit Stift bedeckt, die in der Abbildung gekennzeichneten Teile heraus.
- Page 15 9. Die Winkeleisen entfernen und 8 mm vom äusseren Rand der Tür mit dem Nagel (K) kennzeichnen. 10. Den Winkel wieder auf der Schiene anbringen und mit den mitgelieferten Schrauben befestigen. Für eine allfällig notwendige Ausrichtung Möbeltür, den Spielraum der Langlöcher nutzen. Nach Beendigung der Arbeiten den einwandfreien Verschluss der Gerätetür überprüfen.
- Page 16 Instructions for the use of the instructions booklet Notes which are important for your safety or for the proper functioning of the appliance Supplementary information regarding operation and practical applications of the appliance. Tips and notes concerning economical and environmentally sound use of the appliance The symbol on the product or on its packaging indicates that this product may not be treated as household waste.
- Page 17 Contents Safety Instructions ............................18 Disposal................................19 Use and Control / Before Use / Starting the appliance / Temperature control ........20 Internal parts ..............................20 Hints ................................21 Maintenance Defrosting ..........................21 Cleaning .................................22 How to change the bulb..........................22 Something not Working ..........................23 Customer Service and Spare Parts / Technical Specifications ..............24 Door reversibility ............................24 Installation / Positioning / Electrical connection ..................26 Building-in ..............................27...
-
Page 18: Safety Instructions
Safety Instructions This information has been provided in the interests of your safety. Please read it before installing or using the appliance. Please retain the instruction book for future reference. If owner ship is transferred, please leave the user manual for the new owner. Domestic Use Store pre-packed frozen food in accordance with the frozen food manufacturer's instructions. -
Page 19: Disposal
Disposal Appliance Packaging Information The materials marked with the symbol recyclable. >PE< for polyethylene, e.g. sheet wrapping material >PS< for polystyrene, e.g. padding material (always CFC-free) >POM< polyoxymethylene, e.g. plastic clips. All materials are environmentally sound! Safety precautions for isobutane Warning The refrigerant of the appliance is isobutane (R 600a) that is inflammable and explosive to a greater... -
Page 20: Use And Control / Before Use / Starting The Appliance / Temperature Control
Use and Control Internal Parts Before Use Wait two hours before connecting the appliance to Storage shelves allow the oil to flow back in the compressor. The shelves can be removed for cleaning. Before using the appliance for the first time, wash the To permit storage of food packages of various interior and all internal accessories with lukewarm water sizes, the shelves can be placed at different... -
Page 21: Hints
Maintenance Hints Unplug the appliance before carrying out any maintenance operation. Warning Saving Energy This appliance contains hydrocarbons in its cooling Pay careful attention to where the cabinet is placed. unit maintenance and recharging must therefore only See the section ŇInstallationÓ. When installed be carried out by authorised technicians. -
Page 22: Cleaning
The most typical case of clogging up in the defrost When the appliance is not in use water outlet when you put food wrapped in some Disconnect the appliance from the electricity paper into the appliance and this paper contacts back supply. -
Page 23: Something Not Working
Something not Working Problems may be due to causes which can easily be solved before calling the Technical Service. Please follow these instructions: SYMPTOM SOLUTION Door does not close Level properly the appliances if it is not well levelled. Weight surpasses the storage limit of the door shelf so spread weight more evenly or take some products out. -
Page 24: Customer Service And Spare Parts / Technical Specifications
Customer service and spare parts If you cannot find the remedy for a malfunction in these operating instructions, please contact your dealer or our customer service department and consult the Guarantee card. Selective ordering of replacement parts can save unnecessary travel and costs. For this reason always provide the following appliance information: Model Name... - Page 25 Change of door opening direction of frozen food compartment After changing the outer door opening direction at this type it is necessary to remount the door of the frozen food compartment as well. Operations and their order can be seen in figure. Press the retaining lever inside the lower doorhinge.
-
Page 26: Installation / Positioning / Electrical Connection
Installation Climate for an ambient classification temperature of Take utmost care when handling your +10 to +32 °C appliance so as not to cause any damages +16 to +32 °C to the cooling unit with consequent possible fluid leakages. +18 to +38 °C During normal operation, the condenser and +18 to +43 °C compressor at the back of the appliance heat up... -
Page 27: Building-In
Building-in Dimensions of the recess Height of housing (1) 1225 mm Depth of housing (2) 550 mm Width of housing (3) 560 mm 1. Fit the appliance in the niche by making sure that it stands against the interior surface of the unit on the side where the door hinges of the appliances are fitted. - Page 28 6. Place guide (Ha) on the inside part of the furniture door, up and down as shown in the figure and mark the position of external holes. After having drilled holes, fix the guide with the screws supplied. 4. From the plastic cover (E), which is used to cover the hinge with the pivot pin, you must take away the part as indicated in the drawing.
- Page 29 9. Remove the squares and mark a distance of 8 mm from the outer edge of the door where the nail must be fitted (K). 10. Place the small square on the guide again and fix it with the screws supplied. Should the alignment of the furniture door be necessary, use the clearance of slots.
- Page 30 Les symboles suivants sont utilisés dans cette notice d'utilisation I I n n f f o o r r m m a a t t i i o o n n s s i i m m p p o o r r t t a a n n t t e e s s p p o o u u r r v v o o t t r r e e s s é é c c u u r r i i t t é é e e t t p p o o u u r r é é v v i i t t e e r r d d ' ' e e n n d d o o m m m m a a g g e e r r l l ' ' a a p p p p a a r r e e i i l l I I n n f f o o r r m m a a t t i i o o n n s s g g é...
- Page 31 S S o o m m m m a a i i r r e e A A v v e e r r t t i i s s s s e e m m e e n n t t s s i i m m p p o o r r t t a a n n t t s s ..........................3 3 2 2 É...
- Page 32 A A v v e e r r t t i i s s s s e e m m e e n n t t i i m m p p o o r r t t a a n n t t s s C C e e s s i i n n f f o o r r m m a a t t i i o o n n s s o o n n t t é...
-
Page 33: É É L L I I M M I I N N A A T T I I O O N
P P r r o o t t e e c c t t i i o o n n d d e e l l ' ' e e n n v v i i r r o o n n n n e e m m e e n n t t ·Le circuit réfrigérant et l'isolation de cet appareil ne contiennent pas de gaz réfrigérant nocif pour l'ozone. - Page 34 U U t t i i l l i i s s a a t t i i o o n n e e t t r r é é g g l l a a g g e e C C o o m m p p o o s s a a n n t t s s i i n n t t e e r r n n e e s s A A v v a a n n t t l l a a m m i i s s e e e e n n s s e e r r v v i i c c e e Attendez deux heures au moins avant de...
-
Page 35: C C O O N N S S E E I I L L S
B B a a l l c c o o n n n n e e t t s s d d e e l l a a c c o o n n t t r r e e - - p p o o r r t t e e C C o o n n s s e e i i l l s s p p o o u u r r l l a a r r é... - Page 36 Entretien D D é é b b r r a a n n c c h h e e z z l l ' ' a a p p p p a a r r e e i i l l a a v v a a n n t t t t o o u u t t e e o o p p é é r r a a t t i i o o n n . . A A t t t t e e n n t t i i o o n n Cet appareil contient des hydrocarbures dans son circuit réfrigérant : l'entretien et la recharge ne...
-
Page 37: N N E E T T T T O O Y Y A A G G E
N N e e t t t t o o y y a a g g e e De temps en temps, dépoussiérez le condenseur (paroi arrière de l'appareil) et les conduits de N N ' ' u u t t i i l l i i s s e e z z j j a a m m a a i i s s d d ' ' o o b b j j e e t t s s m m é é t t a a l l l l i i q q u u e e s s p p o o u u r r ventilation. -
Page 38: R R É É V V E E R R S S I I B B I I L L I I T T É É D D E E L L A A P P O O R R T T E
S S e e r r v v i i c c e e a a p p r r è è s s - - v v e e n n t t e e e e t t p p i i è è c c e e s s d d e e r r e e c c h h a a n n g g e e Une fois que tous ces contrôles ont été... - Page 39 I I n n v v e e r r s s i i o o n n d d u u s s e e n n s s d d ' ' o o u u v v e e r r t t u u r r e e d d e e l l a a p p o o r r t t e e d d u u c c o o m m p p a a r r t t i i m m e e n n t t c c o o n n g g é...
-
Page 40: I I N N S S T T A A L L L L A A T T I I O O N
I I n n s s t t a a l l l l a a t t i i o o n n B B r r a a n n c c h h e e m m e e n n t t é é l l e e c c t t r r i i q q u u e e L L o o r r s s d d u u t t r r a a n n s s p p o o r r t t e e t t d d e e l l ' ' i i n n s s t t a a l l l l a a t t i i o o n n d d e e Contrôlez, que le compteur électrique peut l l ' ' a a p p p p a a r r e e i i l l , , v v e e i i l l l l e e r r à... -
Page 41: E E N N C C A A S S T T R R E E M M E E N N T
E E n n c c a a s s t t r r e e m m e e n n t t D D i i m m e e n n s s i i o o n n s s d d e e l l a a n n i i c c h h e e Hauteur (1) 1225 mm Profondeur (2) - Page 42 6. Placez la glissière (Ha) à l'intérieur de la porte du meuble en haut et en bas comme indiqué dans la figure et marquez la position des orifices externes. Après avoir percé les trous, fixez la glissière avec les vis fournies. 4.
- Page 43 9. Enlevez les carrés et marquez une distance de 8 mm du bord extérieur de la porte où doit être planté le clou (K). 10 .Placez de nouveau le petit carré sur la glissière et fixez-le avec les vis fournies. S'il est nécessaire d'aligner la porte du meuble, utilisez l'espace des rainures.
- Page 44 KÜPPERSBUSCH HAUSGERÄTE AG Postfach 10 01 32, D-45801 Gelsenkirchen, Küppersbuschstr. 16, D-45883 Gelsenkirchen Telefon: (02 09) 4 01-0, Telefax: (02 09) 4 01-3 03 www.kueppersbusch.de Küppersbusch Ges. m. b. H. Eitnergasse 13, 1231 Wien, Telefon: 01 / 8 66 80-0, Telefax: 01 / 8 66 80 72 www.kueppersbusch.at ·...
Need help?
Do you have a question about the IKE 237-5-2T and is the answer not in the manual?
Questions and answers