STERWINS ELM2-36P-3W.4 Assemby - Use - Maintenance Manual
Electrical lawn mower 36cm 360' 3 wheels 1400w
Hide thumbs
Also See for ELM2-36P-3W.4:
- Manual (127 pages) ,
- Assemby - use - maintenance manual (84 pages) ,
- Assemby - use - maintenance manual (82 pages)
Table of Contents
Advertisement
Available languages
Available languages
Quick Links
Tondeuse à gazon électrique 1400 W
FR
Electric lawn mower 1400W
EN
EAN code: 3276000429975
Notice de Montage, Utilisation
FR
et Entretien
STERWINS ELECTRICAL LAWN
Assemby - Use - Maintenance
EN
Manual
Traduction de la version originale du mode d'emploi / Original instruction manual
MOWER 36CM 360° 3 WHEELS
ELM2-36P-3W.4
Advertisement
Chapters
Table of Contents

Subscribe to Our Youtube Channel
Related Manuals for STERWINS ELM2-36P-3W.4


Summary of Contents for STERWINS ELM2-36P-3W.4
- Page 1 STERWINS ELECTRICAL LAWN MOWER 36CM 360° 3 WHEELS ELM2-36P-3W.4 Tondeuse à gazon électrique 1400 W Electric lawn mower 1400W EAN code: 3276000429975 Notice de Montage, Utilisation Assemby - Use - Maintenance et Entretien Manual Traduction de la version originale du mode d’emploi / Original instruction manual...
- Page 3 5130 included...
- Page 4 SYMBOLES ATTENTION ! Lisez attentivement la notice d’utilisation. Prenez garde aux lames tranchantes. Les lames restent en rotation un certain temps après que le moteur a été éteint – Débranchez la fiche de la prise secteur avant de procéder à une opération d’ e ntretien sur l’appareil ou si son cordon d’alimentation a été...
- Page 5 SYMBOLES Classe II, double isolation. Cet outil est conforme aux directives européennes applicables et une évaluation de la conformité à ces directives a été effectuée. Symbole de la circulation du produit sur le marché de l’union douanière des États membres. Protégé...
- Page 6 CONSIGNES DE SÉCURITÉ DANGER ! Choc électrique ! Risque de blessure due à un choc électrique. • Il convient de surveiller les enfants pour s’assurer qu’ils ne jouent pas avec l’ o util. • Lisez attentivement les instructions. Familiarisez-vous avec les commandes et l’utilisation correcte de la machine.
- Page 7 CONSIGNES DE SÉCURITÉ de vêtements amples ou comportant des nœuds ou des cordons. • Inspectez minutieusement la zone où l’ o util doit être utilisé, et enlevez tout ce qui pourrait être projeté par l’ o util. Avant utilisation, inspectez toujours visuellement les lames, l’ é crou de lame et l’unité...
- Page 8 CONSIGNES DE SÉCURITÉ protection est défectueux, ou sans l’un de ses dispositifs de sécurité (par exemple les déflecteurs et/ou le sac/bac de ramassage). • Démarrez le moteur prudemment, de la manière indiquée dans le manuel d’utilisation, en veillant à éloigner vos pieds des lames. N’inclinez pas l’...
- Page 9 CONSIGNES DE SÉCURITÉ heurté un objet étranger. Examinez l’ o util pour vérifier qu’il n’ e st pas endommagé et faites procéder aux réparations nécessaires. Si l’appareil se met à vibrer anormalement (inspectez immédiatement) • Serrez bien tous les écrous, les boulons et les vis afin de vous assurer que l’appareil est en état de fonctionnement sûr.
- Page 10 CONSIGNES DE SÉCURITÉ indications du mode d’ e mploi, certains risques subsistent. Les dangers suivants peuvent survenir en raison de la structure et de la conception de ce produit : • Problèmes de santé entraînés par les vibrations si le produit est utilisé...
-
Page 11: Table Of Contents
TABLE DES MATIÈRES 1. Utilisation prévue de la tondeuse à gazon Sterwins 2. Description 3. Spécifications techniques 4. Avant la mise en service de l’appareil 5. Utilisation 6. Entretien 7. Dépannage 8. Mise au rebut et recyclage 9. Garantie 10. Vue éclatée et liste des pièces... -
Page 12: Utilisation Prévue De La Tondeuse À Gazon Sterwins
1. UTILISATION PREVUE DE LA TONDEUSE A GAZON STERWINS Merci d’avoir acheté ce produit. Lisez le présent mode d’ e mploi dans son intégralité et conservez-le pour pouvoir vous y référer ultérieurement. Cette tondeuse à gazon est conçue exclusivement pour couper de l’herbe et peut facilement être utilisée dans votre jardin. -
Page 13: Description
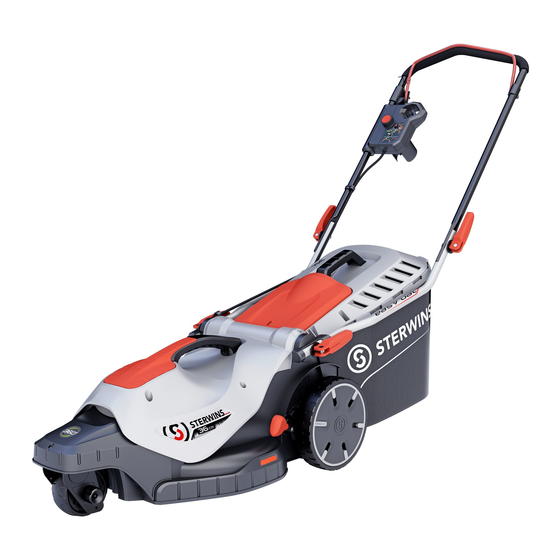
2. DESCRIPTION Partie inférieure du guidon Levier d’interrupteur Roues arrière Interrupteur marche/arrêt Poignée de réglage de la hauteur de lame Partie supérieure du guidon Poignée de carter du moteur Clip de câble Carter du moteur Bride de verrouillage rapide Bouton de réglage de la hauteur de lame Poignée du bac de ramassage Roue rotative Bac de ramassage... - Page 14 3. DONNÉES TECHNIQUES Modèle ELM2-36P-3W.4 Tension nominale 220-240V~50Hz Puissance d’entrée nominale 1400W Régime à vide 3200/min Largeur de coupe 360mm Pression acoustique 77,9 dB(A) K = 3 dB(A) Niveau de puissance acoustique 93,82 dB(A) K=0,686dB(A) mesuré Niveau de puissance acoustique...
- Page 15 4. AVANT D’UTILISER L’ÉQUIPEMENT DANGER ! Risque de blessure due à un choc électrique. Attention ! Ne branchez pas l'outil tant qu'il n'est pas entièrement assemblé ! PREPARATION DE LA RALLONGE • En principe, nous vous recommandons d’utiliser - Une rallonge adaptée, afin d'éviter d’ e ndommager inutilement la tondeuse à gazon. (Image A) (Image A) ATTENTION : Utilisez exclusivement des rallonges électriques standard conçues pour une...
-
Page 16: Utilisation
5. UTILISATION DANGER ! Risque de blessure due à un choc électrique. Attention ! Ne branchez pas l’ o util tant qu’il n’ e st pas entièrement assemblé ! Attention ! Ne touchez pas la lame rotative! Mise en place de votre tondeuse à gazon Posez la tondeuse sur un sol plat et rigide pour permettre un fonctionnement stable et sûr. - Page 17 5. UTILISATION d’utiliser la tondeuse pour la première fois, montez la position de coupe à la hauteur la mieux adaptée à votre pelouse. Pour régler la hauteur de la lame : Coupez l’alimentation électrique. Pour augmenter la hauteur de lame, utilisez votre main pour régler la poignée de réglage de hauteur de lame , et, pendant ce temps, réglez le bouton de réglage de la hauteur de lame pour vous assurer que les deux niveaux de hauteur de lame soient sur la même position.
-
Page 18: Entretien
6. ENTRETIEN DANGER ! CHOC ELECTRIQUE ! Coupez l’alimentation électrique avant de nettoyer la tondeuse, de changer la lame de coupe ou de stocker la machine. Nettoyage Veillez à ce que tous les dispositifs de sécurité, les ouvertures d’aération et le carter du moteur soient exempts de débris et de saletés. -
Page 19: Dépannage
7. DÉPANNAGE DANGER ! RISQUE DE BLESSURE DUE À UN CHOC ÉLECTRIQUE. Attention ! Éteignez la tondeuse avant de procéder à un dépannage. Problèmes Causes possibles Actions correctives Raccordez la machine à La tondeuse ne démarre pas. L'appareil n'est pas branché. l’alimentation électrique. -
Page 20: Garantie
Nous serions ravis de récupérer vos commentaires sur le site internet du magasin. Garantie Les produits STERWINS sont conçus selon les standards de qualité des produits grand public les plus exigeants. Ces produits sont assortis d’une garantie de 3 ans à compter de la date d’achat. Cette garantie couvre tous les défauts de fabrication ou matériels. - Page 21 L’ o util/la batterie/le chargeur n’a jamais été placé(e) dans un environnement humide (exposition à la rosée ou à la pluie, immersion…) Aucune pièce incorrecte – pièce non fabriquée par STERWINS – s’avérant être la cause de la détérioration n’a été utilisée.
-
Page 22: Vue Éclatée Et Liste Des Pièces
10. VUE ÉCLATÉE ET LISTE DES PIÈCES... - Page 23 10. VUE ÉCLATÉE ET LISTE DES PIÈCES Numéro de pièce Description Nombre Numéro de pièce Description Nombre A021039-018-00 Barre supérieure de guidon 8304-511002 Plaque de fixation A021039-019-00 Ensemble boîtier d’interrupteur 8440-513007-00 Ensemble capot supérieur 1-1-1 A021039-007-00 Capot inférieur de boîtier d'interrupteur 1 16-1 8342-513001 Ressort de torsion...
- Page 24 SYMBOLS CAUTION! Read the instruction booklet. Beware of sharp blades. Blades continue to rotate after the motor is switched off - Remove plug from mains before maintenance or if cord is damaged. Keep by standers away. Keep the flexible supply cord away from the cutting blades. Guarantee sound power label.
- Page 25 SYMBOLS Class II - Double insulation. The product complies with the applicable European directives and an evaluation method of conformity for these directives was done. Sign of product circulation in the market of the Customs Union member states. Protection against splashed water from all directions. IPX4 Recycling symbol.
- Page 26 SAFETY INSTRUCTIONS DANGER ! Electric shock ! Risk of injury due to electric shock. Children should be supervised to ensure that they do not play with the appliance. Read the instructions carefully. Be familiar with the controls and the correct use of the machine. Never allow children or people unfamiliar with these instructions to use the machine.
- Page 27 SAFETY INSTRUCTIONS clothing that is loose fitting or that has hanging cords or ties. Thoroughly inspect the area where the machine is to be used and remove all objects which can be thrown by the machine. Before using, always visually inspect to see that the cutting means, blade nut and the blade assembly are not worn or damaged.
- Page 28 SAFETY INSTRUCTIONS Switch on the motor carefully according to instructions and with feet well away from the blade(s). Do not tilt the machine when switching on the motor, except if the machine has to be tilted for starting. In this case, do not tilt it more than absolutely necessary and lift only the part, which is away from the operator.
- Page 29 SAFETY INSTRUCTIONS is in safe working condition. Check the grass box frequently for wear or deterioration. Replace worn or damaged parts for safety. On machines with multi blade, take care as rotating one blade can cause other blades to rotate. Be careful during adjustment of the machine to prevent entrapment of the fingers between moving blades and fixed parts of the machine.
- Page 30 SAFETY INSTRUCTIONS or hidden objects that are suddenly dashed. Burns if hot surfaces are touched. WARNING: This product produces an electromagnetic field during operation. This field may under some circumstances interfere with active or passive medical implants. To reduce the risk of serious or fatal injury, we recommend that people with medical implants consult their doctor and the medical implant manufacturer before operating this product.
- Page 31 CONTENTS 1. Intended use of Sterwins lawn mower 2. Description 3. Technical data 4. Before putting the equipment into Operation 5. Operation 6. Maintenance 7. Trouble Shooting 8. Disposal and recycling 9. Warranty 10.Exploded view and part list 11. EC declaration of conformity...
-
Page 32: Intended Use Of Sterwins Lawn Mower
1. INTENDED USE OF STERWINS LAWN MOWER Thank you for purchasing this product. Please read through these operating instructions and keep them for future reference. This lawn mower is only intended to be used for cutting grass and can be used easily in your garden. Do not use it for others purposes. -
Page 33: Description
2. DESCRIPTION Switch Bar Lower Handle Switch Button Rear Wheels Upper Handle Blade Height Adjustment Handle Wire Clip Motor Cover Handle Quick Clamp Motor Cover Grass Collection Box Handle Blade Height Adjustment Knob Grass Collection Box Rotate Wheel Rear Discharge Door 33 33... -
Page 34: Technical Data
3. TECHNICAL DATA Model ELM2-36P-3W.4 Rated voltage 220-240V~50Hz Rated power input 1400W No-load speed 3200 / min Cutting width 360mm Sound pressure 77.9 dB(A) K=3 dB(A) Measured sound power level 93.82 dB(A) K=0.686dB(A) Guarantee sound power level 96 dB(A) Cutting height... -
Page 35: Before Putting The Equipment Into Operation
4. BEFORE PUTTING THE EQUIPMENT INTO OPERATION DANGER! Risk of injury due to electric shock. Warning! Do not plug in before installation is fully completed! PREPARING THE EXTENSION CORD As a basic principle, we recommend the use - A proper extension cord, in order to avoid unnecessary damage to the lawn mower. (Fig. A) (Fig. -
Page 36: Operation
5. OPERATION DANGER! Risk of injury due to electric shock. Warning! Do not plug in before installation is fully completed! Caution! Do not touch rotating blade! Setting up your lawn mower Set up the lawn mower on flat and firm ground to ensure safe and sturdy operating. Put the upper handle horizontally on the ground,then open the quick clamp of the... - Page 37 5. OPERATION mower for the first time,raise the cutting position to the height best suited for your lawn. To adjust the blade height: Disconnect power supply. To raise the blade height, use your hand to adjust the blade height adjustment handle , and in the meanwhile,you have to adjust the blade height adjustment knob to make sure both...
-
Page 38: Maintenance
6. MAINTENANCE DANGER ! ELECTRIC SHOCK ! Disconnect power supply before cleaning ,changing the cutting blade and storing of the mower. Cleaning Keep all safety devices, air vents, and motor housing free of debris and dirt. Wipe down the equipment with a cloth and/or compressed air. It is highly suggested that you clean the device after every use. -
Page 39: Trouble Shooting
7. TROUBLE SHOOTING DANGER! Risk of injury due to electric shock. Warning! Before any trouble shooting, switch off the lawnmower. problems Probable causes Corrective action Mower not starting. Power supply not connected. Connect to power supply. Mower cutting grass Lawn is rough or cutting Adjust the cutting height. -
Page 40: Warranty
The products are covered with a warranty of 3 years starting from the date of purchase. This warranty covers all manufacturing or material defects. If purchasing a Sterwins lawn mower with a deck made of galvanised steel, the deck is covered with a 10-year warranty against corrosion. - Page 41 That the tool/battery/charger have never been in a wet environment (dew, rain, submerged in water...) That no incorrect parts have been used, parts not made by STERWINS, whereas they prove to be the cause of deterioration That the tool has not been used improperly (overloading the tool, or use of non-approved accessories).
- Page 42 10. EXPLODED VIEW WITH PART LIST 42 42...
- Page 43 10. EXPLODED VIEW WITH PART LIST PART NUMBER DESCRIPTION PART NUMBER DESCRIPTION A021039-018-00 Upper handle assembly 8304-511002 Fixing board A021039-019-00 Switch box assembly 8440-513007-00 Upper cover assembly 1-1-1 A021039-007-00 Switch box lower cover 16-1 8342-513001 Torsion spring 1-1-2 A021039-021-00 hook plate 16-2 8081-513002 rear shaft...
- Page 44 às normas ao documento| harmonizadas pertinentes utilizadas ou referências às especificações para as quais a conformidade é declarada| for model ELM2-36P-3W.4 EN 60335-1:2012+ A11:2014+ A13:2017+ A1:2019+ A14:2019+ A2:2019 2006_42_EC_MACHINE EN 60335-2-77:2010 machinery|Machines|máquinas |máquinas|...
- Page 45 Dove applicabile * il nome e il numero del laboratorio notificato che ha rilasciato la certificazione e il riferimento al documento|W stosownych przypadkach * notyfikowana nazwa specyfikacji, w odniesieniu do których deklarowana jest document| for model ELM2-36P-3W.4 EN 60335-1:2012+ A11:2014+ A13:2017+ A1:2019+ A14:2019+ A2:2019 2006_42_EC_MACHINE EN 60335-2-77:2010 for model 25EGT1-300.1...
- Page 46 FR: Montage / ES: Montaje / PT: Montagem / IT: Montaggio / EL: Συναρμολόγηση / PL: Montaż / RU: Сборка / KZ: Монтаждау / UA: Збiрка / RO: Montaj / EN: Assembly...
- Page 48 Clic...
- Page 49 FR: Préparation / ES: Preparación / PT: Preparação / IT: Preparazione / EL: Προετοιμασί / PL: Przygotowanie / RU: Подготовка / KZ: Дайындау / UA: Пiдготування / RO: Pregatire / EN: Preparation...
- Page 50 110 cm 95 cm...
- Page 52 1/3 cm 1/3 cm 1/3 cm 1/3 cm 1/3 cm 1/3 cm 1/3 cm 1/3 cm 1/3 cm...
- Page 53 15°...
- Page 55 FR: Utilisation / ES: Utilización / PT: Utilização / IT: Uso / EL: Χρήση / PL: Użytkowanie / RU: Использование / KZ: Пайдала / UA: Використання / RO: Utilizare / EN: Use 360° easy...
- Page 57 FR: Entretien / ES: Mantenimiento / PT: Manutenção / IT: Manutenzione / EL: Συντήρηση / PL: Konserwacja / RU: Уход / KZ: Және техникалы ызмет к рсету / UA: Догляд / RO: Întreţinere / EN: Maintenance...
- Page 58 FR: Hivernage / ES: Durante el invierno / PT: Preparação para o inverno / IT: Rimessaggio / EL: Αποθήκευση το χειμώνα / PL: Przechowywanie / RU: Зимний период / KZ: ыс ы са тау / UA: Зимовий період / RO: Păstrare pe perioada iernii / EN: Winter storage 90°...
- Page 59 5130 included (25-30)N.m...
- Page 64 Ce produit se recycle, s’il n’est plus utilisable déposez-le en déchetterie. Notice à trier. Pour en savoir plus : www.quefairedemesdechets.fr Ce produit est recyclable. S’il ne peut plus être utilisé, veuillez l’apporter dans un centre de recyclage de déchets. This product is recyclable. If it cannot be used anymore, please take it to waste recycling centre. ES EN ®...
Need help?
Do you have a question about the ELM2-36P-3W.4 and is the answer not in the manual?
Questions and answers