Table of Contents
Advertisement
Quick Links
Advertisement
Table of Contents
Troubleshooting

Subscribe to Our Youtube Channel
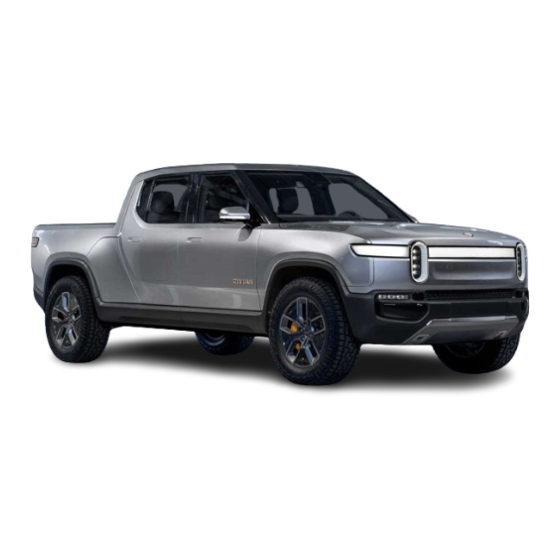
Related Manuals for RIVIAN R1T


Summary of Contents for RIVIAN R1T
- Page 1 OWNER'S GUIDE KEEP THE WORLD ADVENTUROUS FOREVER APRIL 30, 2021...
-
Page 2: Copyright
Copyright © 2020–2021 Rivian Automotive, LLC. All rights reserved. -
Page 3: Table Of Contents
Contents Copyright Introduction Symbols Used in Owner's Exterior Interior Access, Safety, and Climate Opening and Closing Keys Key Fob NFC Key Card NFC Key Wristband Mobile Application NFC Wristband Door Handles (Exterior and Interior) Exterior Handles Interior Handles Child Locks Rear Door Notification Garage Door Opener Seating... - Page 4 Airbag Components May Be Hot After Deployment Passenger Seat Occupant Classification System Deployed Airbags Questions- Seats Driver & Passenger Seat Second-row seats (for R1S and certain R1T models) 9-Module Battery 12-Module Battery Seat Belts Children Expectant Mothers Fasten Seat Belts...
- Page 5 Seat Belt Pretensioners Seat Belt Maintenance Headrests Front Seat Headrests Rear Seat Headrests Child Seats Choosing a Child Seat Installing a Child Seat Installing Child Seats with LATCH Installing the Lower Anchorage Guide Installing a Booster Seat Removing a Secured Child Seat Automatic Locking Retractor (ALR) Activating ALR Canceling ALR...
- Page 6 Climate Control Options Seat Climate Control Heated Steering Wheel Sun Visors Roof Defrost Audio and Phone Audio Surround Package (standard) Rivian Elevation 360-Degree Audio (upgrade) Alexa Overview & Setup Opt-Out and Mic Off Things You Can Ask Alexa Mobile Device Support...
- Page 7 Connecting to a Wi-Fi Network Wi-Fi Settings Cellular Connectivity Wi-Fi Hotspot Phone Call Receiving a Call Making a Call SOS or Emergency Calls Rivian Mobile App Smartphone Integration Phone Calls Contacts Media Audio Text Messages Updates Software Available Software Update...
- Page 8 Device Charging Charge Ports (USB-C) Wireless Charger Troubleshooting Driving Basic Vehicle Operations Starting and Powering Off Brakes Selecting a Gear Park (P) Reverse (R) Neutral (N) Drive (D) Selecting a Drive Mode Driving Controls Status Indicators Function Check Hard-Key Controls Steering Wheel Stalks Thumbwheel...
- Page 9 Horn Display Screens Driver Display Center Display Rear Display Navigation System Rivian ID Wipers Front Windshield Wipers Automatic Front Wipers Windshield Washers Driver+ Adaptive Cruise Control and Active Driving Assistance Engaging Adaptive Cruise Control Changing the Speed and Following Distance...
- Page 10 Traction & Stability Control Automatic Terrain Control & Hold Emergency Deceleration Charging Charging at Home Charging on the Road Rivian Adventure Network Rivian Waypoints Public Chargers Using the Trip Planner Charging the Vehicle Starting a Charging Session Viewing Charging Status...
- Page 11 Low Range Battery Types + Sizes Battery Life Jump Starting the 12-Volt Batteries Portable Charger IMPORTANT SAFETY INSTRUCTIONS Precautions Grounding Instructions Safety Symbols on Hardware Labels Identifying Parts Attaching and Removing an Adapter Charging Attaching the Portable Charger Tracking Time to Charge Light Bar States Detaching the Portable Charger Maintenance...
- Page 12 Under-Seat Storage Exterior Storage Front Trunk Spare Tire Compartment Accessing the Spare Tire Compartment Cargo Crossbars Set and Place Crossbars Secure the Crossbars Rack Loading Removing the Crossbars Maintenance Tailgate (for R1T) Opening & Closing the Tailgate (manual & power)
- Page 13 Truck Bed (for R1T) Tower Bed Rack Tonneau Cover (for R1T) Hard Tonneau Gear Tunnel Rivian Gear Tunnel™ Shuttle (R1T) Charging Devices Pulling Out the Shuttle for Use Shuttle Maintenance Security Gear Guard Security System (Alarm) Automatic Incident Reporting Camping and Off-Road...
- Page 14 Prepare the Clamp Knobs Prepare the Mounting Clamps Attach the Mounting Clamps Attach the Ladder Brackets Attach the Ladder Install the Cover Prepare the Clamps for Installation Install the Tent on the Vehicle Using the Rivian Three-Person Tent at a Campsite...
- Page 15 Deploy the Tent and Adjust the Ladder Install the Rainfly Remove the Rainfly Close and Secure the Rivian Three-Person Tent Remove the Rivian Three-Person Tent Weight Limits Warnings Care and Maintenance Rivian Camp Speaker Important Safety Information Speaker Specifications Getting Started...
- Page 16 Lantern Battery Checking Charge Level Charging the Speaker Resetting the Speaker Hardware Reset Factory Reset Updates Cleaning the Speaker Troubleshooting Warranty Customer Service Air Compressor Operating the Air Compressor Inflating Tires and Adventure Equipment Using the Spray Nozzle for Clean-Up Field Kit Contents Power Outlets...
- Page 17 Truck Bed Second-Row Seats Vehicle Modes Hangout Mode Off-Road Equipment Features and Capabilities Off-Road Package Hydraulic Roll Control Rock Rails Underbody Protection Towing and Loading Capabilities and Limitations Tow Hitch & Hooks Towing Modes Troubleshooting and Help Troubleshooting Keys Not Working Loss of Power Overheating System Failures...
- Page 18 Contacting Transport Canada Roadside Assistance Hazard Lights Instructions for Vehicle Transporters Preparing the Vehicle for Towing Loading the Vehicle onto the Tow Truck Customer Service Customer Engagement Center Roadside Assistance 24/7 Insurance Service 24/7 Service and Maintenance Service EV Safety During Servicing Tires Tires and Wheels Uniform Tire Quality Grading...
- Page 19 Glossary of Tire Terminology Tire Care Load Capacity Determining the Correct Load Limit Tire Inflator Kit Full-Sized Spare Tire Tire and Wheel Sizes Winter Tire Chains Tire Pressure Monitoring System TPMS Malfunction Indicator TPMS Sensor Automatic Learning Process Spare Tire TPMS Sensor Jacking and Lifting the Vehicle Routine Maintenance Maintenance Schedule and Record...
- Page 20 Interior Cleaning All-Weather Floor Mats Exterior Cleaning Washing Waxing Cold Weather Care Legal and Reference Legal Certification Conformity FCC and ISED Certification Exposure to Radio Frequency Energy State-Specific Disclaimers California Passenger and Off-Highway Motor Vehicles Event Data Recorder Privacy and User Data Quality Control...
-
Page 21: Introduction
Introduction Introduction Symbols Used in Owner's The following are the meanings of symbols used in this Owner's Guide. DANGER Risk of electrocution or electric shock DANGER Risk of major injury such as fire chemical or poison crushing maiming death WARNING Risk of minor injury CAUTION Risk of... -
Page 22: Exterior
Introduction IMPORTANT Instructions to successfully complete a task NOTE Useful information Exterior [[Exterior photos with callouts]] Interior [[Interior photos with callouts]] Driver Display Speedometer Odometer (including trip information) startup/all, driving mode) Power & battery meters Center Display Rear Display Climate control... -
Page 23: Access, Safety, And Climate
Access, Safety, and Climate Access, Safety, and Climate Opening and Closing Keys You can use any of the following keys to lock or unlock the vehicle: Key fob NFC key card NFC key wristband Mobile application NOTE To change default settings for locks and keys, see the Settings menu in the Mobile App or in the Center Display. -
Page 24: Mobile Application
Access, Safety, and Climate Mobile Application Press the lock/unlock button in the Mobile App to lock or unlock the vehicle. [[You can connect up to x_____ number of phones to the vehicle?]] [[The doors automatically lock when you start driving.]] NFC Wristband (2 cards provided w/ vehicle) Door Handles (Exterior and Interior) -
Page 25: Garage Door Opener
The airbags do not require routine maintenance. If it is necessary to modify the airbag system for a person with disabilities, contact Rivian Service. Airbag System Status Before you drive the vehicle, an airbag status indicator appears in the driver display for a few seconds during the function check. -
Page 26: Airbag Locations
Access, Safety, and Climate Airbag Locations Following are the locations of the airbag inflators: Inflator Description Front passenger knee airbag inflator Front passenger airbag inflator Side airbag inflator Head side curtain airbag inflator Driver knee airbag inflator Driver airbag inflator... -
Page 27: Driver And Passenger Airbags
Access, Safety, and Climate Inflator Description Side airbag inflator Head side curtain airbag inflator Driver and Passenger Airbags The driver and passenger airbags perform the following functions: Location Function Driver and front passenger airbags The driver and front passenger airbags protect the head and torso from high-impact collisions. -
Page 28: Warnings
Access, Safety, and Climate Warnings Maintain Proper Positioning WARNING Maintain a distance of at least 10 in (25 cm) between the driver's chest and the driver's airbag, as recommended by the National Highway Traffic Safety Administration (NHTSA). Never place a rear-facing child seat in front of an active airbag. The safest place for children 12 years old and under is in the rear seats in a suitable child restraint. -
Page 29: Airbag Components May Be Hot After Deployment
Access, Safety, and Climate Airbag Components May Be Hot After Deployment WARNING Some airbag system components such as inflators may be hot after airbags are deployed. To reduced the risk of injury, do not touch the airbag system components after inflation. Passenger Seat Occupant Classification System This vehicle has a passenger seat Occupant Classification System (OCS) that disables the passenger airbag under certain conditions:... -
Page 30: Questions
Questions- [[Can an owner ask Rivian to modify a passenger airbag for a person with disabilities or can an owner ask to disable the airbag for other reasons? This is a regulatory requirement: "S4.5.1.f (2), (viii) Information on how to contact the vehicle manufacturer concerning modifications for persons with disabilities that may affect the advanced air bag system."]]... -
Page 31: 12-Module Battery
Access, Safety, and Climate Seat LATCH restraint system Heated (lower cushion only) Folding (& moving??) 12-Module Battery Rear Seat Seating Capacity: 3 Rear Seat Feature: 100% Fixed Cushion (Does not flip forward) Rear Seat Feature: Fold down center armrest with cup holders (x2) with removable liner and storage compartment Access to gear tunnel behind armrest (PCCR-771) Seat LATCH restraint system... -
Page 32: Children
The vehicle is equipped with a side curtain airbag on both the driver and passenger side. In the event of a rollover accident where an airbag deploys, the airbag malfunction indicator lights up in the instrument cluster panel of the driver display. Contact Rivian Service have the vehicle serviced. Children Children should be in the rear seats and properly restrained in a child seat appropriate for their height and weight. -
Page 33: Expectant Mothers
Access, Safety, and Climate Expectant Mothers The lap belt should be worn securely and as low as possible over the hips and not over the waist. The shoulder belt should be worn between the breasts and to the side of the abdomen. - Page 34 Access, Safety, and Climate 5. Adjust the lap belt to be as low as possible on the hips. 6. Press and hold the shoulder anchor button and slide it up or down to adjust the shoulder belt height. WARNING The belt webbing should pass over the middle of the shoulder and across the chest without touching the neck.
-
Page 35: Unfasten Seat Belts
Access, Safety, and Climate in an improper position or introducing slack to the belt could significantly reduce its effectiveness in an accident. Unfasten Seat Belts 1. Press the release button on the buckle. 2. Allow the seat belt to retract slowly to avoid any twists. -
Page 36: Seat Belt Maintenance
Modifications or front-end attachments to the vehicle such as bars, winches, or snow plows may affect pretensioner sensors. Don't modify the vehicle with parts not approved by Rivian. Seat Belt Maintenance Use mild soap with water and a soft cloth to clean surface stains on the seat belt. Inspect the seat belts periodically for signs of damage, including wear and tear. -
Page 37: Rear Seat Headrests
WARNING A Rivian ID (user profile) can automatically move the seat to a desired position. Ensure that the front seats maintains a safe and comfortable seating position for the occupants, but that it does not impact the child seat or a child sitting directly behind. -
Page 38: Choosing A Child Seat
Access, Safety, and Climate Do not use a child seat that has been involved in a collision, even if it does not show any sign of damage. All child restraint systems are designed to be secured in vehicle seats by the following: Lap belts Lap belt portion of a lap-shoulder belt Lower and tether anchorages (LATCH/ISOFIX) - Page 39 Access, Safety, and Climate IMPORTANT If the forward-facing child seat requires a top tether, latch the hook into the tether anchor behind the seat and tighten the belt. 2. Run the vehicle's seat belt through the belt path as instructed by the child seat manufacturer instructions.
-
Page 40: Installing Child Seats With Latch
In the Rivian vehicle, only the two outboard seats support LATCH installation, while the middle seat is meant to be used with a seat-belt-retained seat. LATCH Seat Configuration The R1T second-row seats comes with three upper (tether) anchorages and four lower (bar) anchorages, two for each outboard seat. - Page 41 Access, Safety, and Climate The lower anchorages are marked by this symbol: They are located between the seat cushion and seat back. The upper anchorages are marked by this symbol: They are located on the rear shelf directly behind the seats. 1.
- Page 42 Access, Safety, and Climate 2. Connect the lower hooks of the child seat to the lower bar anchorages located in between the seat cushion and seat back. Avoid twisting the LATCH straps or snagging the vehicle seat belt. 3. If your child seats come with tether belts, be sure to pull on the tethers to tighten any slack, while pushing the child seat into the bottom and back cushions of the vehicle seat for a tight fit.
-
Page 43: Installing The Lower Anchorage Guide
Access, Safety, and Climate Single-tether configuration: Route the top tether belt over the center of the headrest. Double-tether configuration: Route the two top tether belts to either sides of the headrest, wrapping the belts as close as possible to the headrest without twisting them. -
Page 44: Installing A Booster Seat
Access, Safety, and Climate the seat cushion and seat back. 2. Grip the square frame of the anchorage guide on both sides and push the part onto the lower anchorage bars until the guide sits securely in place. NOTE To remove the anchorage guide, grip the square frame on both sides and pull it straight out. -
Page 45: Removing A Secured Child Seat
Access, Safety, and Climate WARNING A high-positioned lap belt may increase the risk of injury to the abdomen, or the chance that the child may slide under the belt, in the event of a collision or sudden braking. Do not allow children to wear the shoulder belt under the arm or behind the back. -
Page 46: Mirrors
Access, Safety, and Climate NOTE ALRs are different from Emergency Locking Retractors (ELRs), which are designed to allow occupants to move freely once the seat belt is buckled, but lock up in the event of an accident. ALRs are only equipped on passenger seats. Mirrors Windows Driver’s Door: Hard window switches for all 4 power windows + Window Lockout. -
Page 47: Rearview Mirrors
Access, Safety, and Climate Auto Dimming Power Folding Power Glass Adjust with Memory High Gloss Arm and Base Body Color Cap Puddle Lamps Integrated Turn Signals Blindspot indicator Surround View Camera Heated Mirror Rearview Mirrors The rearview mirror is auto-dimming. Toll Devices Placing RFID transporters (e.g., FastTrack) Lights... -
Page 48: Controlling The Headlights
Access, Safety, and Climate Entry lights: Rivian logo projects onto the ground in front the doors to enhance safety and visibility as you approach the vehicle. Hazard warning lights: Front and rear turn signals flash to alert other drivers that a hazard or emergency may exist. -
Page 49: Using The High Beams
Access, Safety, and Climate Icon needed Using the High Beams Use the drive stalk on the left side of the steering wheel to turn on the high beams. This increases visibility in dimly lit areas. Pull towards you to turn on High Beams temporarily. Release to turn off. Push away from you to turn on High Beams. -
Page 50: Using The Turn Signals
Access, Safety, and Climate Auto High Beams Using the Turn Signals Use the drive stalk on the left side of the steering wheel to control the turn signals. Push the drive stalk up indicate a right turn. Push the drive stalk down to indicate a left turn. Turning on the Hazard Warning Lights Press the Hazard Warning Lights button on the overhead console to turn on the hazard... -
Page 51: Flashlight
350 lumen 120 meters 7 hours 60 lumen 50 meters 18 hours Return the flashlight to its storage location in the front passenger door to recharge. It takes 2.5 hours to fully recharge. NOTE To replace the rechargeable battery, contact Rivian. -
Page 52: Climate
Access, Safety, and Climate Is there an accessory charger? Post SOP Will the flashlight ship with the vehicle or separately to save weight? With vehicle, TBD with welcome kit. Will it be available after-market? Post SOP Will it need a standalone Owner's Guide? TBD Climate Climate Control Options How to select options for the climate control system. -
Page 53: Sun Visors
With the sun visor in the down position, flip open the cover for illuminated vanity mirrors. Roof Tint glass, removable panel Glass roofs - adjust light penetration (from interior) Rivian vehicles have a fixed, tinted all-glass panoramic roof. [[Joe Brown is the contact for roof]]... -
Page 54: Defrost
Access, Safety, and Climate Defrost Electric de-icer Rear window defroster... -
Page 55: Audio And Phone
Base amplifier 10 channel with basic sound modes Chime and SOS speaker Expanded metal grill AM/FM/HD radio Amazon music Acoustic Vehicle Alerting System (AVAS) Rivian Elevation 360-Degree Audio (upgrade) Rivian Elevation 360° audio is included with the Launch Edition and Adventure package. -
Page 56: Alexa
For your privacy, Alexa, is disabled when the vehicle is in guest mode. Opt-Out and Mic Off Alexa is the only supported voice assistant in Rivian vehicles. You can disable the wake word in the Settings menu on the center display. Once the wake word is disabled, you can invoke Alexa by pressing the left thumbwheel on the steering wheel. -
Page 57: Mobile Device Support
'Alexa, turn down the air' 'roll down the windows' 'open the front trunk' The "Things to try" option on the center display suggests phrases that you can try with Alexa. You can cycle through different category features to learn about Alexa's capabilities and recognized commands. -
Page 58: Connecting Wi-Fi
Connecting Wi-Fi The vehicle uses a Wi-Fi connection to deliver the following: Infotainment (music or video streaming) Maps and navigation Live traffic displays The vehicle automatically prefers Wi-Fi connectivity over cellular connectivity unless you turn off Wi-Fi. Connecting to a Wi-Fi Network 1. -
Page 59: Cellular Connectivity
You will be notified before the trial subscription ends, and you can use your Rivia n account to choose a cellular service plan that meets your needs. [[Check to see if the notification is through email, the Rivian account, mobile app, and/or center display.]]... -
Page 60: Phone Call
To change the name of your hotspot, enter the new name. Check the center display for a message to set up the hotspot for your vehicle. If your devices lose connection to the Wi-Fi hotspot, check the center display for messages. -
Page 61: Sos Or Emergency Calls
Choose the More button to add another contact to the call (creating a conference call) or make a new call (creating a parallel call). [[Are there any phones or cellular networks that don't support parallel or conference calls? If so, then add a note mentioning that the capability for parallel or conference calls depends on the phone and cellular network.]] NOTE... -
Page 62: Smartphone Integration
[[Is there any information we need to include about how to pair the app with the in-vehicle experience? Would Rivian ID or some other aspect be part of this?]] Download the mobile app from the App Store or Google Play Store. -
Page 63: Media Audio
You can read the update details and choose the time period when the vehicle will install an update. [[Should it be mentioned that we (Rivian) pay for cellular data usage by OTA updates?]] These are the types of software updates: New and improved features - You can delay the update by a certain time period. -
Page 64: Emergency Updates
Version number of the software update Date and time of its planned installation Estimated time it takes for installation Completed percentage of the download, if a download is in progress If a new software version is ready, your vehicle will try to install it during the time period you choose and notify you some time before an update begins. -
Page 65: Charge Ports (Usb-C)
Four 110V Three 12V Charge Ports (USB-C) USB, power sockets available in the car Wireless Charger Once the vehicle is powered on, you can charge your phone and other rechargeable, battery-operated devices on the high-speed wireless charger located on upper tray of the center console. -
Page 66: Troubleshooting
While you can charge two phones at the same time, the charging pad is designed to work best simultaneously charging a phone and another small item such as ear buds. The charging pad has a temperature sensor and will stop charging if a device or environment is too hot. -
Page 67: Driving
Driving Driving Basic Vehicle Operations Starting and Powering Off To start the vehicle: 1. Unlock the vehicle and open the driver side door. 2. Sit in the driver's seat. 3. Close the door and buckle the seat belt. 4. Press brake pedal. Adjust vehicle settings or destination, as needed. -
Page 68: Selecting A Gear
Driving Selecting a Gear DANGER Fully press the brake pedal and ensure the vehicle is stationary before shifting into Park, Drive, or Reverse. Make sure the vehicle is in Park before you exit the vehicle. Failure to follow these warnings could result in personal injury, death, or property damage. -
Page 69: Reverse (R)
Driving Reverse (R) Push the drive stalk all the way up and then release to put the vehicle in Reverse. Make sure the vehicle is completely stopped before shifting into or out of Reverse. Neutral (N) Push up the drive stalk to put the vehicle in Neutral. The vehicle can roll freely in Neutral. DANGER If the vehicle is stationary, press and hold the brake pedal so the vehicle doesn't roll. -
Page 70: Driving Controls
If any of the "malfunction" or "system failure" lights become active, there could be a safety risk when operating the vehicle. The vehicle may not be drivable when a malfunction has occurred. Contact Rivian Customer Service to have the vehicle inspected. - Page 71 Driving play Scre Stat Name Description Zone Acti Anti-lock braking system is malfunctioning Soli Drive System Malfun Displ ction ay - Instru ment Clust Airbag Airbag system is malfunctioning Soli Drive Malfun ction Displ ay - Instru ment Clust Autom High beams are being controlled automatically Soli Drive...
- Page 72 Driving play Scre Stat Name Description Zone Acti ction ay - Instru ment Clust Door One or more vehicle doors are not fully closed. Re Soli Drive Ajar Multiple variations of "door ajar" are shown on a larger Indicati Displ 3D graphic (while the vehicle is parked) to indicate...
- Page 73 Driving play Scre Stat Name Description Zone Acti Electro ESC system has been turned off Soli Drive Stabilit Displ ay - Control Instru (ESC) ment System Clust Front Front fog lamps are active Soli Drive Lamps Displ ay - Instru ment Clust High...
- Page 74 The battery's State of Charge (SOC) is low. Soli Drive Battery Red - 5 to 30 miles (10 to 50 km) of range Warnin Displ remaining ay - Instru Yellow - 50 miles (80 km) of range remaining ment Clust Rivian Resource: https://rivianautomotivellc.atlassian.net/wiki/spaces/ UX/pages/1558959867/Battery+Thresholds+In- Vehicle+Notifications...
- Page 75 Driving play Scre Stat Name Description Zone Acti Low beam headlights are malfunctioning Flas Drive Beams hing Displ Malfun ay - ction Instru ment Clust Low beam headlights are active Soli Drive Beams Displ Operat ay - ional Instru ment Clust One or more tires has low tire pressure Soli...
- Page 76 Driving play Scre Stat Name Description Zone Acti Clust Parking Parking brake is active Soli Drive Brake Applie Displ ay - Instru ment Clust External wiring malfunction to the electronic control Flas Parking Drive unit for the parking brake hing Brake System Displ...
- Page 77 Driving play Scre Stat Name Description Zone Acti Rear Rear fog lamps are active Soli Drive Lamps Displ ay - Instru ment Clust Rear Rear window defrost/defog function is active Cent Soli Windo Displ Defrost /Defog Seat Driver seat belt is not fastened Drive Soli Belt...
- Page 78 Driving play Scre Stat Name Description Zone Acti Tailgat Tailgate is not fully latched. Soli Drive e Open Shown as a telltale on the instrument cluster and a Displ larger 3D graphic (while the vehicle is parked). ay - Instru ment Clust Tire...
-
Page 79: Hard-Key Controls
Driving play Scre Stat Name Description Zone Acti Clust Windsh Windshield defrost/defog function is active Cent Soli ield Defrost Displ /Defog Windsh Windshield washer fluid is low Soli Drive ield Washer Displ Fluid ay - Instru ment Clust Hard-Key Controls Steering Wheel Heated Electronic power steering... -
Page 80: Thumbwheel
Driving Thumbwheel Two multi-function metal thumbwheels are located on the left and right sides of the steering wheel. [[The left thumbwheel controls audio and media. Right thumbwheel is for ADAS]] Roll the thumbwheel up and down to scroll through items on the screen, or to increase / decrease audio volume. -
Page 81: Display Screens
Driving Display Screens Driver Display The driver display is located behind the steering wheel. This is not a touch screen and displays information relevant to the driver, such as the gear the vehicle is in and driving speed. -
Page 82: Center Display
Driving Center Display The center display is a touch screen located at the center of the instrument panel. Rear Display The rear display is a touch screen located at the back of the center console. It shows the settings for passengers at the rear to control the heating and air conditioning to the rear seats. -
Page 83: Navigation System
Wait until the screen has cooled before touching the center display. Navigation System Updateable digital map with real-time traffic, satellite, EV stations and location services Turn-by-turn navigation, with Rivian-optimized EV routes Offline assisted GPS Compass mode Topographical maps Off-road un-mapped route tracking Rivian ID AKA, "User Profiles"... -
Page 84: Wipers
Use the wiper switch on the left stalk to control the wiper speed. Push the wiper switch up to increase the wiper speed from low to high. Push the wiper switch down to decrease the wiper speed from high to low [R1T wiper stalk:]... -
Page 85: Automatic Front Wipers
Driving CAUTION In cold weather, turn off the wipers and allow them to return to the wiper park position before exiting the vehicle. The wipers may freeze to the windshield and may cause damage to the wiper motor. Fully defrost the front windshield before switching the wipers on. Automatic Front Wipers Use the wiper switch to select Auto mode to enable automatic front wipers. -
Page 86: Windshield Washers
Driving Windshield Washers [The "upper washer button" in the first sentence is for R1S only. The R1T wiper stalk has only one washer button.] Press and hold the washer button to wash the front windshield. Press the button for at least two seconds. - Page 87 Driving WARNING In cold weather, do not wash the front windshield while driving. The wiper fluid can freeze suddenly and obstruct your view, which can lead to a collision.
-
Page 88: Driver
Driving [Rear window wiper and washer are for R1S only:] Driver+ Rivian vehicles support a suite of driver assistance and safety features. 10 exterior cameras help with day-to-day and higher-speed driving, while a camera inside monitors for driver alertness. 12 ultrasonic sensors provide 360° close range coverage. -
Page 89: Changing The Speed And Following Distance
Driving To engage Adaptive Cruise Control while driving, push the drive stalk all the way down and then release. The vehicle maintains the current target speed. The Adaptive Cruise Control feature does not engage if the system detects safety issues. For example, if the distance between the car in front of you is too close, Adaptive Cruise Control will not engage. -
Page 90: Engaging Active Driving Assistance
Driving Control Function Quick press- reduce by 1 mph or 1 Long press - reduce by 5 mph or 10 Right thumbwheel button Increase speed Quick press - increase by 1 mph or 1 Long press - increase by 5 mph or 10 Thumbwheel up Increase following distance Thumbwheel down... -
Page 91: High Beam Assist
Driving To set a new target speed, accelerate or brake to the new speed, then push the drive stalk all the way down one time and release. To disengage Active Driving Assistance, press the brake pedal or push the drive stalk up. NOTE If you turn the steering wheel while Active Driving Assistance is engaged, the system switches to Adaptive Cruise Control at the current set speed. -
Page 92: Level 2 Autonomous Drive
Driving Level 2 Autonomous Drive Accent Lighting acts as secondary ADAS indicators for Adventure trim ONLY Includes Optical Driver Monitoring System (sensor mounted in 1st row overhead console) Per PCCR -495: Current ADAS hardware package to be made standard on all trims. Customer facing features to be turned off for vehicles that do not elect L3 option. -
Page 93: Increased Default Ride Height
Mid (default setting) Lowest The Rivian vehicle has front- and rear-ride-height adjustable air suspension, allowing for 6.5 inches of vertical travel — as low as 7.9 inches or as high as 14.4 inches — to optimize your vehicle’s ride height for improved handling, comfort, aerodynamics and stability with varying payloads. -
Page 94: Emergency Deceleration
Driving Emergency Deceleration If an emergency occurs while driving at speed, press and hold the Park button to perform an immediate emergency deceleration. An emergency deceleration notification appears on the driver display. Continue to hold the Park button to bring the vehicle to a stop. If the vehicle reaches a standstill, it automatically shifts into Park and applies the parking brake. -
Page 95: Charging
Charging Charging Charging at Home The most convenient way to charge is by installing a Rivian Wall Charger at home (available separately). You can also use the Portable Charger (included with your vehicle) to plug into a power outlet. For more information, see the Portable Charger User Guide. [Ref other doc... -
Page 96: Using The Trip Planner
3. Align the charge plug to the vehicle's charge port and insert fully. If using the Rivian Adventure Network (or other DC charger), lift the vehicle's DC charge port cover before plugging into the vehicle. Charging starts automatically. There may be a short delay if the battery requires heating or cooling. -
Page 97: Selecting A Range Setting
Status Blue (solid) Charge scheduled Red (solid) Error. Contact Rivian. Red (pulsing) Error. The light bars at the front and rear of the vehicle briefly display charging progress as you approach or walk away from the vehicle. Green light bars show progress towards charge completion based on the range setting (Daily, Extended, or Trip). -
Page 98: Range
Charging 1. Select Charge Schedule from the Energy menu. 2. Select days to schedule. 3. Select times to start and stop charging. To disable the charge schedule, select Off. Range Range is the number of miles (or kilometers) a vehicle can travel before needing a charge. Range may vary and a reduction in range does not indicate a sudden or permanent loss of battery capacity. -
Page 99: Low Range
Contact Rivian. vehicle powers down completely. WARNING Never open or tamper with the vehicle battery. Contact Rivian for battery service. CAUTION If the vehicle battery’s charge level falls to 0%, plug it in immediately. If you leave the vehicle unplugged for an extended period, it may not charge without jump starting or replacing the 12-volt batteries. -
Page 100: Battery Types + Sizes
Leave the vehicle plugged in when it won't be driven for a long time. Range decreases slightly when parked to maintain battery health. Use the Rivian Wall Charger or Rivian Waypoint chargers as much as possible. Minimize the use of DC fast chargers, except for long trips. -
Page 101: Portable Charger
Do not use the Portable Charger outside of the guidelines detailed in this guide. The Portable Charger is designed to charge Rivian vehicles only. Do not use the Portable Charger for any other purpose or to charge any other vehicle. - Page 102 Do not attempt to service the Portable Charger by disassembling it. It is not user-serviceable. Contact Rivian for repairs. Do not twist or place significant strain on the Portable Charger. Do not subject the Portable Charger controller to undue force or impact.
-
Page 103: Grounding Instructions
Charging Grounding Instructions The Portable Charger must be grounded. If it should malfunction or break down, grounding provides a path of least resistance for electric current to reduce the risk of electric shock. The Portable Charger is equipped with a cord that has an equipment grounding conductor and a grounding plug. -
Page 104: Safety Symbols On Hardware Labels
Charging Safety Symbols on Hardware Labels The following safety symbols may appear on labels located on the Portable Charger. Symbol Indication Risk of electric shock Danger Equipment grounding conductor Instruction manual UL logo Identifying Parts... -
Page 105: Attaching And Removing An Adapter
Charging 1. Light bar 4. Coupler 2. Controller 5. 120-volt AC charge adapter 3. Cable 6. 240-volt AC charge adapter Attaching and Removing an Adapter To attach an adapter to the Portable Charger, push the connector on the adapter into the port in the controller on the cable until the connector clicks into place. -
Page 106: Charging
Charging Charging Attaching the Portable Charger DANGER Before attaching the Portable Charger, inspect it and the power outlet for damage. If one or the other is damaged, do not use. Use only a 120 volt, 208 volt, or 240 volt AC power supply, 50/60 Hz wall outlet with a dedicated and properly grounded circuit, rated for the coupler in use. -
Page 107: Tracking Time To Charge
Charging NOTE The groove in the adapter plug helps to provide a good grip when inserting the plug into and removing it from the outlet. 2. Open the charge port door by touching the area on the vehicle to the lower right of the door. -
Page 108: Light Bar States
Charging Battery temperature During a charge session, view data such as charge progress, time remaining to charge, and distance estimates in the vehicle display screens or in the mobile app. Use the information in the table below to help determine charge rates. Adapter Current Voltage... -
Page 109: Maintenance
Charging Maintenance Cleaning When cleaning is necessary, wipe the Portable Charger with a damp cloth. Do not use anything abrasive. NOTE Take care not to get water in the Portable Charger connection points. Follow the warnings "IMPORTANT SAFETY INSTRUCTIONS" on page 101. -
Page 110: Troubleshooting
Problem Unplug the Portable Charger Light bar on Portable Charger Power from the power outlet. displays flashing red interruption Plug the Portable Charger into the power outlet. Light bar on Portable Charger Charger error Contact Rivian service. displays solid red... -
Page 111: Specifications
Charging Specifications Specification Description Operating voltage range 90-264 (120-240 V nominal) AC single-phase Operating grid frequency 45-65 Hz Maximum current 32 A; limited by adapter selected Cable length 18 ft (5.5 m) Mechanical and environmental load UL 2231-1,2, UL 2594 regulatory standard Operating temperature -30°C to +50°C Storage temperature... -
Page 112: Storage And Security
Storage and Security Storage and Security Interior Storage Center Console The center console is located in between the driver and passenger seats. It serves a storage compartment for small belongings. Charge your devices on the included wireless charger. Cup Holder Press the plated trim on the forward edge of the center console to pop out the cup holder for use. -
Page 113: Power Outlets
Storage and Security Power Outlets The center console has the following outlets: 2 plugs for USB-C in the center console bin 2 plugs for USB-C in the back of center console near the rear display screen 1 plug for 110v AC outlet in the back of center console below the rear display screen [[Please verify the accuracy of the power outlets, number and location.]] Storage Bin Press the button at the front and center of the console to access the storage bin. -
Page 114: Rear Seat Armrest
Storage and Security [[Is there a good closeup shot of the button and how to locate and press it to activate storage bin opening so our illustrator can mock it up?]] Rear Seat Armrest When the middle seat is not occupied in the second row, you can pull down the rear seat armrest. -
Page 115: Door Pockets
Storage and Security Door Pockets Front and rear doors contain hinged storage pockets to hold your belongings. Pull the pocket away from the door to expand it and store larger items. The front door pockets can hold a larger one-liter water bottle. -
Page 116: Seat Back Pockets
Storage and Security NOTE Don't store bulky items that prevent the door from closing, or items big enough to contact the sides of the seats. Don't store any liquid that isn't securely sealed to prevent spills when the door is closed. Seat Back Pockets The front row seats have seat back pockets to hold your belongings. -
Page 117: Exterior Storage
Storage and Security NOTE The maximum weight capacity of the under-seat storage drawer is approximately 0.5 lb (230 g). [[Is there a better graphic or mockup to show the drawer?]] Exterior Storage Front Trunk The front trunk can be opened in the following ways: Hard button on the front fascia [[insert picture of location and look of the button]] Smartphone app Emergency-release button... -
Page 118: Spare Tire Compartment
The front trunk has drainage holes in case of water spills. Spare Tire Compartment R1T owners will have the option of ordering a full- or compact-size spare tire from Rivian at additional cost or may obtain one on their own. - Page 119 Storage and Security 1. Ensure that the truck bed is empty, and that there aren't any objects on the lid. 2. Ensure that the tailgate is open (in the down position) for enough clearance to open the compartment. 3. Press the button at the rear of the truck bed for the lid to open. Compact tire.
-
Page 120: Cargo Crossbars
2 crossbars 2 locking keys Set and Place Crossbars [R1T:] The crossbars can be mounted on the roof or on the truck bed. [R1S:] 1. Set the width of the crossbars by extending them over the cargo ports on the vehicle. - Page 121 Rivian Proprietary & Confidential Draft - DO NOT DISTRIBUTE...
-
Page 122: Secure The Crossbars
Storage and Security Secure the Crossbars 1. Lock the crossbars with the key. - Page 123 Storage and Security 2. Push the crossbar latch all the way down to cover the key cylinder. 3. Check both sides of each crossbar to make sure the crossbars are secured. WARNING Incorrectly mounted crossbars and unsecured loads can loosen while driving and cause a serious accident.
-
Page 124: Rack Loading
Storage and Security Rack Loading Do not exceed the maximum specified load for the cargo crossbars. Maximum Roof Load = weight of crossbars + weight of load. The maximum dynamic (driving) load is 250 lbs (113 kg). The maximum static (parked) load is 890 lbs (404 kg). For example, when the vehicle is parked at a campsite with a rooftop tent, the maximum roof load is 890 lbs (404 kg). -
Page 125: Removing The Crossbars
Clean the crossbars with a solution of water and standard car wash liquid. Do not use cleaners that contain bleach, ammonium, or alcohol. Remove the crossbars when not in use. Tailgate (for R1T) The tailgate manually opens to 90 degrees and has a power-locking feature. -
Page 126: Truck Bed (For R1T)
The truck bed won't remain dry if you ford in water that’s higher than the truck bed floor. If you're planning to drive your Rivian truck in deep water, ensure that equipment stored in your truck bed won't be damaged by contact with water. - Page 127 Rivian Proprietary & Confidential Draft - DO NOT DISTRIBUTE...
-
Page 128: Tonneau Cover (For R1T)
Storage and Security Tonneau Cover (for R1T) Tonneau covers (power hardcover, manual soft cover) Hard Tonneau The hard tonneau cover can be opened and closed with a button on the exterior bed rail. The tonneau cover can also be locked. -
Page 129: Rivian Gear Tunnel™ Shuttle (R1T)
CAUTION Don't use an outlet with any device that requires over 1500 W of power. Rivia n Gear Tunnel™ Shuttle (R1T) The Rivia n Gear Tunnel shuttle extends from the vehicle and acts as an additional surface for holding equipment off the ground. -
Page 130: Charging Devices
Storage and Security Gear Tunnel shuttle Gear Tunnel shuttle with full-length storage bin Gear Tunnel shuttle with half-length storage bin [[Are storage bins available at the same time as the shuttle?]] [[Will the storage bins be sold separately (from the shuttle)? If so, we should have instructions for installation.]] Charging Devices... - Page 131 Storage and Security [[consider illustration with numbered callouts]] Item Description 110 V power outlets 12 V USB power outlets...
-
Page 132: Pulling Out The Shuttle For Use
Storage and Security Pulling Out the Shuttle for Use WARNING Ensure your vehicle is level. [[is there a self-leveling feature?]]... - Page 133 Storage and Security [[consider overall illustration of Gear Tunnel shuttle]] [[Stating "right" for the Gear Tunnel door because the passenger side could change in different countries.]]...
-
Page 134: Shuttle Maintenance
Storage and Security 1. Open the right Gear Tunnel door. 2. Press and hold the slide lock button on the shuttle and pull it out from the Gear Tunnel. NOTE The shuttle offers 10 length options. Release the slide lock button when the shuttle is extended to the length you want. -
Page 135: Security
Storage and Security Security Gear Guard Vision module and camera Bed module with cable attachment location 1 gear guard cable Gear Guard is the theft deterrence system for belongings stored in the truck bed. It consists of Security cameras Alarm system Locking cables Security System (Alarm) [[Content TBD]]... -
Page 136: Camping And Off-Road
Camping and Off-Road Camping and Off-Road Camping Rivia n Camp Kitchen The Rivia n Camp Kitchen includes the following: Induction cooktop Water container Collapsible sink Faucet with hose reel Lights stored in a drawer Cookware [[consider illustration of built-out Camp Kitchen for context]] Installing the Camp Kitchen The Camp Kitchen is made up of the following:... - Page 137 Rivian Proprietary & Confidential Draft - DO NOT DISTRIBUTE...
- Page 138 Rivian Proprietary & Confidential Draft - DO NOT DISTRIBUTE...
- Page 139 Rivian Proprietary & Confidential Draft - DO NOT DISTRIBUTE...
- Page 140 Rivian Proprietary & Confidential Draft - DO NOT DISTRIBUTE...
-
Page 141: Installing The Water Module
Camping and Off-Road [[Stating "right" for the Gear Tunnel door because the passenger side could change in different countries.]] 1. Open the right Gear Tunnel door. 2. Press and hold the slide lock button on the shuttle to pull it out from the Gear Tunnel. [[consider illustration of Gear Tunnel open with arrow pointing to slide lock button on shuttle and shuttle being pulled out of Gear Tunnel]]... -
Page 142: Pulling Out The Camp Kitchen For Use
Camping and Off-Road [[consider illustration of open electrical access door and zoom showing power plug being inserted into outlet with arrow]] [[Check to see if the cooktop should be plugged in immediately during Camp Kitchen installation or later when they are ready to use the cooktop--what is preferred?]] [[Should step-by-step instructions to open the Gear Tunnel be included here? consider keeping it general in case the UI... -
Page 143: Storing Water
Camping and Off-Road Storing Water When you insert the water container into the water module, the water container connects to the powered pump and faucet with hose reel so it's easy to dispense water. [[consider top and front, angled illustration with numbered callouts]] Item Description... - Page 144 Rivian Proprietary & Confidential Draft - DO NOT DISTRIBUTE...
- Page 145 Camping and Off-Road [[Questions and feedback from review: Any health concerns about storing the water for a long time? Do we have any recommendations or guidelines for how long to store water? Temperatures? Any guidelines re sub-freezing temperatures? Could the container crack if the water freezes?]] NOTES...
-
Page 146: Using The Sink
Camping and Off-Road 4. Turn the water container cap in a counterclockwise direction to open it. 5. Fill the water container and close the cap. 6. Insert the water container into the water module. [[consider illustration showing the water module with the safety lever in the vertical direction and water container being inserted with arrow showing direction of insertion]] 8. - Page 147 Rivian Proprietary & Confidential Draft - DO NOT DISTRIBUTE...
- Page 148 Camping and Off-Road [[consider illustration with sink module being lifted with zoom to safety latch]]...
-
Page 149: Charging A 110 V Device
Camping and Off-Road 1. Pull the webbing and lift the sink. 2. Press the safety latch to lock the sink into place. 3. Press the sink lid release tab and lift the sink lid from the sink. 4. Expand the sink to full capacity for use. 5. - Page 150 Rivian Proprietary & Confidential Draft - DO NOT DISTRIBUTE...
- Page 151 Rivian Proprietary & Confidential Draft - DO NOT DISTRIBUTE...
-
Page 152: Setting Up Lights
Camping and Off-Road [[consider illustration showing zoom of pole tip with arrow going in direction of cap, poles being extended to full length, zoom of bottom of pole with arrow going to light pole holder, zoom of power cord going to USB-C power outlet; so illustration with three zooms or may be more than 1 illustration]] The light poles and string of lights are stored in the lower drawer behind the cooktop. -
Page 153: Cooktop Controls
Camping and Off-Road 5. Connect the USB-C power cord to the 12 V USB-C power outlet on top of the water module. [[Is there an on/off switch for the lights?]] [[Need to confirm final design of lights.]] [[Need to confirm that each pole needs to be extended. Seems like it's too long to fit into a drawer.]] Cooktop Controls The induction cooktop heats up food or liquids in magnetic cookware, which is stored in... - Page 154 Camping and Off-Road Item Description Cooking zones Temperature Heat Timer Timer On display - or + to adjust temperature, heat, or timer Cooktop lock or unlock when pressed together On/Off Air vents underneath the cooktop CAUTION Keep the area around the air vents open so the cooktop won't overheat. If it overheats, the cooktop will automatically turn itself off.
-
Page 155: Heating Food Or Water
Camping and Off-Road Heating Food or Water [[consider illustration with cooktop module being lifted with zoom to safety latch]] [[Turning on/off 110 V outlets doesn't seem to be in the mobile app at SOP.]] 1. Turn on 110 V power outlets in the vehicle. 2. -
Page 156: Cooktop Maintenance
Camping and Off-Road 9. When the timer expires, the cooktop turns off automatically. Push any button to turn off the beeping timer. To manually turn off the cooktop, push the On/Off button. WARNING The cooktop remains hot after use. Wait up to 10 minutes for the cooktop to cool down before stowing the Camp Kitchen. -
Page 157: Camp Kitchen Specifications
Camping and Off-Road [[Should we state mild detergent instead of standard car wash liquid? For now use the first two sentences of the Crossbars maintenance section for step 1, except mention the Camp Kitchen instead.]] [[get the dimensions and total weight; any other specs to list for Camp Kitchen? water container capacity (4 gallons or 5 liters) may change, so remove it from the specs table]] Camp Kitchen Specifications... -
Page 158: Warranty
[[if there is a stand-alone printed guide, will it suffice to have a line referring to the warranty rivian.com?]] This product is covered by a limited warranty from XXXXXX Customer Service Still need help? Connect with us 8 AM–8 PM (CT) Mon–Fri. Call (888) RIVIAN1 (888) 748-4261. Write customerservice@rivian.com. Chat or find answers at rivian.com. -
Page 159: Rivian Three-Person Tent
Rivia n Three-Person Tent The Rivia n Three-Person Tent includes: Tent Ladder Rainfly Cover Keys Mounting Hardware [[Does the owner need to add the mounting hardware?]] [[Placeholder graphics are used throughout this document. Figures will not contain text.]] Assemble the Tent 1. -
Page 160: Prepare The Mounting Clamps
Prepare the Mounting Clamps 1. Use a 5 mm hex wrench to loosen the slider bolt on the mounting clamp. 2. Slide two of the square nuts into each mount. 3. Repeat the process of loosening the slider bolt and installing square nuts for each of the mounting clamps. -
Page 161: Attach The Mounting Clamps
Attach the Mounting Clamps 1. Reach under the mattress and push the bolt through the mounting hole. You can also remove the mattress for easier access to the mounting holes. [[possibly omit this step in production version if we are going to have a mounting plate?]] 2. - Page 162 3. Put a washer on each of the long bolts. 4. Position the ladder bracket over the holes. 5. Reach under the mattress and insert the two long bolts with washers through the floor and bracket. 6. Hand-tighten the lock nuts on each of the long bolts. 7.
-
Page 163: Attach The Ladder
8. Repeat for the second ladder bracket. Attach the Ladder 1. Position the ladder so the information stickers are visible and the top brackets are aligned with the flat edge down. 2. Fasten the ladder with the short bolts, washers, plastic bushings and lock nuts as shown in the figure. -
Page 164: Install The Cover
3. Use the 8 mm hex wrench and 13 mm open-ended wrench to fully tighten the hardware on both ladder clamps. WARNING Ensure the ladder bolts are fully tightened to avoid injury. Install the Cover A. Slide the cover with the Velcro™ side up into the round channel on the edge of the tent. -
Page 165: Prepare The Clamps For Installation
Prepare the Clamps for Installation 1. Measure the distance (X) between the centers of the crossbars on the vehicle. 2. Tilt the tent on its side and open the clamps completely. 3. Slide the clamps in the track to match the measured crossbar center distance (X). Measure from the fixed side of the clamp. -
Page 166: Install The Tent On The Vehicle
Install the Tent on the Vehicle 1. Ask a friend to help lift the tent onto the vehicle crossbars. 2. Tighten the clamps as follows:... - Page 167 A. Tighten the clamps around the crossbars B. Completely tighten the slider bolt on each clamp. C. Lock the clamps with the key.
-
Page 168: Using The Rivian Three-Person Tent At A Campsite
CAUTION Ensure the clamps are correctly seated on the crossbars so the tent doesn't slide. Test the installation and re-tighten the clamps if necessary. Using the Rivia n Three-Person Tent at a Campsite 1. Find a level place to park. 2. -
Page 169: Deploy The Tent And Adjust The Ladder
4. Release the Velcro straps. Deploy the Tent and Adjust the Ladder 1. Release the ladder strap, then grab the bottom rung of the ladder and pull to extend the ladder. 2. Push down on the ladder and walk 2 or 3 steps backward to open and unfold the tent. - Page 170 3. Securely grasp the ladder and use it to lower the tent until it is fully open and the floor of the tent is flat. Rest the feet of the ladder on the ground. 4. Set the ladder as follows: Ensure the top rung is locked into one of the 3 positions.
-
Page 171: Install The Rainfly
WARNING Don't retract the ladder while it is in use. The ladder must remain in place to support the tent. Use caution while climbing up and down the ladder. Assist children on the ladder. Install the Rainfly 1. The easiest way to install the rainfly rods is from the inside of the tent. 2. -
Page 172: Remove The Rainfly
CAUTION The rainfly rods are under tension when installed. Position your body to the side of the rod when installing or uninstalling. The rod could spring out of place and cause injury if you are directly under the rod. Remove the Rainfly 1. - Page 173 WARNING Never operate your vehicle with the Rivia n Three-Person Tent open! You must close and secure the tent before driving.
-
Page 174: Remove The Rivian Three-Person Tent
Remove the Rivia n Three-Person Tent A. Unlock the clamps with the key B. Fully open the clamp levers. C. Ask a friend to help remove the Rivia n Three-Person Tent from the vehicle. Weight Limits Description Weight Maximum tent capacity 600 lbs (272 kg) Maximum crossbar capacity, static (parked) 890 lbs (404kg) -
Page 175: Warnings
Description Weight (driving) Tent weight 115 lbs (52 kg) Warnings WARNING Remove the tent and crossbars before entering an automated car wash Do not use fuel-burning or oxygen consuming devices inside the tent. This includes candles, gas lanterns, kerosene lamps, stoves, and cooking and heating appliances. - Page 176 Failure to properly dry out the tent may cause growth of mold or mildew, which can degrade the tent material, causing degradation and foul odor. Mold and mildew growth is not covered under your warranty. Store the tent in a cool, dry indoor location when not in use to prolong its life. Ensure that the tent is fully dry before storing.
-
Page 177: Rivian Camp Speaker
Important Safety Information DANGER The rechargeable battery may explode if it is incorrectly replaced. Contact Rivian Customer Service for battery replacement. The speaker will force a shutdown to protect the battery if the temperature falls outside the range of -4°F to 140°F (-20°C–60°C). - Page 178 Refer all servicing to Rivian qualified service personnel. Servicing is required when the speaker is not functioning normally, or has been damaged in any way, such as exposure to spilled liquids, excessive rain, or moisture. [[Battery shorting causing a thermal event...
-
Page 179: Speaker Specifications
Item Description Handle Audio controls Fabric speaker covers Lantern USB-C port Lantern button Speaker Specifications Item Value RCS1.0 Model Dimensions 9.9 in Height x 6.7 in Length x 5.1 in Width (252 mm x 170 mm x 128.5 mm) Weight 5.7 lb (2.6 kg) Battery capacity (minimum) 32 Watt hours... -
Page 180: Getting Started
185°F (85°C) (non-operating) Getting Started The Rivia n Camp Speaker comes charged and ready to use with the Rivian Adventure Package. The speaker is docked in the center console. [[Placeholder for graphic: Camp Speaker docked in R1S/R1T]] You can view the speaker status and battery level on the vehicle's center display. -
Page 181: Turning On The Speaker
Mode State Behavior Battery-saving mode In use Lantern is on Music is playing Turning On the Speaker If the speaker is off or on standby, press any button to wake it. Connecting with Bluetooth You can connect to the speaker over Bluetooth. The Connect light blinks blue when pairing and is solid blue when connected. -
Page 182: Charging With A Usb-C Cable
[[Does the vehicle have to be on for the speaker to work? Does this deplete the vehicle battery?]] CAUTION Don't store items in the Rivian Camp Speaker's dock. This may damage the charging contacts within the dock. Docking the Speaker The speaker powers down when it is docked. -
Page 183: Actions
Actions Icon Color Name Result White (Off) Connect Once the speaker is on, (Bluetooth or press to see what mode Blue Wi-Fi) the speaker is in: (Bluetooth Bluetooth (blue) or Wi- Fi (amber). Press again Amber (Wi- to switch between the Fi On) modes. - Page 184 Icon Color Name Result White Volume - Press to decrease audio volume in single steps. Hold down to accelerate decreasing the audio volume. White Play/Pause Press to toggle between playing and pausing audio. Press two times to skip to the next track. Press three times to go back to the previous track.
-
Page 185: Low Bass Mode
Icon Color Name Result Previous* start of the current song, or to the previous radio station. Press continuously to skip to prior songs, or to prior radio stations. Hold down button to rewind through the current song, or skip to the previous radio station. -
Page 186: Charging The Speaker
Charging the Speaker When the speaker is docked, it automatically charges. When undocked, the speaker can be charged when plugged into a USB-C source. The LED light above the USB-C connector at the rear of the speaker pulses to indicate that it is currently charging. The LED light shows as solid white when the speaker is fully charged. -
Page 187: Cleaning The Speaker
The speaker can be in either Standby or On modes to receive updates. If the speaker is undocked and doesn't have enough battery, you can connect to a USB-C source so that the speaker can charge while continuing the update. Cleaning the Speaker To maintain the look and functionality of the speaker, occasionally inspect it for wear and tear through regular use. - Page 188 , and Play/Pause buttons simultaneously for seven seconds to perform a factory reset. Customer Service Lantern Contact Rivian for lantern repair. doesn't work This device complies with Part 15 of the FCC Rules and with Industry Canada license- exempt RSS standard(s) using limits for a Class B digital device. These limits are designed to provide reasonable protection against harmful interference in a residential installation.
- Page 189 CAUTION Changes and modifications made to this equipment not expressly approved by the manufacturer may void the FCC authorization to operate this equipment. This equipment generates, uses, and can radiate radio frequency energy and, if not installed and used in accordance with the instructions, may cause harmful interference to radio communications.
- Page 190 [[Need logos designed by Tech [[Need logos designed by Tech Illustrator. AI file available. PDF as Illustrator. AI file available. PDF as reference.]] reference.]] [[Need logos designed by Tech [[Need logos designed by Tech Illustrator. AI file available. PDF as Illustrator.
-
Page 191: Warranty
Certification Marking" Excel.]] Warranty This product is covered by a limited warranty from XXXXXX Customer Service Still need help? Connect with us 8 AM–8 PM (CT) Mon–Fri. Call (888) RIVIAN1 (888) 748-4261. Write customerservice@rivian.com. Chat or find answers at rivian.com. -
Page 192: Air Compressor
Air Compressor The air compressor (if equipped) features a quick-connect nozzle with a hose that extends to all four wheels. The air compressor nozzles and accessories are stored in the Gear Tunnel door. These accessories allow you to inflate bicycle tires, inflatable rafts, or other adventure equipment up to 150 psi. -
Page 193: Using The Spray Nozzle For Clean-Up
7. Press the Start button to start the compressor. 8. Squeeze the inflation nozzle lever to start inflating. The compressor stops when it reaches the target pressure. The pressure setting times out in 60 seconds if you do not press the Start button. -
Page 194: Field Kit
Field Kit The Field Kit is designed to fit in the in the door pocket. Contents Below are some sample contents that your Field Kit can contain. Hand sanitizer Insect sting relief Fire starter Paracord Fold-up shovel Water purification tablets Whistle Lifestraw Zinc oxide tape... -
Page 195: Power Outlets
First aid guide Gauzes and bandages How to re-order contents Can they order contents based on most needed (curated) items? Best practices on checking content to maintain integrity Special Edition 1/2 get the "Field Kit" as standard. Power Outlets DANGER To avoid a risk of fire or thermal event, be careful when using any power outlets, particularly when the vehicle is in Drive, the outlets are powered on, or any devices plugged into the outlets are left unattended. - Page 196 CAUTION Don't use an outlet with any device that requires over 1500 W of power. Center console 110 V AC Outlets 1 plug for 110 V AC outlet 1 plug for 220 V AC outlet USB-C 1 Front Data 1 Front Charge-only 2 Rear Charge-only Wireless Wireless phone charge pad...
-
Page 197: Front Trunk
Underside of Instrument Panel 12 V Accessory Port Front Trunk 12 V Center Display 12 V Gear Tunnel 110 V Truck Bed Two 110 V Second-Row Seats USB-C 2 Charge-only Vehicle Modes Confluence Resource: https://rivianautomotivellc.atlassian.net/wiki/spaces/VF/pages/988522807/Vehicle+Power+ Modes [[Since Tank Turn was such a marketed feature, consider mentioning that it is not a supported feature for this release (US SOP). -
Page 198: Off-Road Equipment
Features and Capabilities Electric Adventure Vehicles are designed and engineered to go where most vehicles can't go, sustainably — that means steeper grades, through water and over challenging terrain. R1T Statistics: Acceleration: 0–60 mph in 3 seconds Max approach angle: 34.0°... -
Page 199: Hydraulic Roll Control
Air compressor Off Road Bumper System Metallic Off Road Bumper replacing the Standard Bumper Hydraulic Roll Control Our electro-hydraulic roll control system replaces a mechanical anti-roll bar for more flexibility in how your vehicle responds, simultaneously delivering far greater breadth in vehicle body control, stability, ride comfort and off-road handling on uneven terrain. -
Page 200: Tow Hitch & Hooks
CAUTION Don't tow a Rivian vehicle behind another vehicle. This could lead to damage to the motors. The R1T can tow up to 11,000 pounds. Range is affected by towing. Hauling 11,000 lbs will reduce range by about 50%. Tow Hitch & Hooks... - Page 201 Towing Approved transporting methods Connecting brake light and turn signals Driving guidance Hitch types Standard hitch for up to 5,000 pounds Weight-distributing hitch for loads heavier than 5K lbs and up to the upper limit (11K)
-
Page 202: Troubleshooting And Help
If you believe that your vehicle has a defect which could cause a crash or could cause injury or death, you should immediately notify Rivian. In addition, you should also inform the National Highway Traffic Safety Administration (NHTSA) if in the United States, or Transport Canada if in Canada. -
Page 203: Contacting Transport Canada
Website https://tc.canada.ca/en/road-transportation/defects-recalls-vehicles-tires-child-car- seats/report-potential-safety-defect-vehicles-tires-child-car-seats Roadside Assistance Rivian has a dedicated 24/7 Roadside Assistance team that you can reach anytime you need support while on the go. The SOS button is located on the overhead console. Press the SOS button to call for assistance from first responders when there's an emergency, such as after an accident. -
Page 204: Hazard Lights
As long as you're in a cellular coverage area, the SOS feature will work, even if you don't have your phone with you. If you don't need help from first responders, you can contact Rivian Roadside Assistance, such as when your vehicle breaks down or you need to be towed. -
Page 205: Preparing The Vehicle For Towing
Troubleshooting and Help CAUTION Rivian vehicles should be towed on the flat bed of a tow truck. Don't tow the vehicle with two wheels on the ground since this can lead to vehicle damage. Preparing the Vehicle for Towing 1. Place the front wheels in the straight-ahead position. -
Page 206: Loading The Vehicle Onto The Tow Truck
Still need help? Connect with us. Customer Engagement Center Roadside Assistance 24/7 8 AM–8 PM (Central) Mon–Fri (844) RIVIAN4 (844) 748-4264 (888) RIVIAN1 (888) 748-4261 customerservice@rivian.com rivian.com Support Center and Chat Insurance Service 24/7 (888) RIVIAN8 (888) 748-4268 (855) RIVIAN5... -
Page 207: Service And Maintenance
Service and Maintenance Service and Maintenance Service EV Safety During Servicing [[Content TBD]] Tires Tires and Wheels Uniform Tire Quality Grading The tire quality grades are on the tire sidewall between the tread shoulder and the widest part of the tire. For example: Treadwear 200 Traction AA Temperature A. The US ... -
Page 208: Temperature - A, B, And C
Service and Maintenance Temperature - A, B, and C The temperature grades are A (the highest), B and C, representing the tire’s resistance to the generation of heat and its ability to dissipate heat when tested under controlled conditions on a specified indoor laboratory test wheel. Sustained high temperature can cause the material of the tire to degenerate and reduce tire life, and excessive temperature can lead to sudden tire failure. -
Page 209: Glossary Of Tire Terminology
Service and Maintenance Number Description Maximum load rating Maximum permissible inflation pressure Load index Speed symbol U.S. DOT tire identification number Tire ply composition and materials used Glossary of Tire Terminology Term Definition Accessory weight The combined weight of factory-installed equipment (in excess of standard items which may be replaced). - Page 210 Service and Maintenance Term Definition The strands that form the plies in the tire. Cord Cord separation The parting of cords between adjacent rubber compounds. Curb weight The weight of the vehicle with standard equipment and properly filled fluids. Groove The space between two adjacent tire tread ribs.
- Page 211 90 degrees to the tread centerline. Recommended inflation pressure The cold tire inflation pressure recommended by Rivian Automotive, LLC . This information is printed on the tire placard on the inside of the door pillar. The metal support for a tire assembly where the tire beads are seated.
-
Page 212: Tire Care
Service and Maintenance Tire Care Check the inflation pressure of the tires, including the spare tire (if equipped), monthly with an accurate tire pressure gauge. The recommended cold inflation pressures are listed on the Tire and Loading Information label on the driver's door pillar. Load Capacity The Tire and Loading Information label on the driver's door pillar. -
Page 213: Tire Inflator Kit
Vehicles without an included spare tire or off-road package are equipped with an inflator and sealant kit. Full-Sized Spare Tire Maryland and Rhode Island require a full-size spare tire, plus a few countries outside the US. Jama links: R1T - https://rivianautomotive.jamacloud.com/perspective.req#/items/3133366?projectId=48 R1S - https://rivianautomotive.jamacloud.com/perspective.req#/items/3133372?projectId=48 Tire and Wheel Sizes... - Page 214 Service and Maintenance Wheel Size Trim Finish Offset 20 inches Adventure 2 Dark 58 mm 20 inches Special Edition 48 mm 21 inches Aero 58 mm 22 inches Performance Bright 48 mm 22 inches Performance Dark 48 mm 22 inches Performance Bright 58 mm...
-
Page 215: Winter Tire Chains
Service and Maintenance Winter Tire Chains Tire Pressure Monitoring System The vehicle is equipped with a Tire Pressure Monitoring System (TPMS) with individual tire pressure display. If one of the tires is significantly under-inflated, a low-tire pressure indicator appears on the driver display. Each tire, including the spare (if provided), should be checked monthly when cold and inflated to the inflation pressure recommended by the vehicle manufacturer on the vehicle placard or tire inflation pressure label. -
Page 216: Tpms Sensor Automatic Learning Process
The tire pressure monitoring system is not designed for aftermarket wheels. If you replace the tires, use the same size and style as the tires provided by Rivian. Do not use the tire pressure monitoring system as a pressure gauge for filling the tires. -
Page 217: Jacking And Lifting The Vehicle
Selecting “Tire Change” will disable the adjustable suspension. Do not disengage the park brake. Jacking points There are four lifting points on the R1T. They are located behind the front tires and in front of the rear tires under the rocker panel. -
Page 218: Routine Maintenance
Service and Maintenance Remove the jack location cover shown below: Place the jack into the riser base and fit the lifting puck to the top of the jack. Using the tools provided, raise the jack ensuring that the tip of the lifting puck lines up with the hole in the jack location. -
Page 219: Parts & Accessories
Service and Maintenance Parts & Accessories [[Content TBD]] Fluid Capacities Filling the Windshield Wiper Fluid [[When approximately (x amount) of wiper fluid remains in the reservoir, the xyz message Wiper fluid low? telltale icon/color as well? appears in the driver display]] 1. -
Page 220: Air Filters
Service and Maintenance 1. Navigate to the Mirrors and Wipers settings from the center display. 2. Enable Wiper Service Mode from the center display to move the wipers out of the wiper park position. 3. Remove and replace the wiper blades and set the new blade on the windshield. 4. - Page 221 Service and Maintenance You can use standard car wash services to clean the vehicle. Ensure that you observe any rules posted by the car wash, and that the vehicle's windows are fully up and side mirrors are folded in before entering the car wash. DANGER Before washing, ensure that the vehicle is not currently charging, and that the charge port cover is closed.
- Page 222 Service and Maintenance CAUTION When the front trunk is open, don't direct a pressure washer or hose with a high water flow rate to the air intake cover. This may lead to degraded performance of the climate system. The durability of the air filter located below the air intake cover will also be impacted if it becomes repeatedly saturated with water.
-
Page 223: Waxing
Service and Maintenance 3. Use only detergent formulated for washing cars and a soft sponge to gently scrub away surface stains. 4. Soap and rinse sections of the vehicle at a time to prevent dry soap scum form forming. 5. To prevent corrosion, flush the vehicle's underbody, fenders, brakes, and wheel wells with water to remove road buildup. -
Page 224: Cold Weather Care
Service and Maintenance Cold Weather Care If your vehicle is iced over, use only the climate control system such as heat and defrost to thaw surfaces. CAUTION Don't pour hot water onto any glass surface to thaw the glass. This may cause the glass to crack. -
Page 225: Legal And Reference
Legal and Reference Legal and Reference Legal Certification Conformity FCC and ISED Certification Certification Rivian Component FCC ID ISED ID Owner Telematics Rivian R1 TCM 2AW3A- 26958- Control Automotive, Rev. F XXXXXXXXXXXXXX XXXXXXXXXXX Module 1.0 Vehicle Rivian R1 VAS 2AW3A-... -
Page 226: Exposure To Radio Frequency Energy
RF exposure from the Federal Communications Commission of the United States (FCC), Industry Canada, and European Union. [[Do we want to list examples of RF-emitting devices that Rivian uses?]] This device complies with Part 15 of the FCC Rules and with Industry Canada license- exempt RSS standard(s) using limits for a Class B digital device. -
Page 227: State-Specific Disclaimers
Legal and Reference State-Specific Disclaimers California Passenger and Off-Highway Motor Vehicles WARNING Operating, servicing and maintaining a passenger vehicle or off-highway motor vehicle can expose you to chemicals including engine exhaust, carbon monoxide, phthalates, and lead, which are known to the State of California to cause cancer and birth defects or other reproductive harm. -
Page 228: Privacy And User Data
EDR. Privacy and User Data Your privacy is important to Rivian. To learn more about the data we collect from you and your vehicle and our data handling practices, see Rivian's Privacy Policy.
Need help?
Do you have a question about the R1T and is the answer not in the manual?
Questions and answers