Citizen CL-S703 User Manual
Cl-s700 series thermal transfer barcode & label printer
Hide thumbs
Also See for CL-S703:
- Quick start manual (2 pages) ,
- Technical manual (71 pages) ,
- Programming manual (95 pages)
Advertisement
Table of Contents
- 1 Main Features
- 2 Compliance Statement for European Users
- 3 Fcc Compliance Statement for American Users
- 4 Confirmation of Carton Contents
- 5 Printer Operation
- 6 Mode Settings
- 7 Emulation Auto-Detection
- 8 Printer Adjustments
- 9 Adjusting the Ribbon
- 10 Adjusting Method
- 11 Specifications
- 12 XON/XOFF Protocol
- Download this manual
See also:
Technical Manual
Advertisement
Table of Contents

Subscribe to Our Youtube Channel
Related Manuals for Citizen CL-S703


Summary of Contents for Citizen CL-S703
- Page 1 Thermal Transfer Barcode & Label Printer CL-S700 Series SER'S ANUAL...
-
Page 3: Main Features
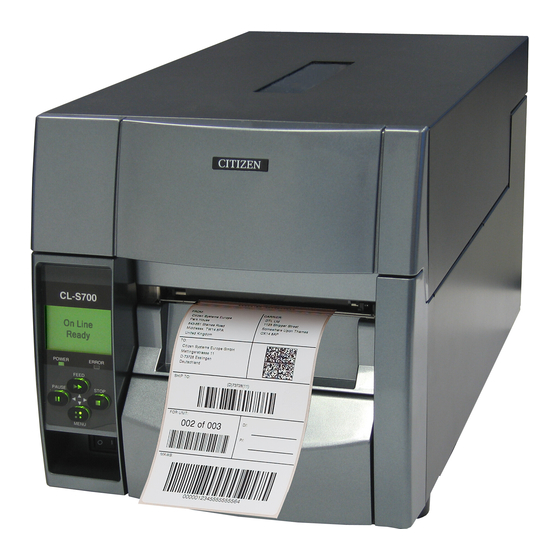
INTRODUCTION Thank you for purchasing a Citizen CL-series label printer offering high performance printing at up to 10 inches per second on media up to 4.65 inches wide. Main Features <Easy Access - Easy Operation> The printer is designed for all day-to-day operations to be accessible from the front of the printer so there is no need to move items near to the printer for access for media loading. -
Page 4: Compliance Statement For European Users
COMPLIANCE STATEMENT FOR EUROPEAN USERS CE marking shows conformity to the following criteria and provisions: Low Voltage Directive (2006/95/EC)/EN60950-1 EMC Directive (2004/108/EC)/EN55022, EN55024, EN61000-3-2 & EN61000-3-3 This product has been tested under EN ISO 7779 and has an acoustic level output no higher than 55db(A). - Page 5 • • • • • • •...
- Page 6 • • • • • • • • • • • • • •...
- Page 7 • Please contact us if there are any mistakes or ambiguities within this manual. • If there are missing or incorrectly collated pages in this manual, contact us to obtain a new manual. CITIZEN is a registered trademark of CITIZEN HOLDINGS CO., Japan. CITIZEN es una marca registrada de CITIZEN HOLDINGS CO., Japón.
- Page 8 • • • • • • • • • •...
- Page 9 • • • • • • • • • • • • • • • • • • • • • • • • • • • • • • •...
-
Page 10: Confirmation Of Carton Contents
Note: The empty carton and packing materials should be stored for future shipping of the printer. When removing the CL-S700R from the box, there is the extra cardboard “sling” to make lifting easier. Paper core (for ribbon) Media holder bar Power cord Quick-start guide Printer [Model CL-S700/CL-S703]... - Page 11 • • • •...
- Page 14 Setup Part Names and Functions Sensor Adjustments and Calibration (p.54) Installing the Media (p.26, p33) 1 Thermal printhead This is the printhead. Avoid touching this with your fingertips and leaving grease or dirt on the printhead surface. 2 Sensor arm The media can be installed by raising this arm.
- Page 15 [Model CL-S700R] 1 Rewinder cover When using the rewinder function, open the door by pulling the opening handle on the front. 2 Media entry slit cover When rewinding the printed batches of media, remove the Media Entry Slit Cover and insert the media from the head unit through the slit. It should then be rewound around the Rewinder Flange.
- Page 16 POWER ERROR FEED PAUSE STOP MENU...
- Page 20 POWER ERROR FEED...
- Page 21 On Line Ready POWER ERROR FEED PAUSE STOP MENU...
- Page 22 POWER ERROR FEED PAUSE STOP MENU...
- Page 27 Using the Rewinder as a Peeler (CL-S700R models/Peeling Mode) 1. Ensure that the optional rewinder paper guide is not installed. 2. Open the rewinder cover and remove the rewinder flange. Rewinder flange 3. Pull out approximately 40cm length of the media from the head unit.
- Page 32 ± ±...
-
Page 36: Printer Operation
Printer Operation Mode Settings Setting the Media (P.23) Media Thickness Adjustment (p.57) Media Width Adjustment (p.58) Self Print Mode Case of label media Case of continuous media Media Adjustments... - Page 37 Main Menu On Line Page Setup Ready Exit Enter POWER ERROR POWER ERROR FEED FEED PAUSE STOP PAUSE STOP MENU MENU ∞...
- Page 38 Main Menu Page Setup Exit Enter On Line Ready ∞ POWER ERROR FEED PAUSE STOP MENU...
- Page 39 Page Setup Print Speed Exit ∞ ∞ Page Setup Print Darkness Exit Darkness Exit ∞ Darkness Exit Enter Enter Enter Enter...
- Page 40 Printer Operation Mode Settings 6. Save Changes to Settings. Unless you save your settings, your changes will be lost when you turn off the printer. To Save Changes 1 Press the 2 key twice to display the message “Save Settings No-Discard”. 2 Press the 5 key or the ∞...
-
Page 41: Mode Settings
Example of changing a menu (p.38) Printing a List of Settings Machine Information Model Number Boot Version ROM Version ROM Date(DD//MM//YY) ROMCheck Sum Head Check Print Counter Service Counter Cut Counter Sensor Monitor Option Interface Current Menu Setting [PageSetup Menu] Print Speed Print Darkness Darkness Adjust... - Page 42 Global Menu Settings Active Configuration Setting Config 1 Config 2 Config 3 [PageSetup Menu] Print Speed Print Darkness Darkness Adjust Print Method Continuous Media Length 04.00inch 04.00inch 04.00inch Vertical Position +0.00inch +0.00inch +0.00inch Horizontal Shift +0.00inch +0.00inch +0.00inch Vertical Image Shift +0.00inch +0.00inch +0.00inch...
- Page 44 Printer Operation Mode Settings ® [Datamax Emulation] After Print...
- Page 45 Printer Operation Mode Settings ® [Datamax Emulation] Interfaces...
- Page 46 Printer Operation Mode Settings ® [Datamax Emulation] Machine Information [Machine Info] Test Mode Global configuration [Global Config] Note:...
- Page 48 Printer Operation Mode Settings ® [Zebra Emulation] After Print...
- Page 49 Printer Operation Mode Settings ® [Zebra Emulation] Interfaces...
- Page 50 Printer Operation Mode Settings ® [Zebra Emulation] Machine Information [Machine Info] Test Mode Global configuration [Global Config] Note:...
- Page 51 PAUSE MENU...
-
Page 52: Emulation Auto-Detection
Printer Operation Menu Setup Mode (p.27, p43, p47) Emulation Auto-Detection ZPI2 detected. Switch emulation ? DMX detected. Switch emulation ? Note:... - Page 53 On Line Ready Rewind O f f...
- Page 54 PAUSE FEED STOP Sensor Cal Mode See Through POWER ERROR ↔ STOP Sensor Cal Mode MENU Reflect POWER ERROR...
- Page 55 ↔ PAUSE Sensor Cal Mode Executing MENU Sensor Cal Mode Succeeded...
- Page 56 ↔ Sensor Cal Mode Executing Sensor Cal Mode Succeeded...
-
Page 59: Printer Adjustments
Setting the Ribbon (p.32) Adjusting the Ribbon Ribbon tension in this printer is already adjusted for the recommended ink ribbon and media and is very tolerant to different types of media. However, it may slip due to imperfect combinations of ribbon and media and it is possible that you will see a “Ribbon End”... - Page 60 TENSION STANDARD TENSION STANDARD SUPER LOW TENSION STANDARD TENSION STANDARD SUPER LOW TENSION STANDARD TENSION STANDARD SUPER LOW...
- Page 63 If the glue of the label media adheres to the roller, the peeled liner will stick and can cause a jam. Remove the glue adhered to the roller by using a cloth or something similar soaked in alcohol. Roller Caution Do not use any solvent other than ethyl alcohol.
- Page 66 ± ±...
- Page 67 Appendixes Specifications...
-
Page 68: Specifications
Operating temperature conditions: Storage temperature conditions: External dimensions (for CL-S700/CL-S703) Description Detects media gap between labels, notches on tags, and media out Detects reflective mark on back of media and media out IEEE1284 (compatible, Nibble, ECP mode) 2400 4800 9600 19200 38400 57600 1 15200bps FULL Speed USB1.1... - Page 69 Appendixes Specifications...
- Page 70 Ω...
-
Page 71: Xon/Xoff Protocol
Appendixes Interfaces XON/XOFF Protocol Requirements to output X-ON code Requirements to output the X-OFF code DTR Protocol Conditions when the DTR signal is “Ready (High)” Conditions when DTR signal is “Busy (Low)”... - Page 72 Ω...
- Page 73 µ µ µ...
- Page 74 µ µ µ...
- Page 80 363 Van Ness Way, Suite 404 Torrance, CA 90501. USA Tel: (310) 781-1460 Fax:(310) 781-9152 http://www.citizen-systems.com Mettinger Strasse 11 D-73728, Esslingen Germany Tel: +49 (0) 711 3906 420 Fax:+49 (0) 711 3906 405 http://www.citizen-europe.com 6-1-12, Tanashi-cho, Nishi-Tokyo-shi Tokyo, 188-8511. Japan...
Need help?
Do you have a question about the CL-S703 and is the answer not in the manual?
Questions and answers