Table of Contents
Advertisement
Quick Links
Please give us a chance to make it right and do better !
Contact our friendly customer service department for help first.
Replacements for missing or damaged parts will be shipped ASAP !
US office: Fontana
UK office: Ipswich
Contact Us !
Do NOT return this item.
AU office: Truganina
US:cs.us@costway.com
UK:cs.uk@costway.com
AU:cs.au@costway.com
THIS INSTRUCTION BOOKLET CONTAINS IMPORTANT SAFETY INFORMATION. PLEASE READ AND KEEP FOR FUTURE REFERENCE.
USER'S MANUAL
TWIN BED
HU10196-T
Advertisement
Table of Contents

Related Manuals for Costway HU10196-T


Summary of Contents for Costway HU10196-T
- Page 1 Replacements for missing or damaged parts will be shipped ASAP ! US office: Fontana UK office: Ipswich AU office: Truganina USER’S MANUAL Contact Us ! TWIN BED HU10196-T Do NOT return this item. US:cs.us@costway.com UK:cs.uk@costway.com AU:cs.au@costway.com THIS INSTRUCTION BOOKLET CONTAINS IMPORTANT SAFETY INFORMATION. PLEASE READ AND KEEP FOR FUTURE REFERENCE.
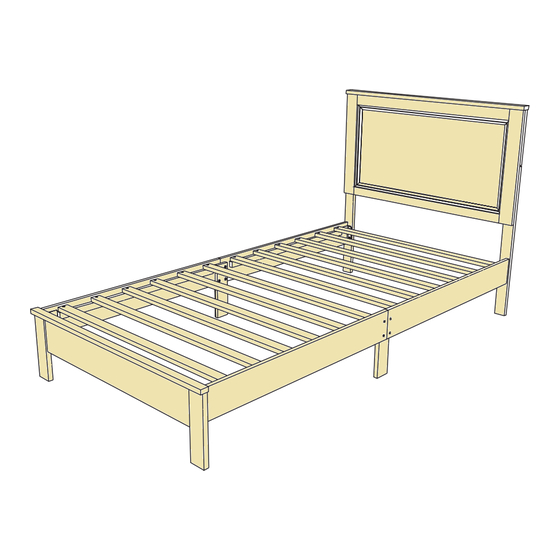
- Page 2 PARTS LIST Headboard Before You Start Footboard Headboard Leg(L&R) Read each step carefully before starting. It is very important Bed Roll-Out Slats Side Rail Left to ensure each step followed in correct order, otherwise assembly difficulties may occur. Most of board parts are labeled or stamped on the raw edges.
- Page 3 STEP 1.1 Attach Head Board Leg (C) to Head Board (A) as shown using JCBC BOLT (1) with Flat Washer (2) and securing with ALLEN KEY (3). STEP 1.2 Fix the other holes with Screws (5) as shown. LEFT RIGHT BACK VIEW STEP 1.2 : STEP 1.1 :...
- Page 4 STEP 3 Care and Maintenance Install the bed slat (D) to Side Rail (E) & (F), and tighten with Screws (5) as shown. (NOTE: THE SETUP MUST DONE AT THE DECIDED LOCATION FOR THE BED TO OBTAIN PERFECT STABILITY.) Use a soft, clean cloth that will not scratch the surface when dusting. Repeat Step 3 for other set of slats assembly.
Need help?
Do you have a question about the HU10196-T and is the answer not in the manual?
Questions and answers