Table of Contents
Advertisement
Quick Links
N
E-Series
NEWALL MEASUREMENT SYSTEMS LTD
Digital Readout System
CONTENTS
2
2
3
3
5
6
6
7
7
7
9
9
10
11
17
17
19
19
21
27
27
27
27
27
29
Arc Contouring
30
Line Hole Function
31
Polar Co-ordinates
33
LATHE FUNCTIONS
33
Tool Offsets
35
Taper Function
36
Summing
36
Vectoring
38
AUXILIARY OUTPUT OPTION
38
Position Pulse Output
41
Remote Zero & Enter Inputs
42
TROUBLESHOOTING
42
CLEANING
Advertisement
Table of Contents

Related Manuals for Newall E Series


Summary of Contents for Newall E Series
-
Page 1: Table Of Contents
NEWALL MEASUREMENT SYSTEMS LTD E-Series Digital Readout System CONTENTS INTRODUCTION TECHNICAL SPECIFICATIONS INSTALLATION Mounting Power Supply Encoder Connection Switching On USER INSTRUCTIONS Options Using the Keypad SET -UP Set-Up Introduction Set-Up Defaults Set-Up Menu STANDARD FUNCTIONS Absolute / Incremental Centre Find... - Page 2 Notes Newall Measurement Systems...
-
Page 3: Introduction
80% for temperatures up to 31°C (87.8°F), decreasing linearly to 33% at 45°C (113°F). Transient overvoltage according to INSTALLATION CATEGORY II of IEC664 POLLUTION DEGREE 2 in accordance with IEC664 NEWALL MEASUREMENT SYSTEMS LIMITED RESERVES THE RIGHT TO CHANGE SPECIFICATION WITHOUT NOTICE Newall Measurement Systems... -
Page 4: Installation
Figure 2.2. The M10 stud mount is provided as standard. The swivel mount assembly (Part No. 600-80290), the E-Series mounting arm (Part No 294-40055) and the DSU mounting assembly (Part No 600-65595) are all optional items as detailed on the price list. view) Newall Measurement Systems... - Page 5 M6 bolts. These bolts are provided with the bracket kit which includes a 300mm 9 pin “D” type cable. This cable is to be used to connect the DSU to the keypad/display and the 3.5 metre cable is not needed in this configuration and can only be connected in one direction. Newall Measurement Systems...
-
Page 6: Power Supply
Equipotential terminal for grounding the DSU to the machine. Refer to section 2.1. Caution. Refer to section 2.2 before connection to the mains supply. Figure 2.3 - Connection diagram for the Digital Sending Unit (DSU) Newall Measurement Systems... -
Page 7: Encoder Connection
Installation 2.3 Encoder Connection Figure 2.3 shows the connection sockets on the DSU. The E-Series is designed for use with Newall Spherosyn and Microsyn encoders only. The encoders are connected to the DSU with 9-pin D Type connectors. Switch off the E-Series before connecting or disconnecting the encoders. To fit the connectors into the appropriate socket on the back of the E-Series , first align the connector and then push firmly in place.and secure with the locking... -
Page 8: User Instructions
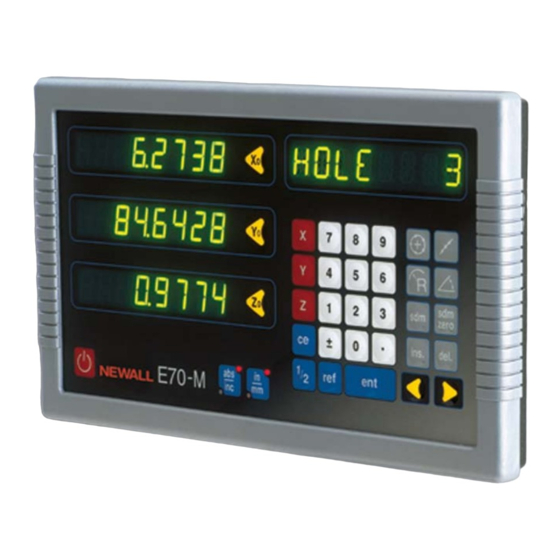
(LED indicates choice of mode) Numeric keypad for data entry Selecting the required Sub-Datum number [SDM] Key Setting the selected Sub-Datum to zero [SDM ZERO] Key zero Insert / Delete [INS] / [DEL] Key ins. del. Scroll Previous / Scroll Next Newall Measurement Systems... - Page 9 [TAPER] Key For using Tool Off-Sets [TOOL USE] Key [TOOL SET] Key Setting Tool Off-Sets Summing function, vectoring function [SUMMING] Key E-Series Mill 2 Axes E-Series Mill 3 Axes E-Series Lathe 2 Axes E-Series Lathe 3 Axes Newall Measurement Systems...
-
Page 10: Set -Up
To exit the Set-Up routine scroll through to the quit option and press [ENT] If the keypad/display has been switched off by pressing the [ON/OFF] key rather than switching off at the mains, it is possible to enter the Set-Up routine by pressing the [ABS/INC] key followed by the [ON/OFF] Newall Measurement Systems... -
Page 11: Set-Up Defaults
Set-Up 4.2 Set-Up Defaults Table 1 - Set-Up Defaults Newall Measurement Systems... -
Page 12: Set-Up Menu
[ENT] I/P Type I/P TYPE The I/P (Input) Type function allows the operator to specify the type of transducer connected to each axis.The E Series reads Newall's Spherosyn, Microsyn 10 or Microsyn 5 Encoders SEL AXIS IMPORTANT:... - Page 13 Toggle between 0 and 1 for each axis using the (AXIS) key. When all axes read the desired direc- tion, select with [ENT] > Press the [ > > ] key to move to the next menu option. Newall Measurement Systems...
- Page 14 Press the [ > > ] key to select another axis for compensation. > ENT. COMP Alternatively, the factor may be automatically calculated and > entered.When ENT. COMP is displayed press the [ > > ] key to enter the routine Newall Measurement Systems...
- Page 15 Starting this procedure deletes existing segmented error data for the axis. The current position relative to the new zero point is displayed in the relevant axis. Move to 1st (nth) correction point (against a standard). Press [ENT] to move on Newall Measurement Systems...
- Page 16 Section 6.0 of this manual. > ARC OFF Toggle between ARC ON and ARC OFF Press the [ > > ] key to move to the next menu option. using the arrow keys and select desired mode with [ENT] Newall Measurement Systems...
- Page 17 See Section 7.0 of this manual. TOOL OFF Press the [ > > ] key to move to the next menu option. Toggle between TOOL ON and TOOL OFF using the arrow keys and select desired mode with [ENT]. Newall Measurement Systems...
- Page 18 Enter the Zero Set window by selecting the axis Press the [ > > ] key to move to the next menu option. and entering the required value. Entering “0” omits the approach warning from that axis Newall Measurement Systems...
- Page 19 Toggle between Default and Quit Normal using the arrow keys and select desired mode with [ENT] Quit Set-Up QUIT Quit exits the Set-Up procedure and returns the E-Series to operational use. QUIT Returns to normal operating mode. Newall Measurement Systems...
-
Page 20: Standard Functions
To set the datum, position the machine at the point you intend to establish the datum and then reset any or all axes, while in the absolute mode. The diagram below is used in the following example to show Absolute and Incremental modes. (0,0) Newall Measurement Systems... - Page 21 0.000 50.000 Press the [ABS/INC] key to return the ABS mode. 150.000 150.000 NOTE: Using the E-Series display in the manner given above can save considerable time as the opera- tor can avoid time consuming math calculations. Newall Measurement Systems...
-
Page 22: Centre Find
5.3 Digifind The E-Series comes equipped with Digifind, a feature unique to Newall digital readout products. Digifind eliminates the risk of losing your position and datum Set-Up.With Digifind, precise Set-Up of a workpiece is carried out only one time. - Page 23 Position the machine to within 6mm (0.2500”) for Spherosyn Select FIND 0 by pressing [ENT]. Select and 2.5mm (0.1000”) for Microsyn, of the datum. “Find” the ref- the axis by using the axis erence. Pre-Set or Re-Set key. The original datum is reset. Newall Measurement Systems...
-
Page 24: Sub Datums (Sdm)
SDM by pressing the Teach key [SDM ZERO], once an SDM number has been selected. EXAMPLE: Keystrokes for entering the following part dimension into SDM are shown. 1.2000 2.8000 SDM NO. ? SDM 1 SDM 3 SDM 2 1.200in 2.800in Newall Measurement Systems... - Page 25 Alternatively, use the SDM key to select a new SDM. SDM 3 NOTE: If the next move is Incremental, move to the zero position, select a new SDM number, and store the position with [SDM ZERO] 0.0000 To exit SDM function, select [ABS/INC]. 0.0000 Newall Measurement Systems...
- Page 26 SDM NO? SDM 10 Select the first Sub Datum in the sequence to be grouped e.g. SDM10 INS SDM ins. Press INS key. INS JOB? > Press the arrow key to display Insert Job. Confirm with [ENT]. Newall Measurement Systems...
- Page 27 The procedure is similar to finding a Sub Datum, except as follows: SDM NO? Enter the Sub Datum function by pressing the [SDM] key. The message screen prompts for the Sub Datum number. Pressing the right arrow key changes the > message screen to ‘JOB NO?’ Newall Measurement Systems...
- Page 28 SDM is retained. To delete a Job Number Follow the above sequence except scroll the message screen, using the arrow keys, to display the Job Number to be deleted instead of the Sub Datum number. Newall Measurement Systems...
- Page 29 Again, all the higher numbered Sub Datums will be shifted one place up and any stored data in SDM 199 will be lost. Proceed to enter the sub datum as described in Sections 5.4.1 or 5.4.2 Pressing [ABS/INC] will exit the function. Newall Measurement Systems...
-
Page 30: Inch/Millimetres
The E -Series Mill calculates positions for a series of equally spaced holes around the circumference of a circle or an arc.The message display prompts the user for various parameters it needs to do the calculations. Once the E Series Mill completes the calculations, the axis displays show the distance to each hole.The operator works to Zero for each...
Need help?
Do you have a question about the E Series and is the answer not in the manual?
Questions and answers