Table of Contents
Advertisement
Quick Links
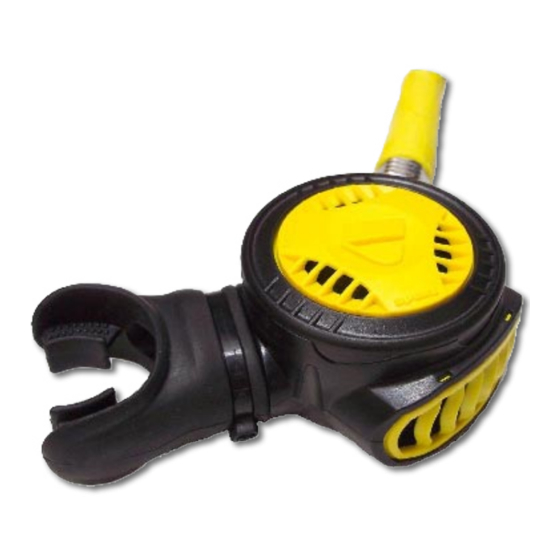
EGRESS
SECOND STAGE
REGULATOR
MAINTENANCE MANUAL
AUTHORISED TECHNICIANS
Document No. AP5832
APEKS MARINE EQUIPMENT LTD, NEPTUNE WAY, BLACKBURN, LANCASHIRE. BB1 2BT
Tel: 0044 (0) 1254 692200 Fax: 0044 (0) 1254 692211 E-mail: info@apeks.co.uk Web: www.apeks.co.uk
TECHNICAL SUPPORT
FOR
Issue 5
16/02/2011
Advertisement
Table of Contents

Summary of Contents for Apeks Egress
- Page 1 TECHNICAL SUPPORT EGRESS SECOND STAGE REGULATOR MAINTENANCE MANUAL AUTHORISED TECHNICIANS Issue 5 Document No. AP5832 16/02/2011 APEKS MARINE EQUIPMENT LTD, NEPTUNE WAY, BLACKBURN, LANCASHIRE. BB1 2BT Tel: 0044 (0) 1254 692200 Fax: 0044 (0) 1254 692211 E-mail: info@apeks.co.uk Web: www.apeks.co.uk...
- Page 2 Amendments and approval of this document can only be carried out by the relevant people listed on the Approved list of signatures, which is listed in the Apeks Quality Manual. To instigate a change, a Task / Change request form, (Form No. ‘DESI/10002’), must be completed and passed to the relevant person(s) for approval which are listed on the Approved List of Signatures.
-
Page 3: Table Of Contents
Egress Maintenance Manual Contents COPYRIGHT NOTICE ................................3 INTRODUCTION ..................................3 WARNINGS, CAUTIONS & NOTES ............................3 SCHEDULED SERVICE ................................3 GENERAL GUIDELINES ................................3 GENERAL CONVENTIONS............................... 4 DISASSEMBLY PROCEDURES ..............................4 REASSEMBLY PROCEDURES..............................7 FINAL TESTING ..................................10 TABLE 1 - TROUBLSHOOTING GUIDE..........................11 TABLE 2 - RECOMMENDED TOOL LIST.......................... -
Page 4: Copyright Notice
This manual provides factory prescribed procedures for tears or holes and checking the general condition. the correct maintenance and repair of the Apeks Egress. It Pulling back hose protectors and checking that the is not intended to be used as an instructional manual for hoses are secure in the hose crimps. -
Page 5: General Conventions
These parts should Using the Egress Locking Ring Tool (AT62) unscrew the be replaced with new, and must not be reused under front locking ring (19) and remove the front cover (18). - Page 6 Egress Maintenance Manual Withdraw and lift the Using the reverse side Spindle Assembly (2-8) of the Egress Locking out of the Case (1). Ring Tool (AT62), fully unscrew the inner locking ring (17). Whilst pressing down the lever (7) screw the 9/16” UNEF...
- Page 7 Egress Maintenance Manual Remove the ‘O’ Ring (4) from the Spring Carrier (3) and, NOTE: If Exhaust Valves (13) are to be removed, using a fingernail, remove the Rubber Seating (7) from pinch edge of Exhaust Valve and pull tail through hole the end of the Shuttle Valve (6).
-
Page 8: Reassembly Procedures
Egress Maintenance Manual REASSEMBLY PROCEDURES Assembling and fitting valve assembly Fitting exhaust valves and exhaust gate Install a new, lubricated ‘O’ Ring If the Exhaust Valves (13) were removed, replace by (4) onto the Spring threading the tails through the retaining holes on the Carrier (3). - Page 9 Egress Maintenance Manual CAUTION: Ensure that lever is not twisted NOTE: Lever should face away from spindle and that legs are parallel. Lever should opening as shown below. appear as that shown on the left, not as shown on the right. If necessary, gently squeeze legs together to straighten.
- Page 10 Any adjustment should only take place when regulator is un-pressurised. Install Front Cover (18) and screw in Front Locking Ring (19). Tighten using other side of Egress Locking Ring Tool (AT62.) NOTE: Ensure that the ribs on the Front Locking Ring are aligned correctly with those on the Front Cover when tightening using locking ring tool.
-
Page 11: Final Testing
+1.5” to +2.2” . If the reading exceeds these specifications, refer to “Table 1 - Troubleshooting” for corrective actions. Screw the hose onto the Egress. Using External Leak Test 11 / a torque wrench with an ”... - Page 12 Adjustment Lever (8) set too high. Procedures. 4. Lever (8) bent. 4. Replace Lever. Leakage or freeflow from Egress 5. Valve Seat (9) sealing surface 5. Replace Valve Seat. damaged. 6. Valve Spring (5) damaged. 6. Replace Spring.
- Page 13 I.P. test gauge Intermediate pressure testing AT79 ‘O’ Ring removal pick ‘O’ Ring removal AT62 Egress Locking Ring Tool Front Cover, Inner Locking Ring removal and installation Torque wrench, Nm or lbf/ft Inlet Fitting, Hose 11/16” adapter for torque wrench Hose AT34 11/16”...
- Page 14 Egress Maintenance Manual Table 3 - Recommended Lubricants & Cleaners LUBRICANT / CLEANER APPLICATION SOURCE Christo-Lube ® MCG-111 All ‘O’ Ring seals Apeks Marine Equipment Ltd (Lubricant) PN AP1495, or Lubrication Technologies 310 Morton Street Jackson, OH 45640, USA (800) 477-8704 CAUTION: Silicone rubber requires no lubrication or preservative treatment.
-
Page 15: Cleaning And Lubrication Procedure
EAN compatible components and lubricants. In addition, each regulator design has passed stringent adiabatic compression testing to ensure its safety and compatibility with increased percentages of oxygen. If it is your intention to use your new Apeks regulator with Nitrox EAN (O2 not to exceed 40%), it is imperative that you maintain the internal cleanliness of the regulator (see section on Care and Maintenance). - Page 16 Egress Maintenance Manual Table 4 - Torque Specifications PART NUMBER DESCRIPTION / KEY NUMBER TORQUE 3 Nm / 2.2 lbf/ft AP7561 Inlet Fitting (12) AP0206 Hose 5 Nm / 3.7 lbf/ft Table 5 - Test Bench Specifications TEST CONDITION ACCEPTABLE RANGE High Pressure >...
- Page 17 AP5707 Shuttle Valve APF116923 Inner Locking Ring AP2034 Rubber Seating AP7556 Egress Front Cover AP2035 Lever AP7557 Egress Front Locking Ring AP7563 Egress Valve Seat AP7551 Egress Decal 10* AP1154 ‘O’ Ring AP1434 Evoprene Mouthpiece 11* AP1267 ‘O’ Ring AP1677...
- Page 18 Egress Maintenance Manual Notes...
- Page 19 TECHNICAL SUPPORT EGRESS SECOND STAGE REGULATOR MAINTENANCE MANUAL AUTHORISED TECHNICIANS Apeks Marine Equpment Ltd Neptune Way, Blackburn, Lancs, England, BB1 2BT...


Need help?
Do you have a question about the Egress and is the answer not in the manual?
Questions and answers